Create and Delete zCX Instance Using z/OSMF Workflows
z/OS Container Extensions allows running Linux applications on z/OS (s390x architecture).
It is an instance of a Linux system configured to run Docker.
In z/OS, we will see it as just another STC, but we can run applications in Docker by connecting via SSH.
The great advantage is being able to leverage all the speed and security of the Mainframe to run this type of workload using zIIP processors
Since this is one of the first times I'm going to try this, someone with more knowledge would probably do it better, but the important thing is to learn and keep improving. Also, it's a good way to learn to work with Docker "without leaving" the z/OS world.
The process to create and delete a zCX instance is done through z/OSMF Workflows. It's a fairly automatic process that, if we do it right from the beginning, we won't have to intervene.
We must consider the necessary space (depending on what we're going to install in the instance, 40GB or more may be needed), the resources we will assign to this instance (CPU, memory), and we also need to assign a virtual IP to this instance (DVIPA for zCX).
Define zIIP Processors for IBM ZD&T
First, I will explain the preliminary actions I performed on the system.
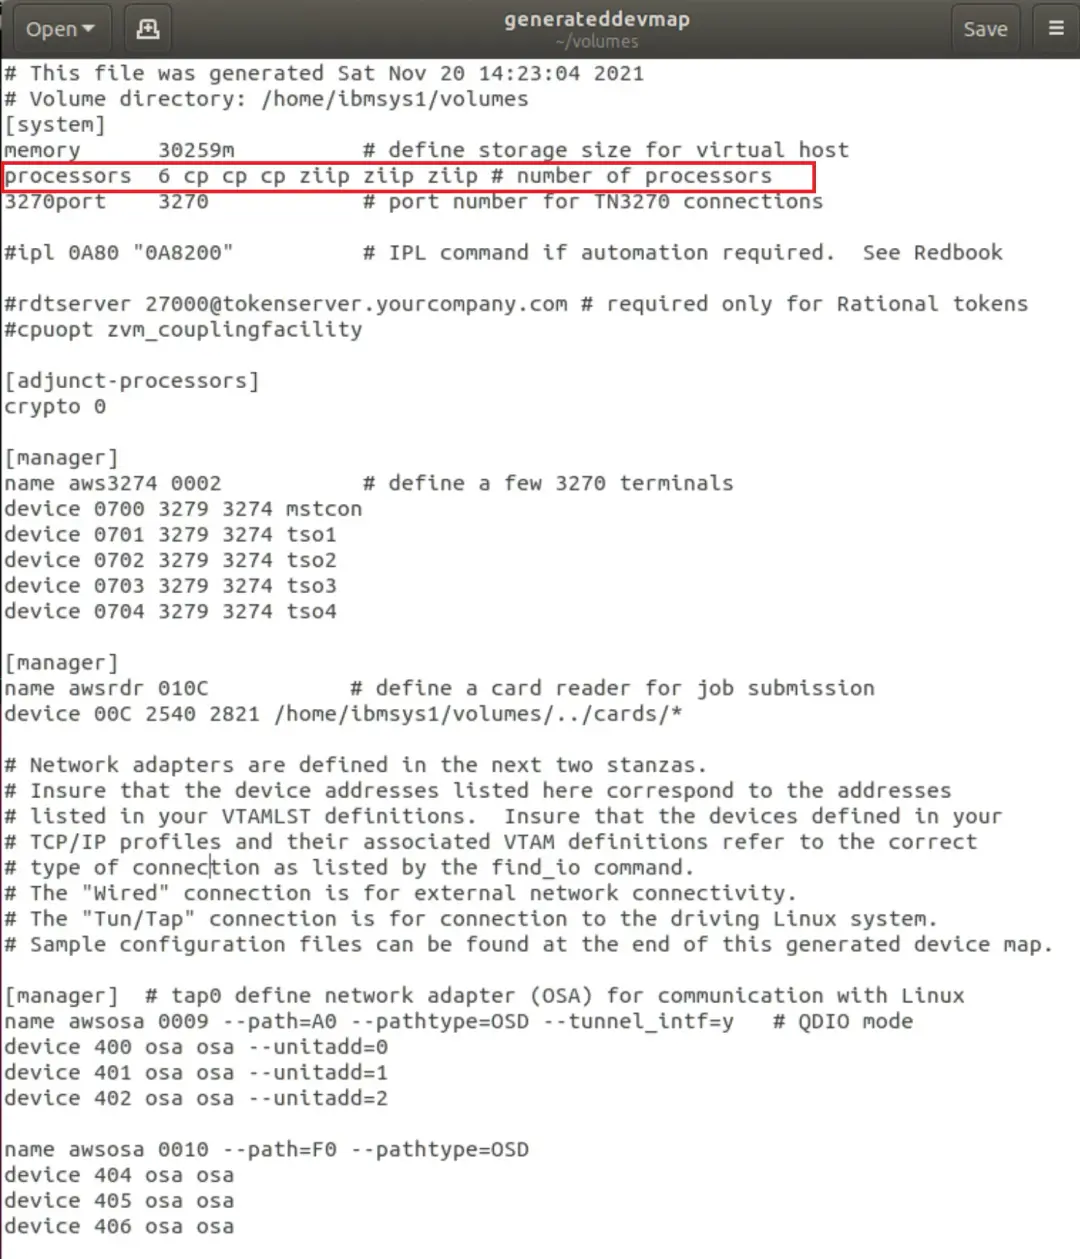
In the emulator configuration file, I defined 3 zIIP processors.
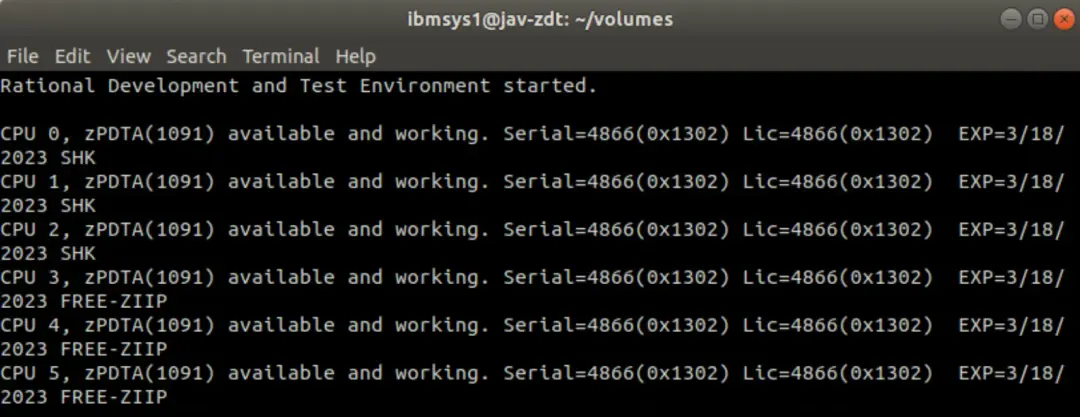
When we start the system, we will see the message FREE-ZIIP.
Modify ACS Routines
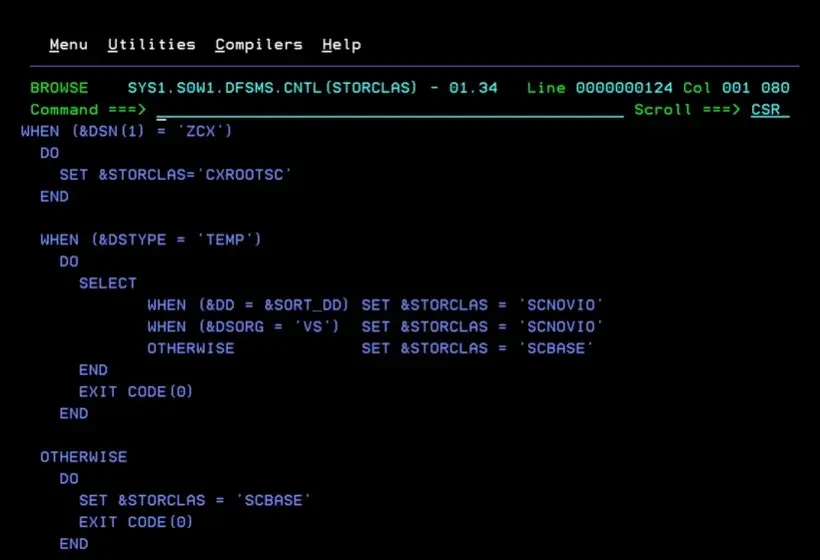
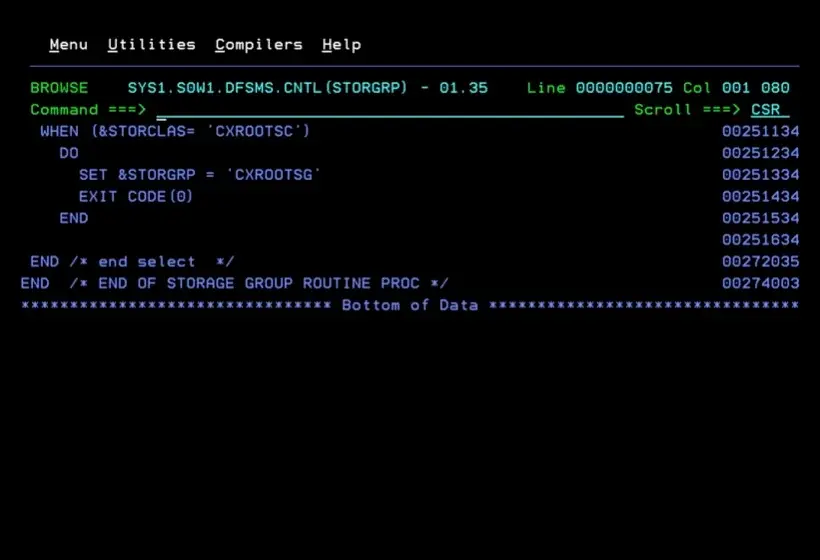
In the case of my system, I also adjusted the ACS routines a bit (in a simple way) for the assignment of corresponding SMS classes. This depends on each system.
NOTE I'm showing the changes I made in case I need them when I update the system to a new version of ADCD.
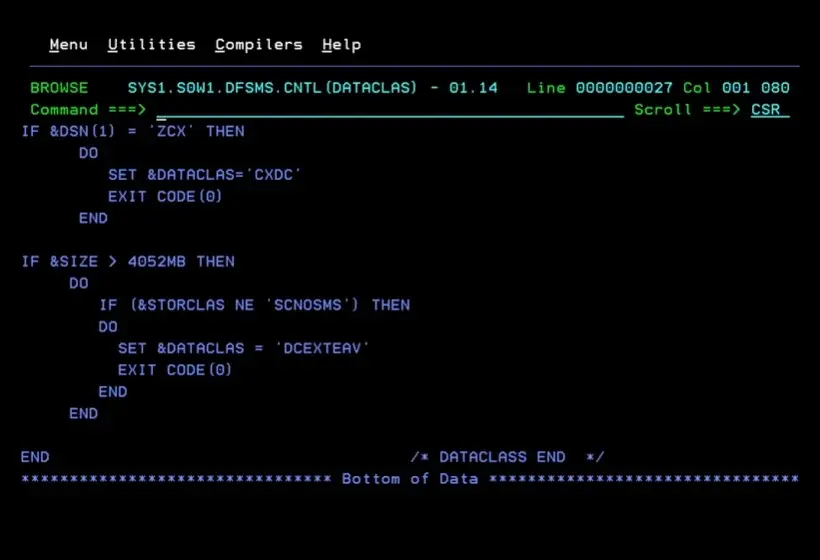
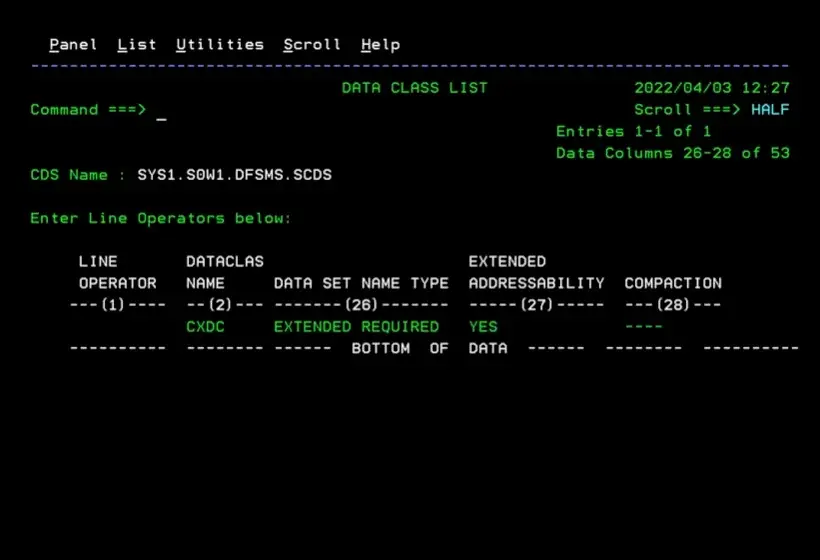
The DATACLAS CXDC is defined with the data set type Extended.
TCP/IP Configuration
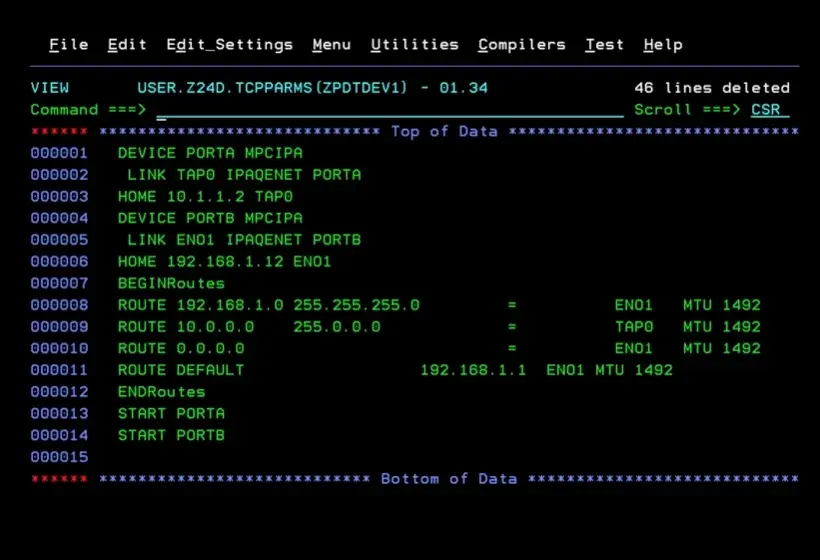
Now I'm going to show the communications configuration. Each person will have to adjust it to their installation.
This configuration is valid for ZD&T.
The IP that the ZCX instance will have is 10.1.3.10.
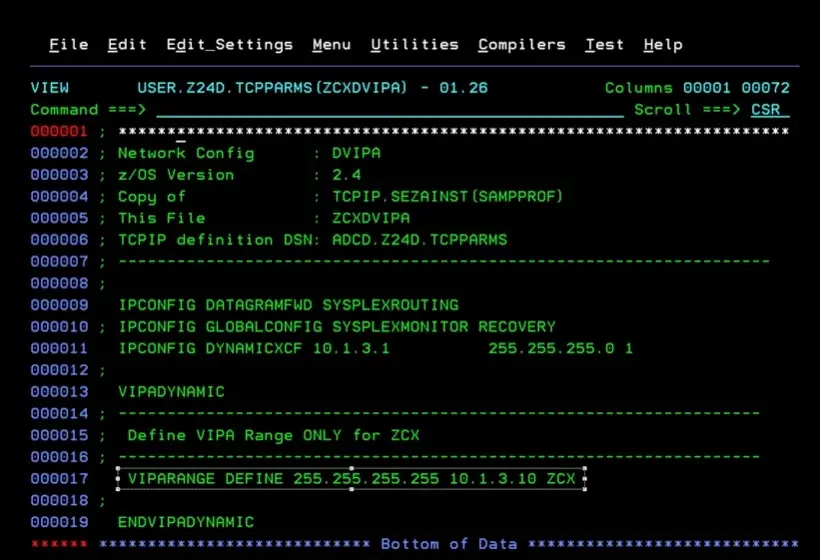
I also show how the TCPIP profile is defined.
With this command we can see the network device names.
ifconfig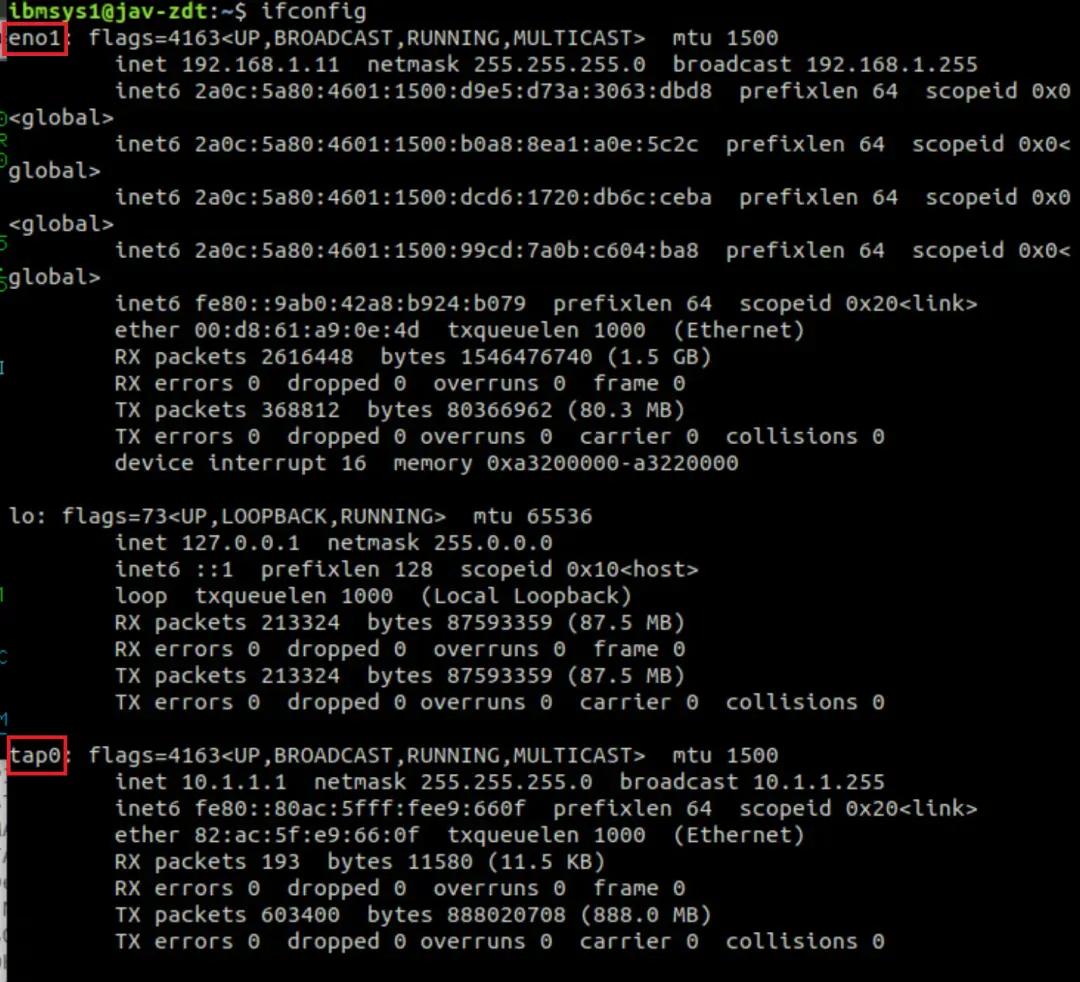
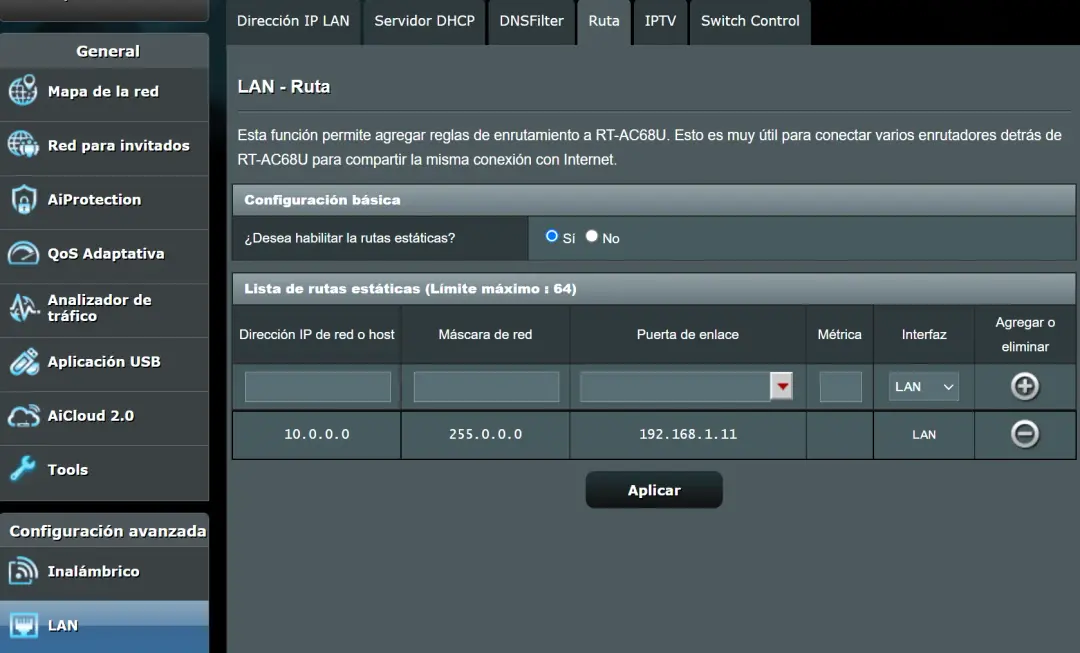
Additionally, in my router I added a rule to be able to connect to the ZCX system from another computer on my network.
The gateway is the IP that the Ubuntu system where the emulator is installed has.
Also, on the system where I have the emulator installed, I set up a route to reach the 10.1.3.* IPs using the tap0 adapter (which the emulator creates).
sudo ip route add 10.1.3.0/24 dev tap0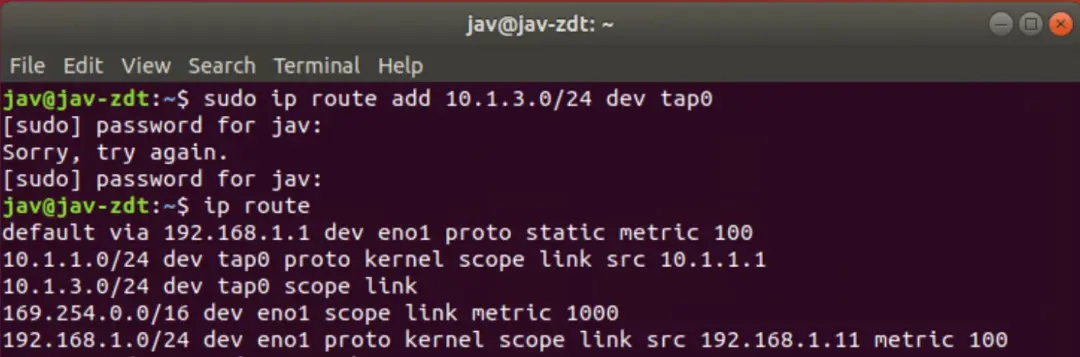
Create Workflow in z/OSMF
Previously, I also added the corresponding disks to have the necessary space to create the instance.
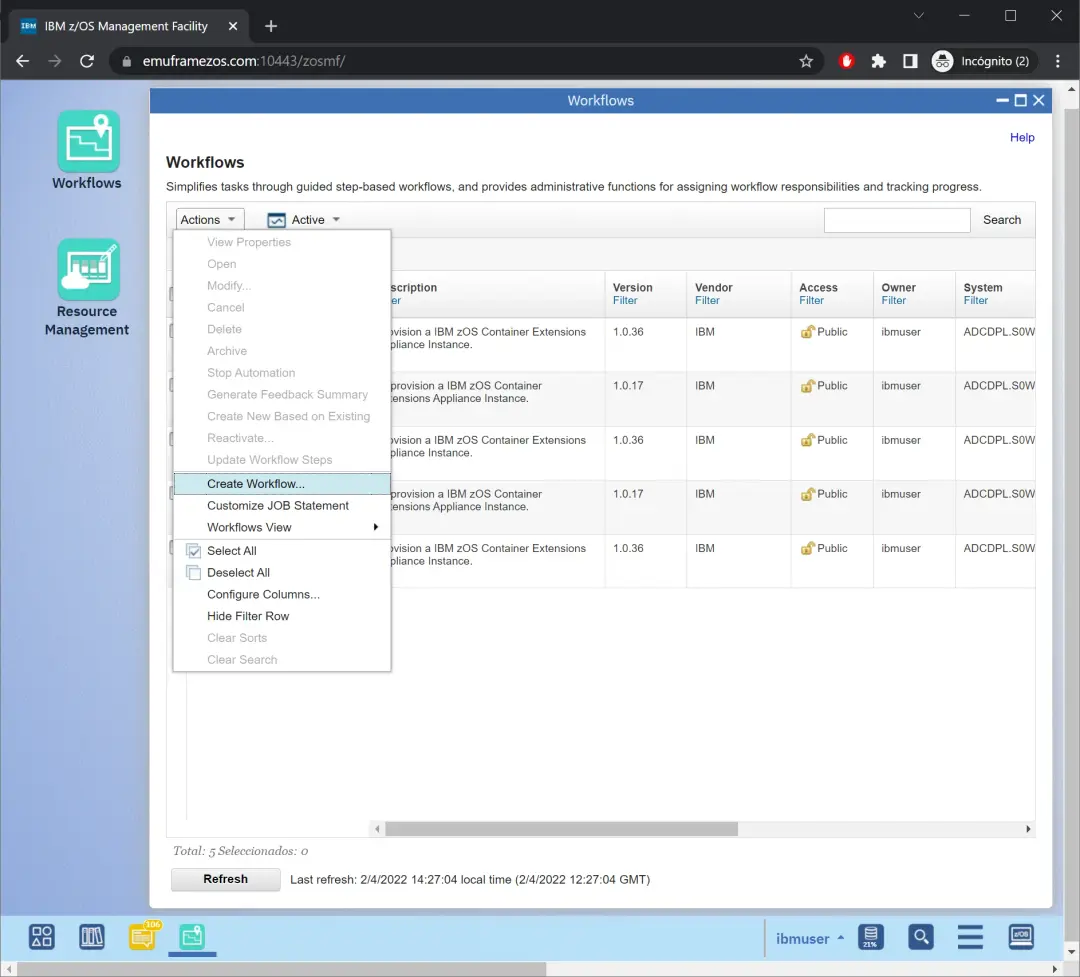
Let's start creating the instance. To do this, we go to z/OSMF. In Workflows, we go to the Actions menu and choose Create Workflow…
We choose the system and for the Workflow file and variables file we will use the following:
/usr/lpp/zcx_zos/workflows/provision.xml
/usr/lpp/zcx_zos/properties/workflow_variables.properties
For the workflow_variables.properties file, I will copy it to another path and use that one because the other file may not allow us to modify some variables:
/var/zcx_zos/workflow_variables.properties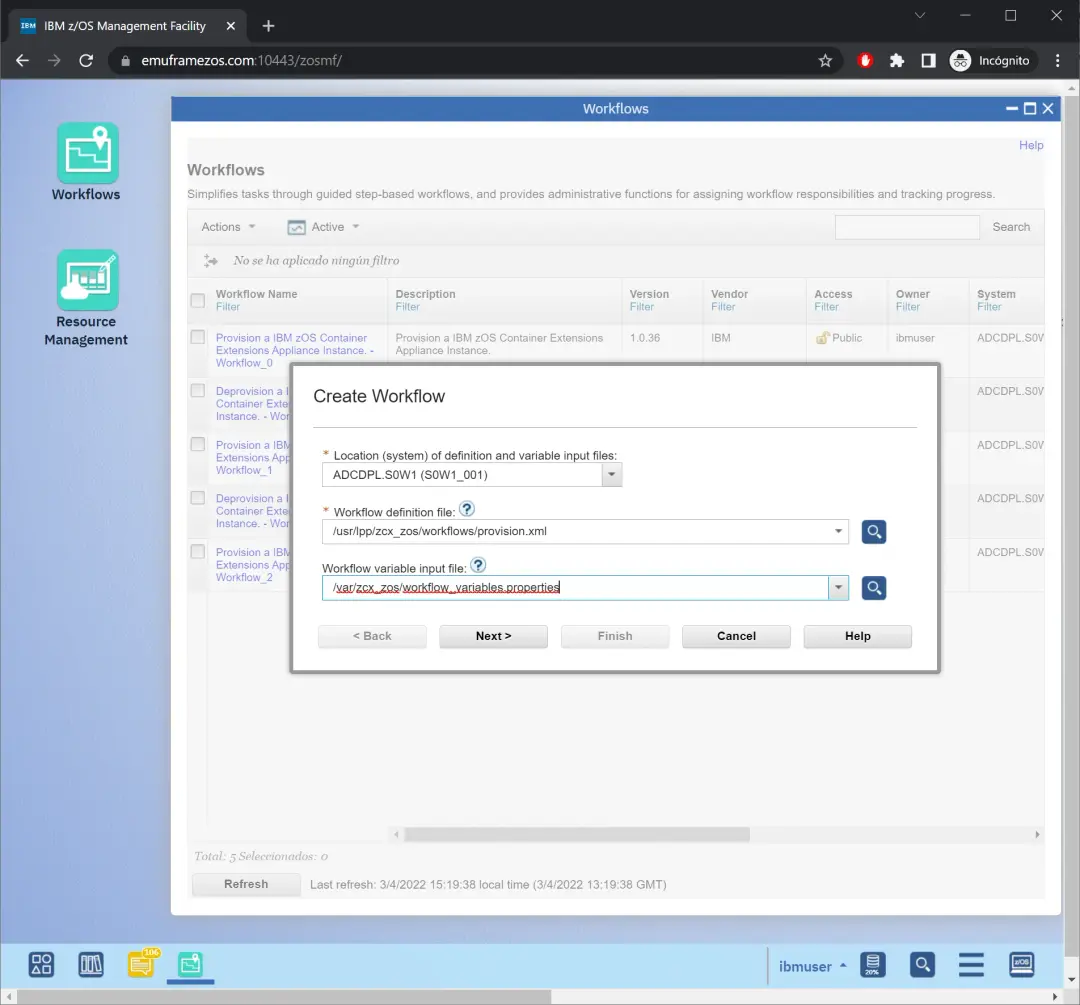
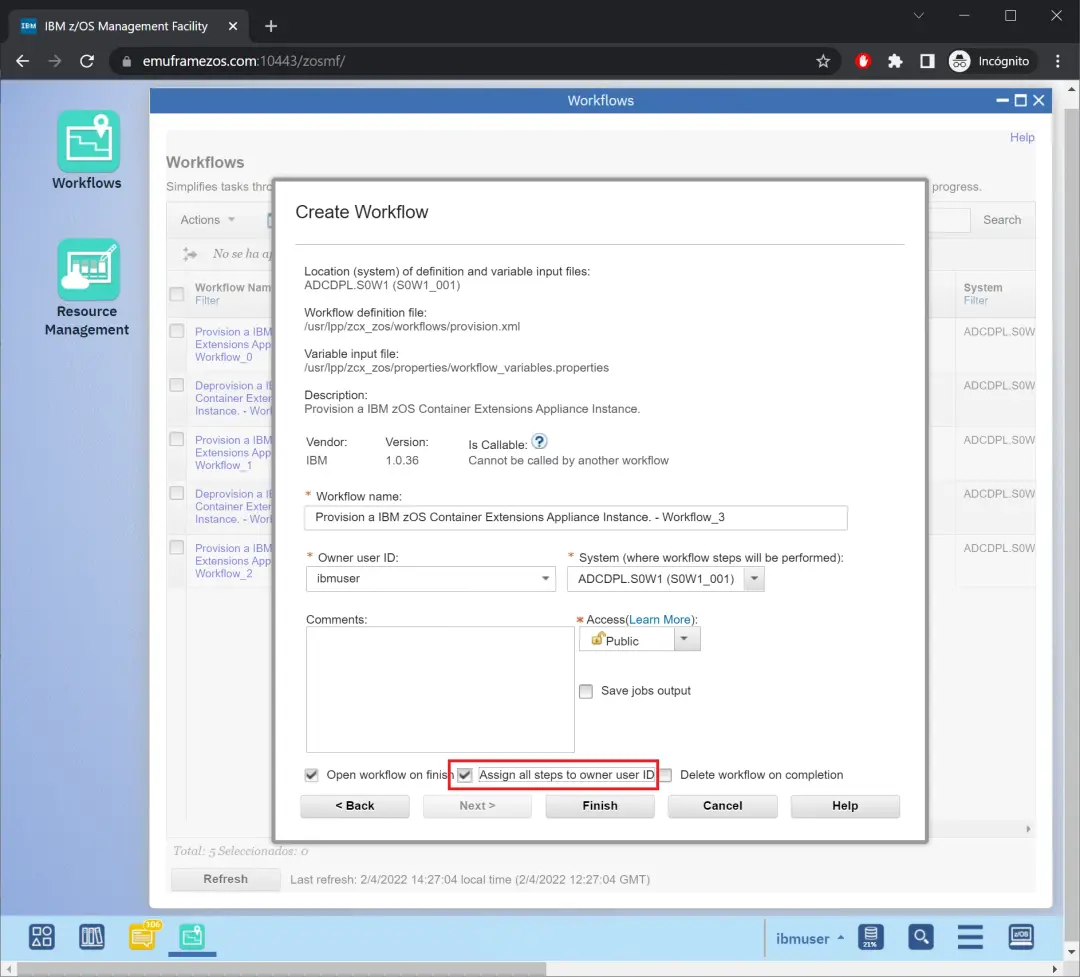
In my case, I assign all tasks to my user, since I will do all of them.
Click Finish.
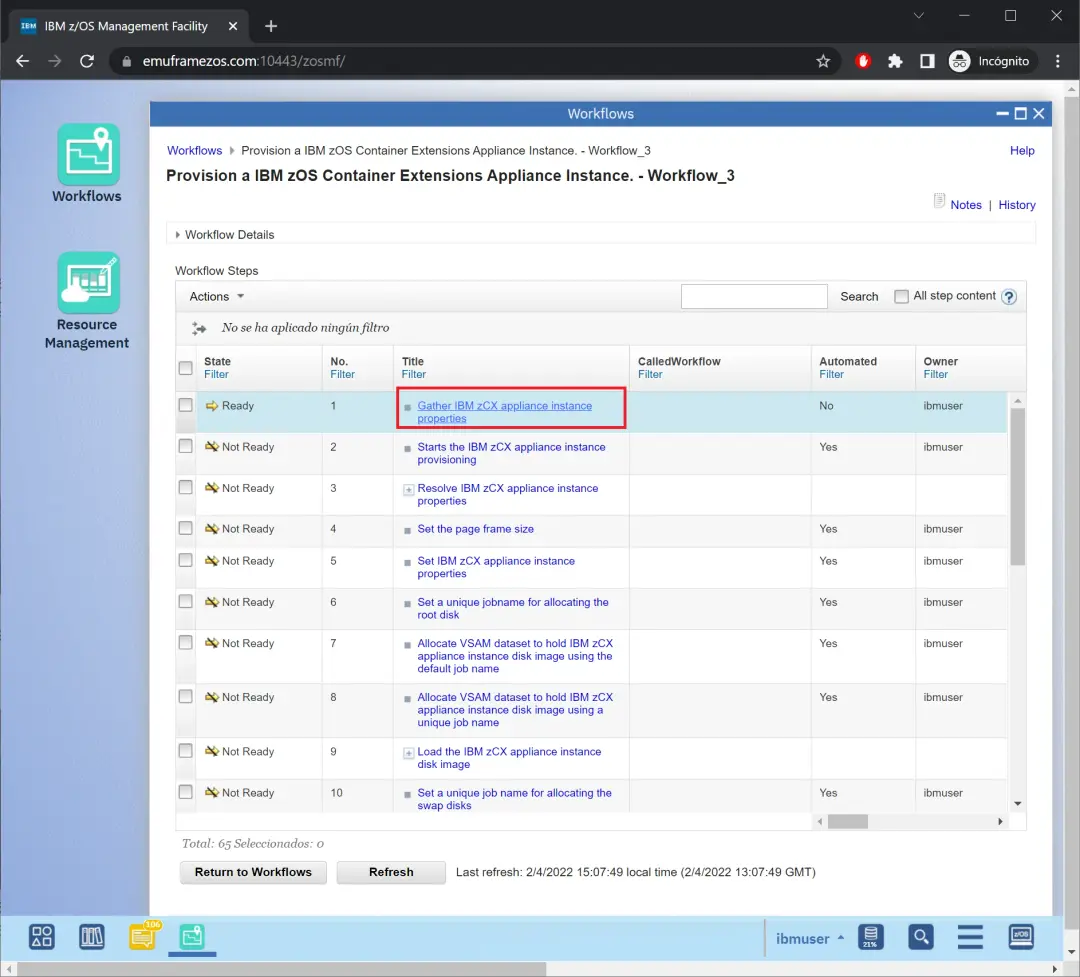
We enter the first task.
We need to fill in the data according to what we have planned. I will put the ones I will use.
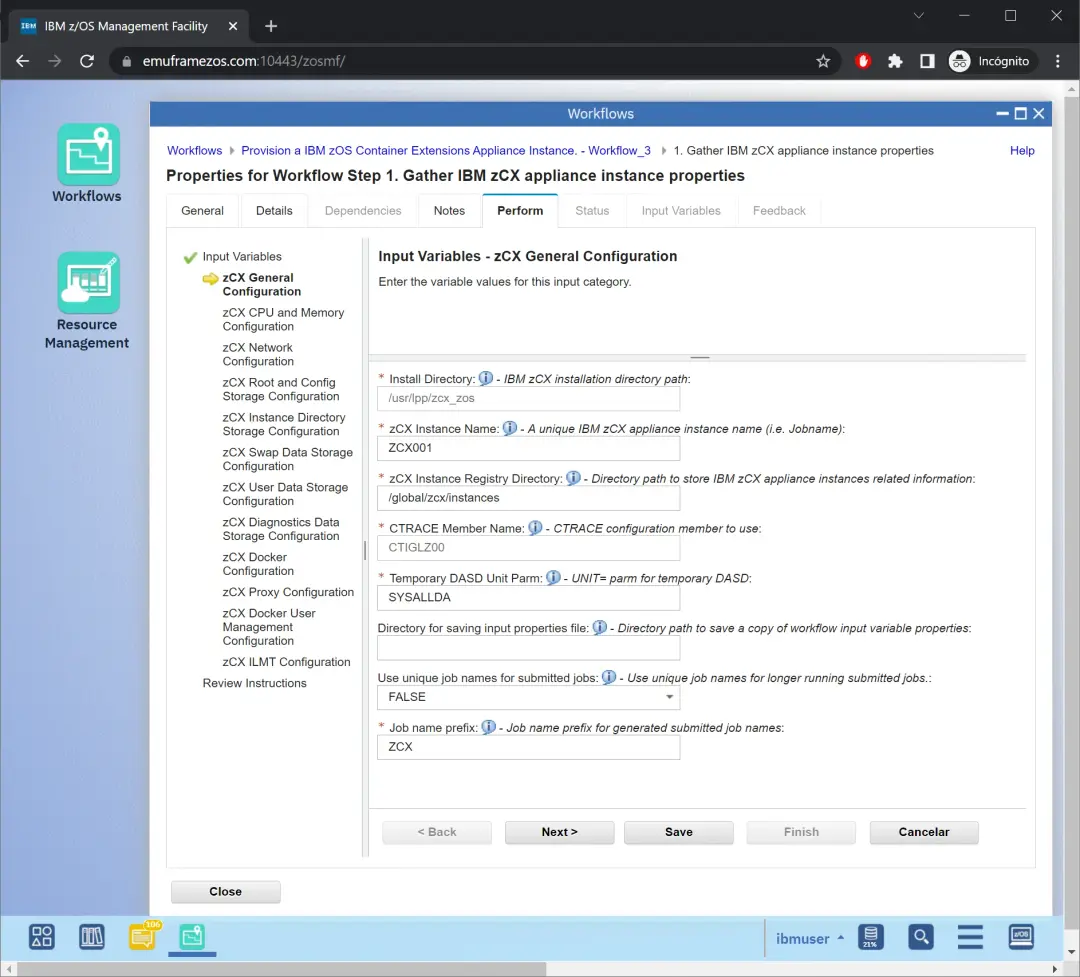
In my case, I will use 8GB of memory because an application I will install in the future requires it.
Everyone should adjust according to their needs.
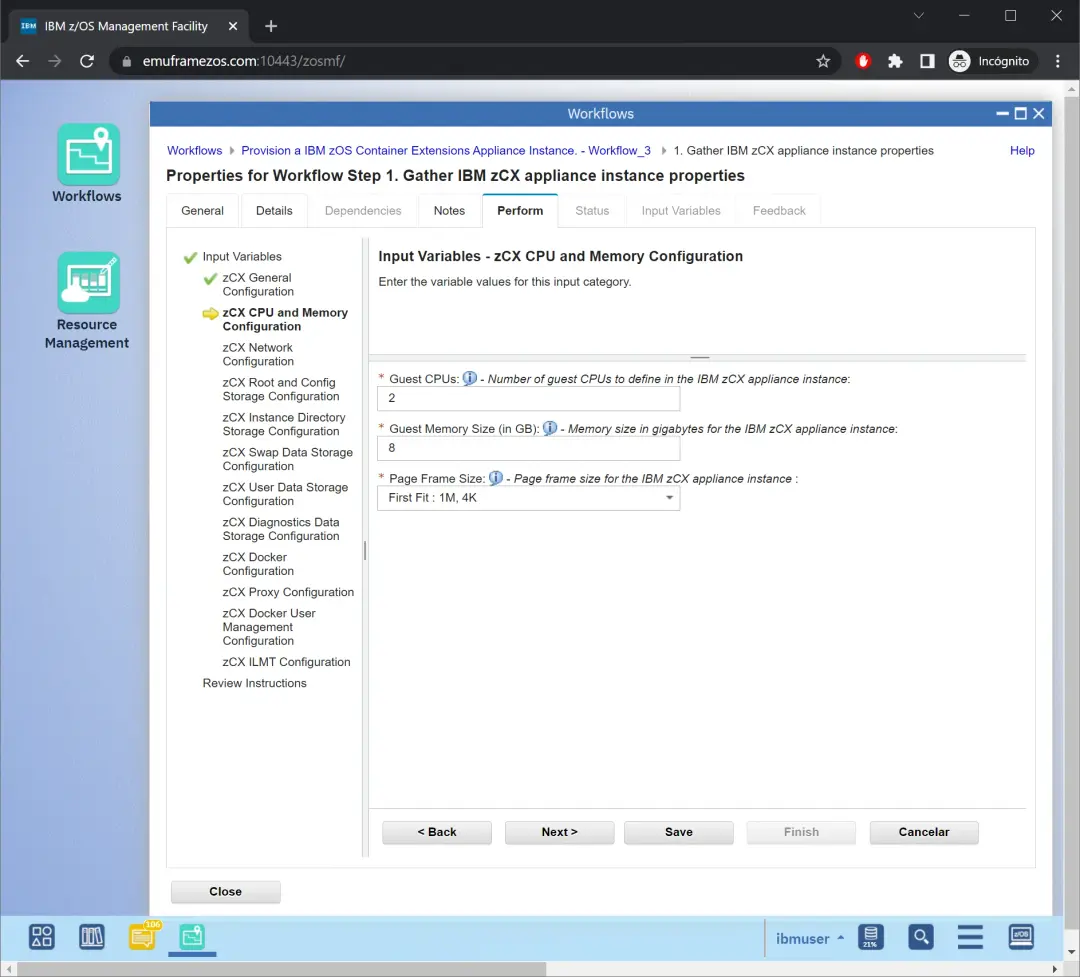
The IP I will use is the one I defined in previous steps (10.1.3.10). I use Google's DNS (8.8.8.8 and 8.8.4.4).
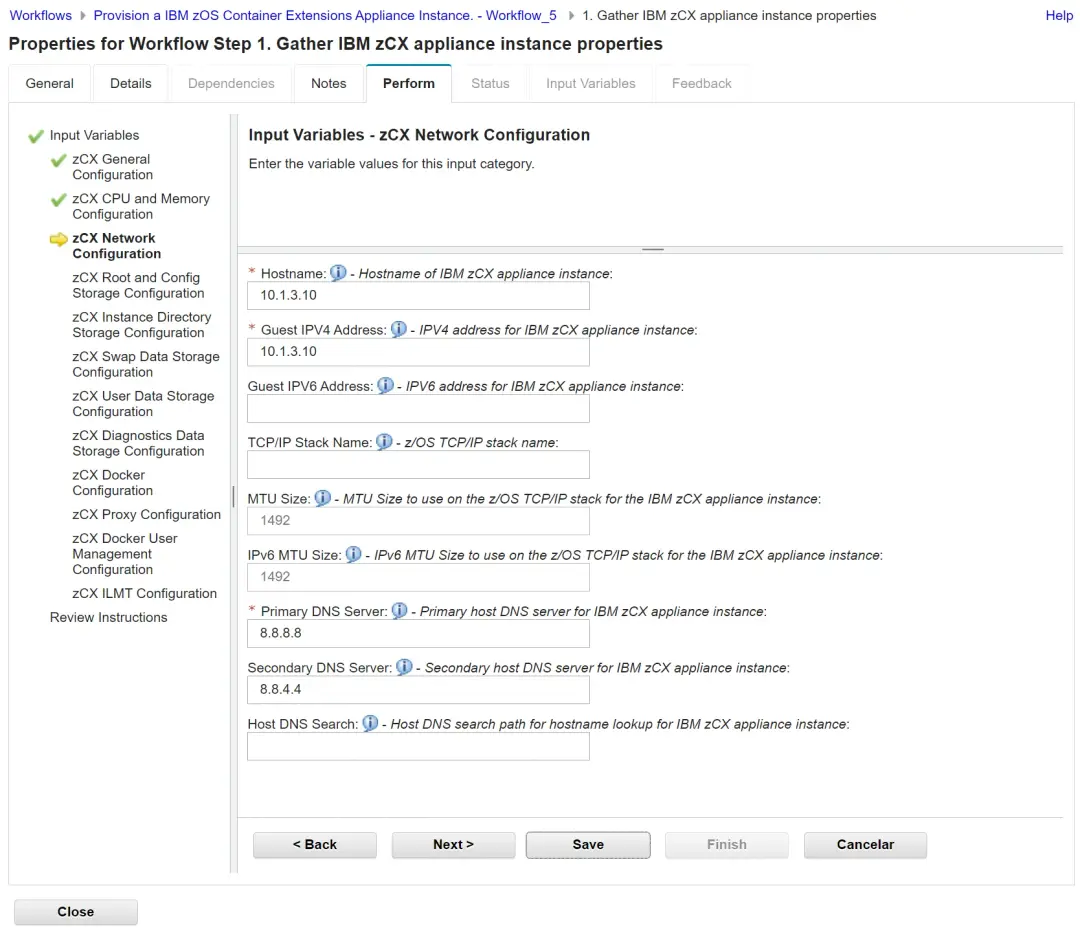
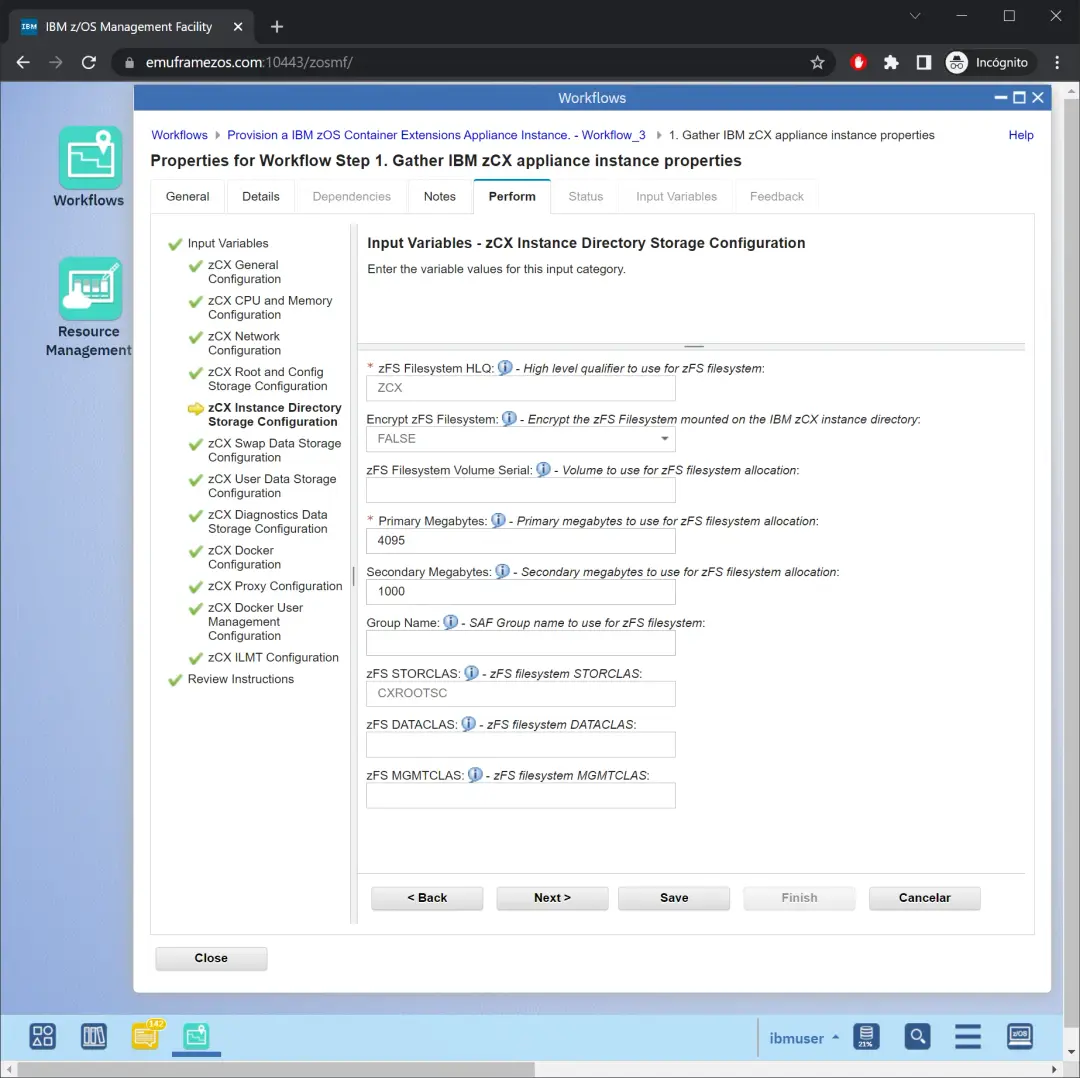
I'm going to set 8GB of space for the ROOT because an application I will install in the future requires it. I will specify the STORCLAS CXROOTSC
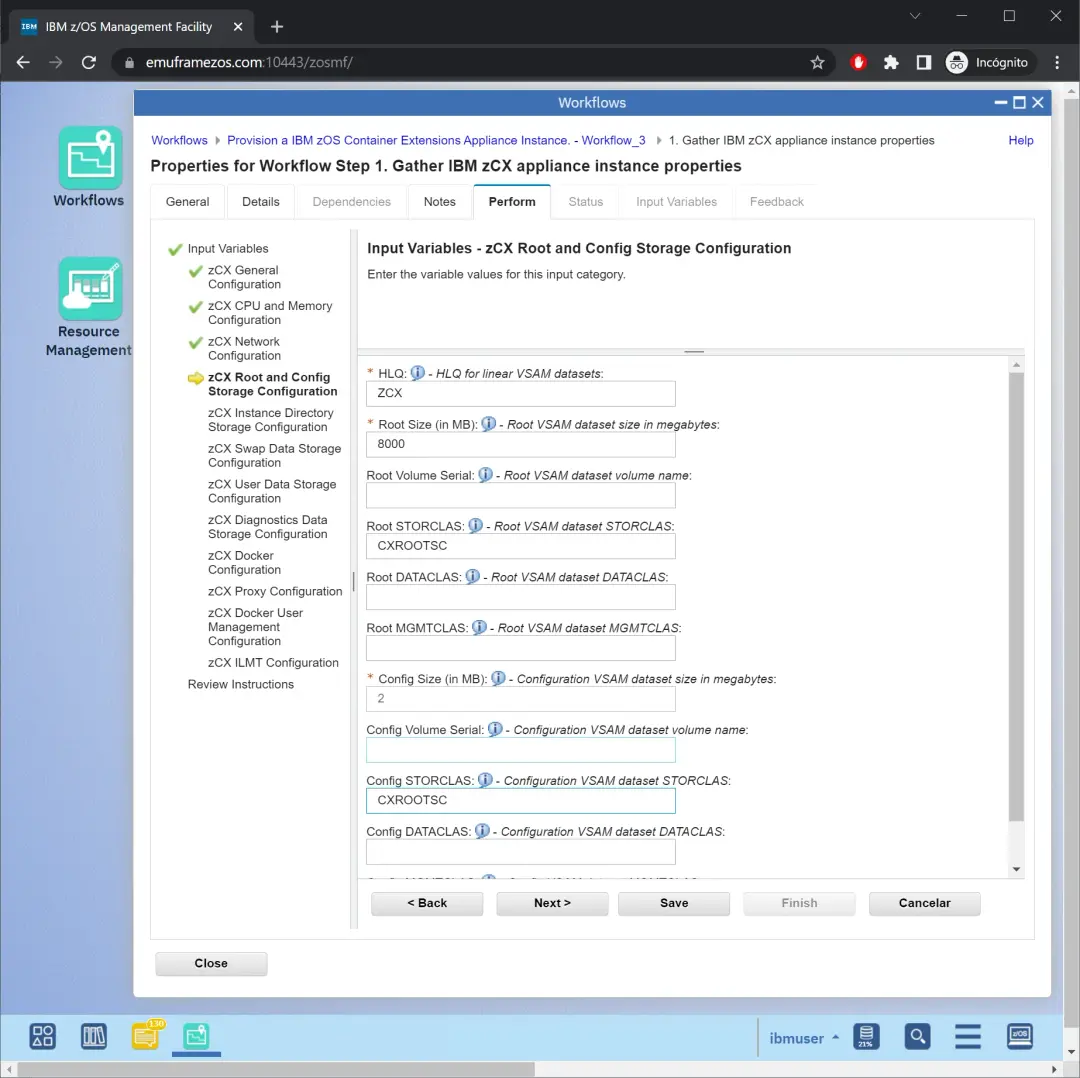
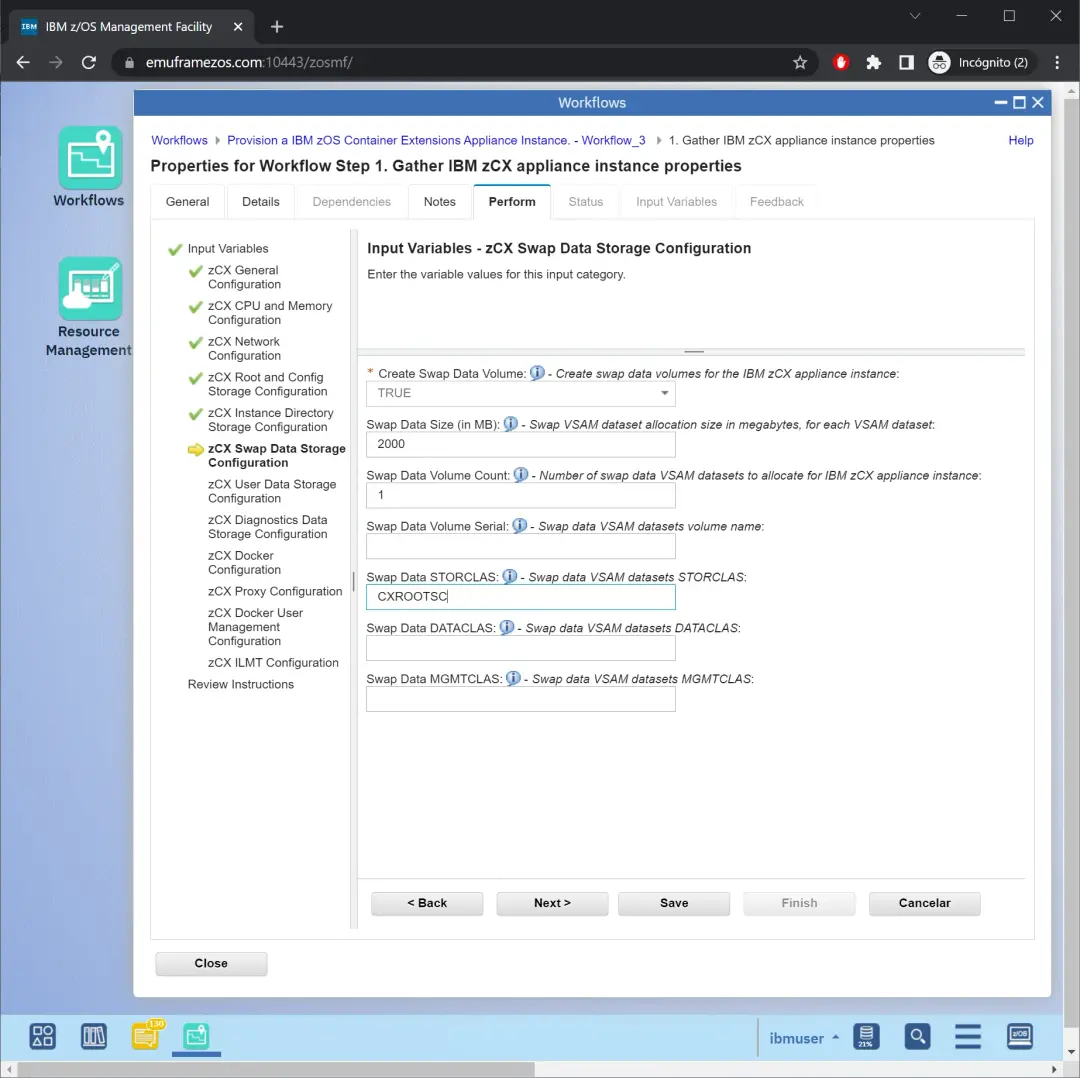
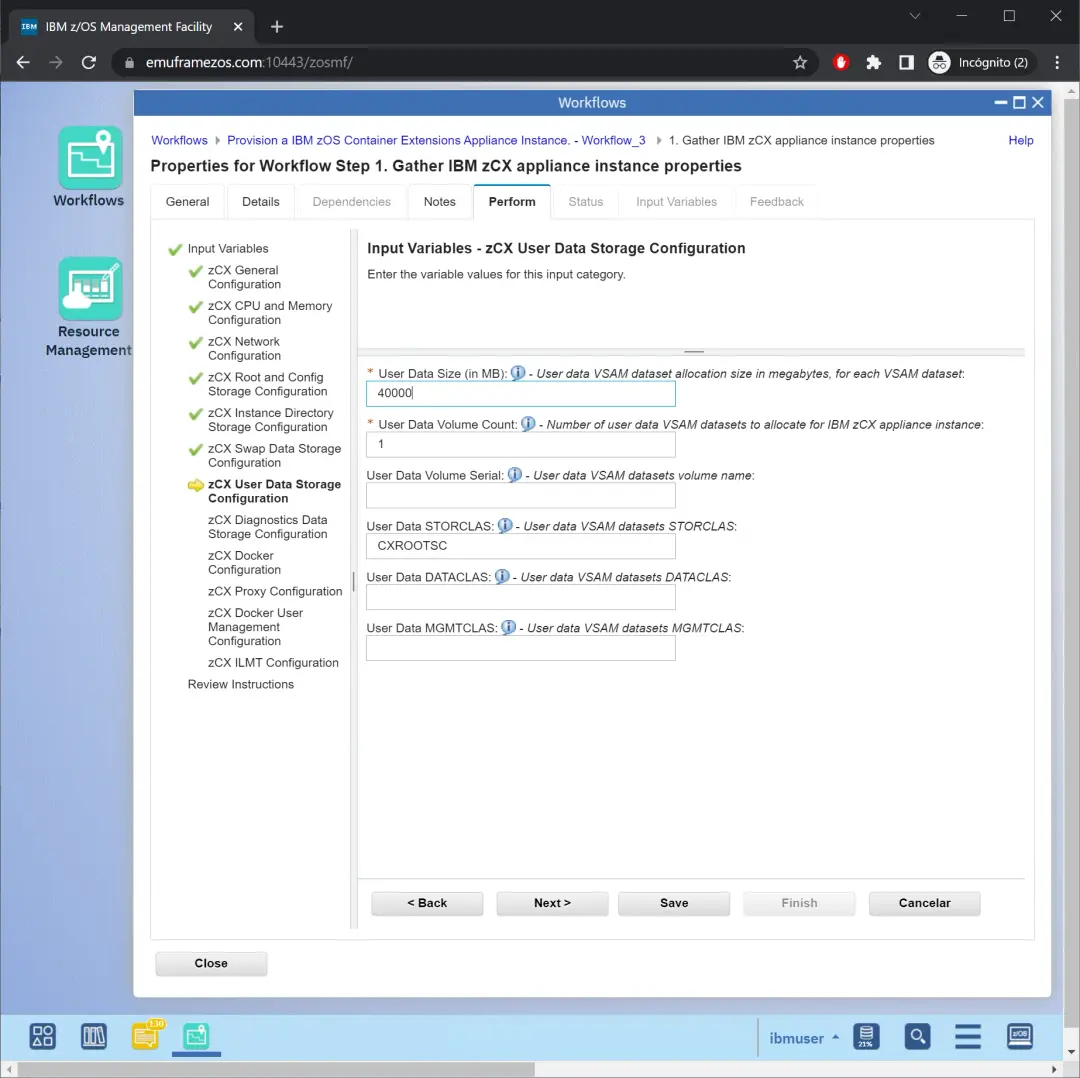
Here I will specify 40GB as required by the software I will install later.
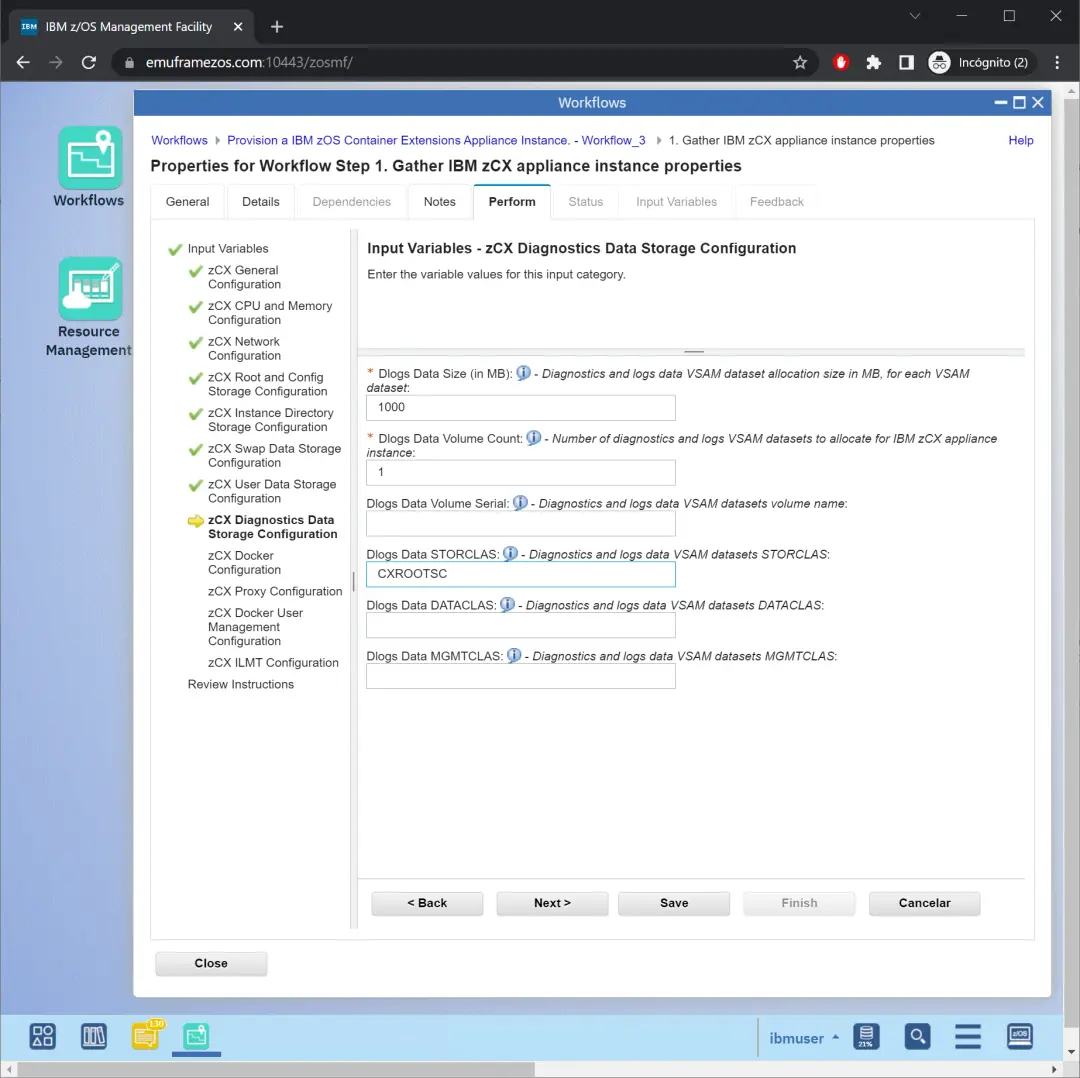
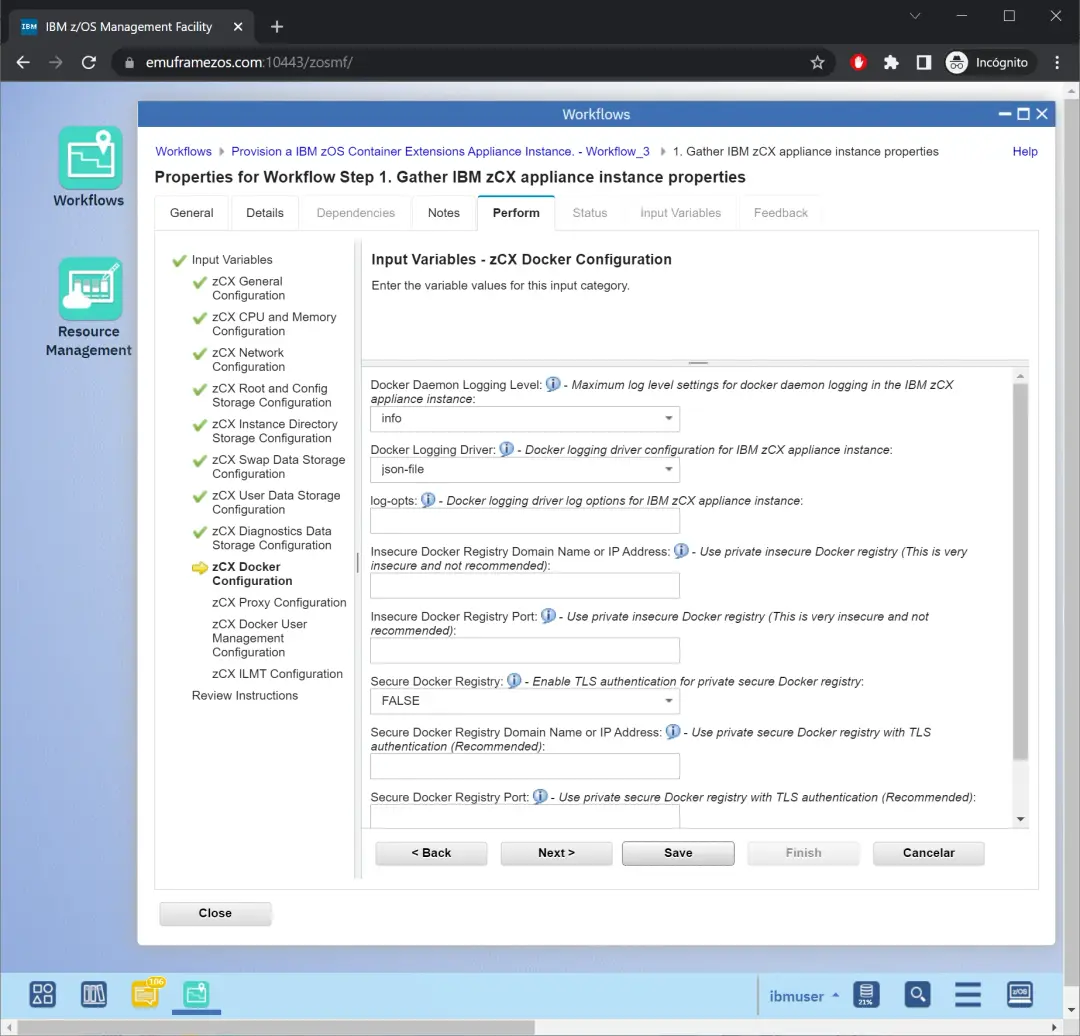
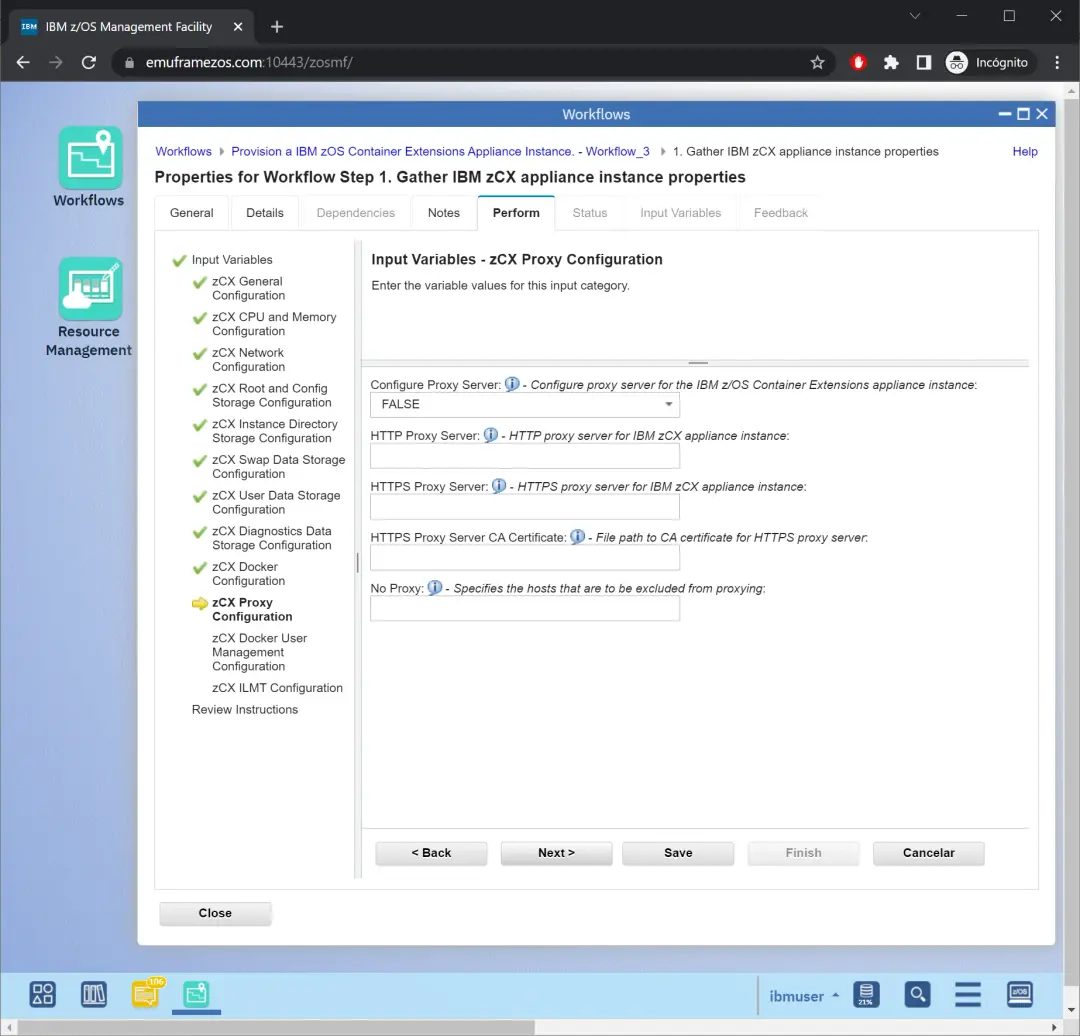
In the following parameters, we will need to specify a public "key" to access the system via SSH. We can generate a new one on the client system with the command:
ssh-keygen -t rsa -b 4096 -C "admin@192.168.1.12"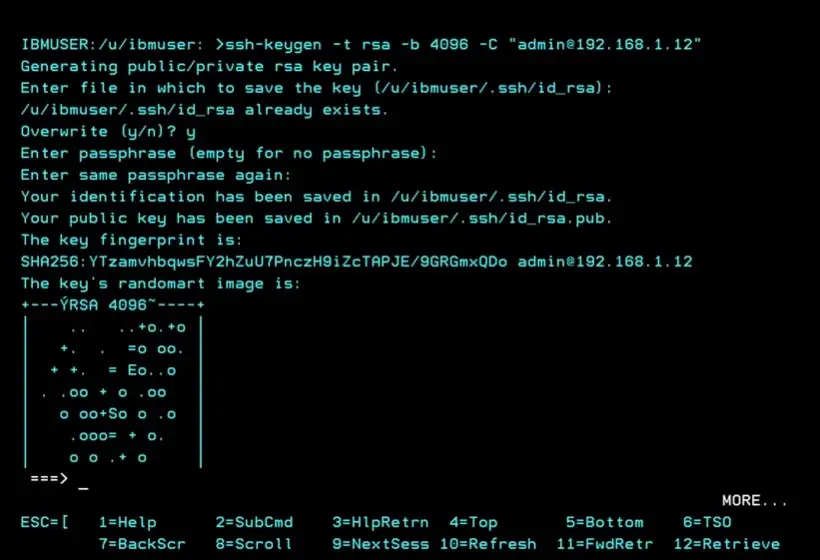
We can download the file to make it easier to copy the key:
ftp 192.168.1.12
cd /u/ibmuser/.ssh/
get id_rsa.pub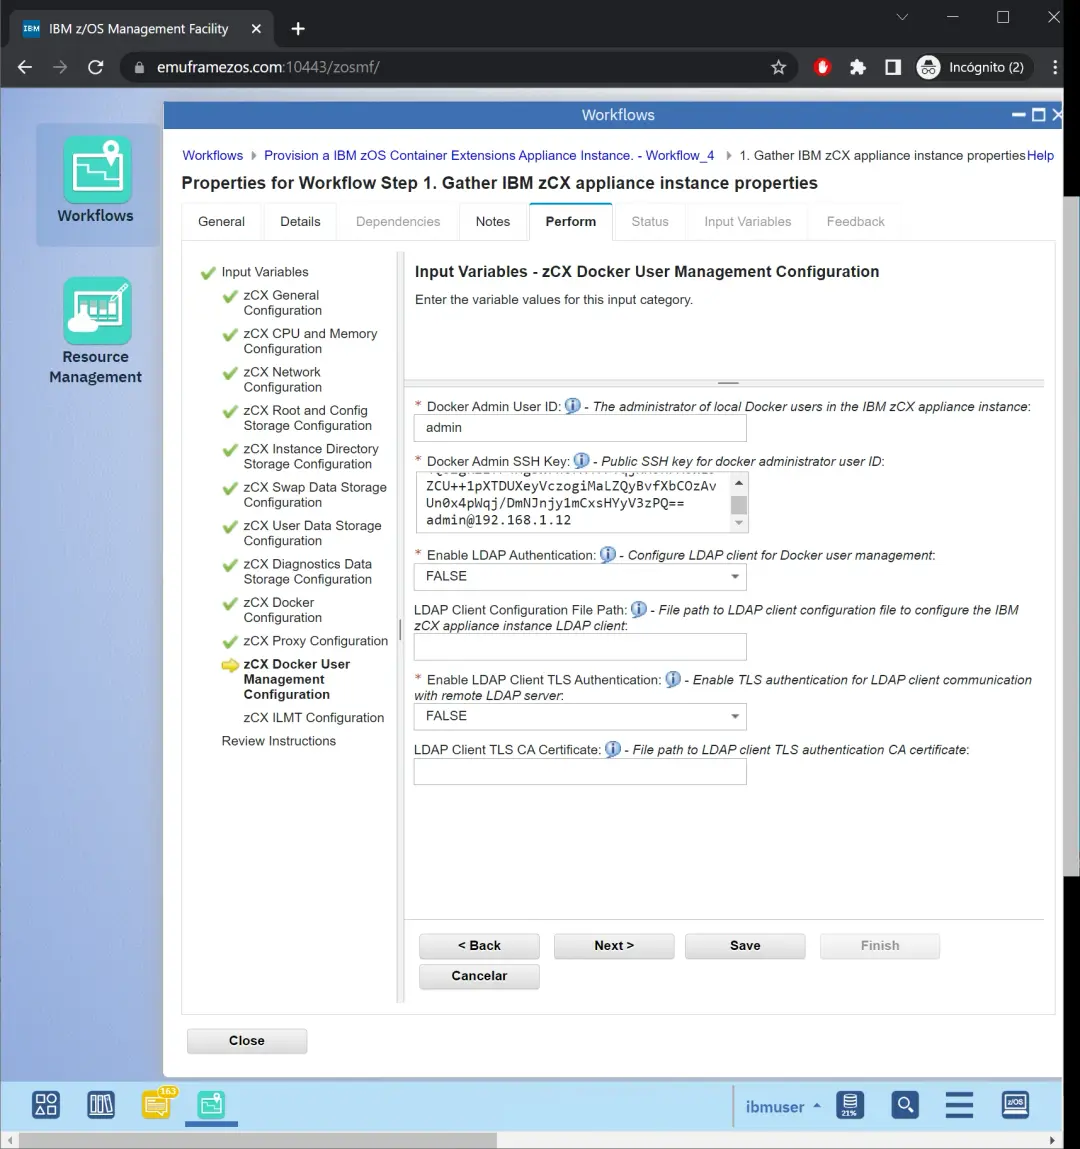
Let's go to the next part of the variables.
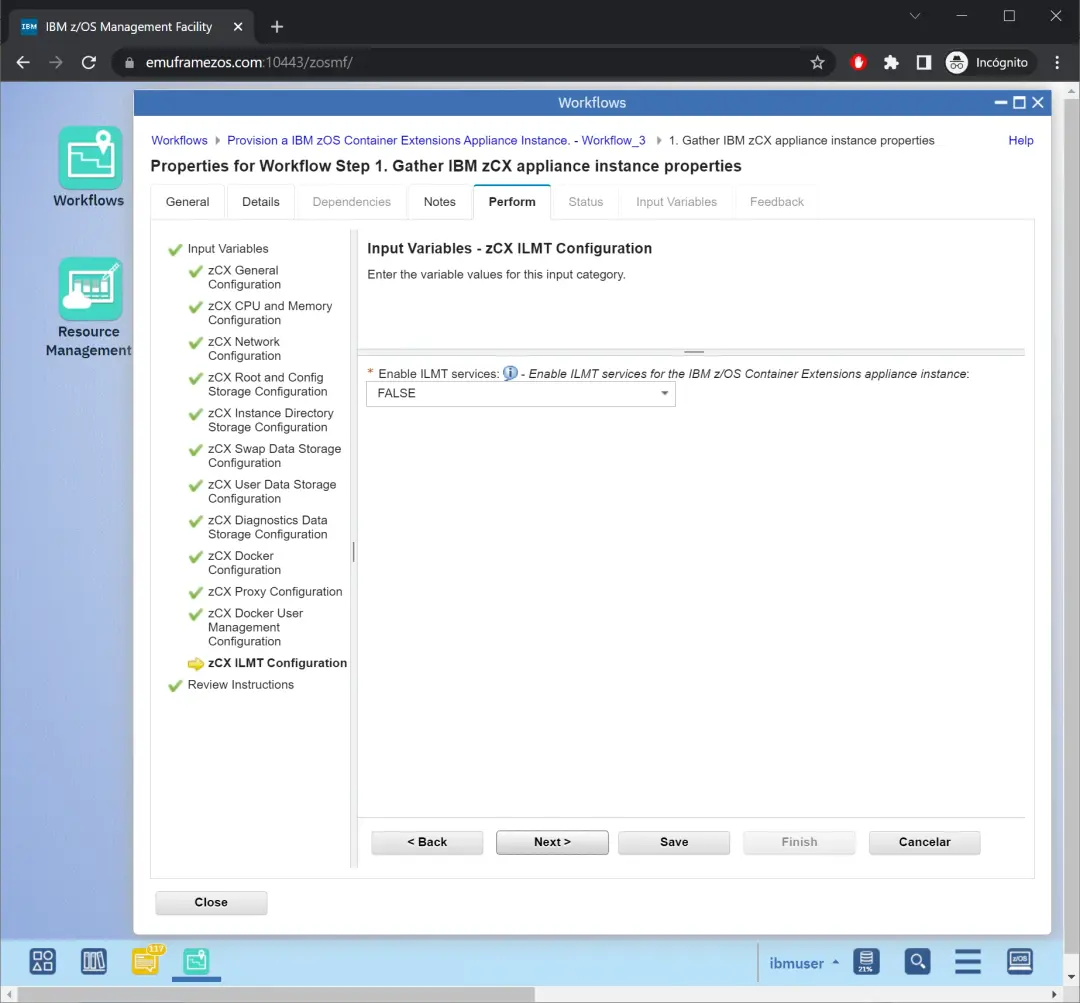
Finally, we save and finish.
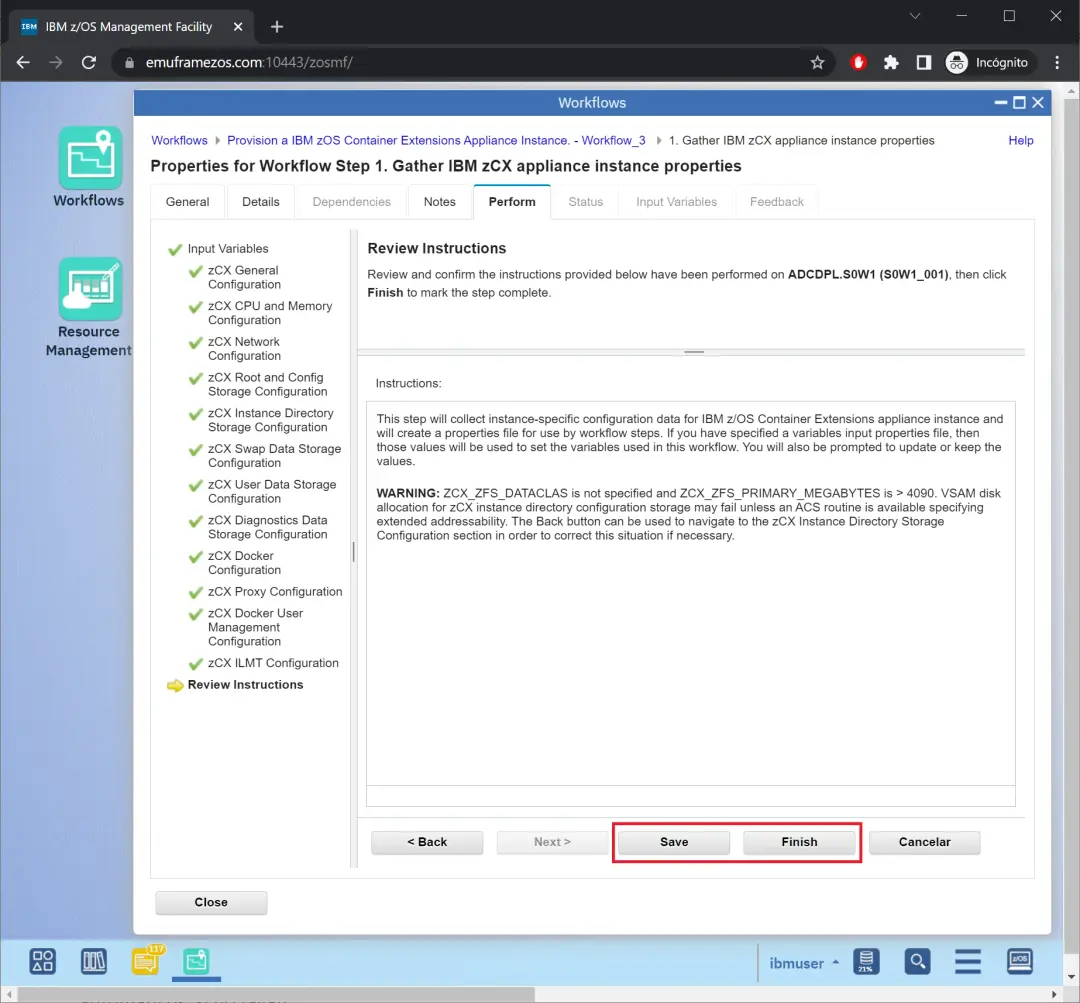
Execute z/OSMF Workflow to Create the Instance
We now have all the parameters defined. In theory, the rest of the steps should be automatic, if they don't fail. We select the second step and go to the Actions menu.
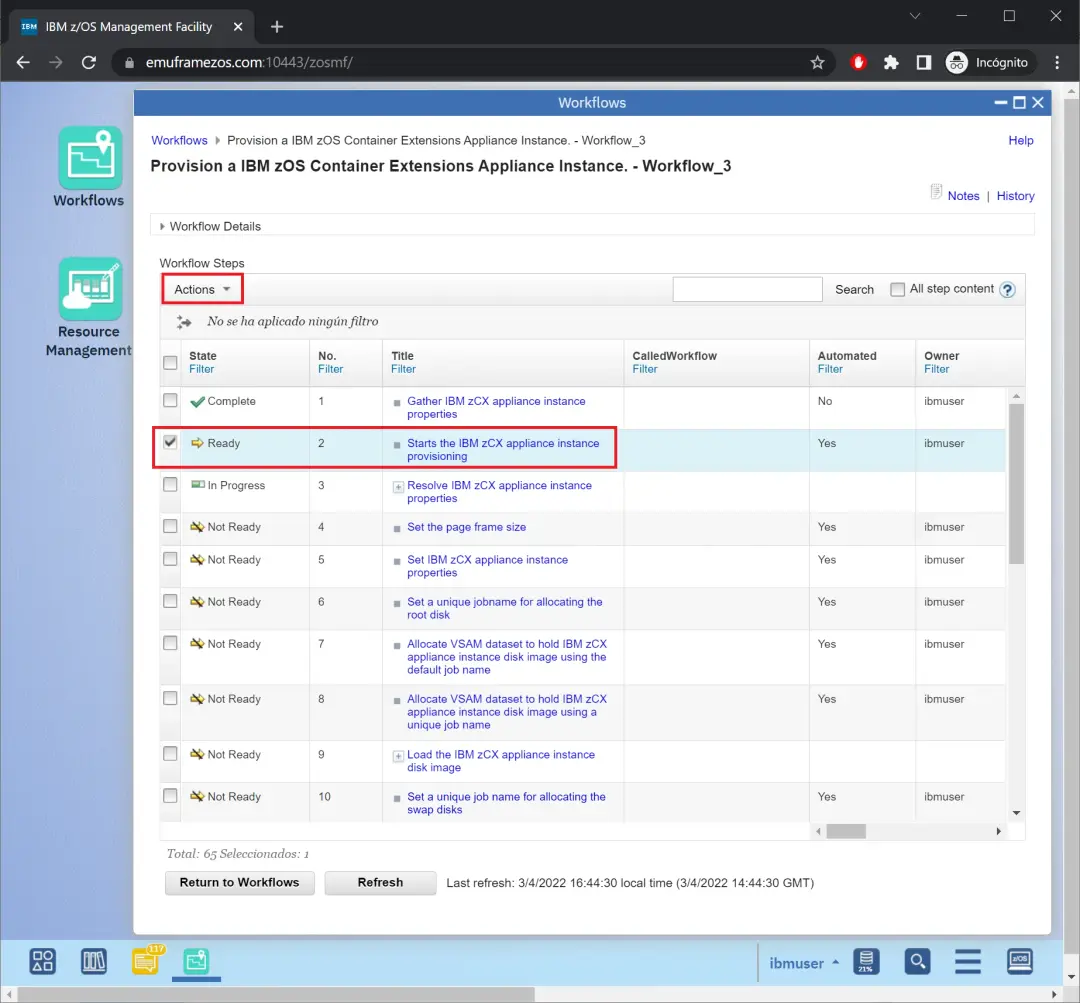
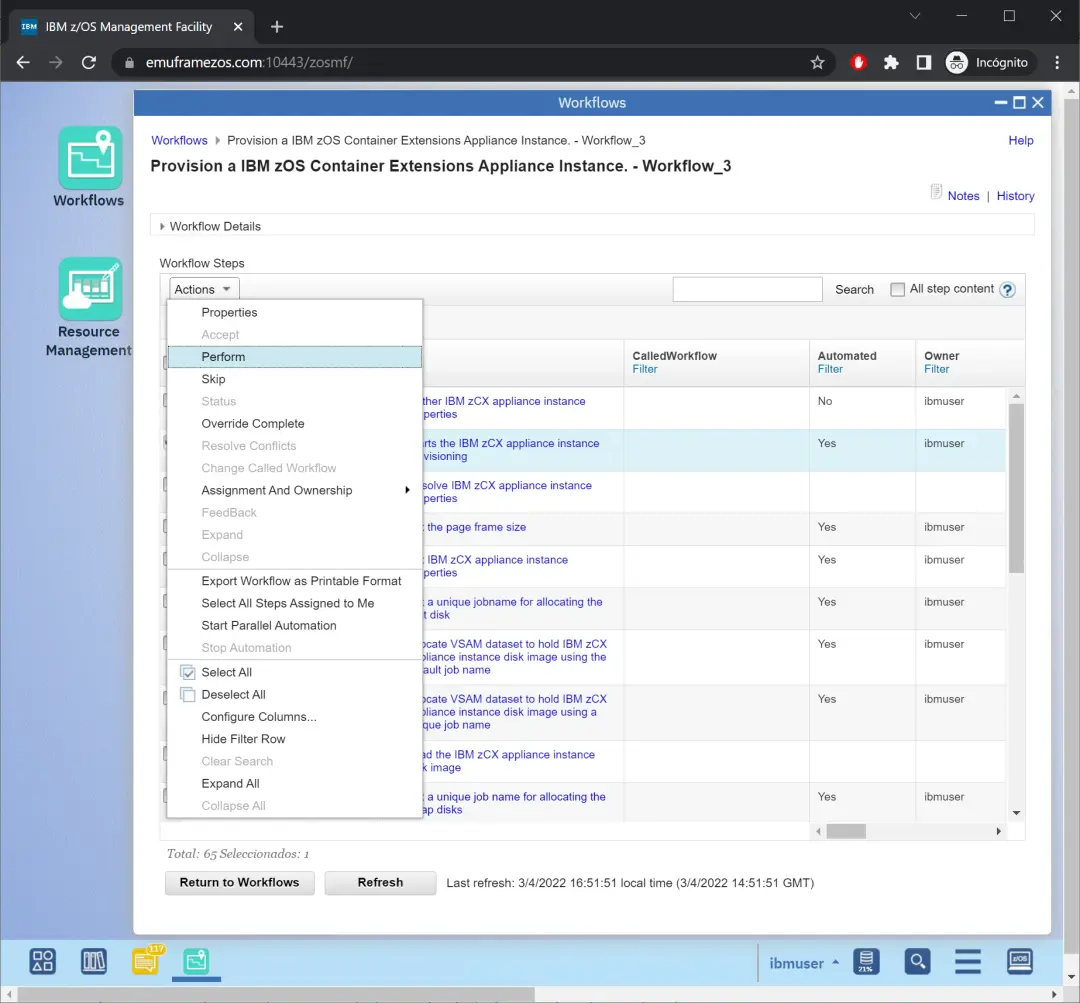
Option Perform.
We check the following options so that it executes all steps automatically and uses the input variables file.
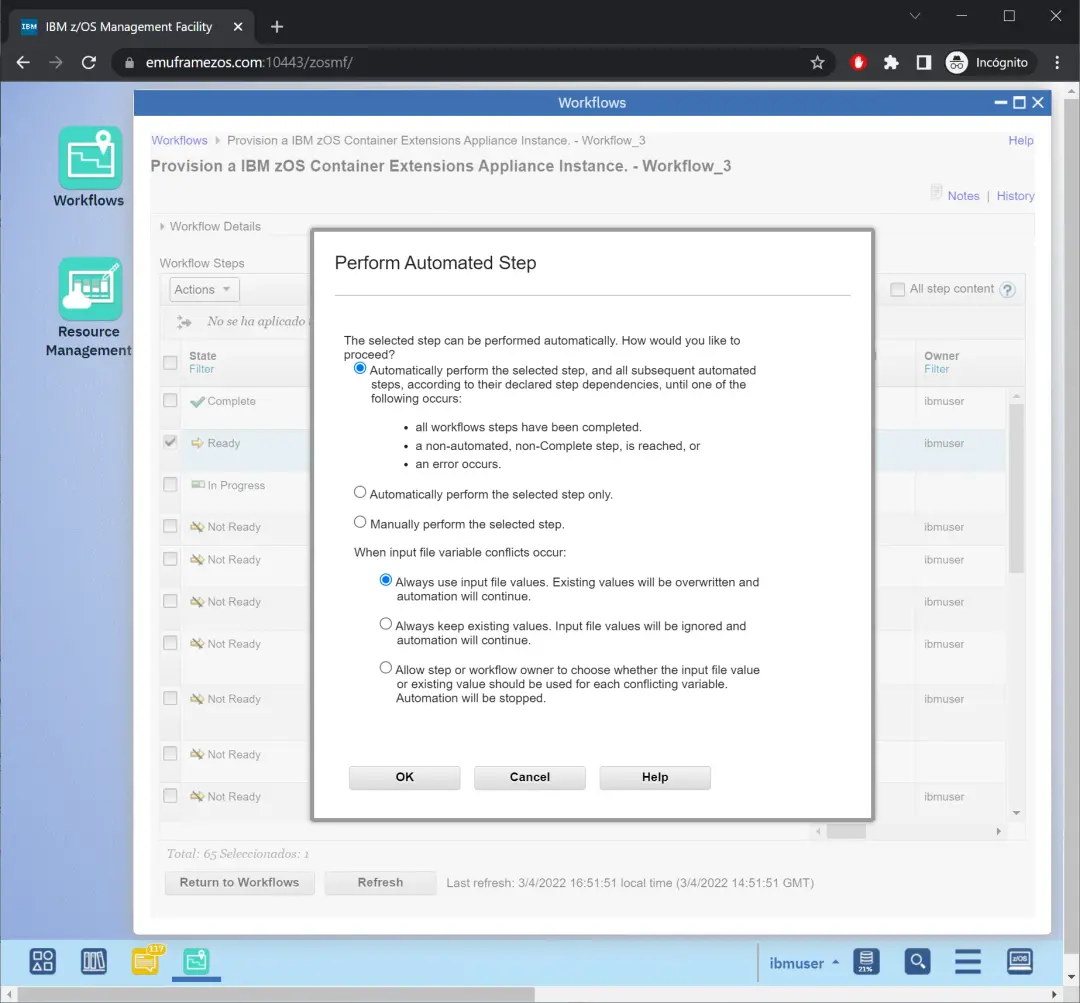
Everything will complete successfully. We will need to enter the last step to see the instance start command.
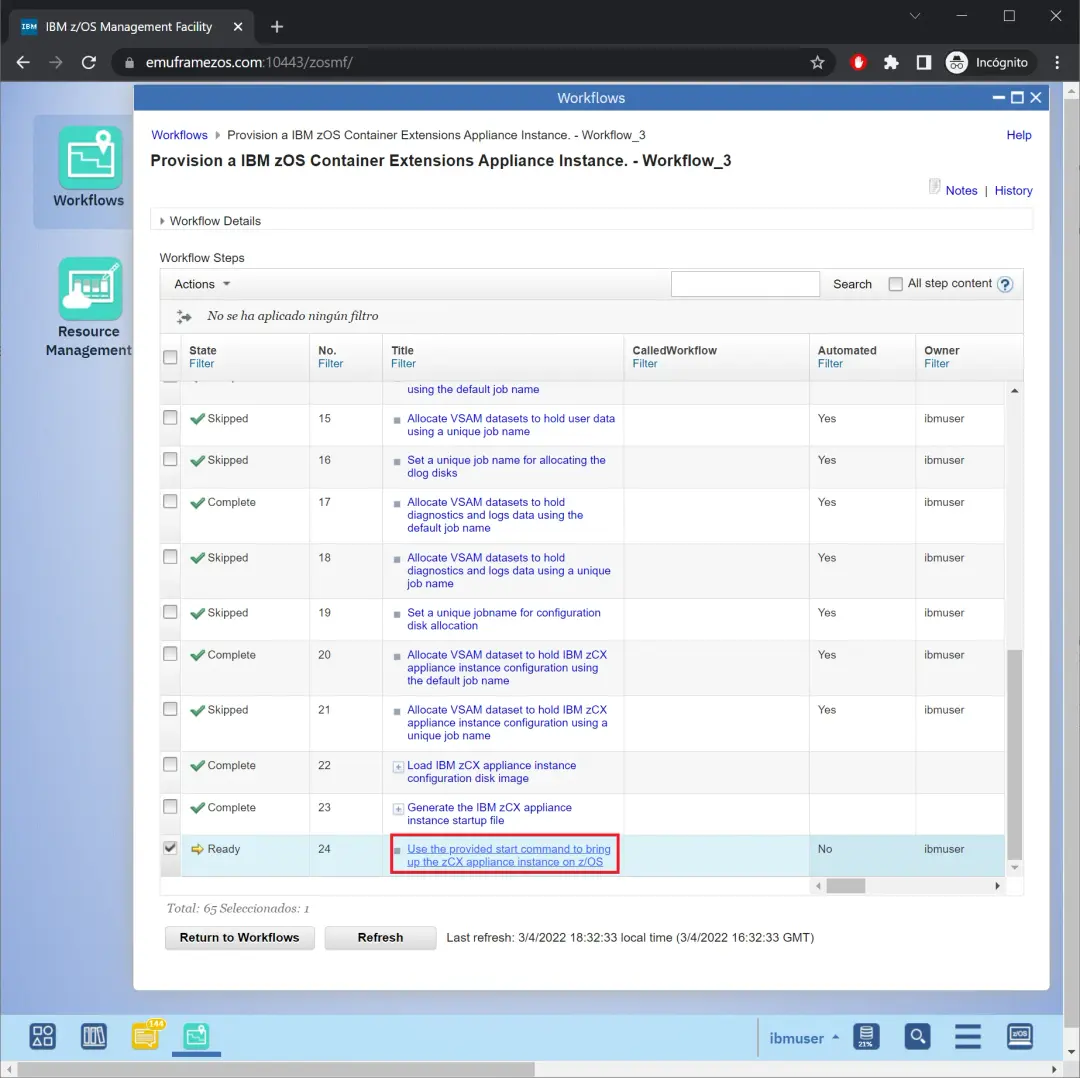
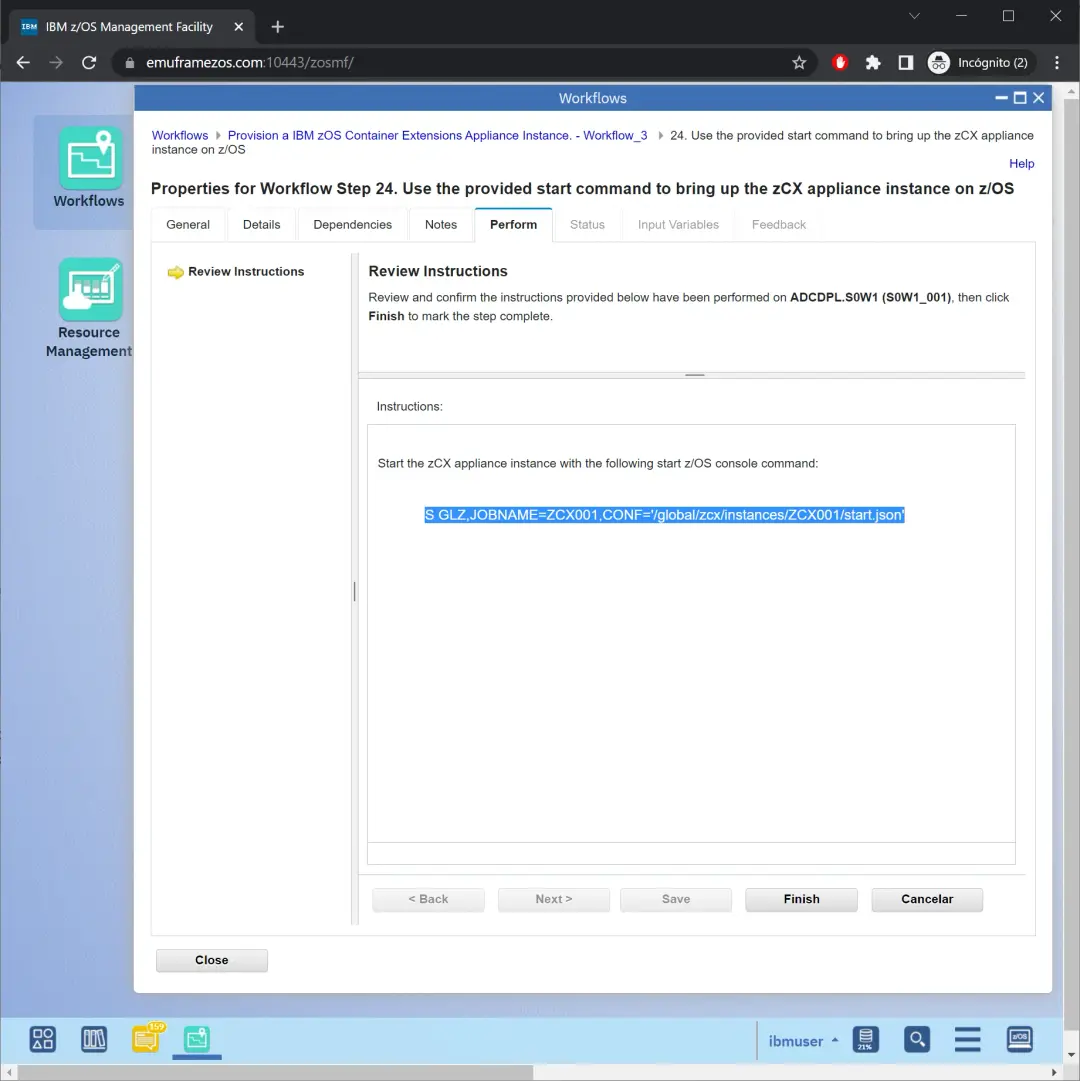
With the following command we will start the instance:
S GLZ,JOBNAME=ZCX001,CONF='/global/zcx/instances/ZCX001/start.json'We will click Finish.
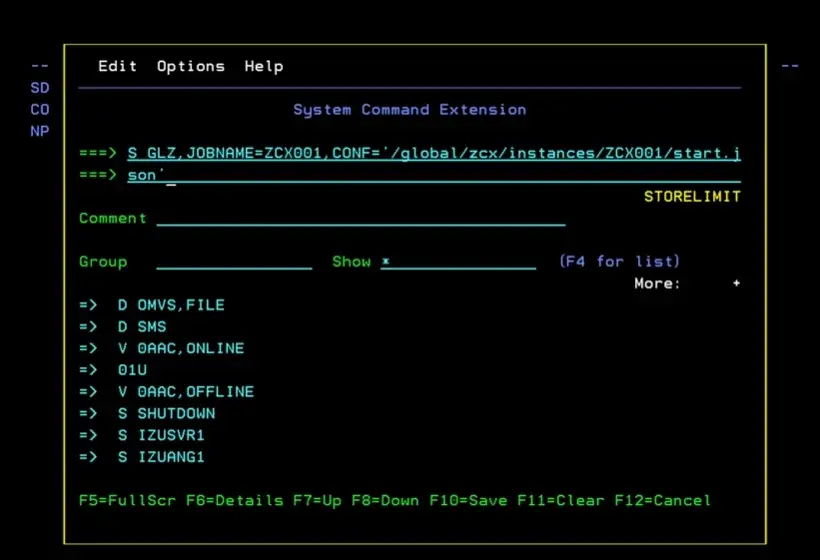
We will issue the command in SDSF or console.
It will start booting, formatting the files, starting the instance, etc.
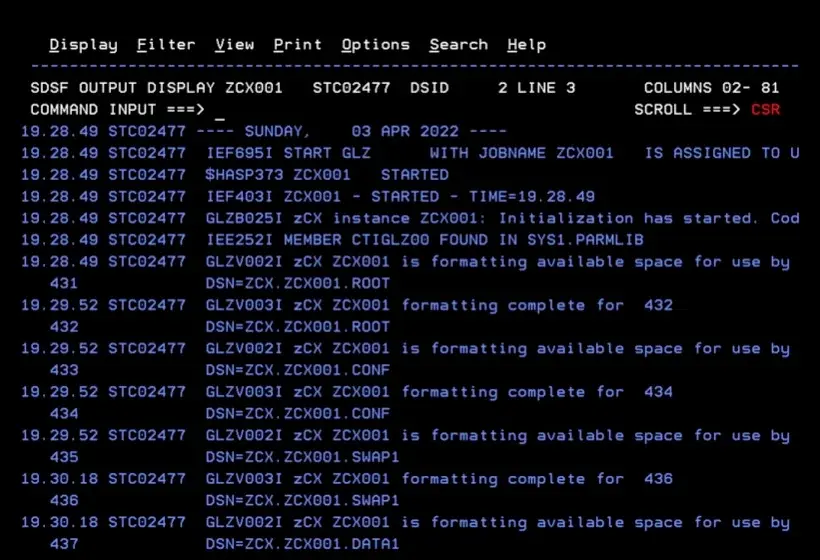
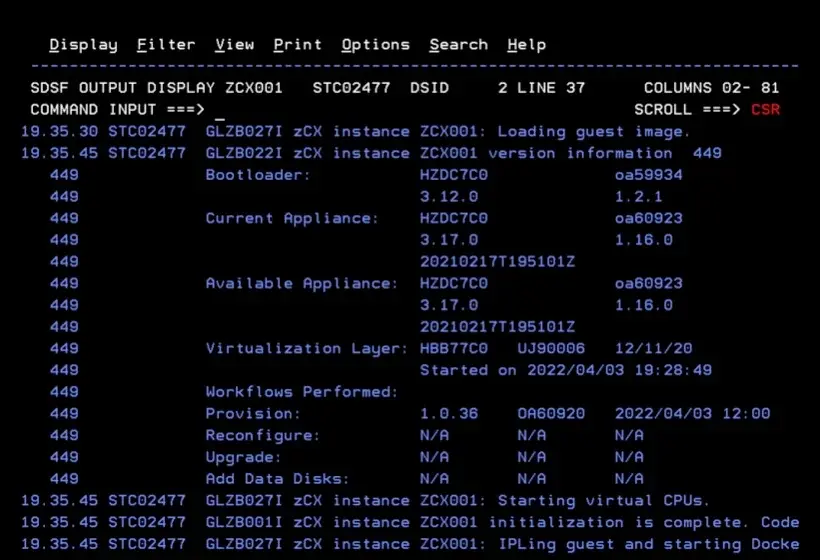
When the instance starts, we can connect.
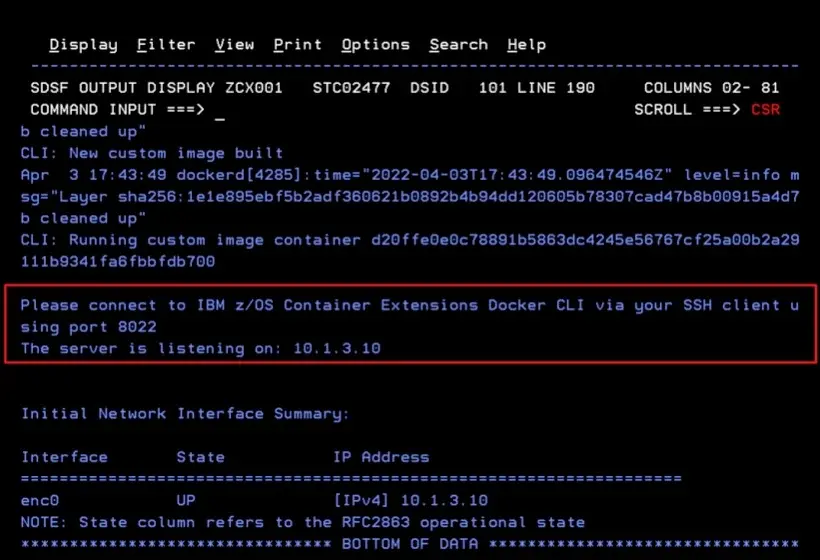
Connect to the Docker Container
We go to OMVS (TSO OMVS) and enter the command:
ssh admin@10.1.3.10 -p 8022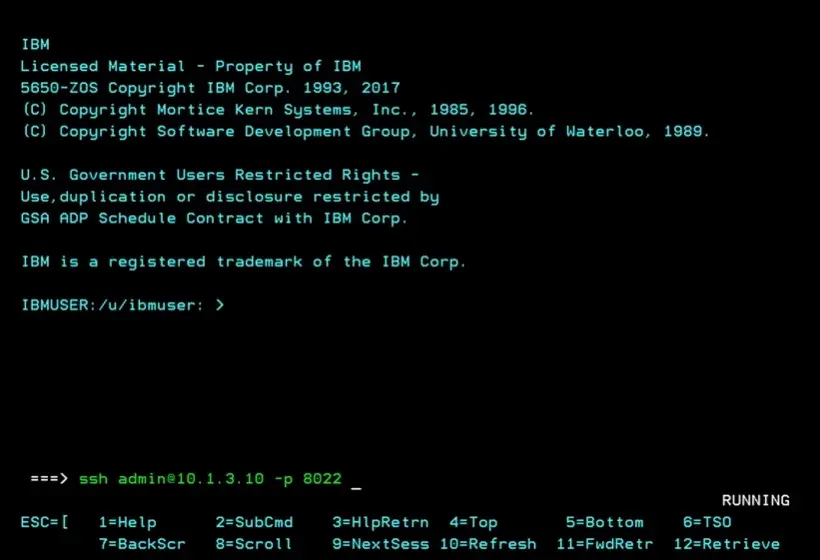
We have accessed it.
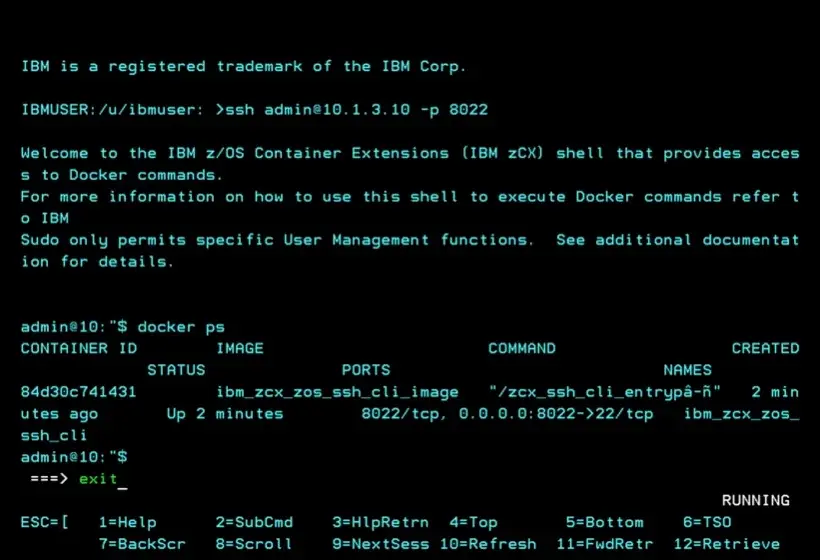
Now I will issue a command to verify it works, for example, docker ps to see what is running.
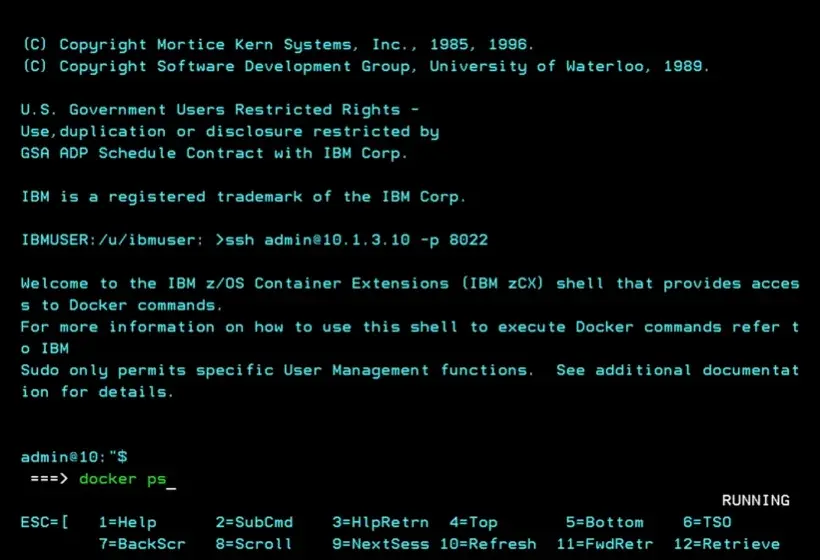
We will see that the ssh process is running. We exit with exit.
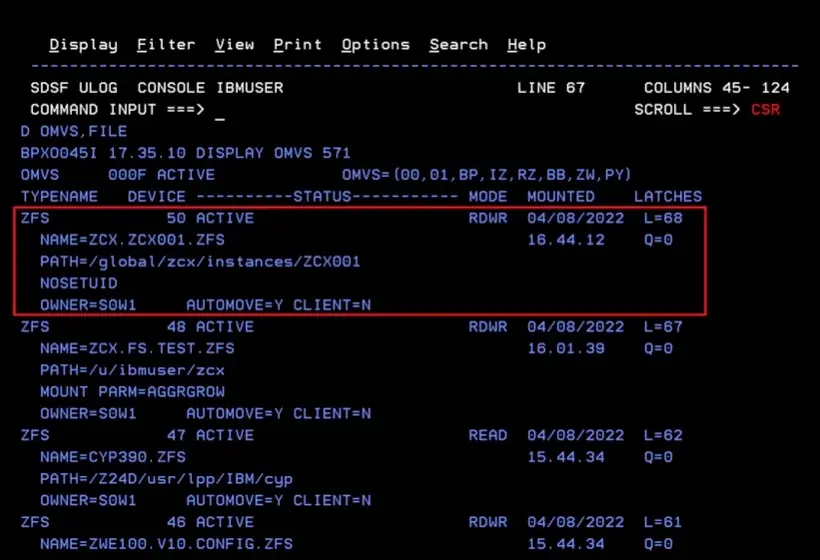
Keep in mind that, during the instance creation process, a ZFS was mounted through the Workflow.
We should consider this to add it in the PARMLIB so it mounts after IPLs.
Delete the Instance
Now I'm going to show how we would delete the instance.
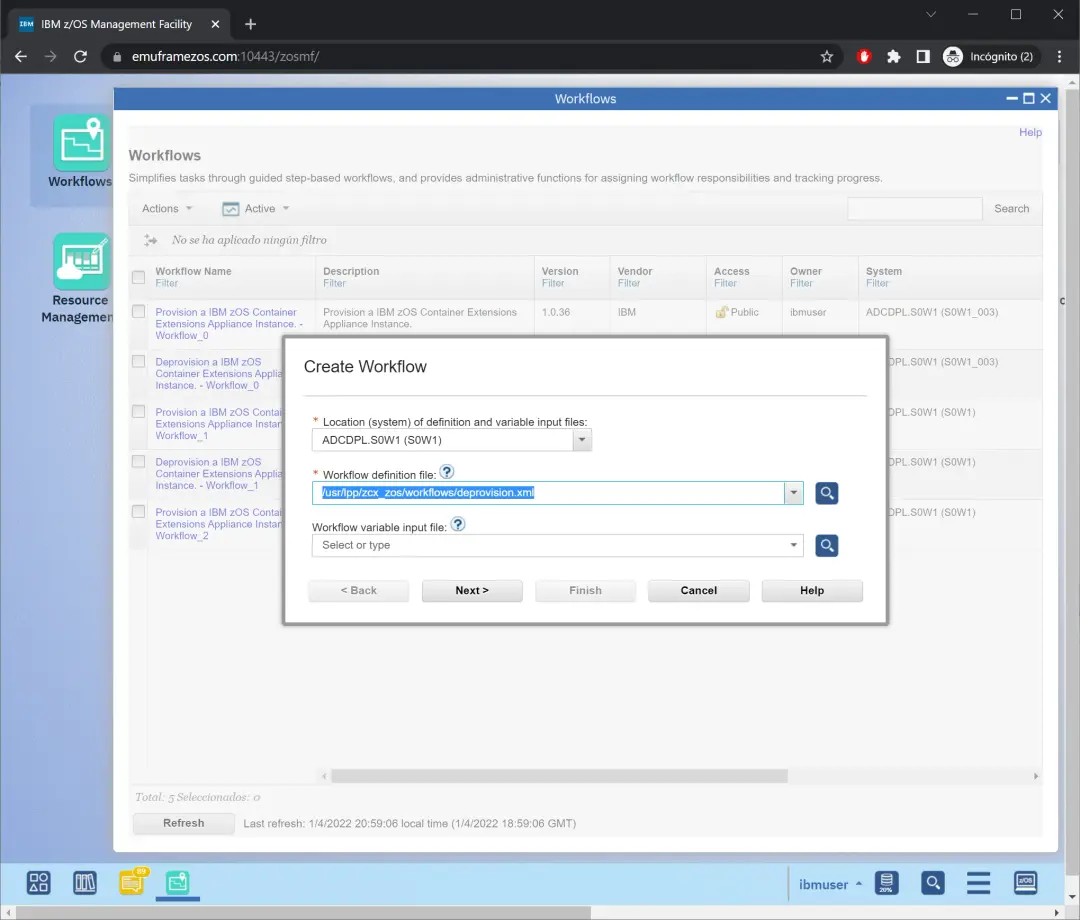
We start by entering z/OSMF and going to the Workflows option. We expand the Actions menu and choose Create Workflow
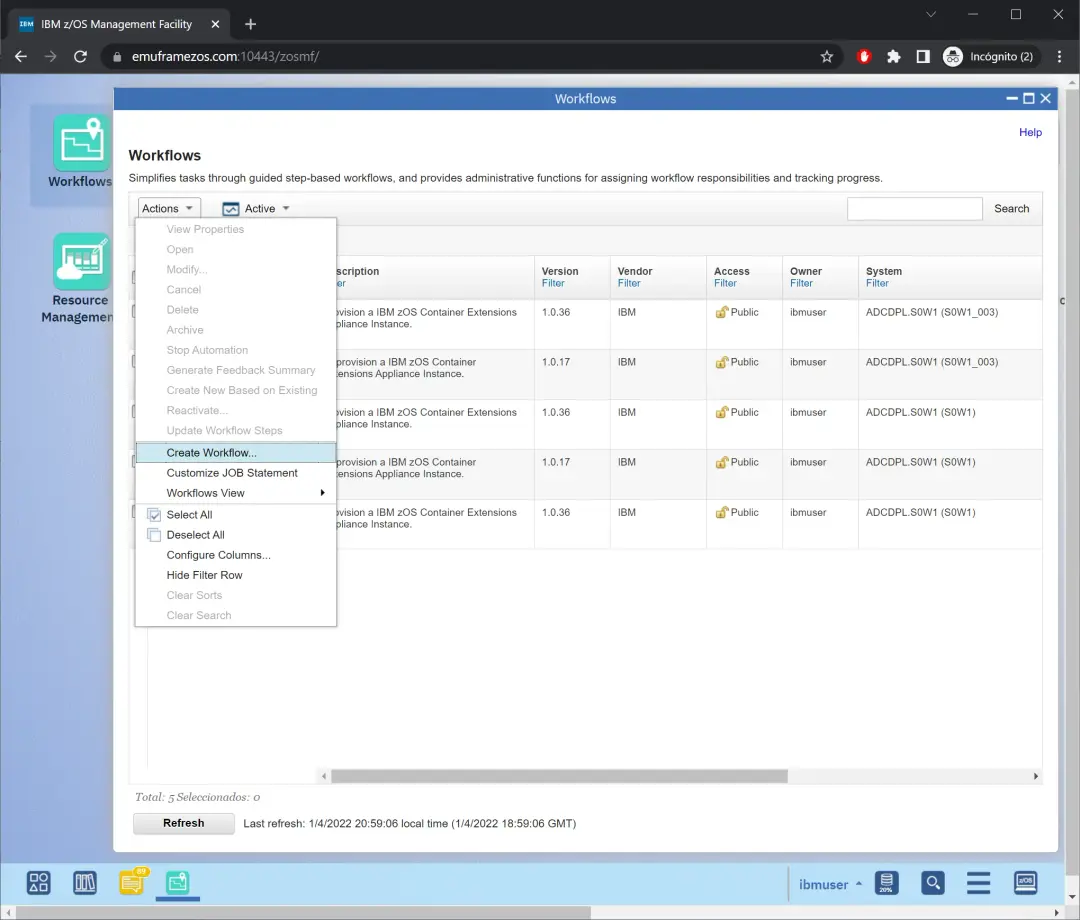
We will need to choose the system on which we will apply the Workflow and choose the Workflow to apply.
The zCX workflows, by default, are in the path /usr/lpp/zcx_zos/workflows/. In this case, I will use:
/usr/lpp/zcx_zos/workflows/deprovision.xmlIn this case, it is not necessary to specify an input variables file (Workflow variable input file).
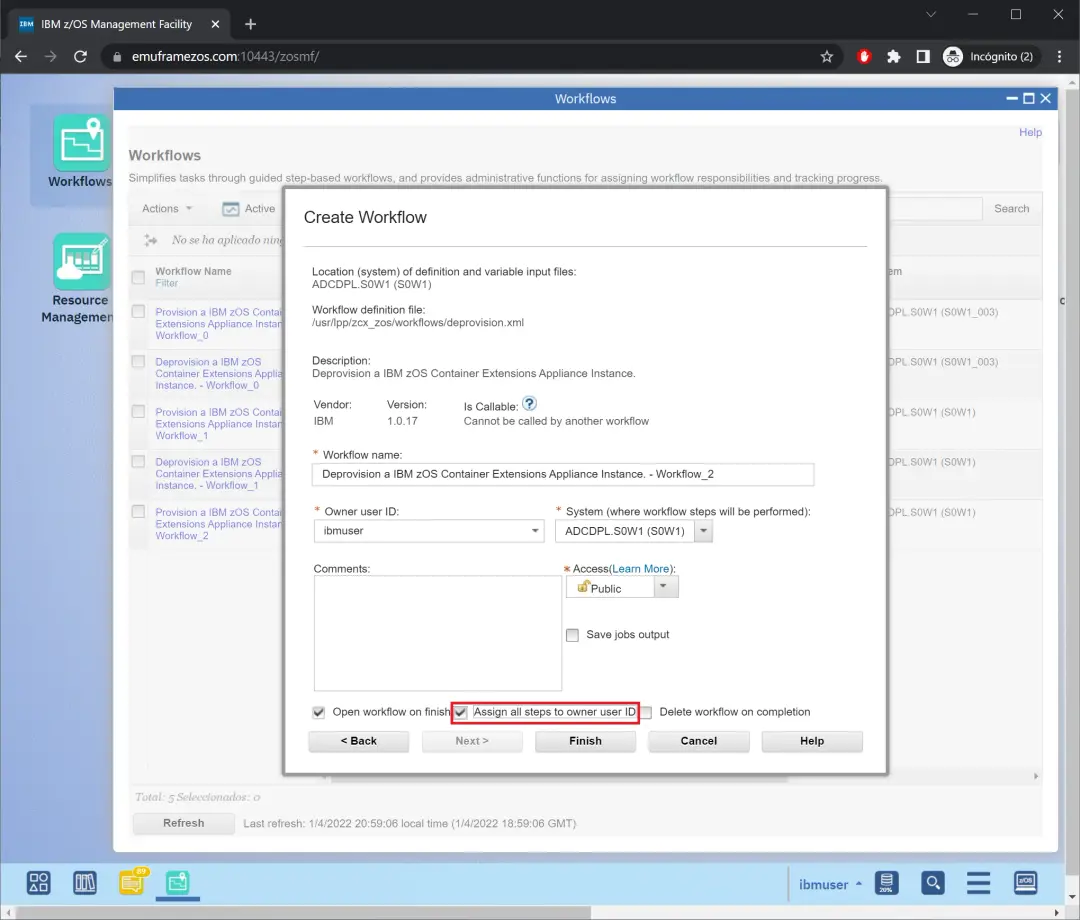
In my case, I check Assign all steps to owner user ID so I don't have to assign them later.
We click Finish.
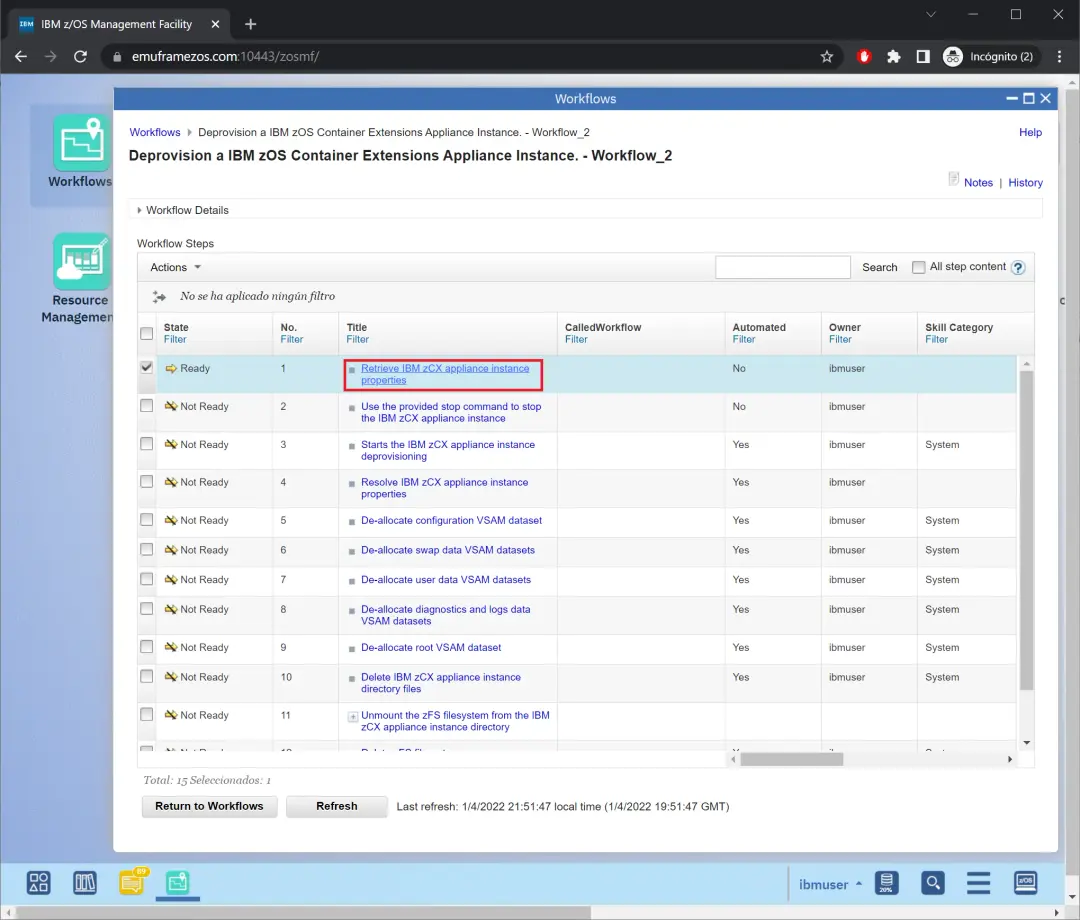
We will see all the steps the workflow has. We must enter the first one.
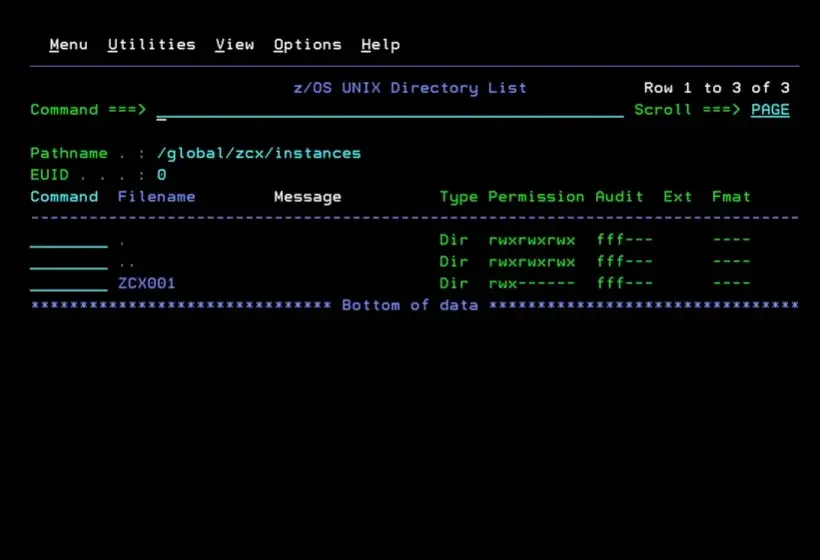
We go to the Perform tab. We specify the instance name and the path where we create the instances. In my case:
ZCX001
/global/zcx/instances
We click Save.
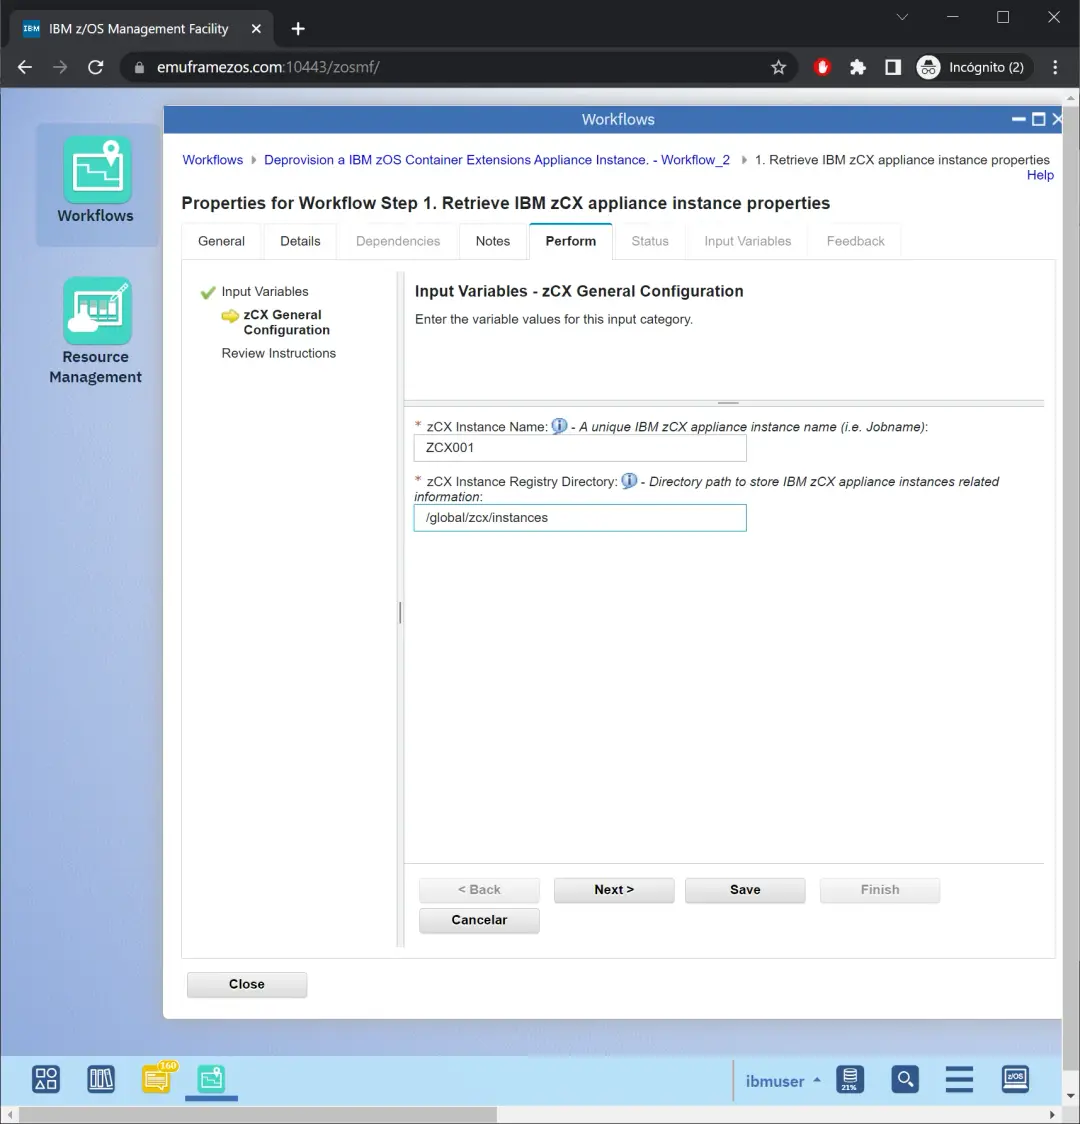
We click Finish.
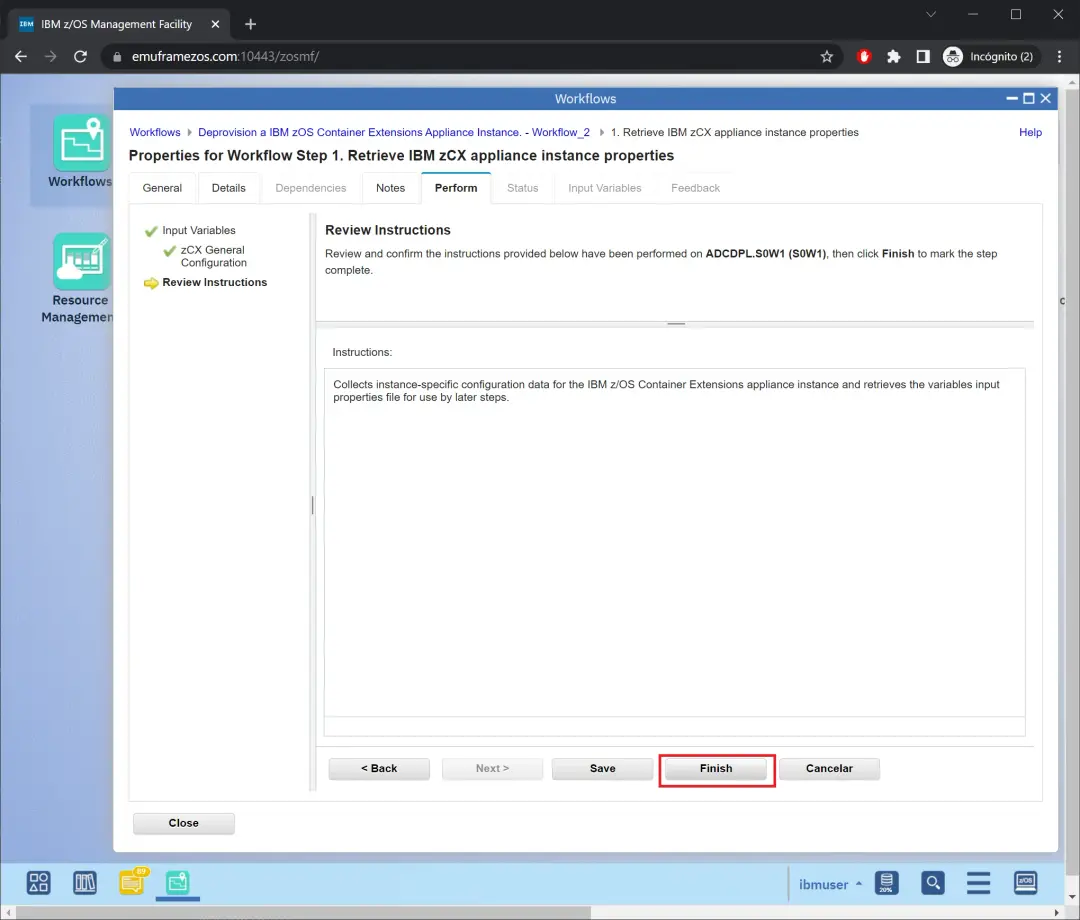
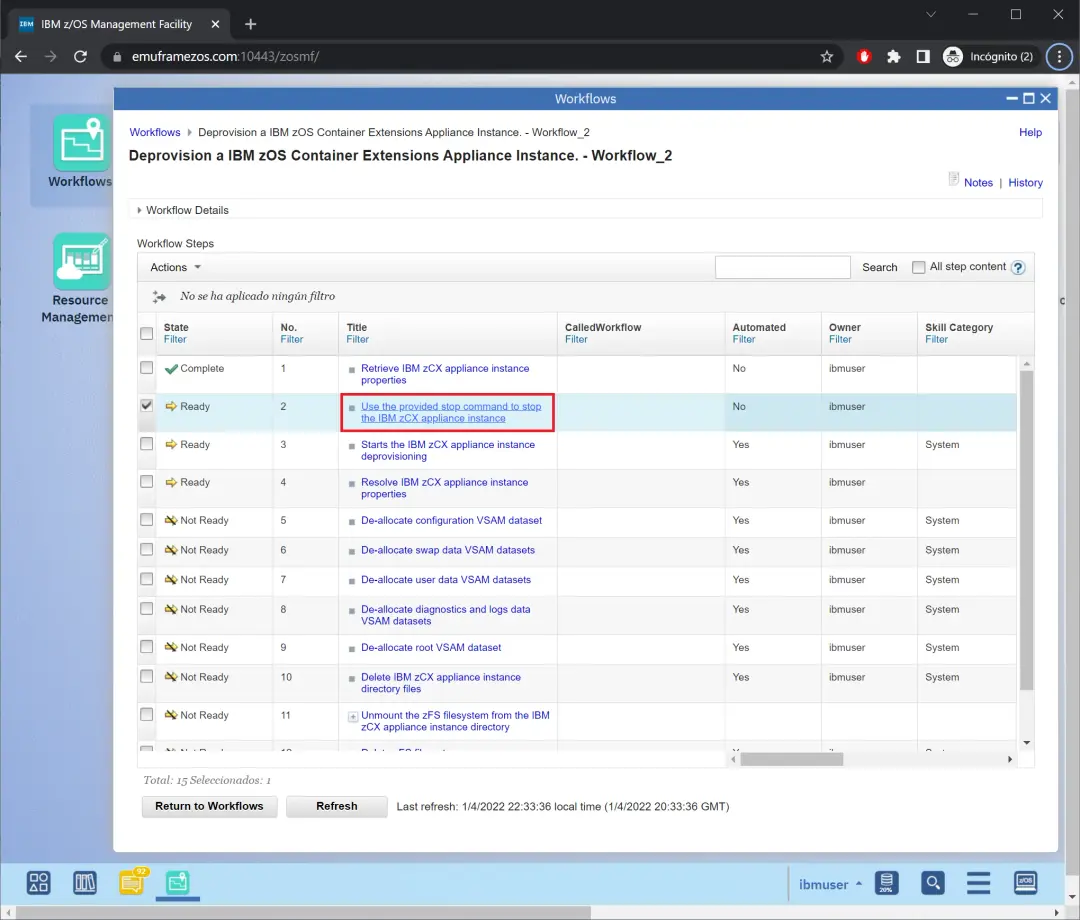
The second step is to stop the instance, if it's already stopped, we can mark it as complete.
I will enter to show it.
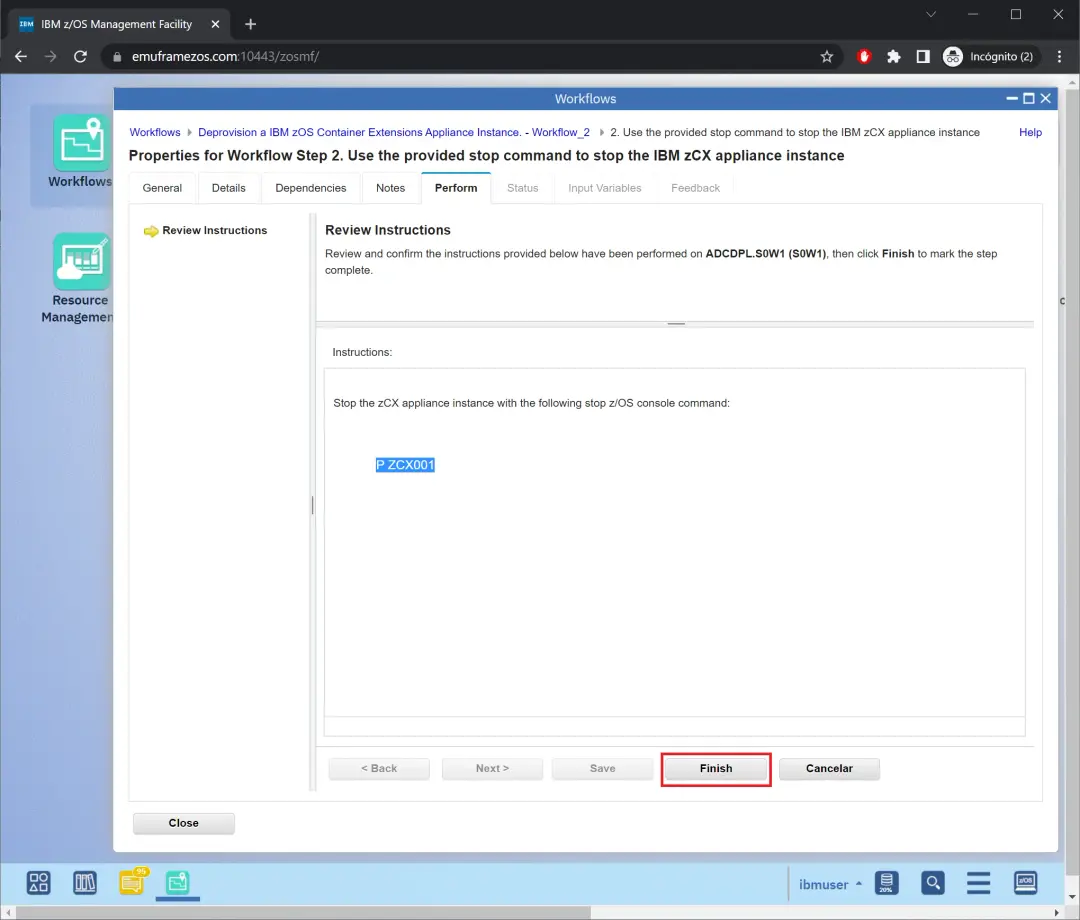
In SDSF or console, we would issue the stop command, in my case:
P ZCX001Once stopped, we click Finish.
Now we're going to execute the remaining steps automatically.
We select the checkbox for step 3. We go to the Actions menu.
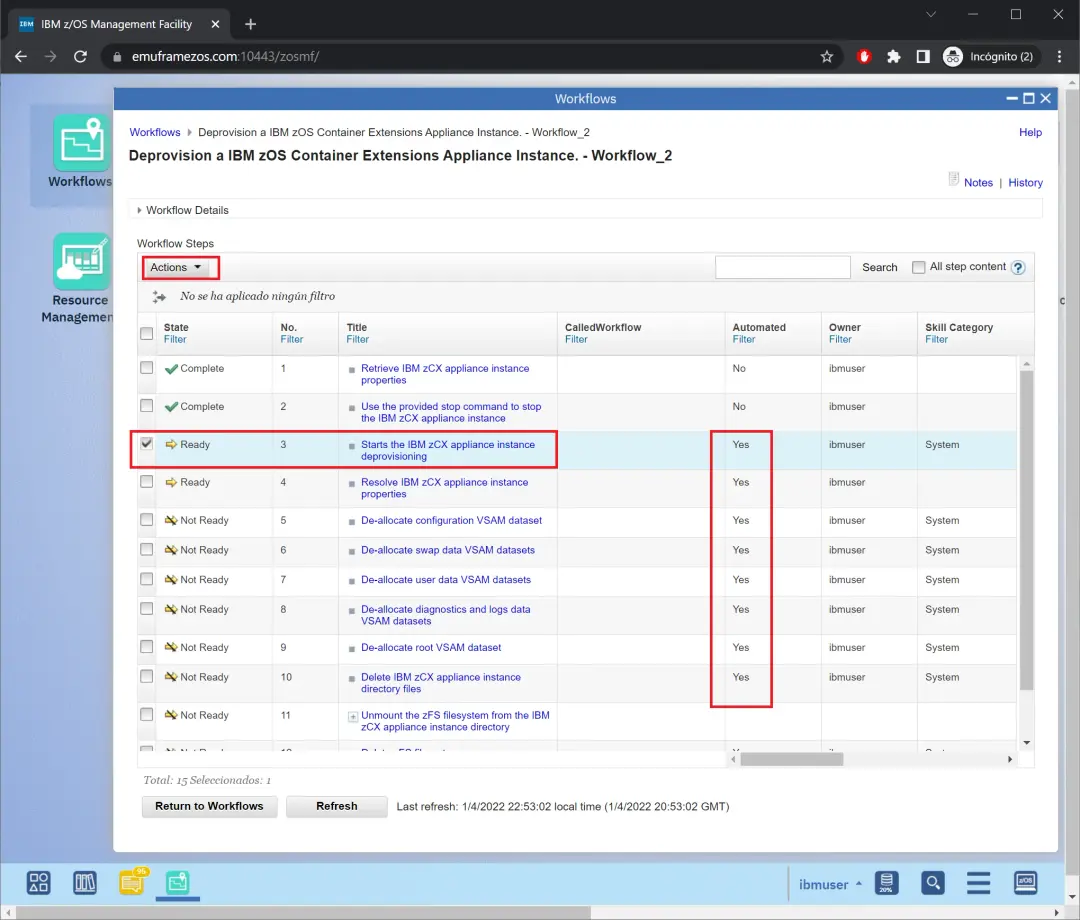
We choose Perform.
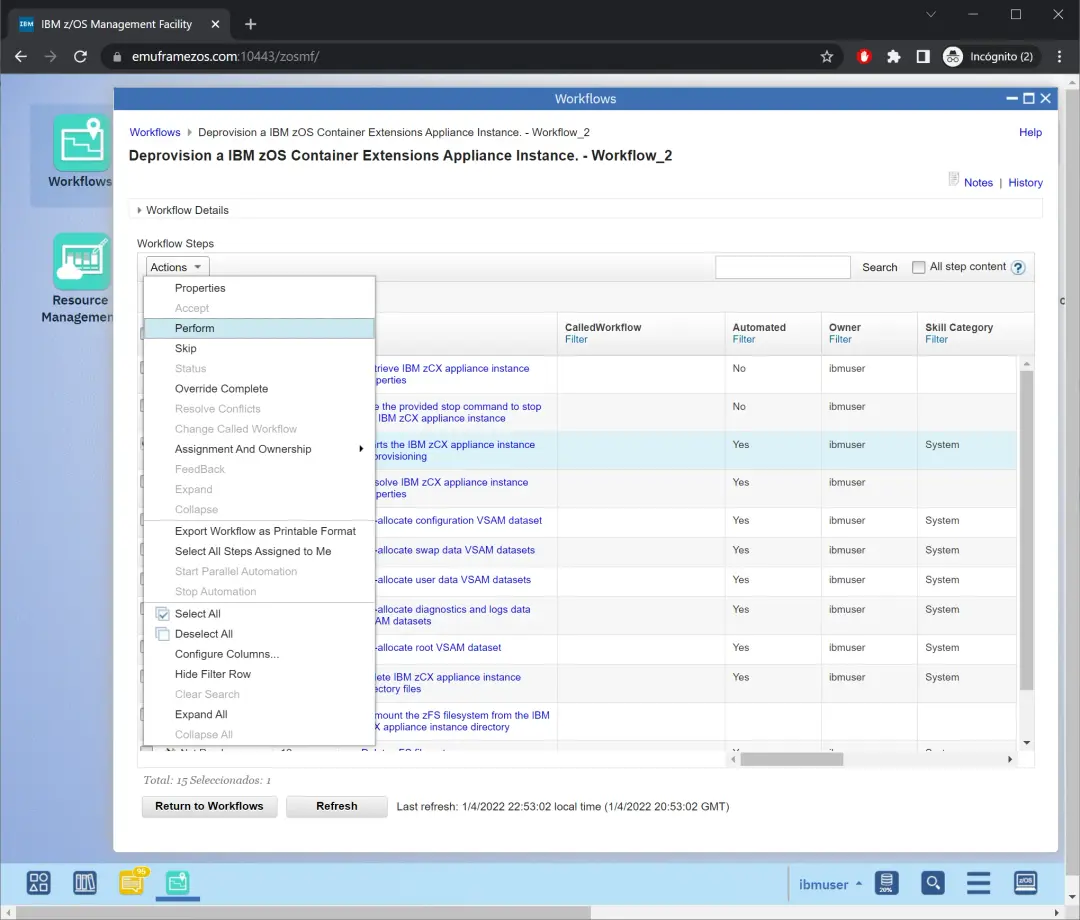
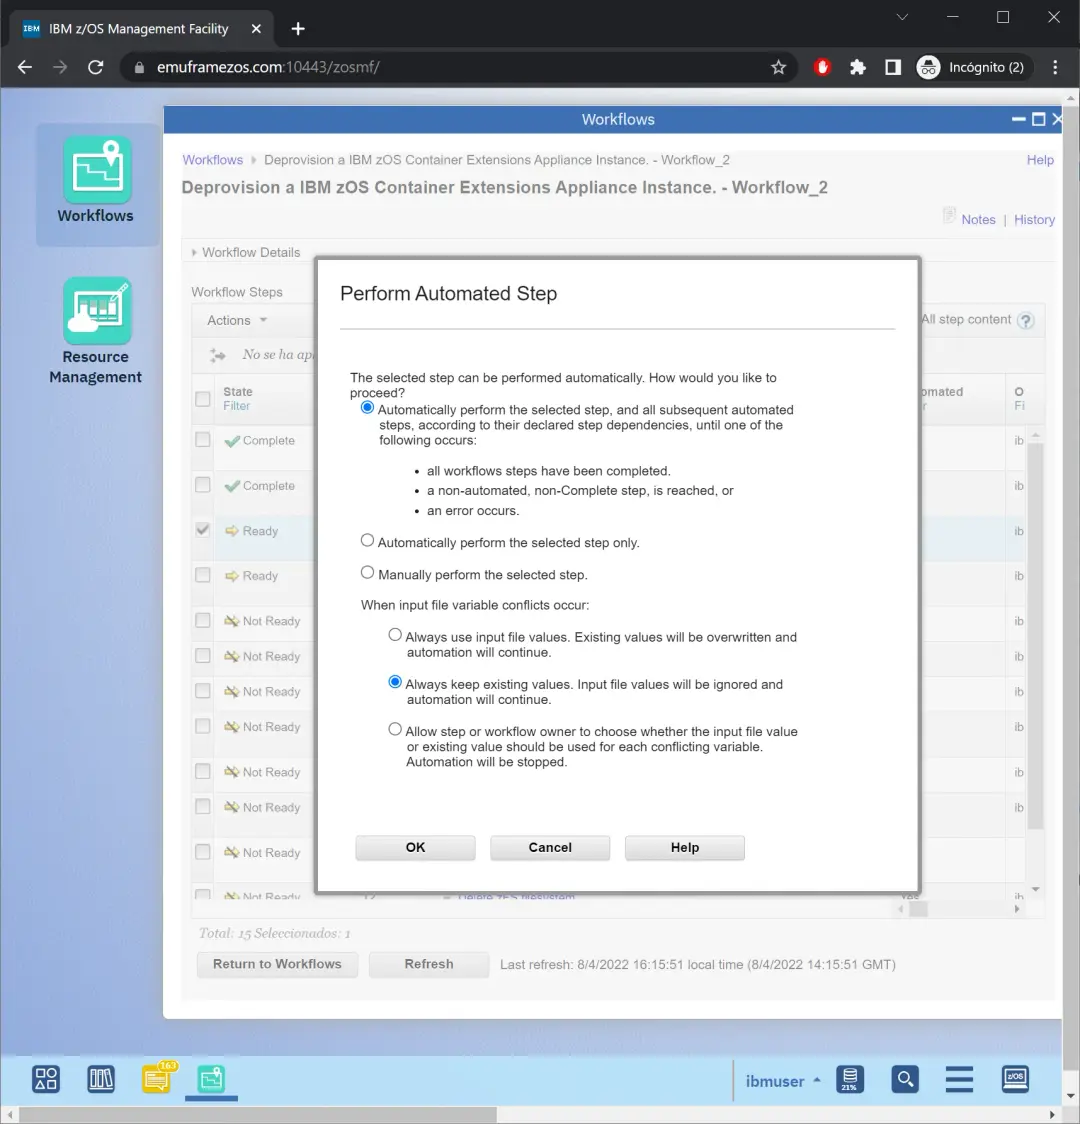
In this case, we must choose Always keeps existing values and click OK.
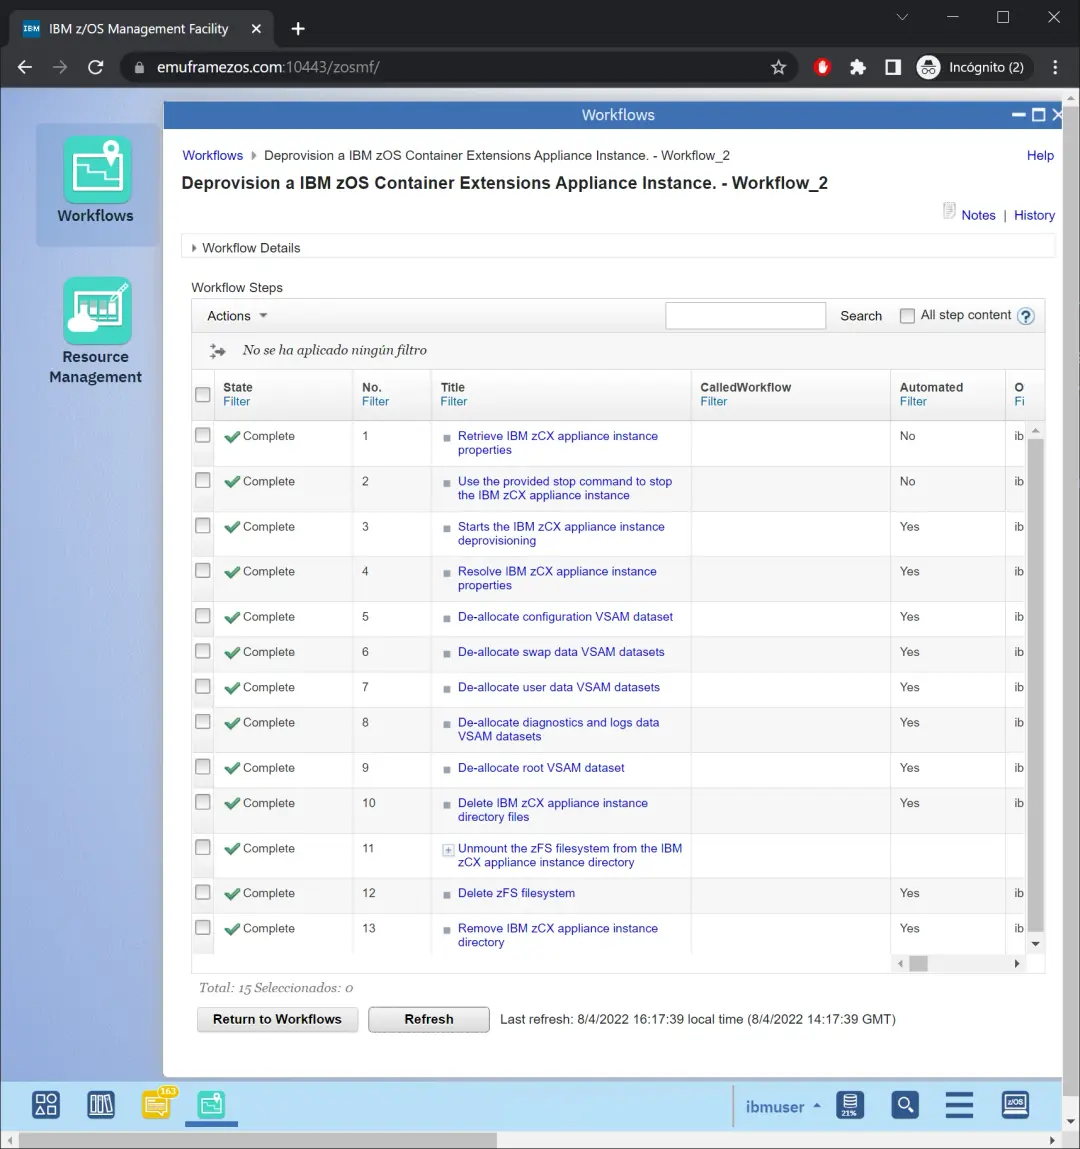
All remaining steps will start executing.
In my case, everything executed directly.
All jobs completed successfully and I didn't have to do anything else.
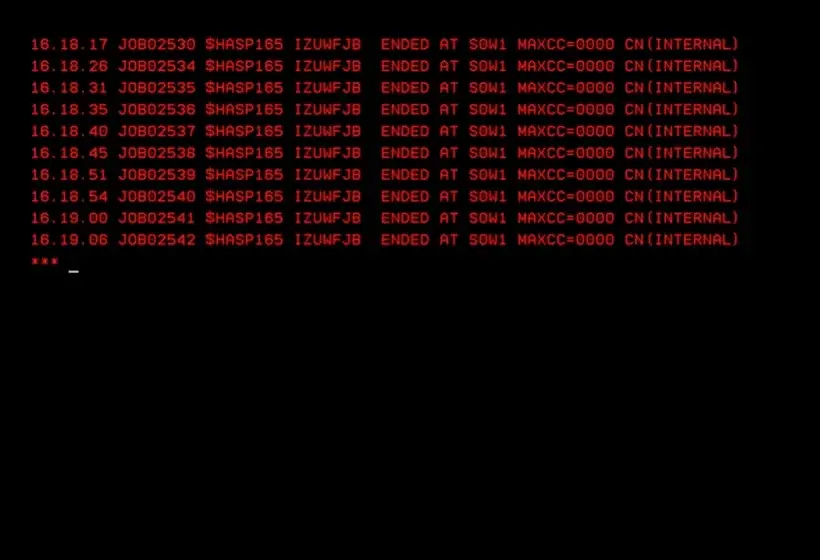
Additionally, if I look in TSO, messages will appear indicating that the jobs went well.
In less than 1 minute everything was done.