IBM Z Workload Scheduler 9.5 - Creating Workstations, Calendars and Applications
With this article we check that the product installation went well.
Workstations
We enter TWS and go to option 1 – Database.
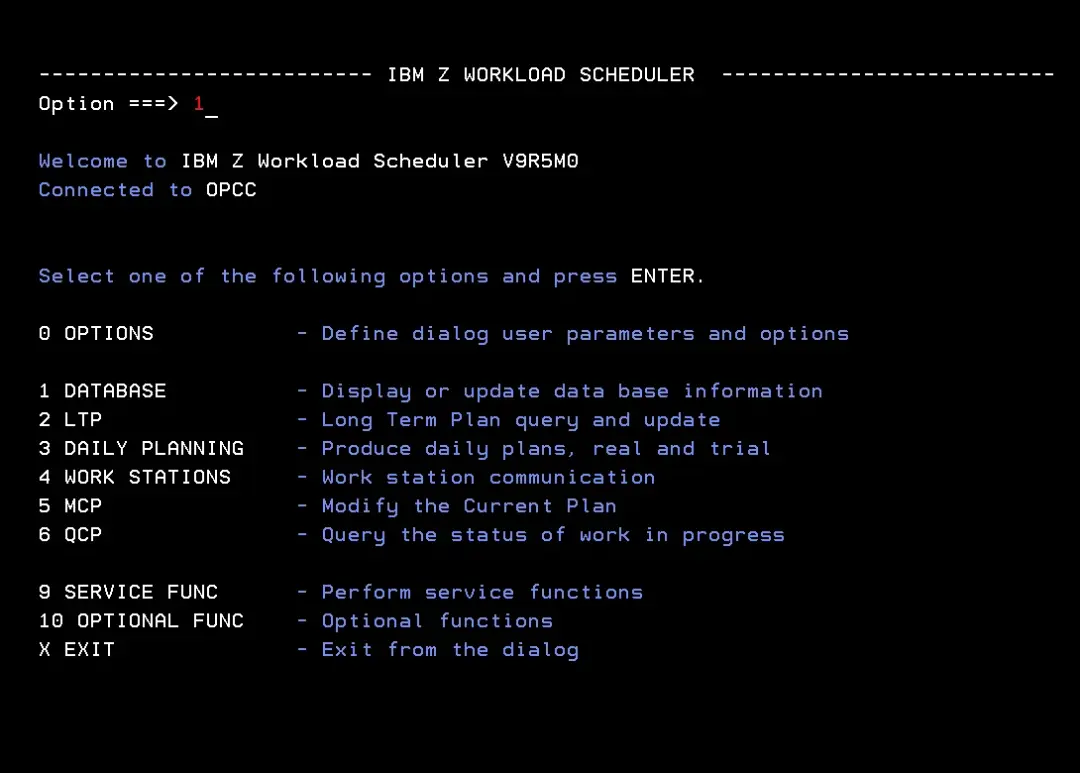
We enter option 1 – WS (Work station description).
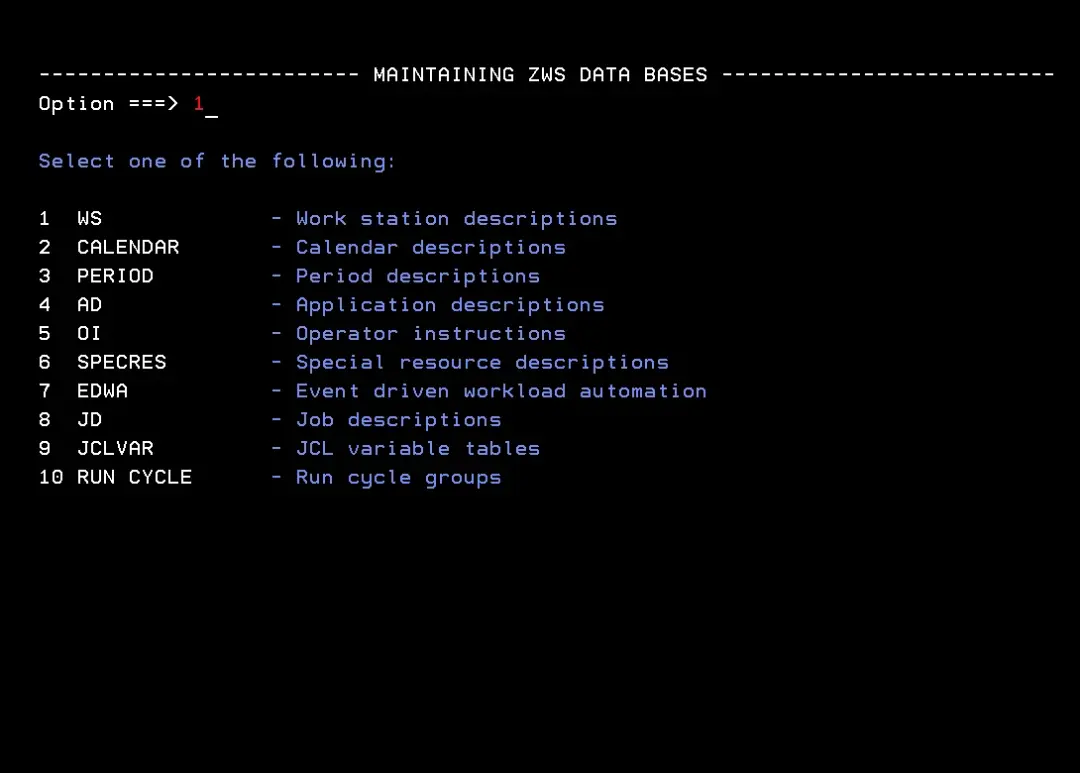
Option 2 – List WS.
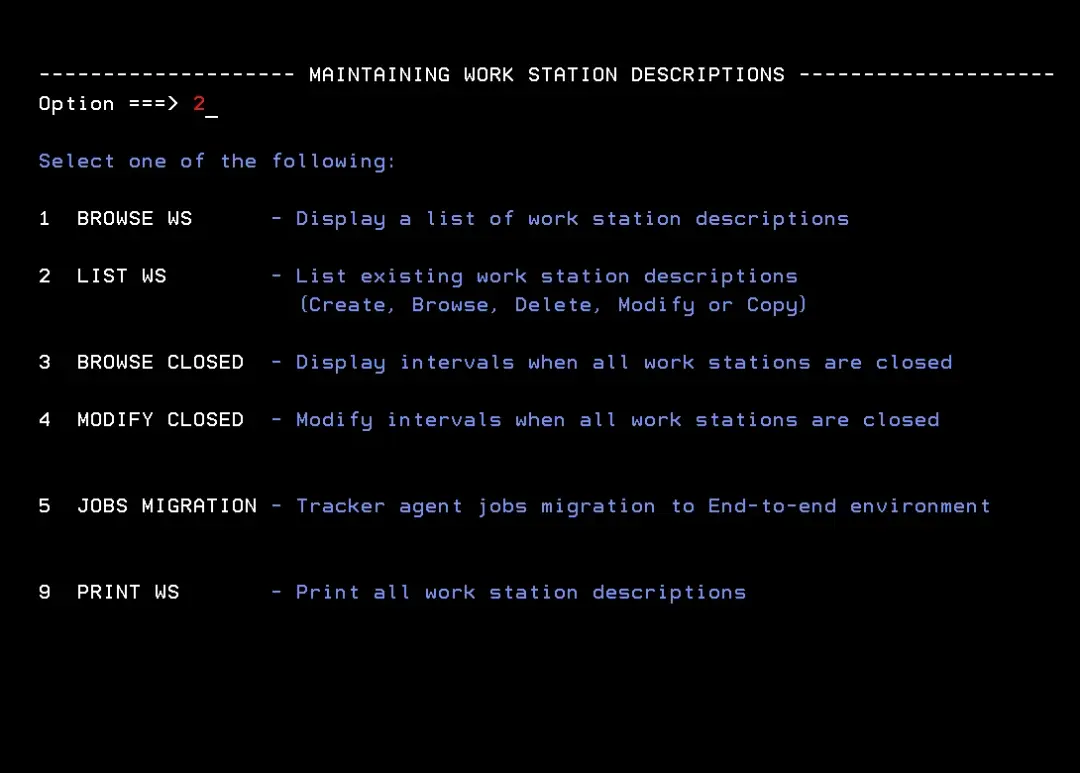
We press Enter without typing anything.
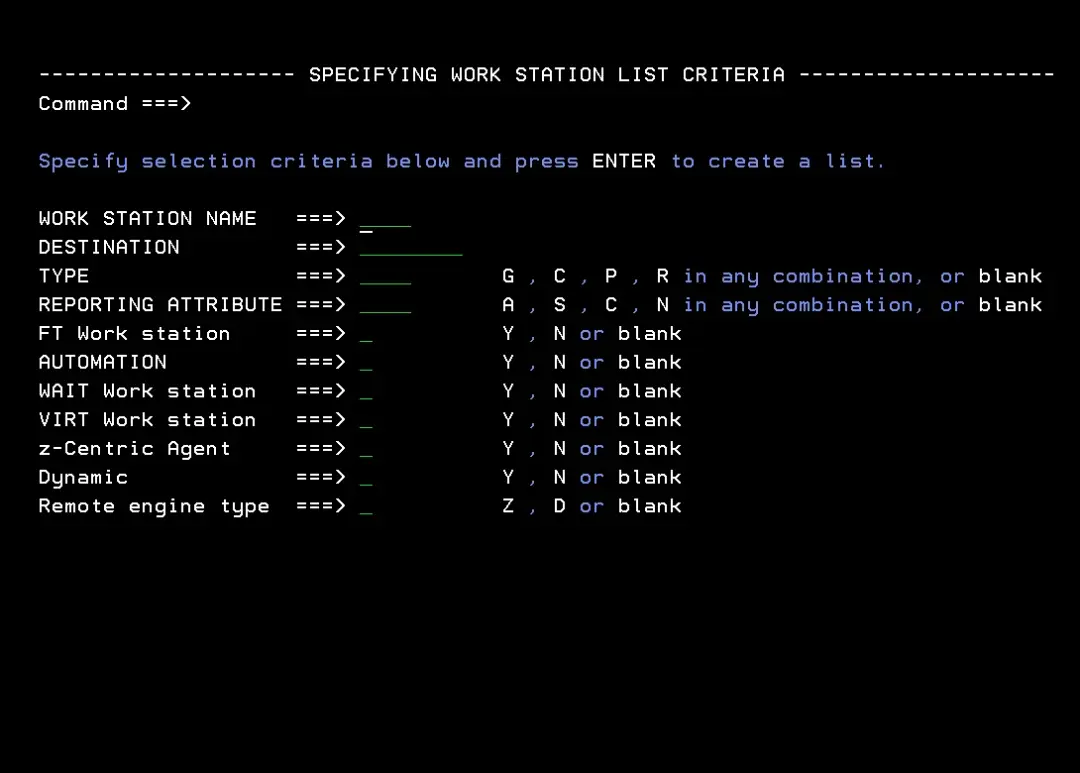
We type the CREATE command to create a new WS.
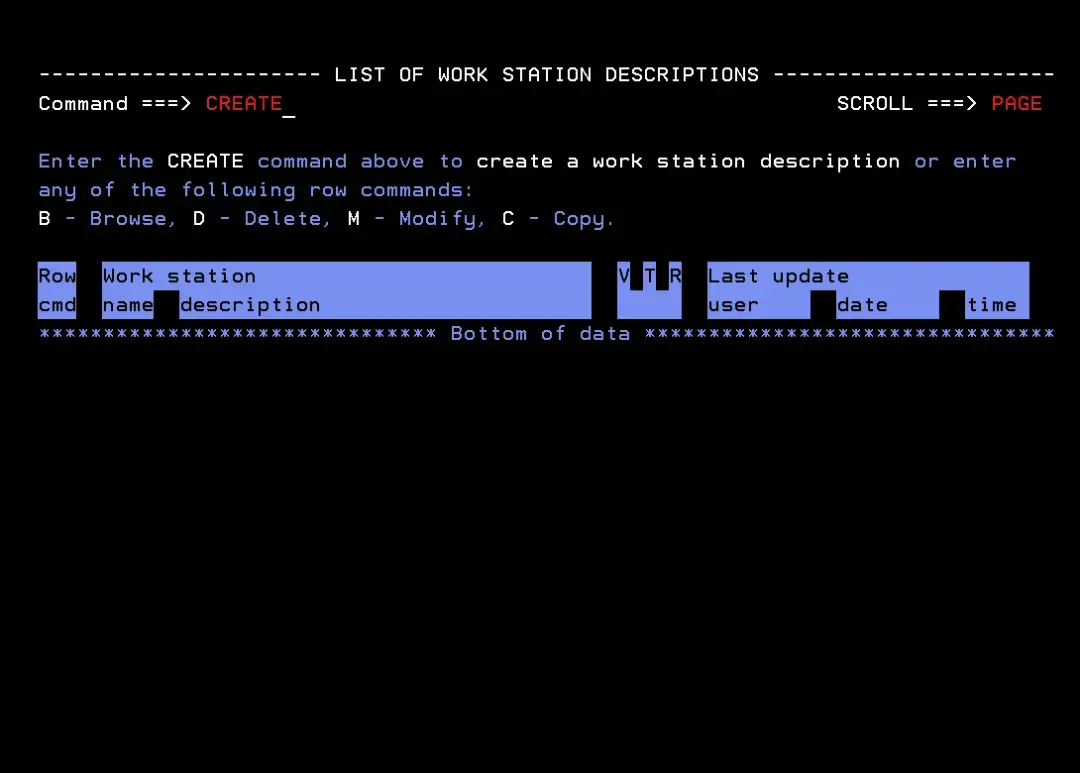
Computer workstation
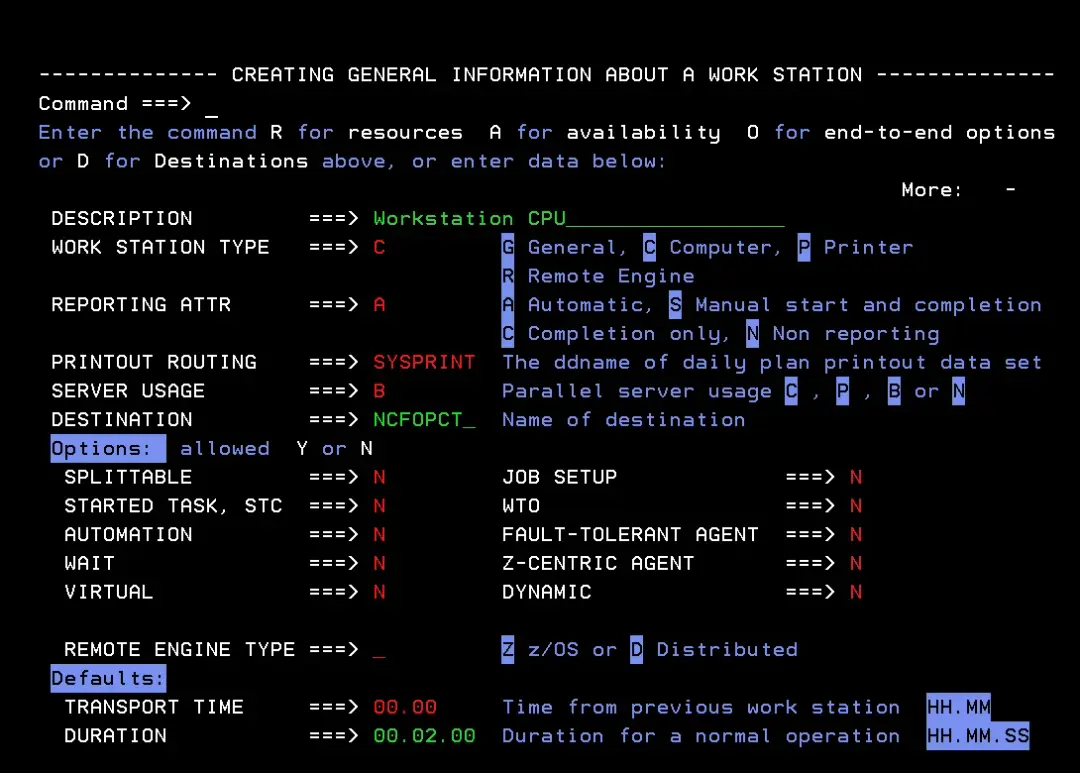
We create the following Computer type WS to run the jobs:
Work Station Name: CPUP (for example)
Description: Workstation CPU
Work Station Type: C (Computer)
Reporting ATTR: A
Server Usage: B
Destination: NCFOPCT (LU of the tracker)
Duration: 00.02.00.
If we had other trackers on other systems, we would have to create a WS of this type so that the jobs run on those systems. In Destination we would put the LU of their tracker.
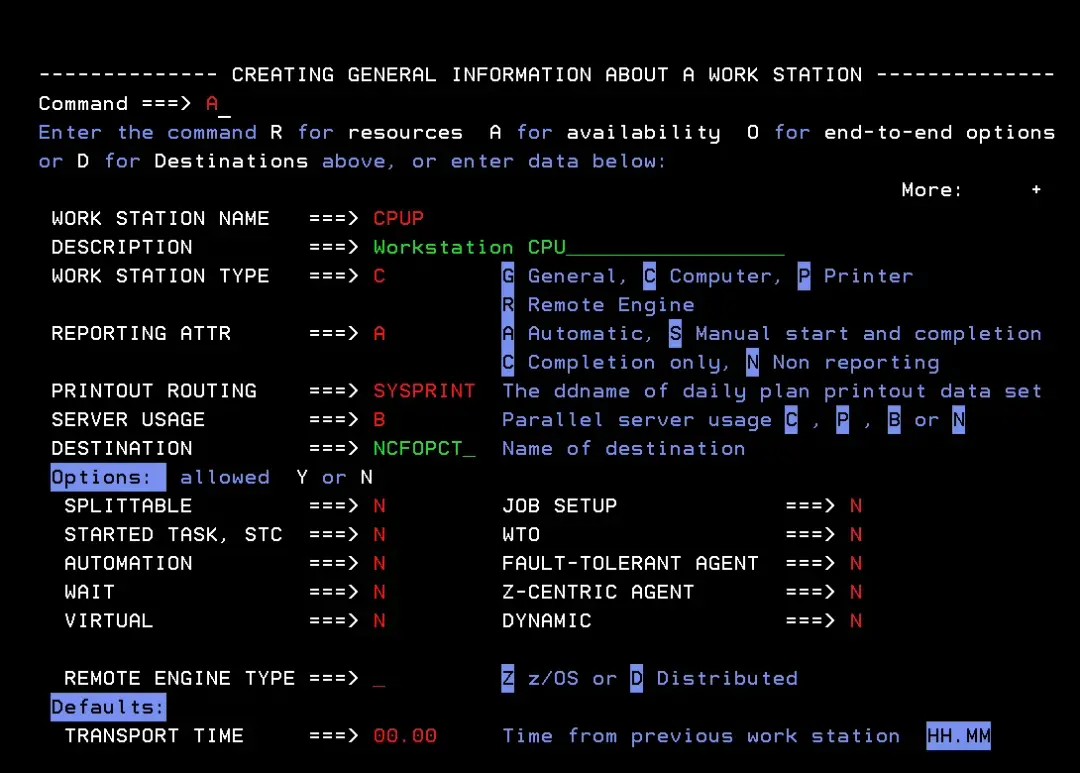
Once the data is entered, we type "A" on the command line to go to the "Availability" option and define when we want the WS to be open.
In this case the days of the week are defined and all of them are "Standard". This means they behave as the "Standard" option is defined. We enter the "Standard" option with "S".
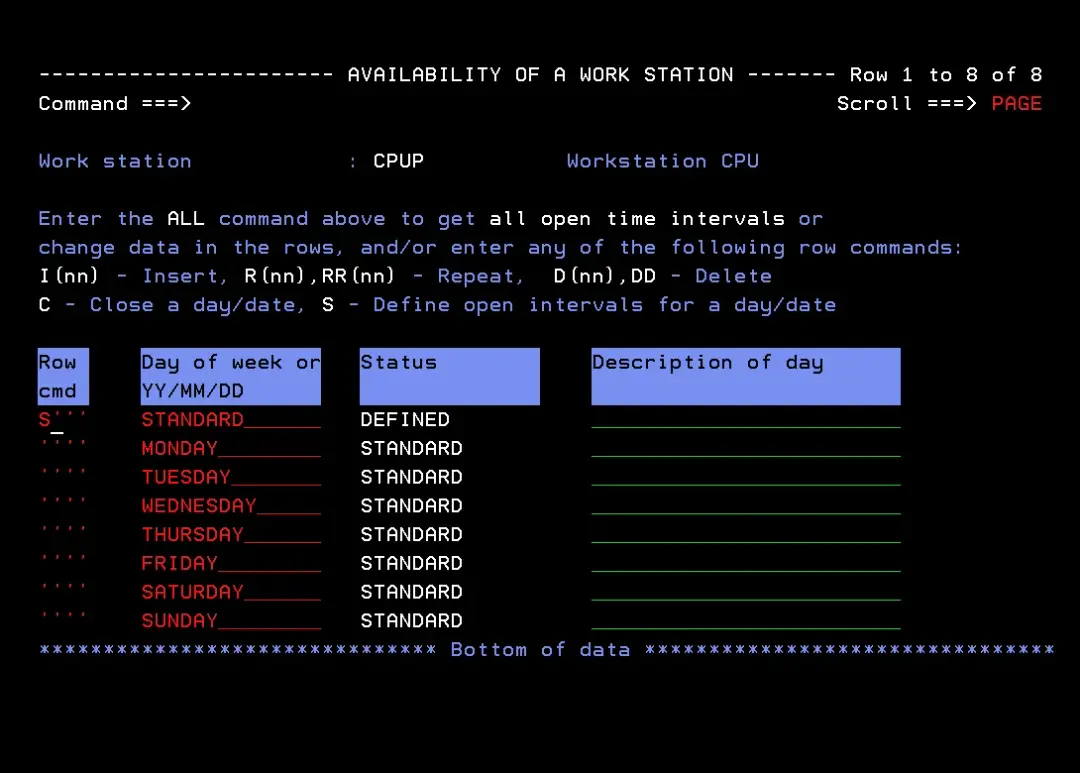
We see that this WS will be available 24 hours a day, every day of the week, and can run up to 99 jobs at the same time.
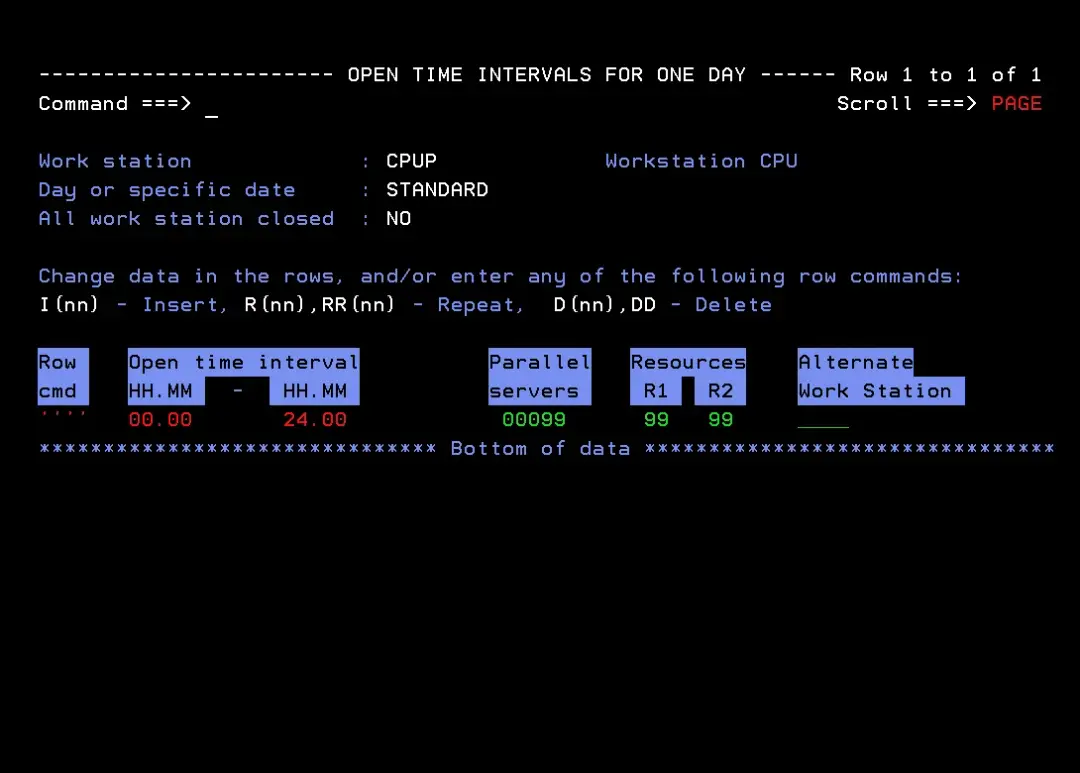
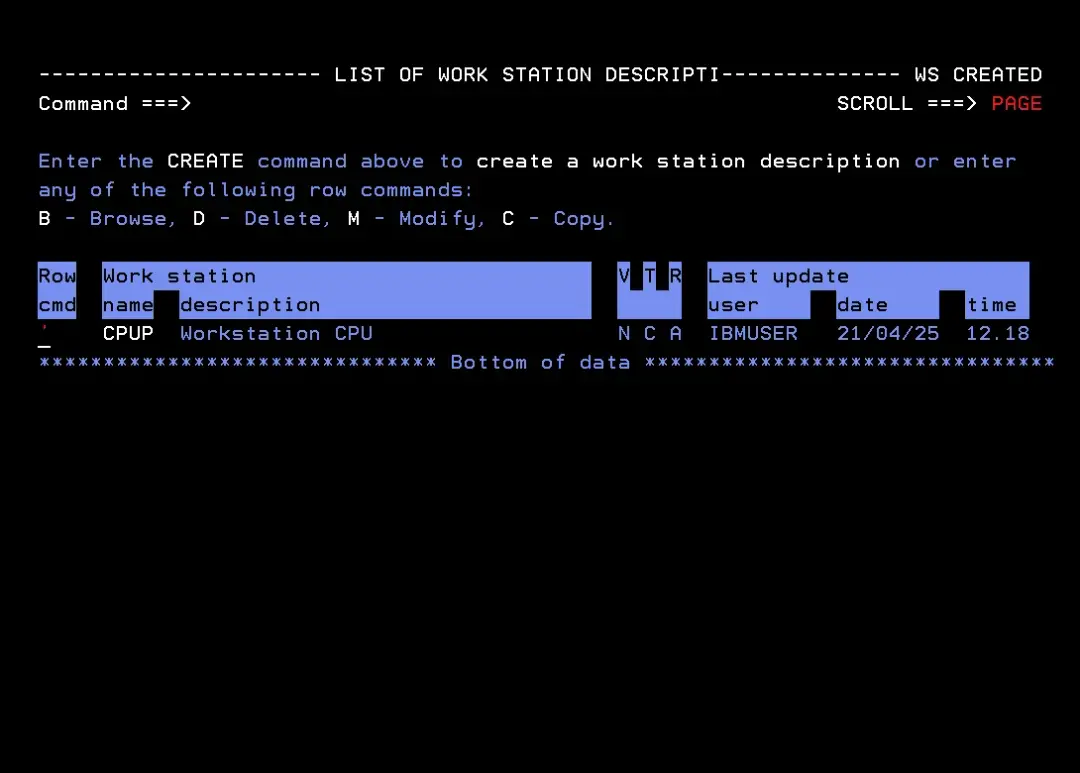
We press F3 until the message shows that the WS has been created.
Job Setup workstation
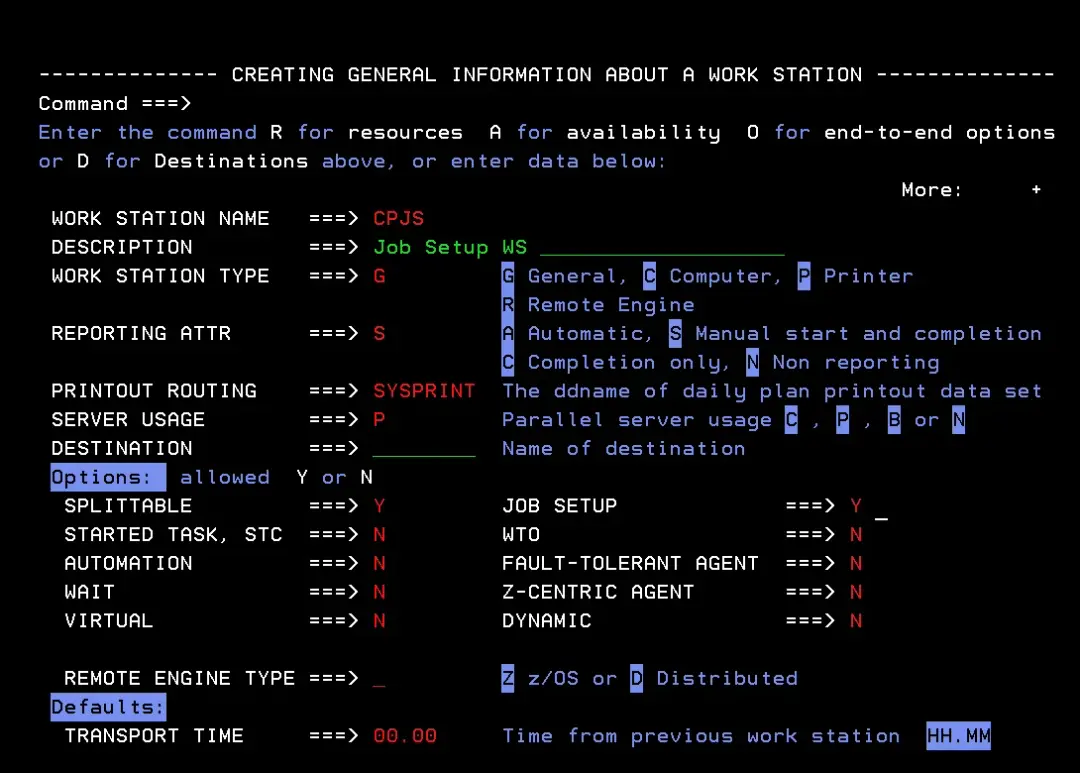
Following the same steps we create a "Job Setup" type WS. This type of WS is used when the JCL has to be edited before it is submitted.
We enter the following data:
Work Station Name: CPJS (for example)
Description: Job Setup WS (for example)
Work Station Type: G (General)
Reporting ATTR: S (Manual start and completion)
Server Usage: P
Split table: Y
Job Setup: Y
Non-reporting workstation
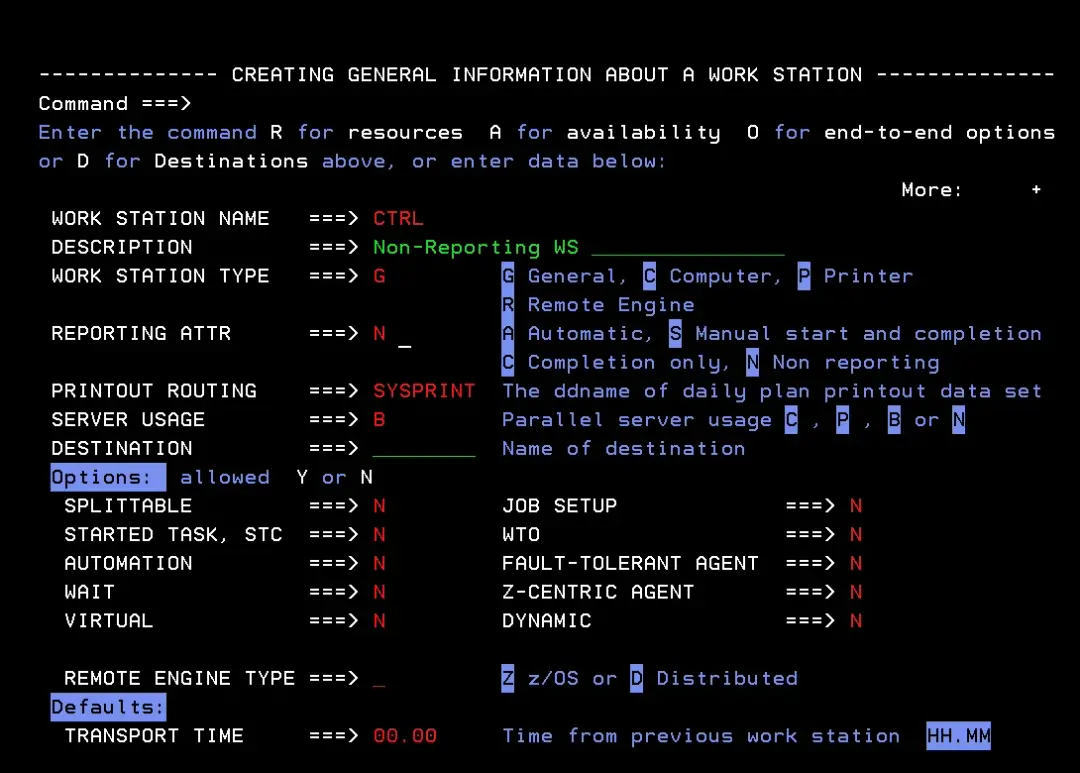
Now we create a "Non-reporting" type WS. This type of WS can be used for the start of the applications. It does no processing: the operation simply completes when it "runs". It would be like an empty IEFBR14 job on a "Computer" WS.
We enter the following data:
Work Station Name: CTRL (for example)
Description: Non-Reporting WS (for example)
Work Station Type: G (General)
Reporting ATTR: N (Non reporting)
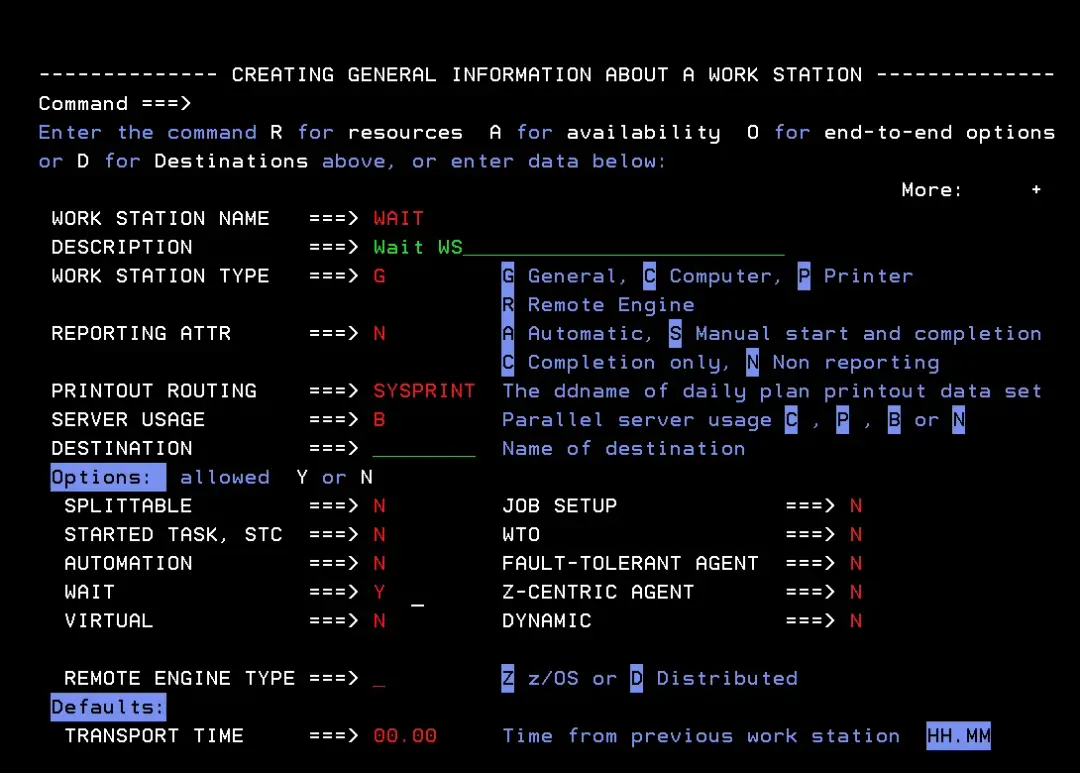
Wait workstation
The last WS we create is a "Wait" type, used to hold an application on an operation.
We use the following data:
Work Station Name: WAIT (for example)
Description: Wait WS (for example)
Work Station Type: G (General)
Reporting ATTR: N (Non reporting)
Wait: Y
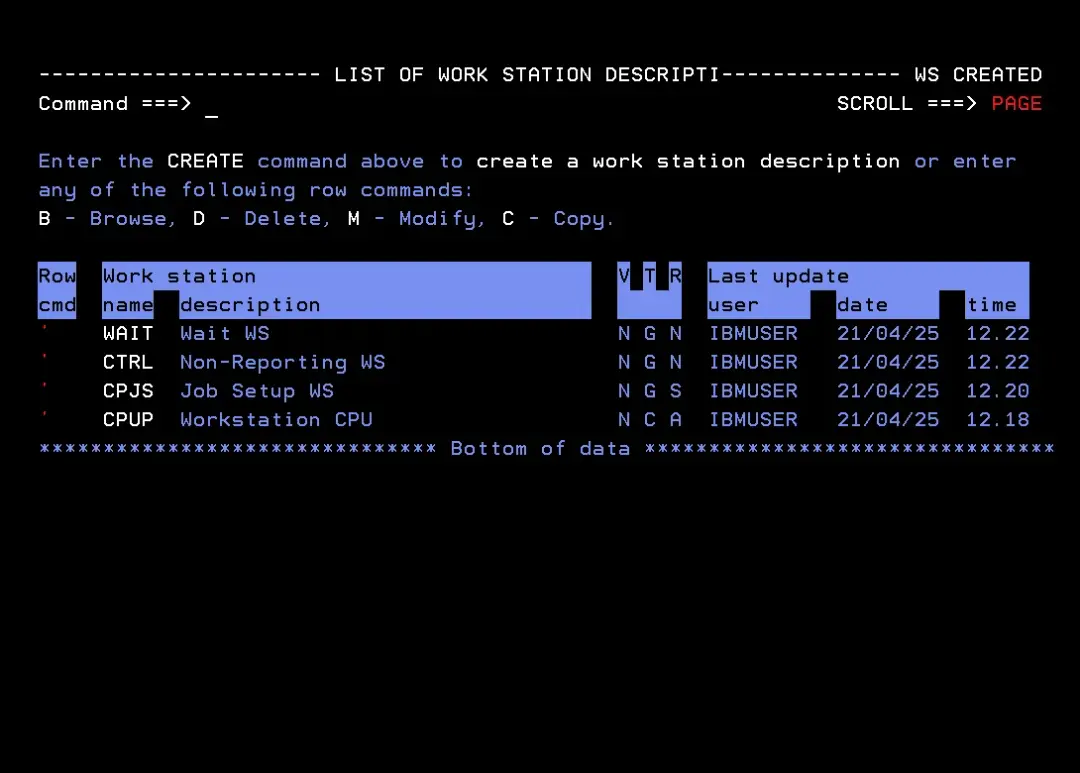
All the WS are now created.
Calendar
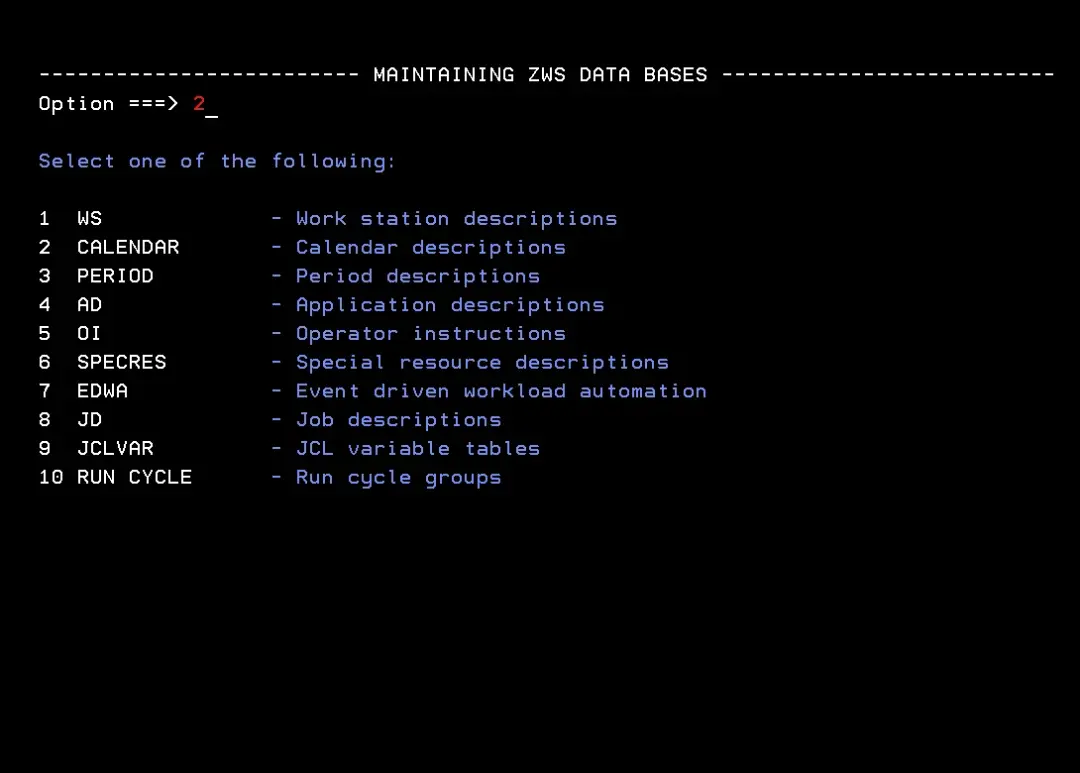
We go back to the Database menu and enter option 2 – Calendar.
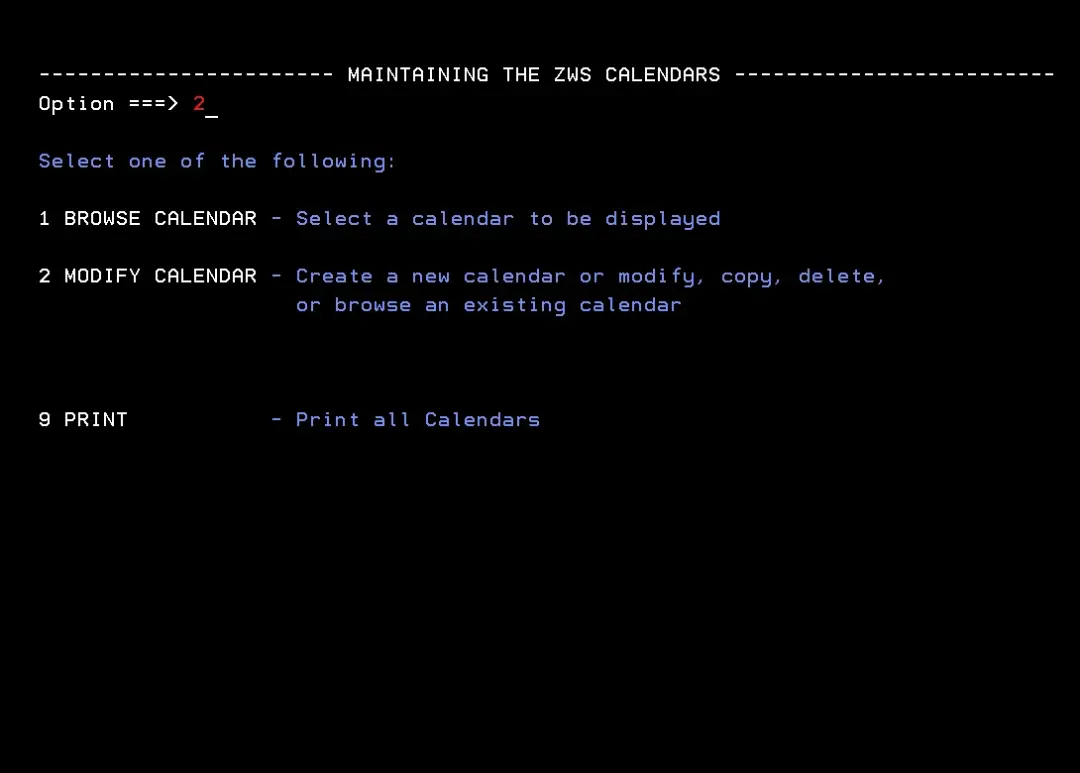
We enter option 2 – Modify Calendar.
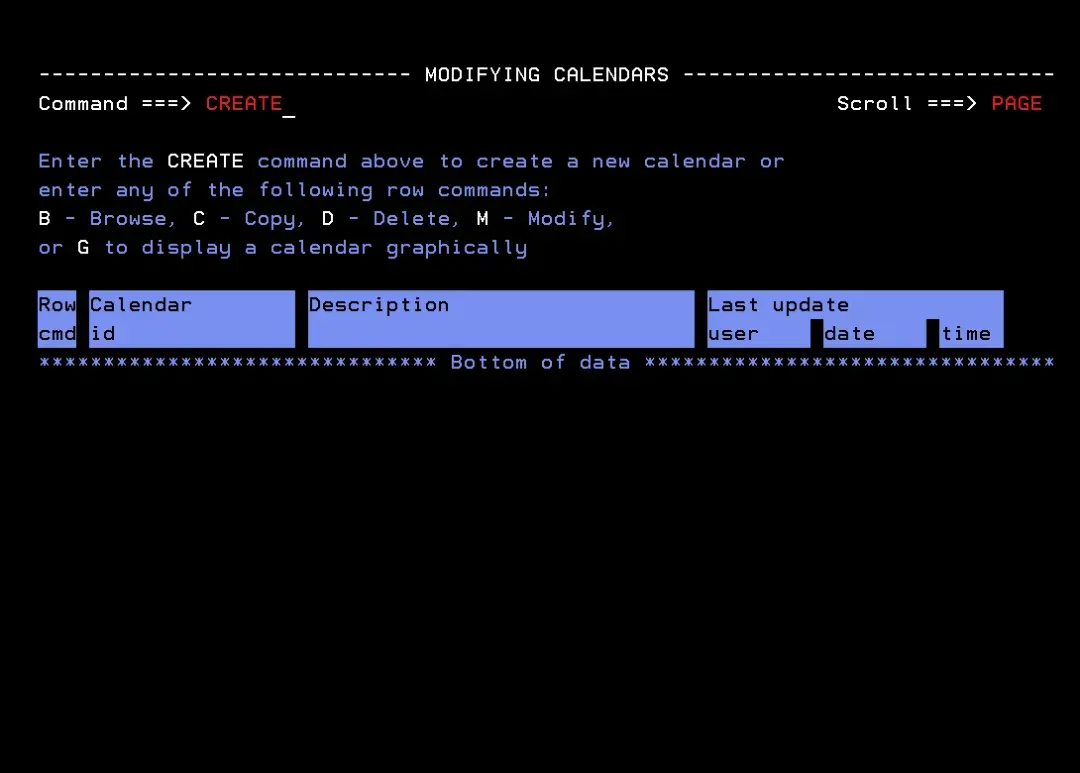
Since we have none, we type CREATE.
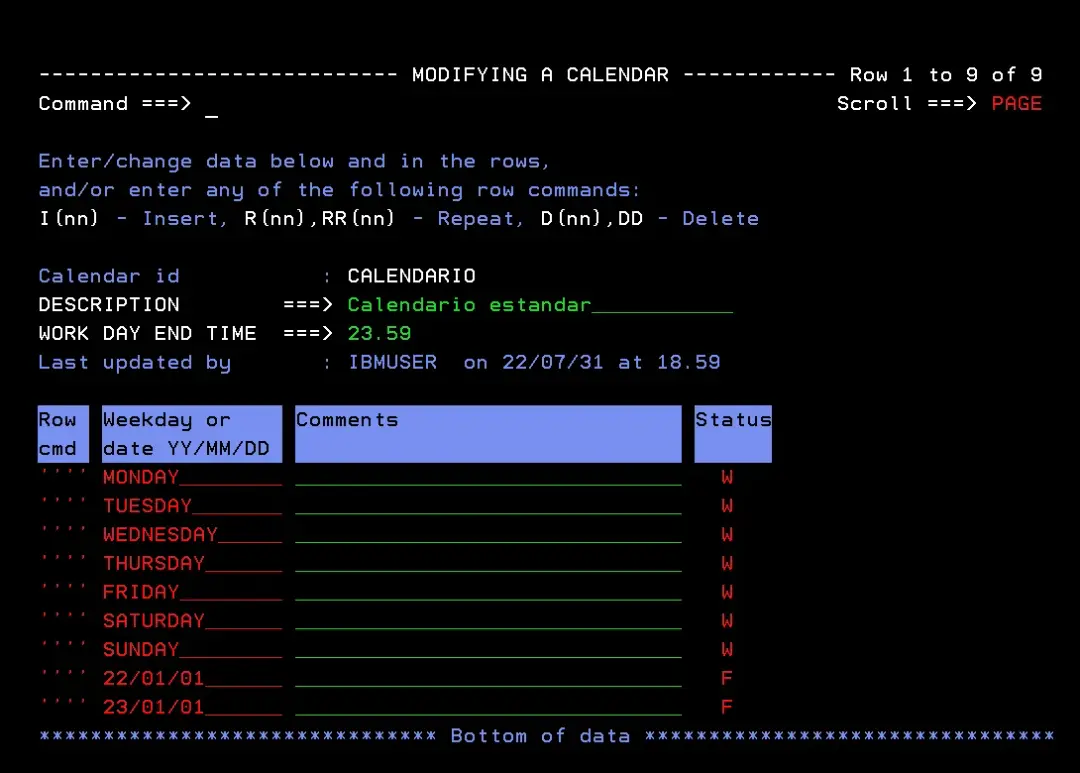
Now we add the following data:
Calendar ID: CALENDARIO
Description: Calendario estándar
Work Day End Time: 23.59
Using option I (insert) in the "Row cmd" column, we add Monday to Sunday with status "Working Day". We can also add holidays, for example 22/01/01 (New Year's Day), using status "Free Day".
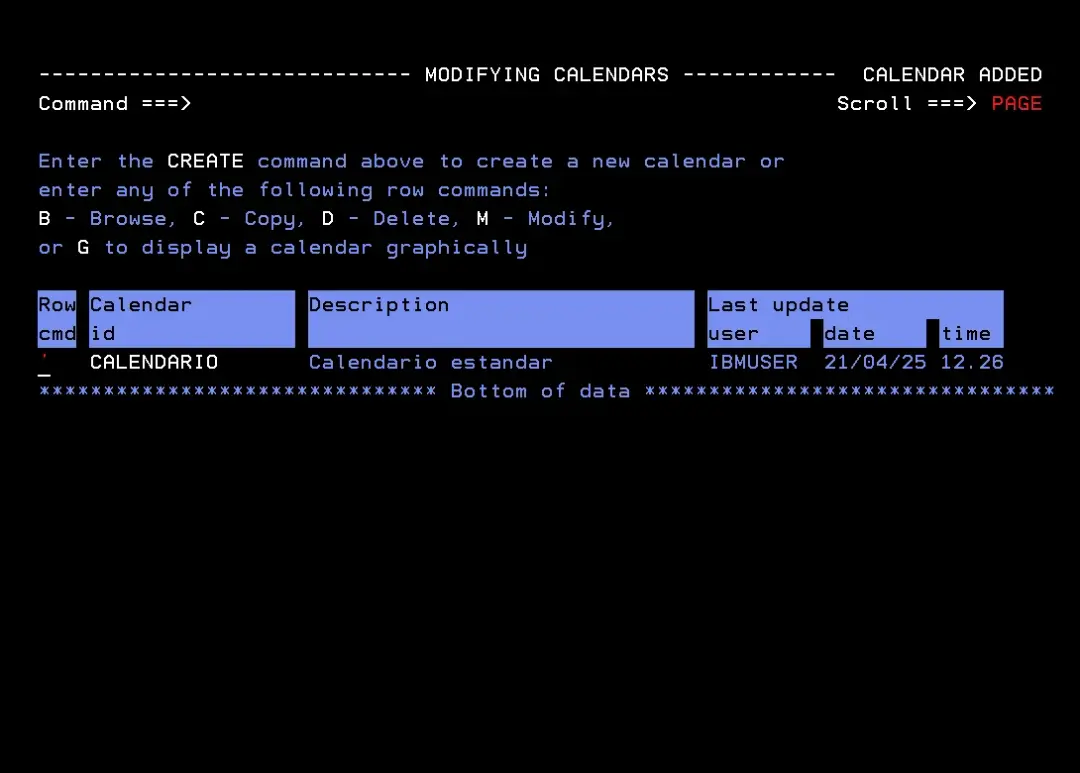
A message shows that the calendar has been added.
Test job
Before creating a simple application, we have to add a job to the right library so it can run.
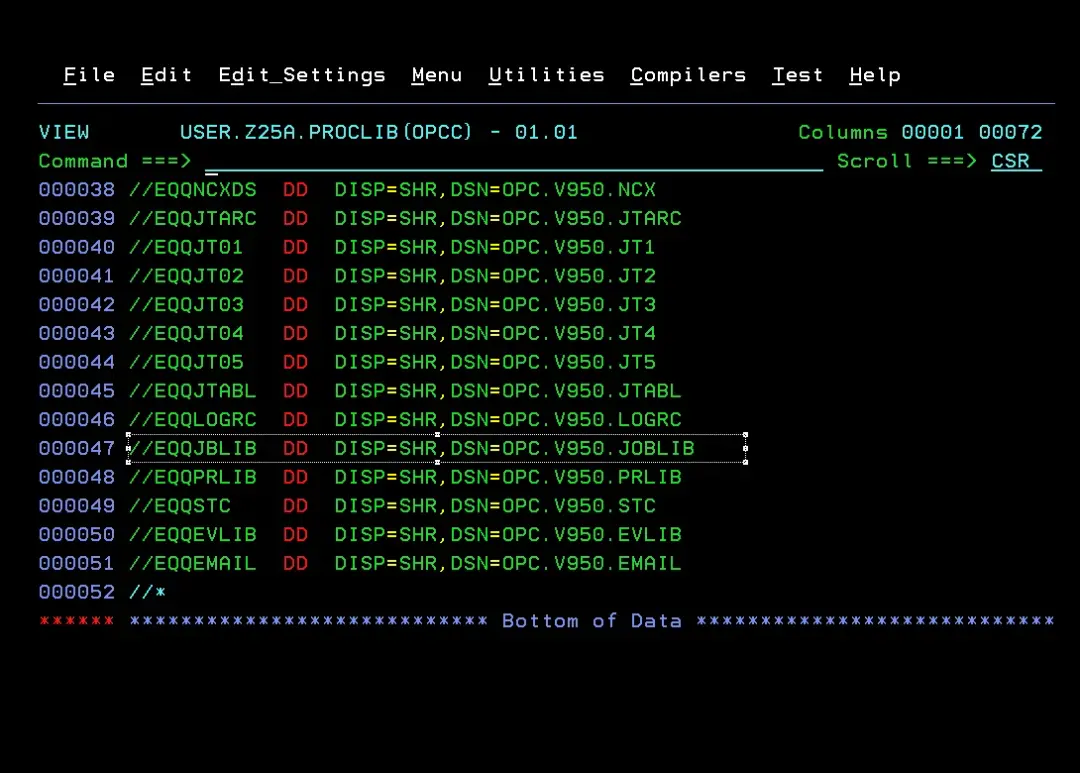
To find out which library the jobs must be stored in, we look for the TWS controller started task and check the EQQJBLIB DD. In my case, it is library OPC.V950.JOBLIB. In other cases it is common to have several job libraries. Keep in mind that if the same job is in several libraries, TWS uses the one that comes first in the concatenation of this DD.
I create a simple job with an error, to see it fail when we run it.
//PRUEBA   JOB CLASS=A,MSGCLASS=X,MSGLEVEL=(1,1)
//*
//BR141  EXEC XGM=IEFBR14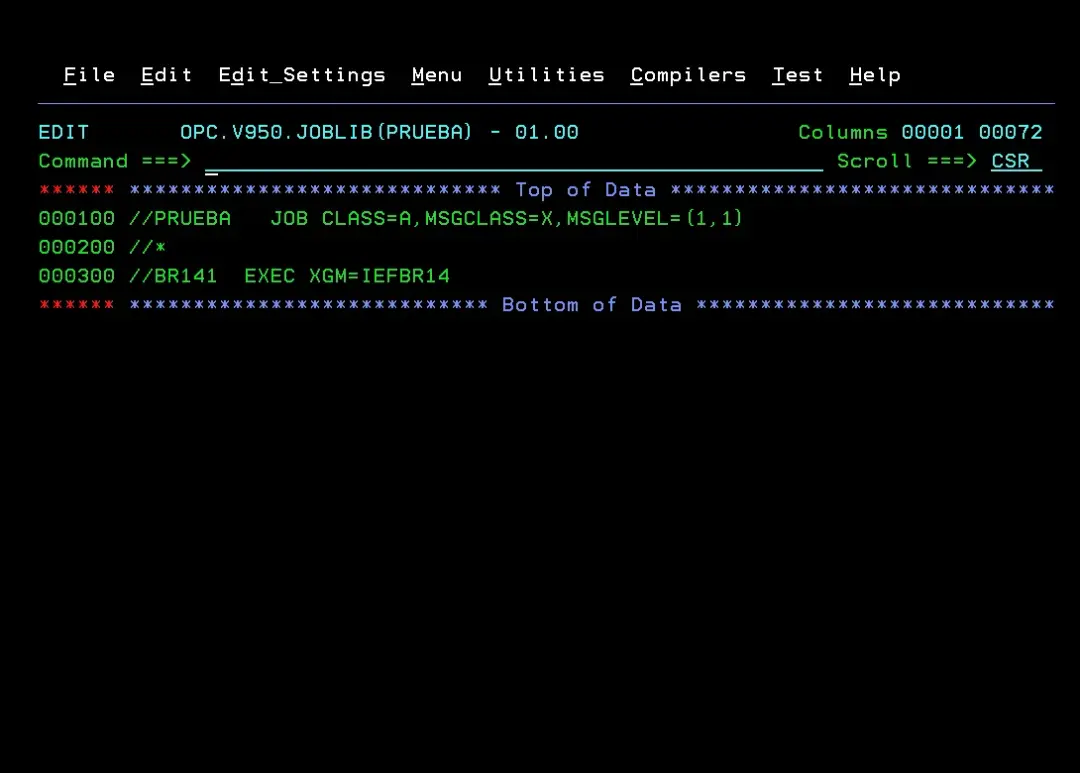
Application
We go back to the TWS Database menu and enter option 4 – AD (Application Descriptions).
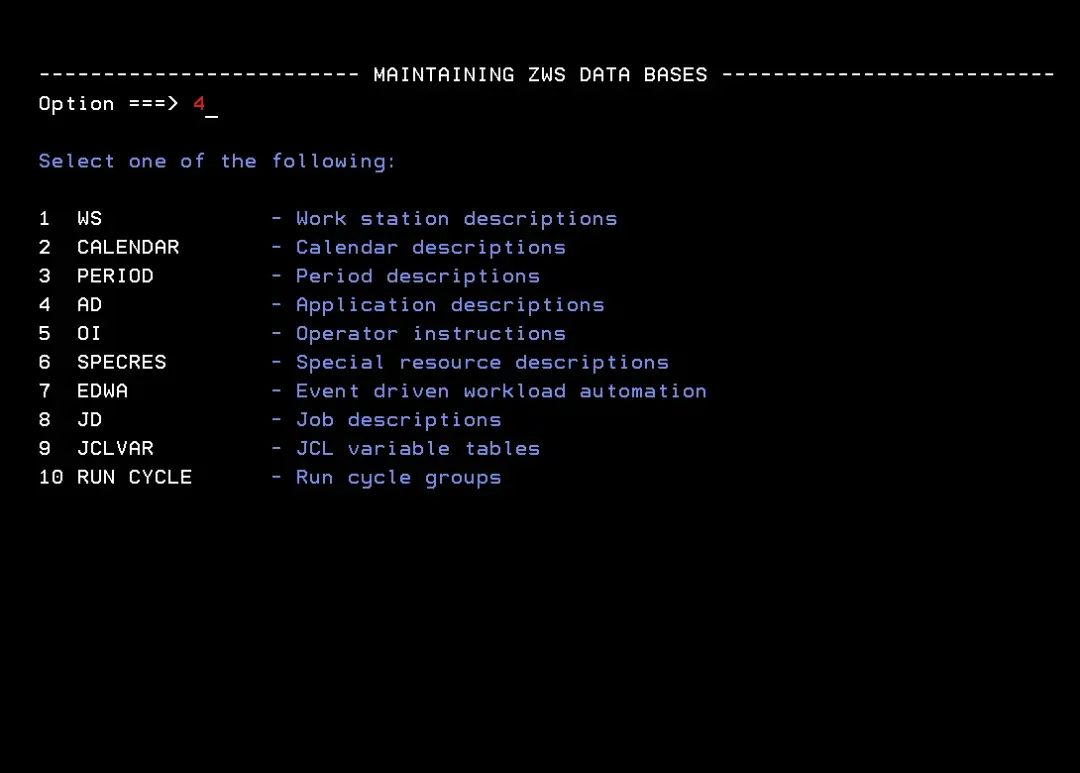
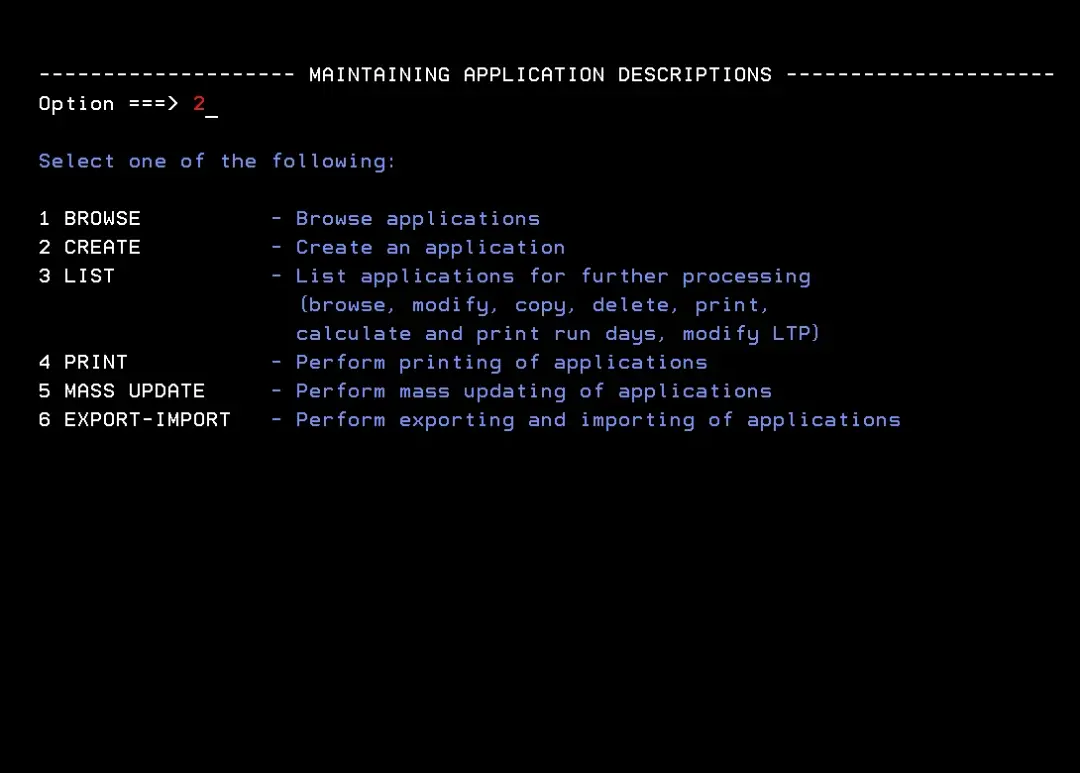
Option 2 – Create.
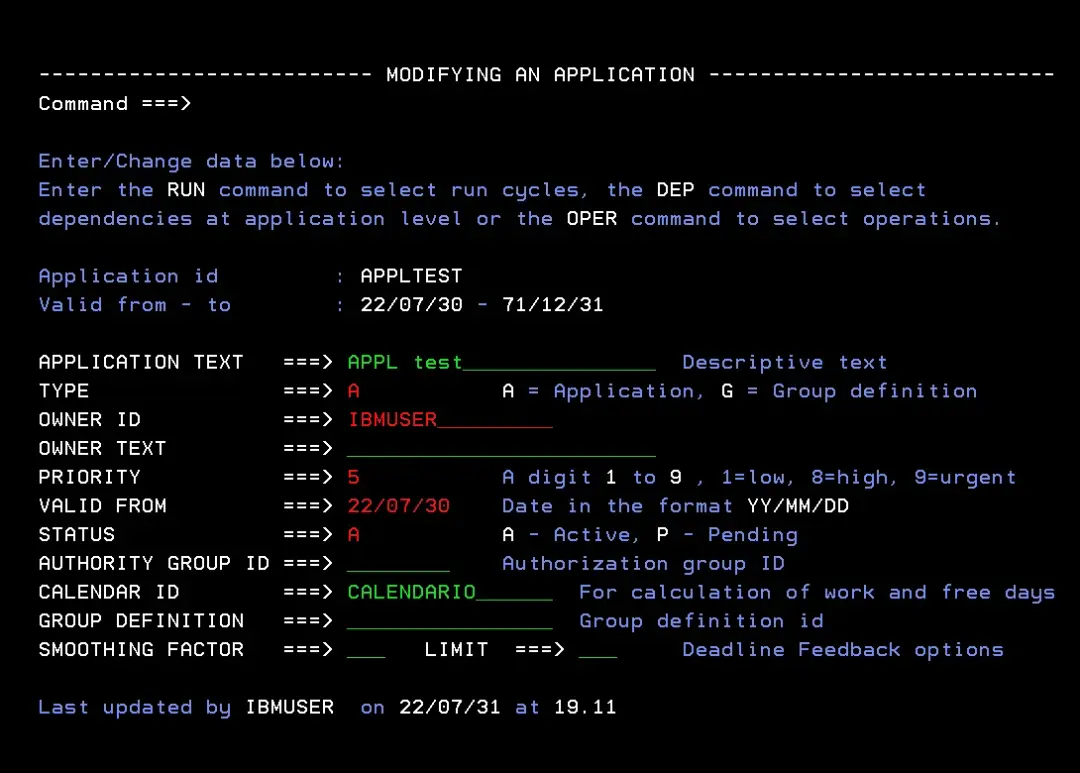
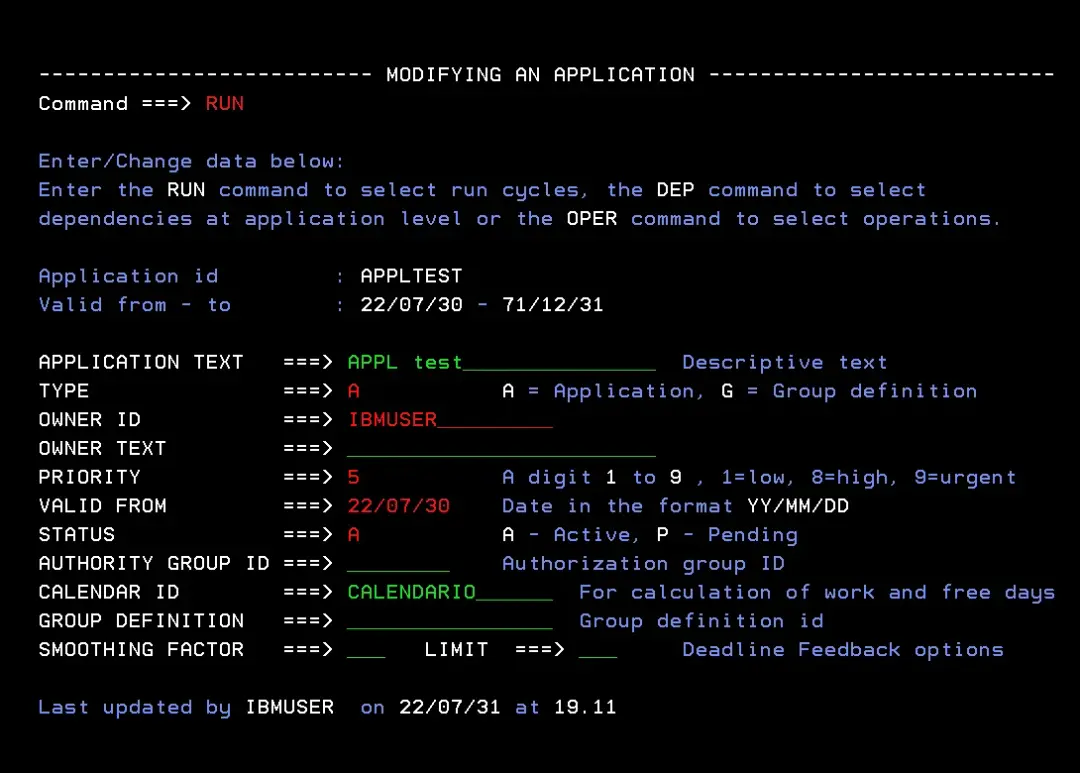
We fill in the data as shown in the image and type OPER on the command line to create the operations.
NOTE: In "VALID FROM" we can put an earlier day so that the application runs when we extend the plan.
We create a simple application with a start, a job and an end.
For the START (INICIO) and END (FIN) operations we use the CTRL WS, since they complete by themselves. For the END operation we use operation number 250 because, if we add operations in the future and other applications depend on this operation, we will not have to change the dependencies of the other applications.
For the PRUEBA operation we use the CPUP WS, because it is a job that will run.
Once the fields are filled in as in the image, we use the PRED command to set the dependencies between operations.
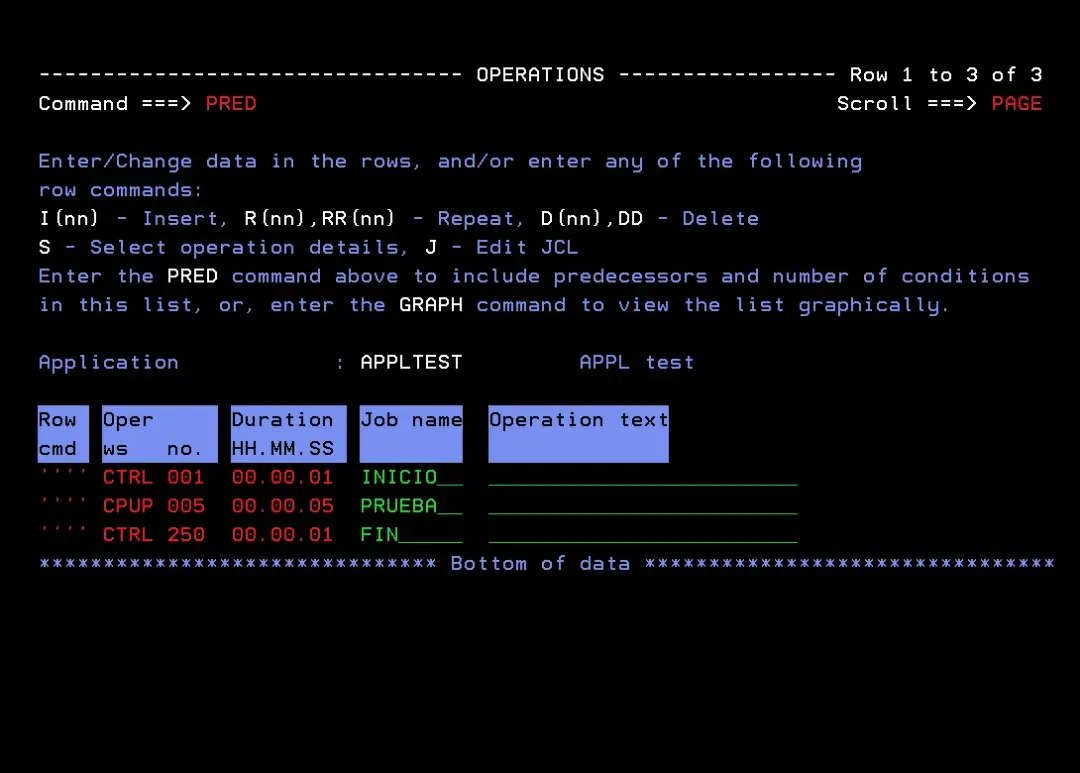
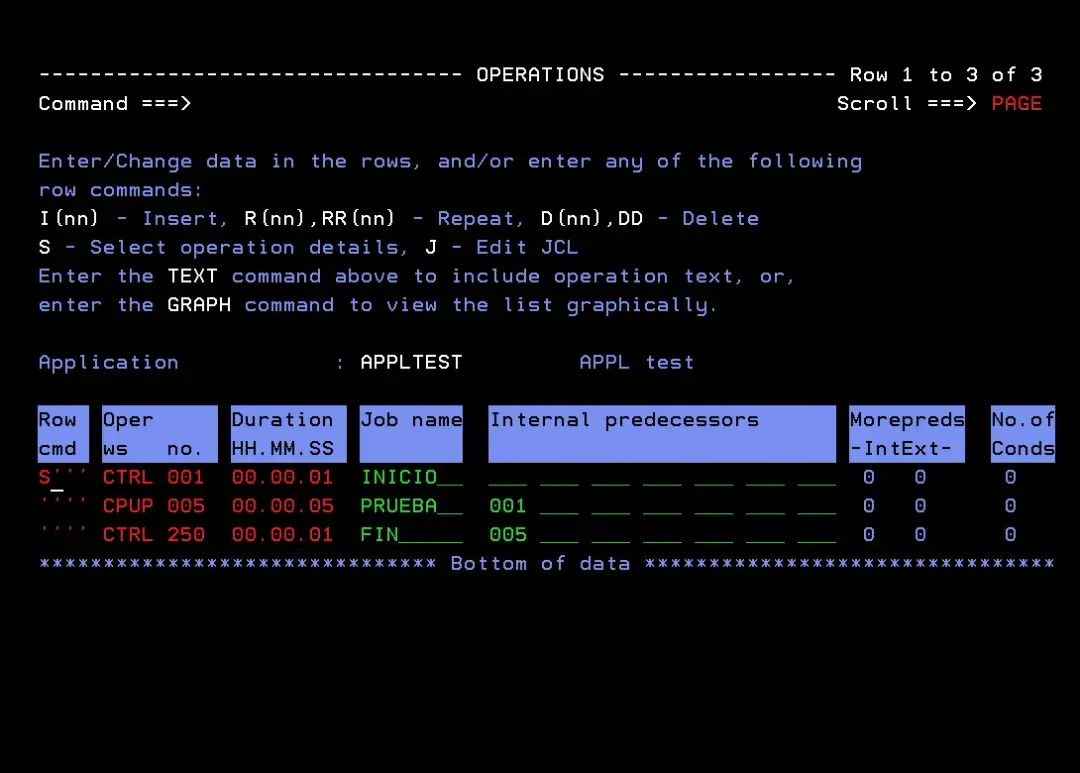
Operation 005 gets operation 001 as its predecessor. Operation 250 gets operation 005 as its predecessor.
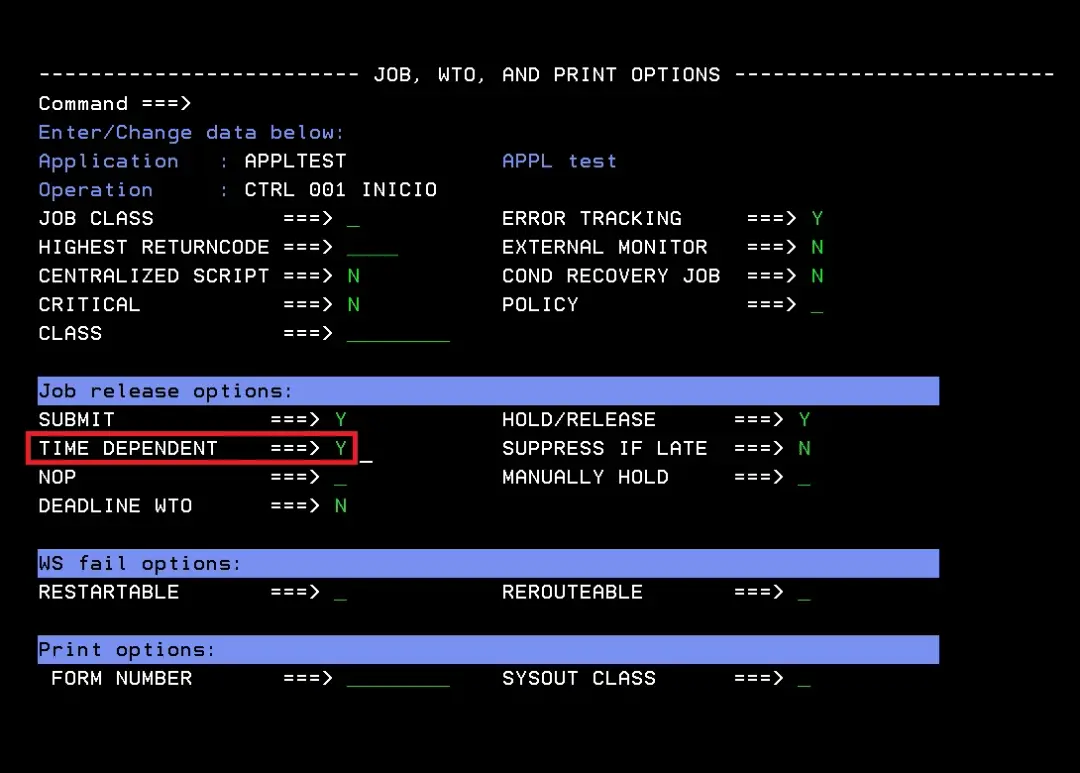
To stop this application from running as soon as the Current Plan is extended, we have to tell it to wait for its run time. To do so, we enter the first operation with an S.
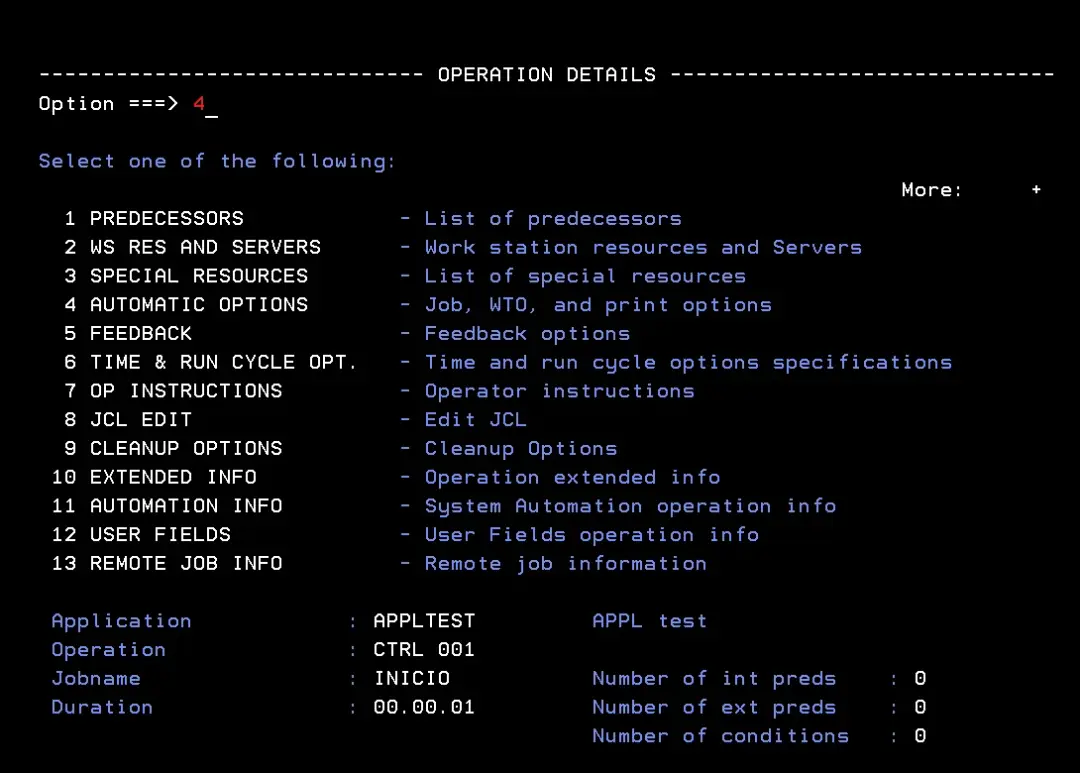
We enter option 4 - AUTOMATIC OPTIONS.
In the TIME DEPENDENT field we put Y.
Run cycle rule
We press F3 three times and use the RUN command to set when this application runs.
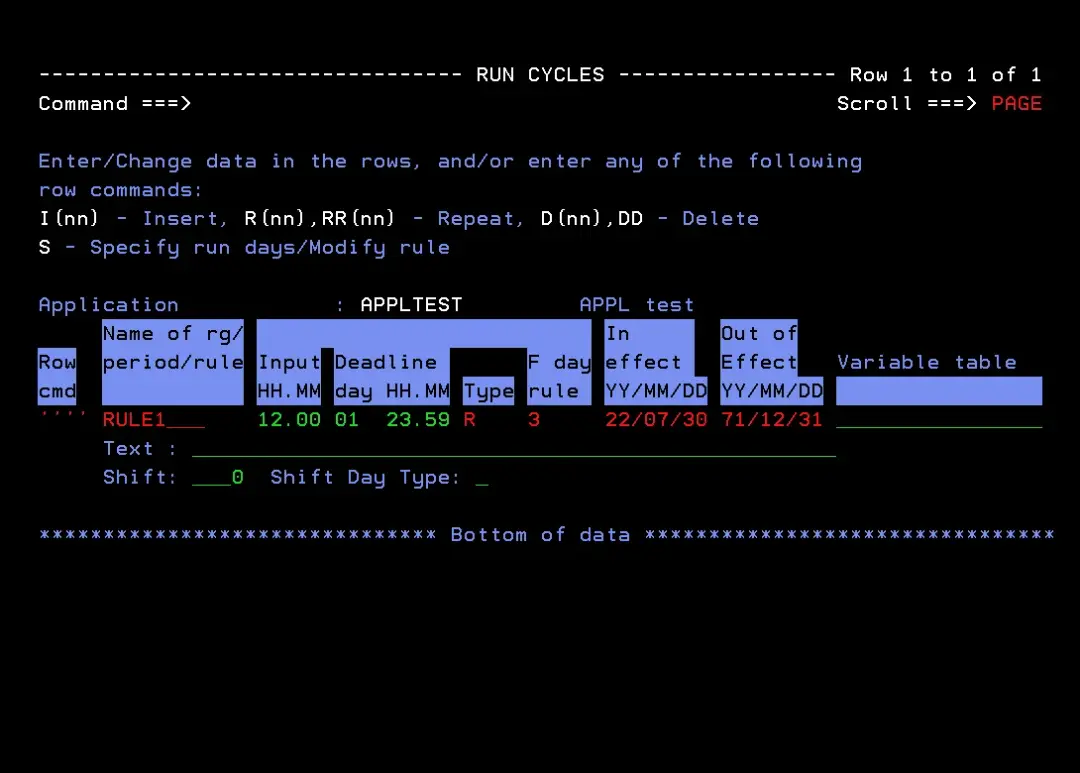
We add the following data (these are example values, they can be different):
Rule name: RULE1
Input: 12.00 (the time at which we want the application to be planned)
Deadline day: 01 (so that it runs on the next day at the latest)
Deadline HH.MM: 23.59
We press Control to load the rest of the data. We change the "F day rule" field to 3 so that it also runs on holidays.
The IBM manual has more information on the free day rules (you can also press F1 for the help).
This application will start running at 12.00 and its deadline is the next day at 23.59.
To edit the run days, we enter the rule with an S.
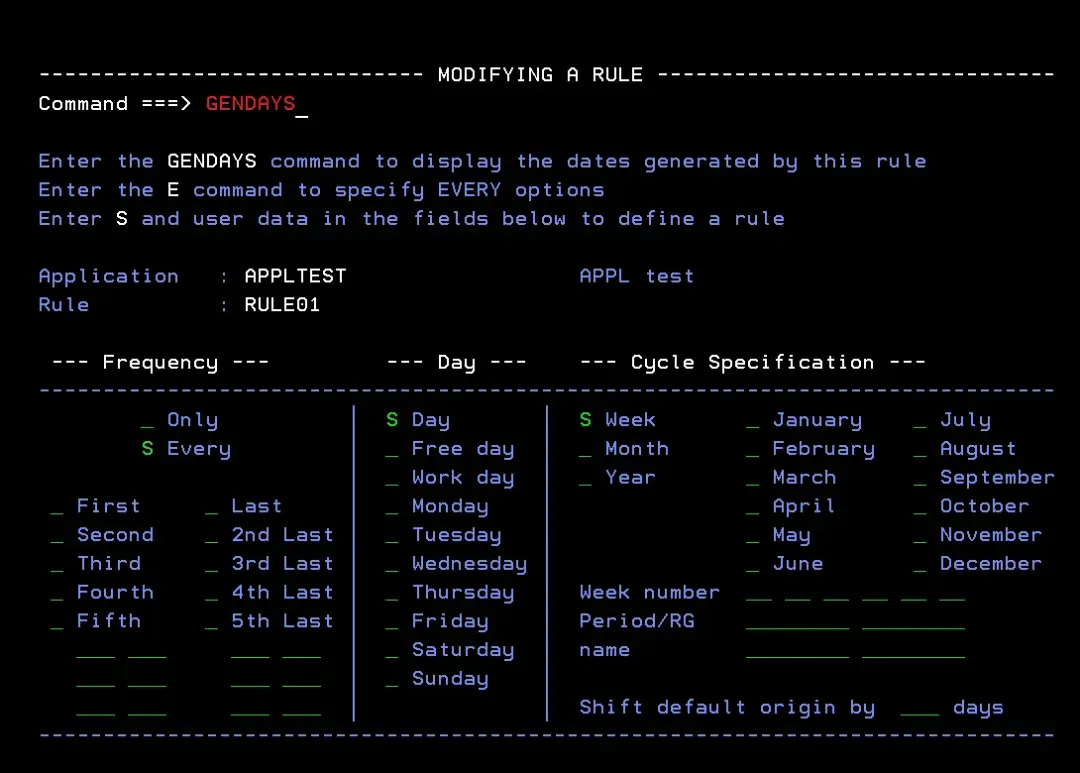
We mark the Every, Day and Week fields with an S so that it runs every day of the week. Then we type the GENDAYS command to see the generated calendar.
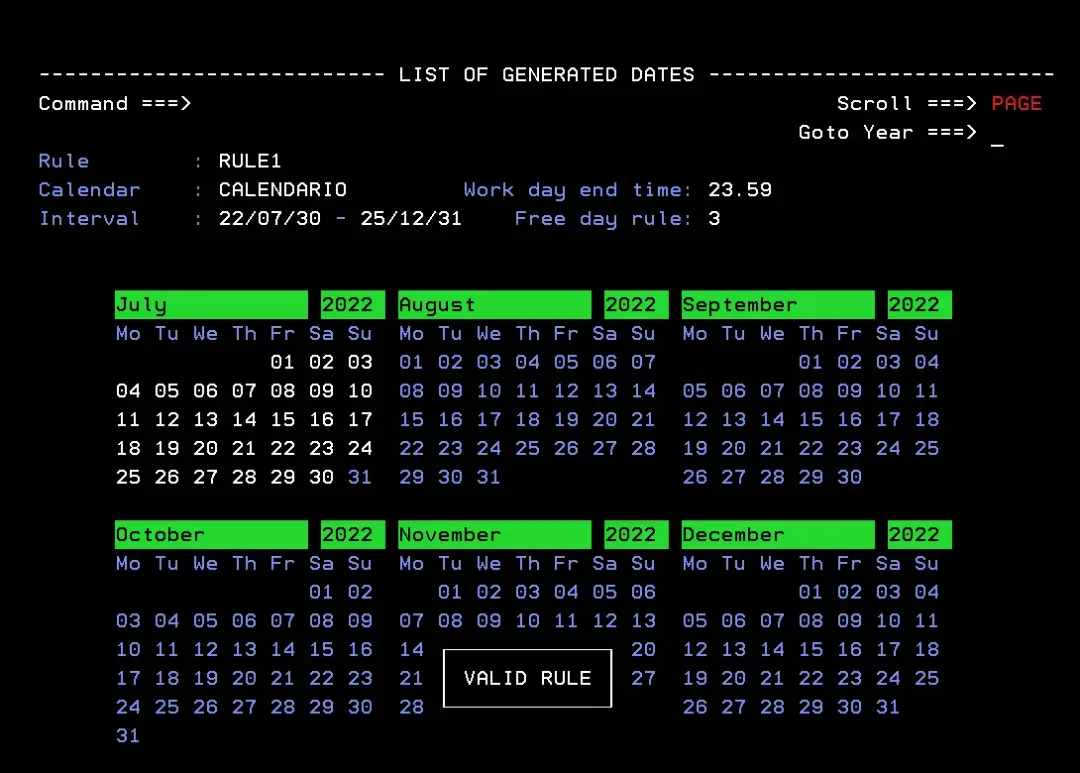
The message VALID RULE is shown.
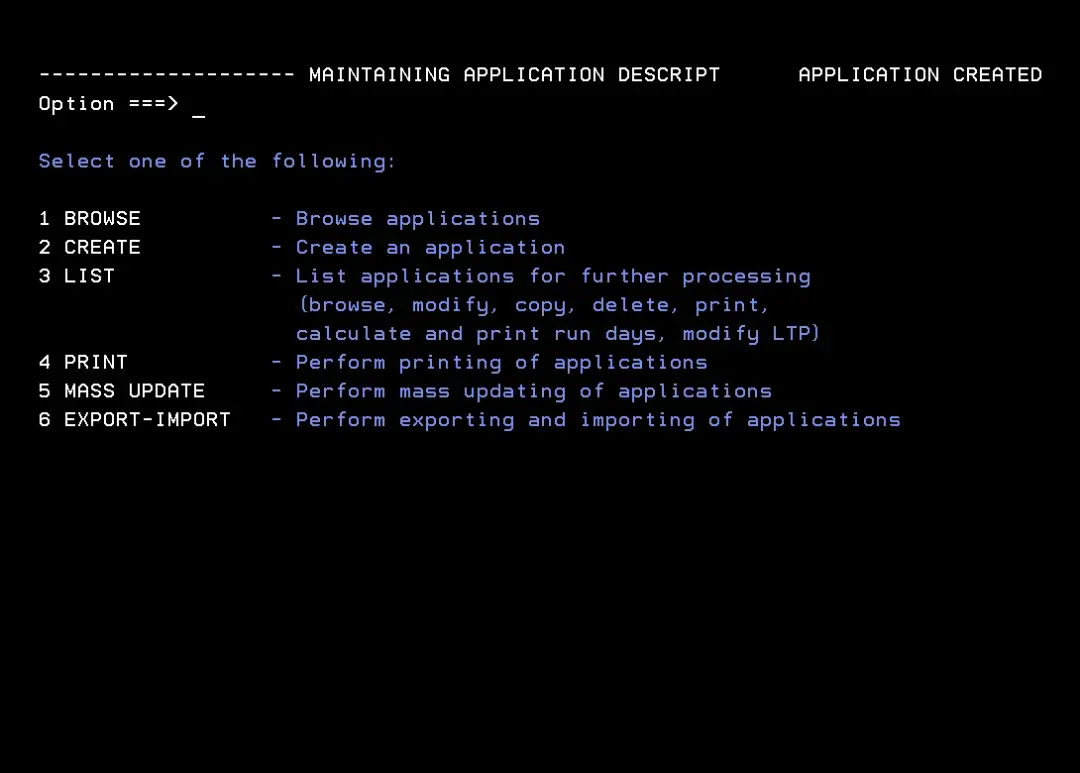
We press F3 back to the Application Description menu and the message "APPLICATION CREATED" is shown.
We have now created four types of WS, a calendar and a simple test application. The next step is to create the Long Term Plan and the Current Plan: IBM Z Workload Scheduler 9.5 - Creating the Long Term Plan and Current Plan.