IBM Z Workload Scheduler 9.5 - Installation
In this post we will install IBM Z Workload Scheduler 9.5. This product is IBM’s scheduler, also known as TWS or OPC. On other occasions, we have already installed other versions of this product, therefore, this post will be similar.
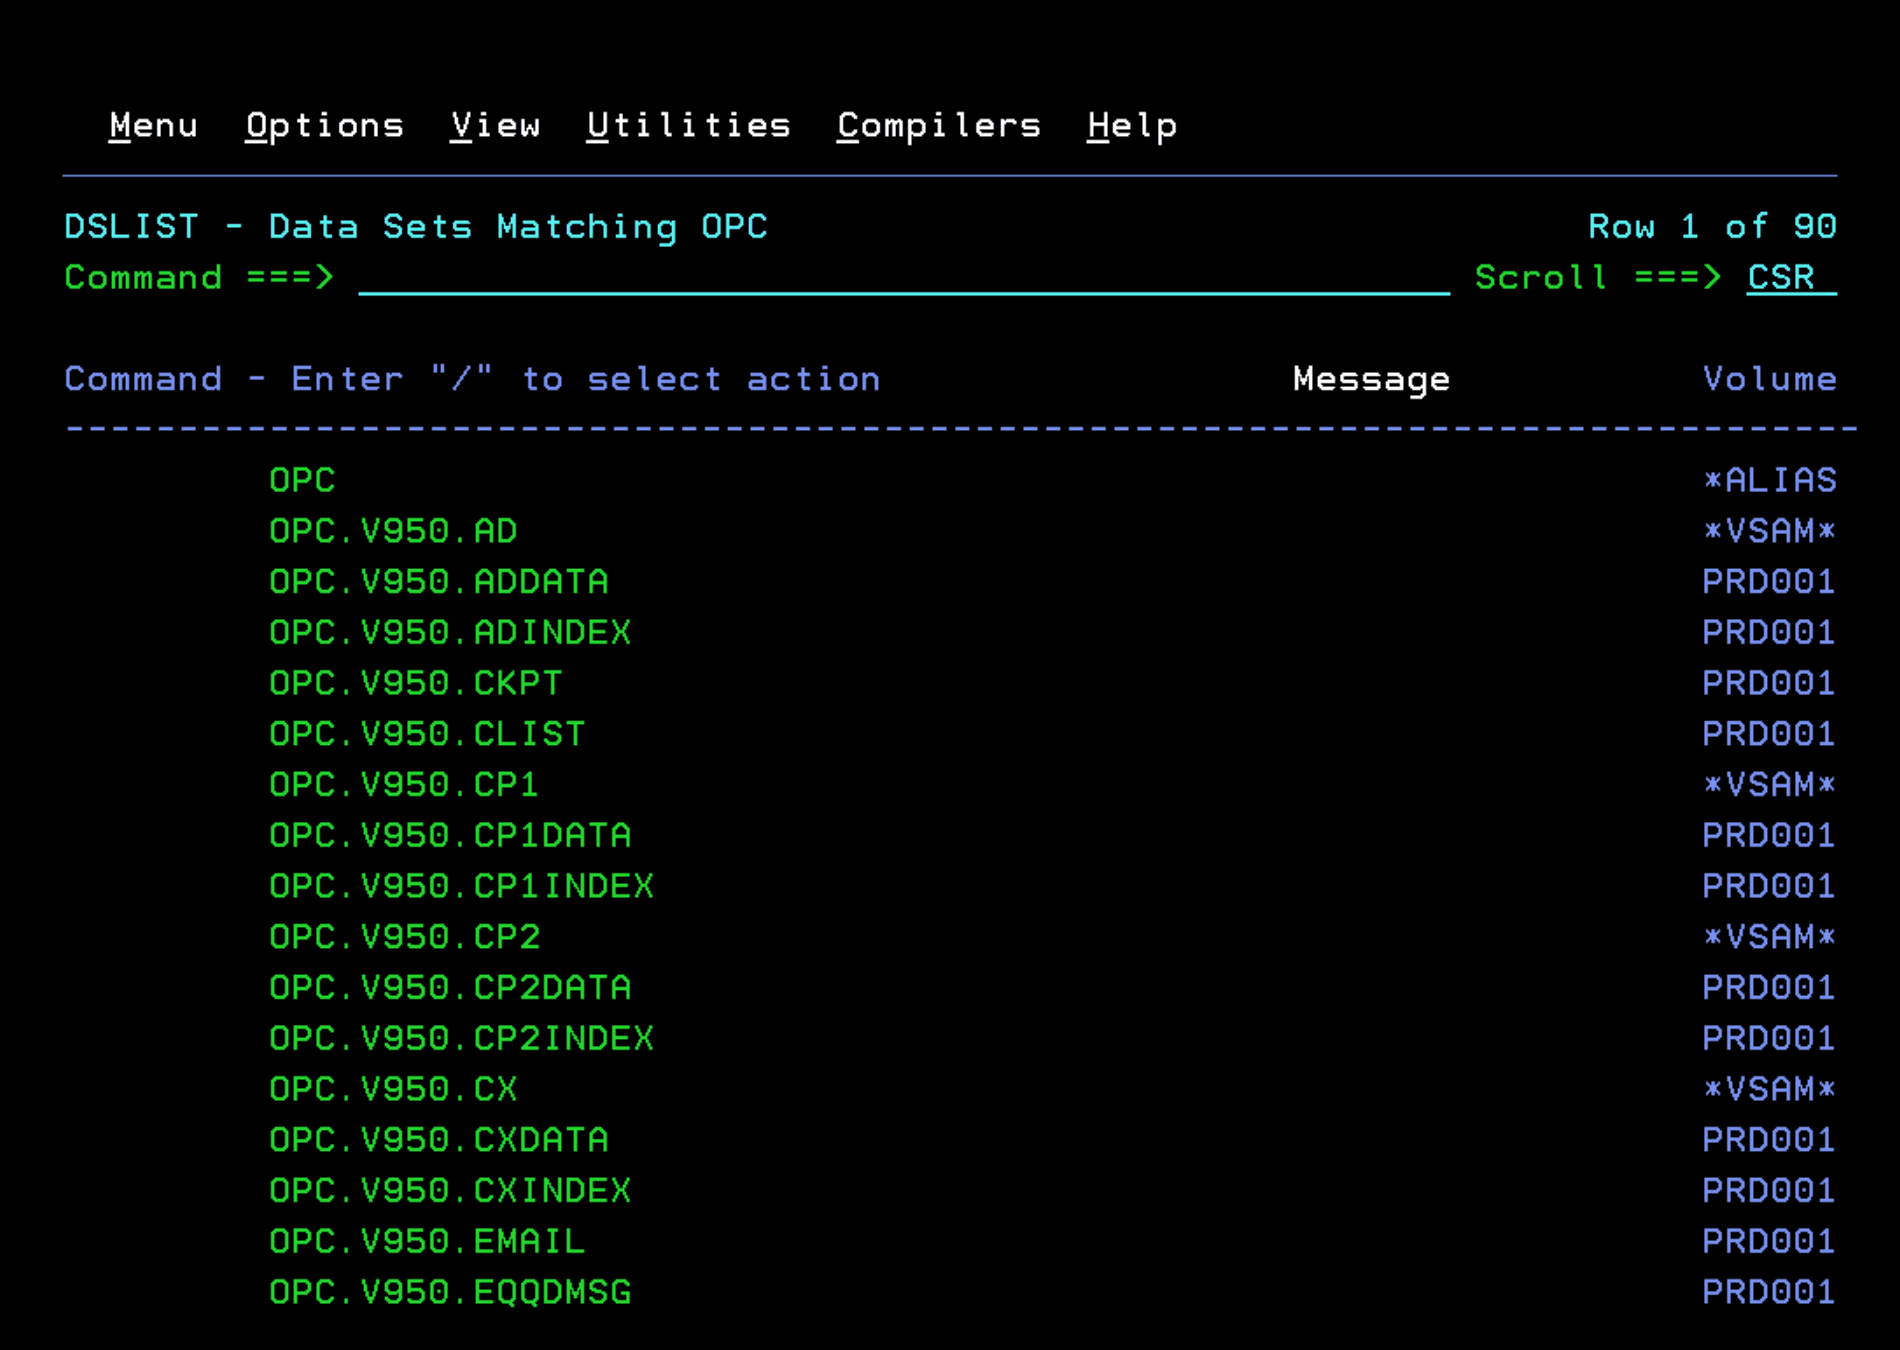
We will start by locating the libraries we will use. In my case, they start with TWS950.

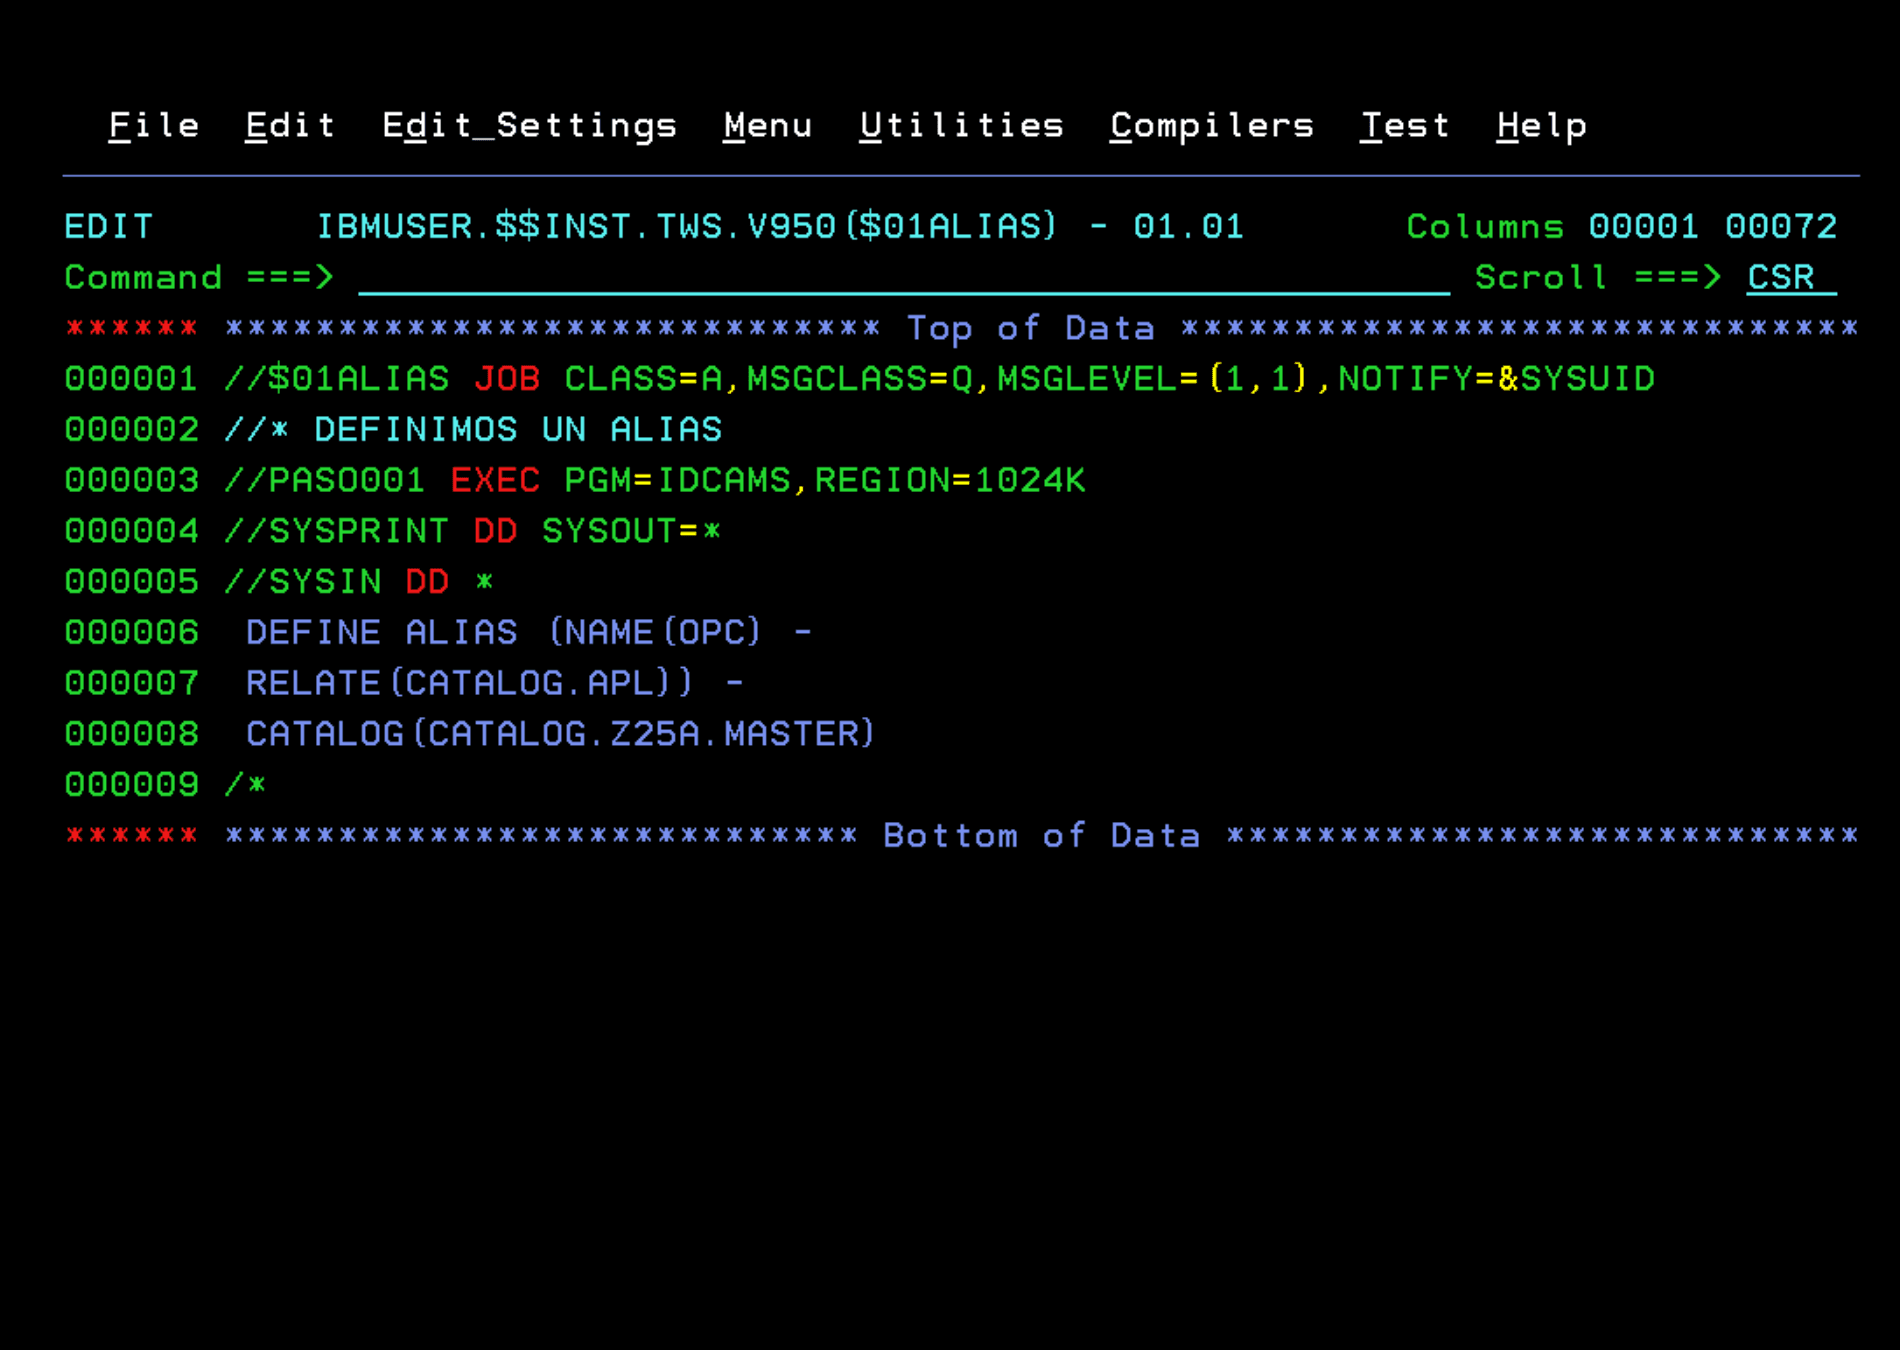
I will create an ALIAS related to my catalog CATALOG.APL.
//$01ALIAS JOB CLASS=A,MSGCLASS=Q,MSGLEVEL=(1,1),NOTIFY=&SYSUID
//* DEFINE AN ALIAS
//PASO001 EXEC PGM=IDCAMS,REGION=1024K
//SYSPRINT DD SYSOUT=*
//SYSIN DD *
 DEFINE ALIAS (NAME(OPC) -
 RELATE(CATALOG.APL)) -
 CATALOG(CATALOG.Z25A.MASTER)
/*
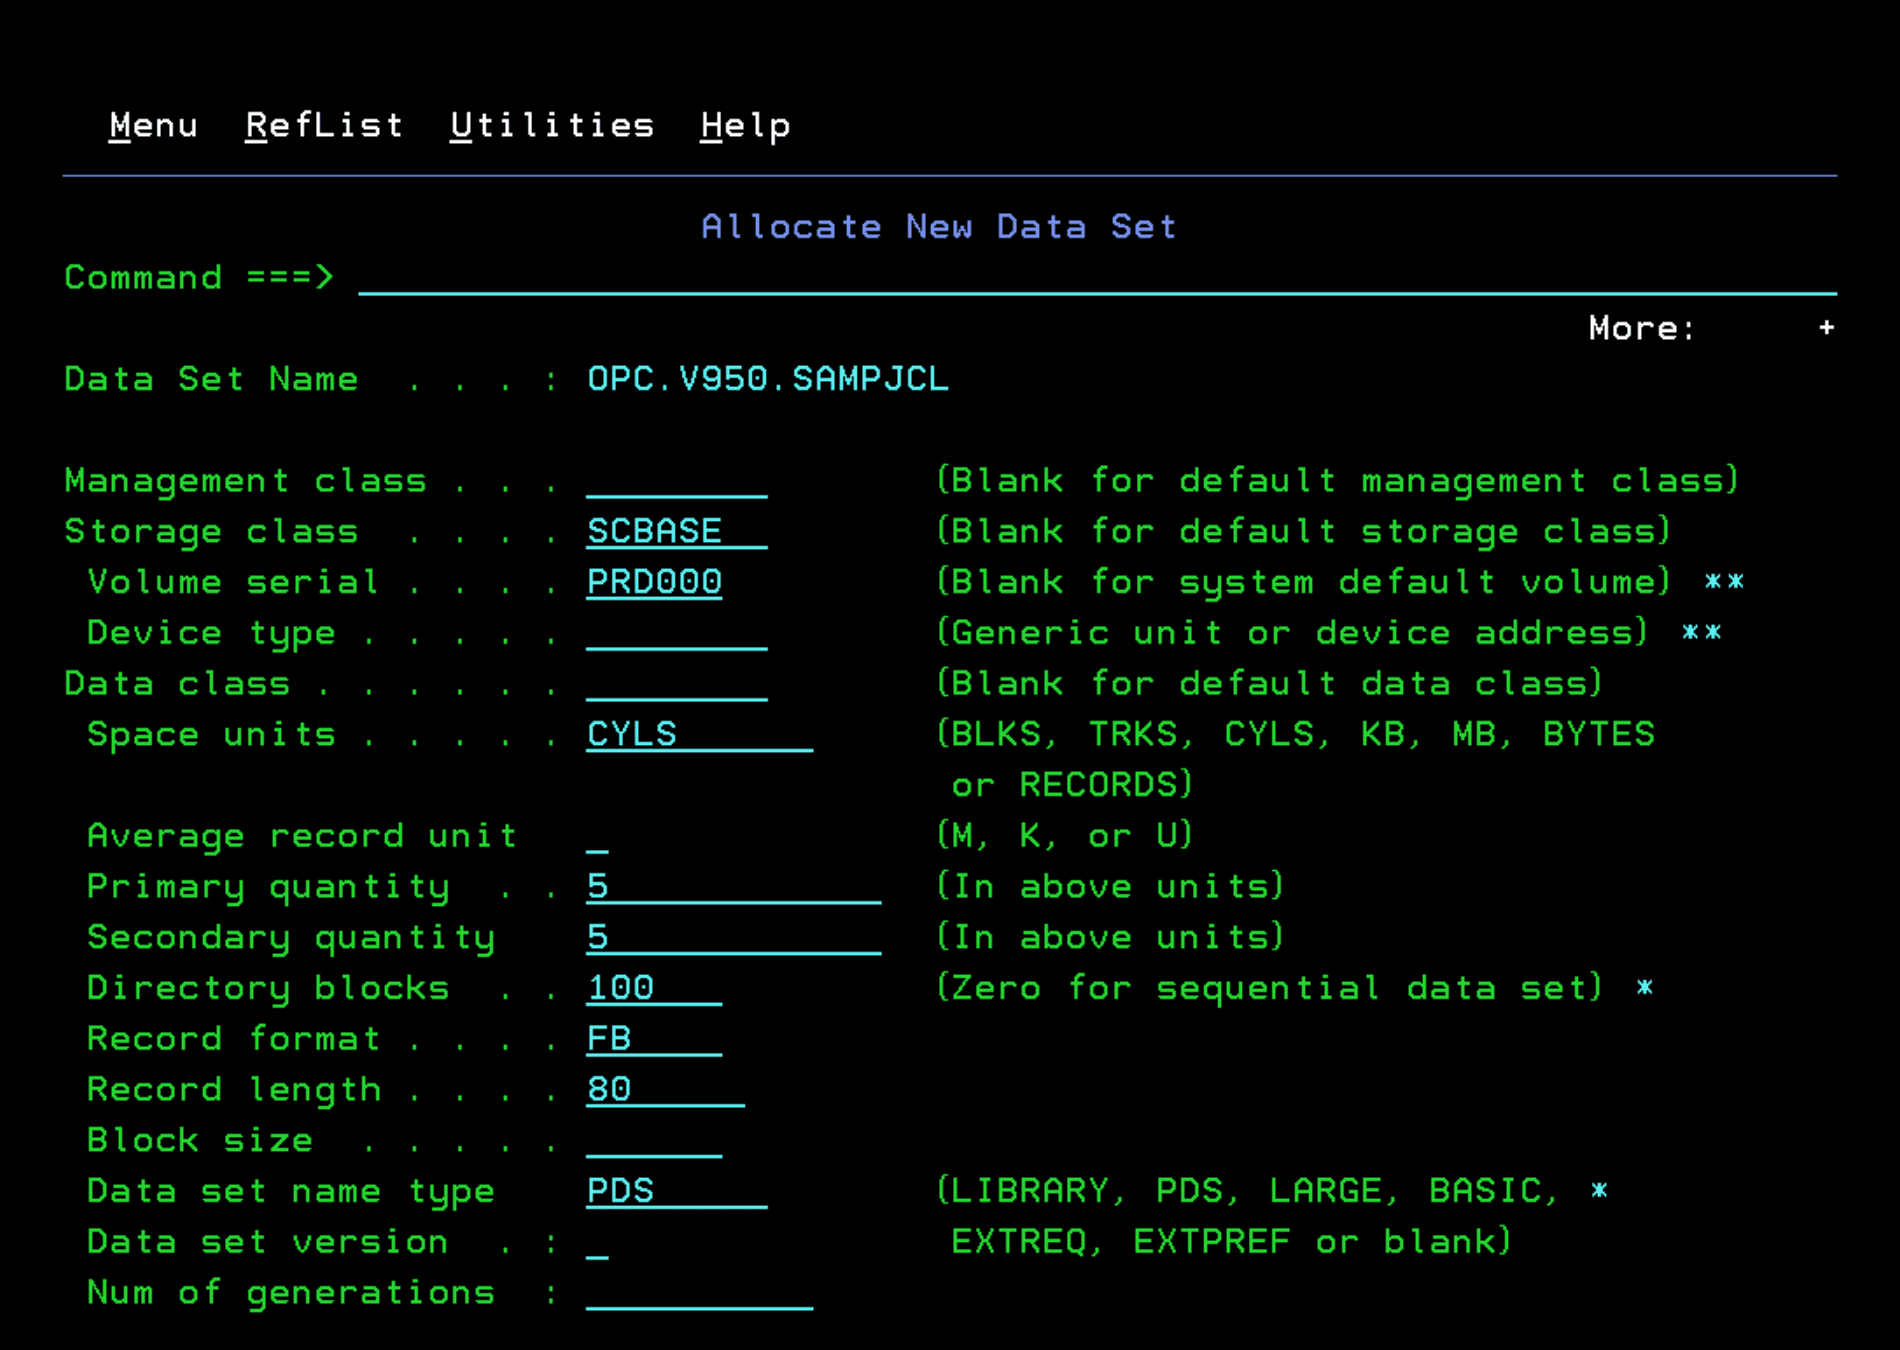
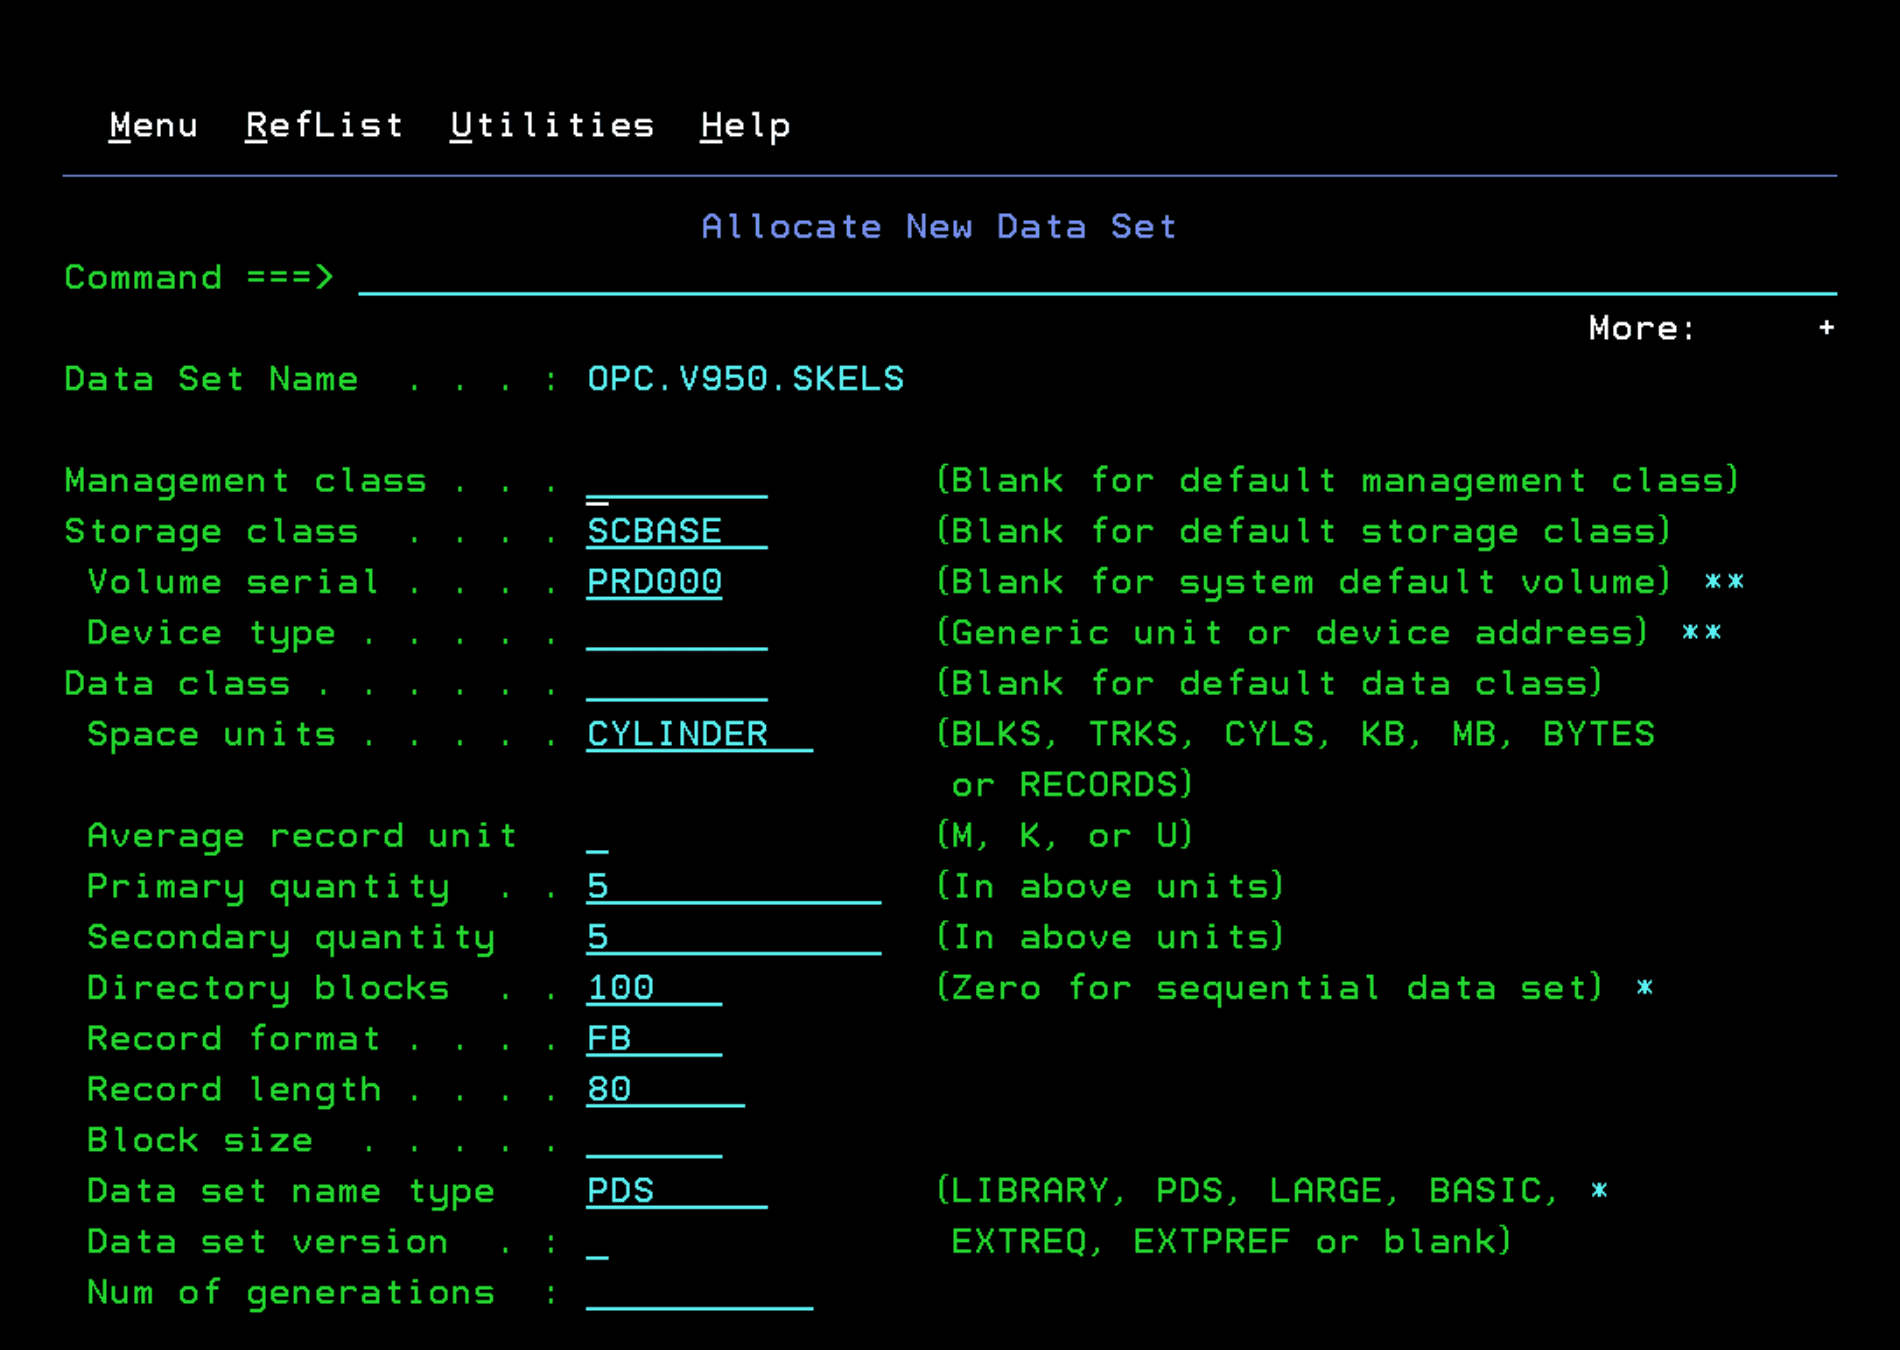
Now we will create two libraries that will contain all the resources we will use during the installation. I will call them:
- OPC.V950.SAMPJCL
- OPC.V950.SKELS
Configure Libraries in TSO
The installation is performed using the REXX utility “EQQJOBS”.
First we must add the following libraries to our TSO session:
- Library SEQQCLIB to SYSPROC
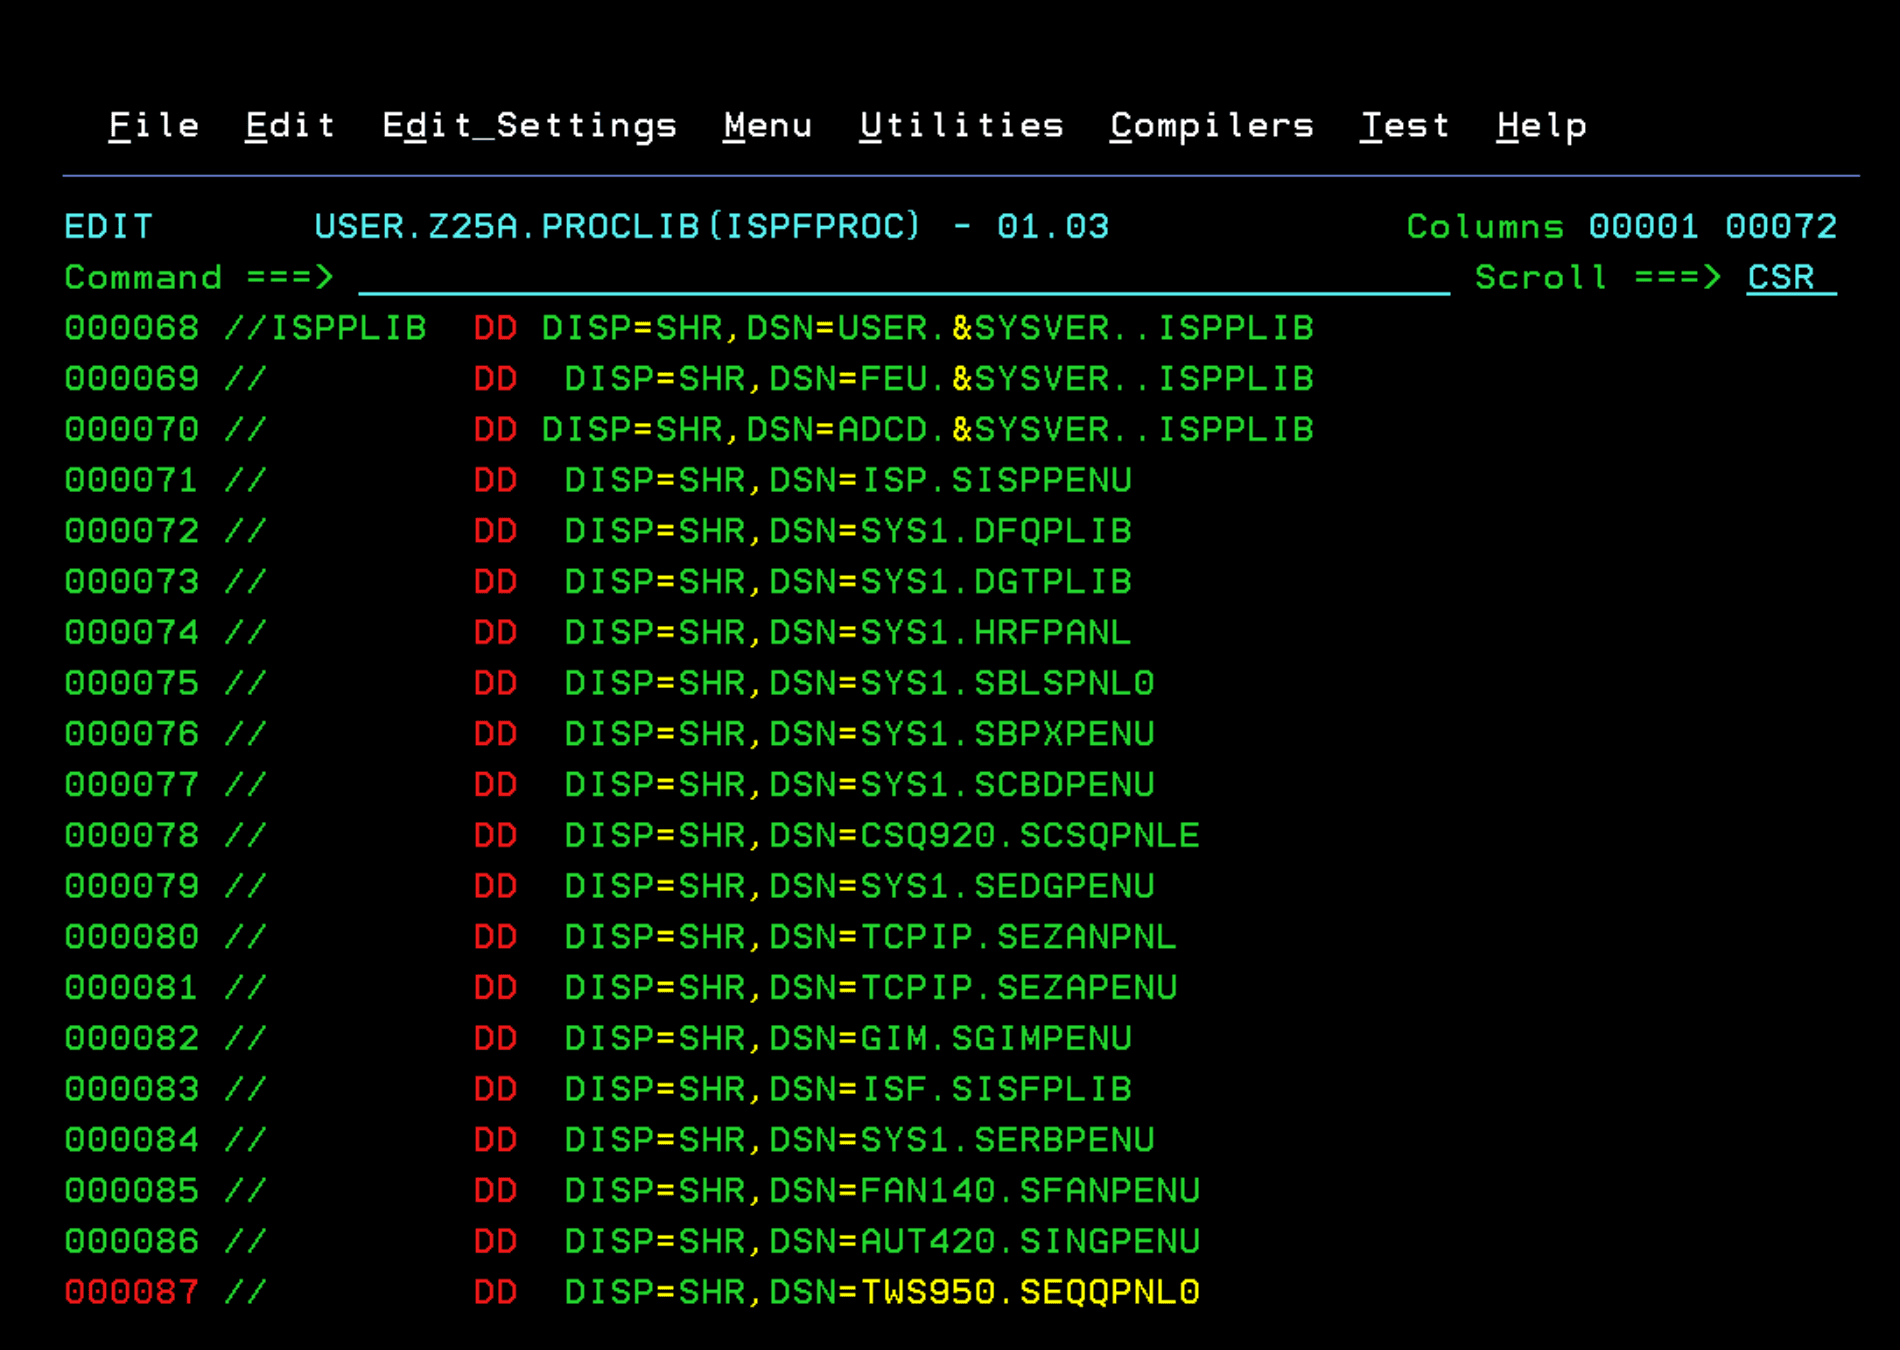
- Library SEQQPNL0 to ISPPLIB
- Libraries SEQQSKL0 and SEQQSAMP to ISPSLIB
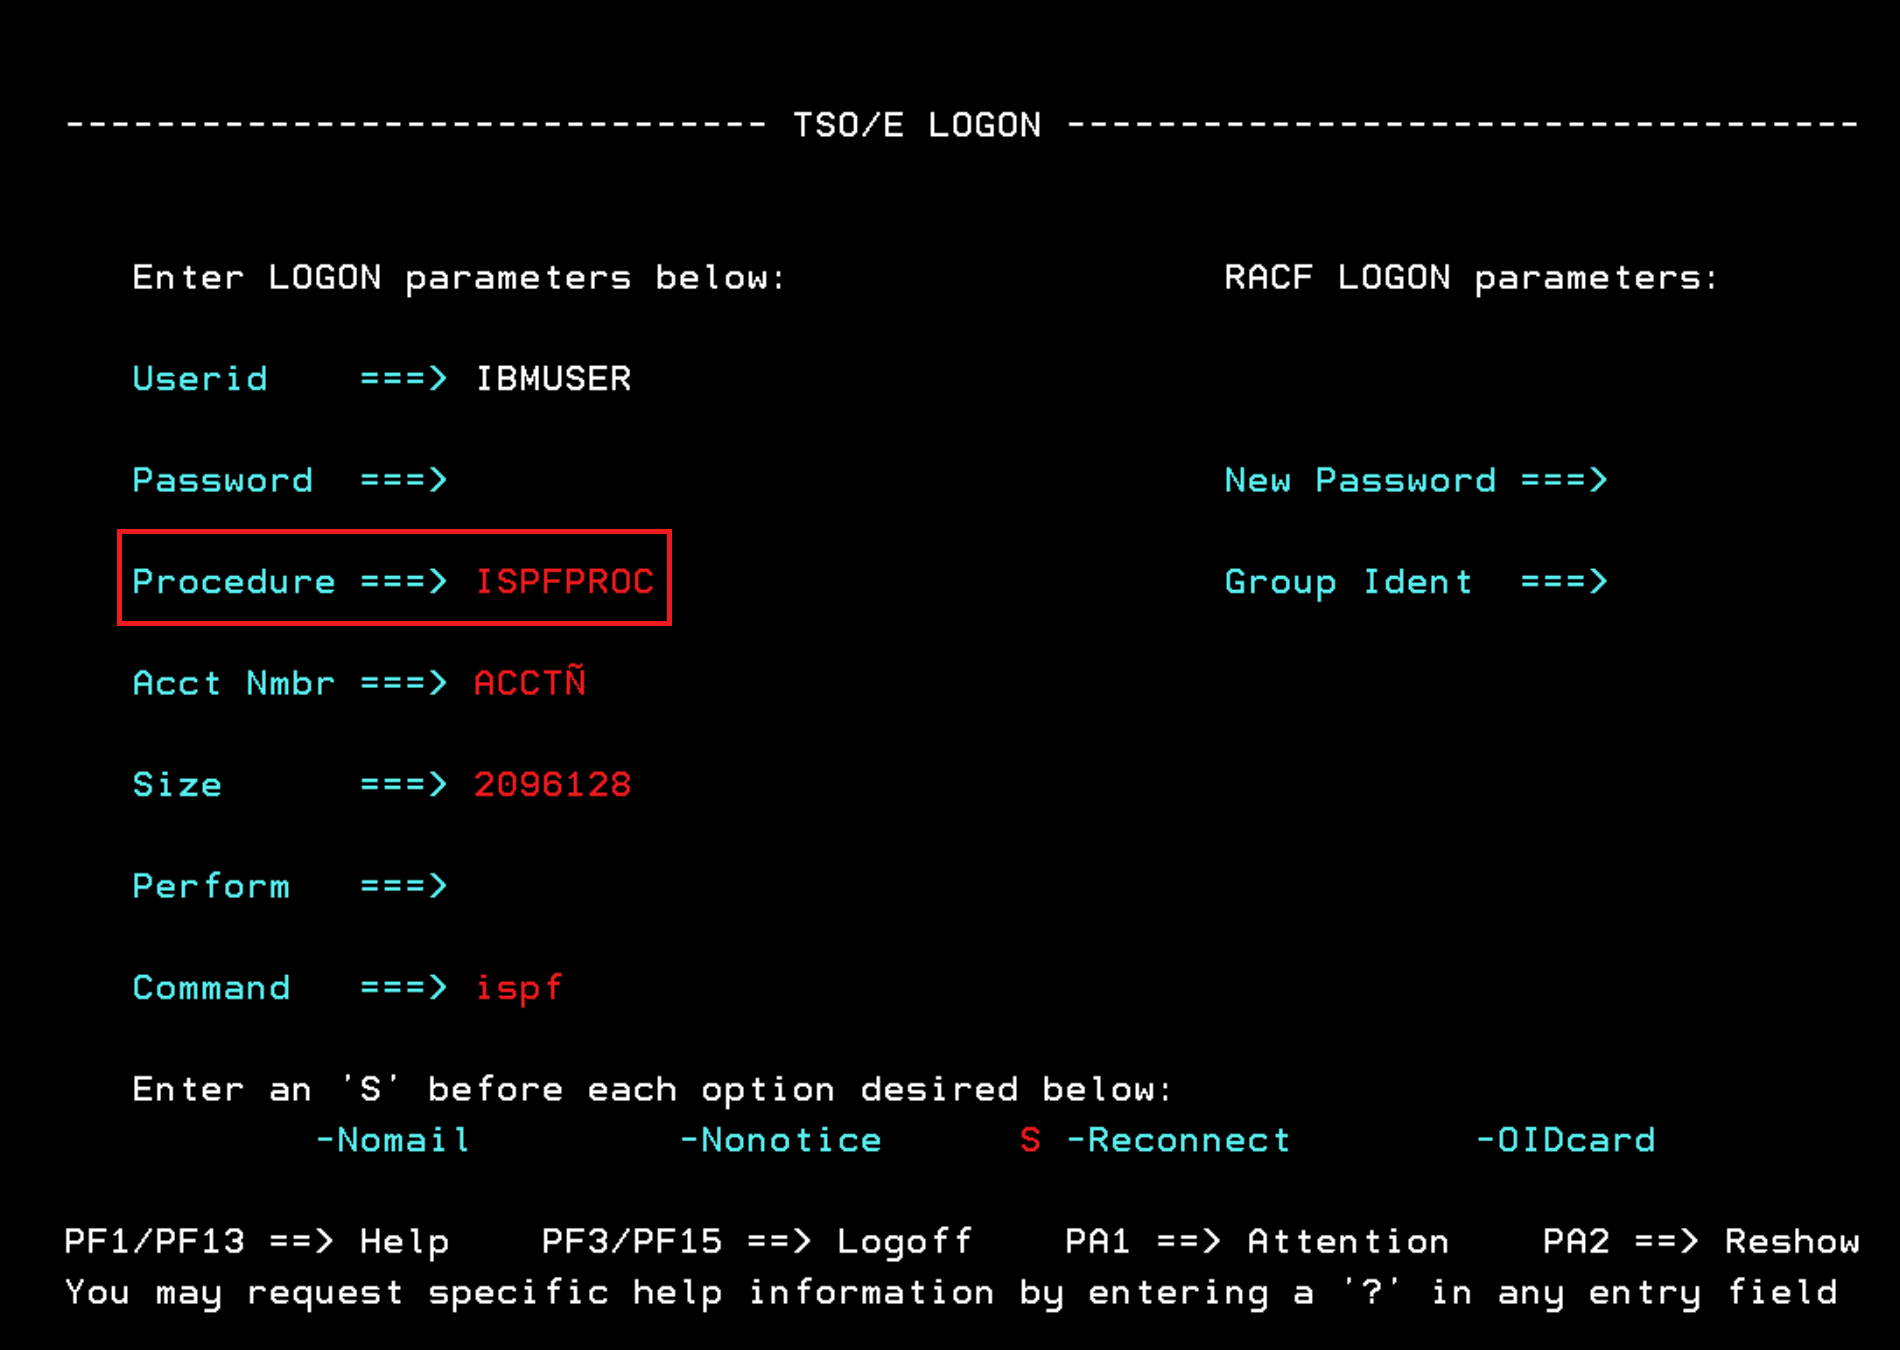
To find out the TSO logon procedure we use, we can see it when we log into TSO. In my case, it’s ISPFPROC.
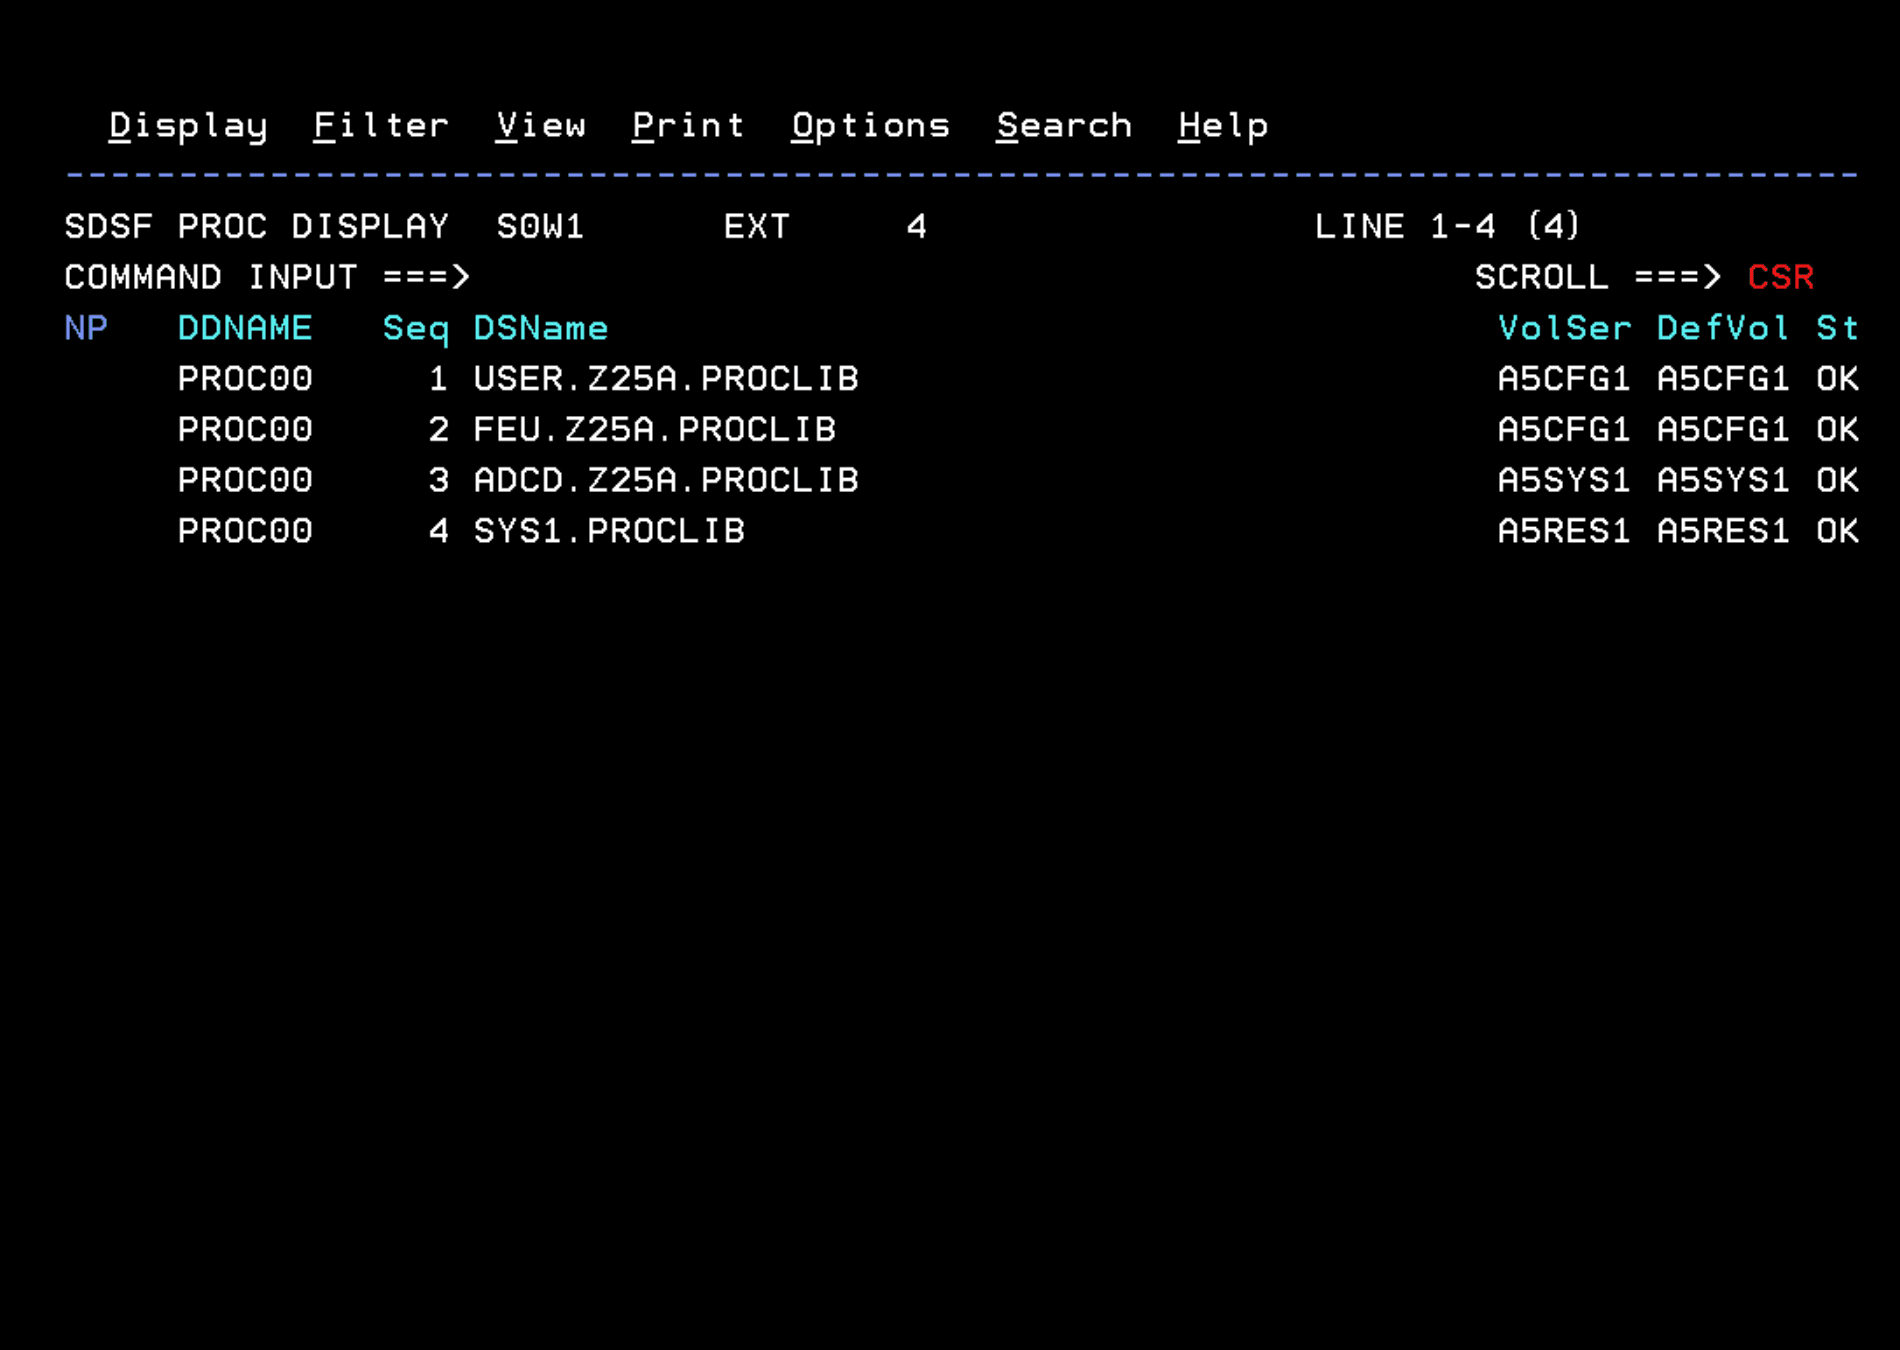
This procedure is stored in one of the system PROCLIBs. To find out which one, we can look at the PROC option in SDSF. We can also use the system command $D PROCLIB.
We add the libraries.
TWS950.SEQQCLIB
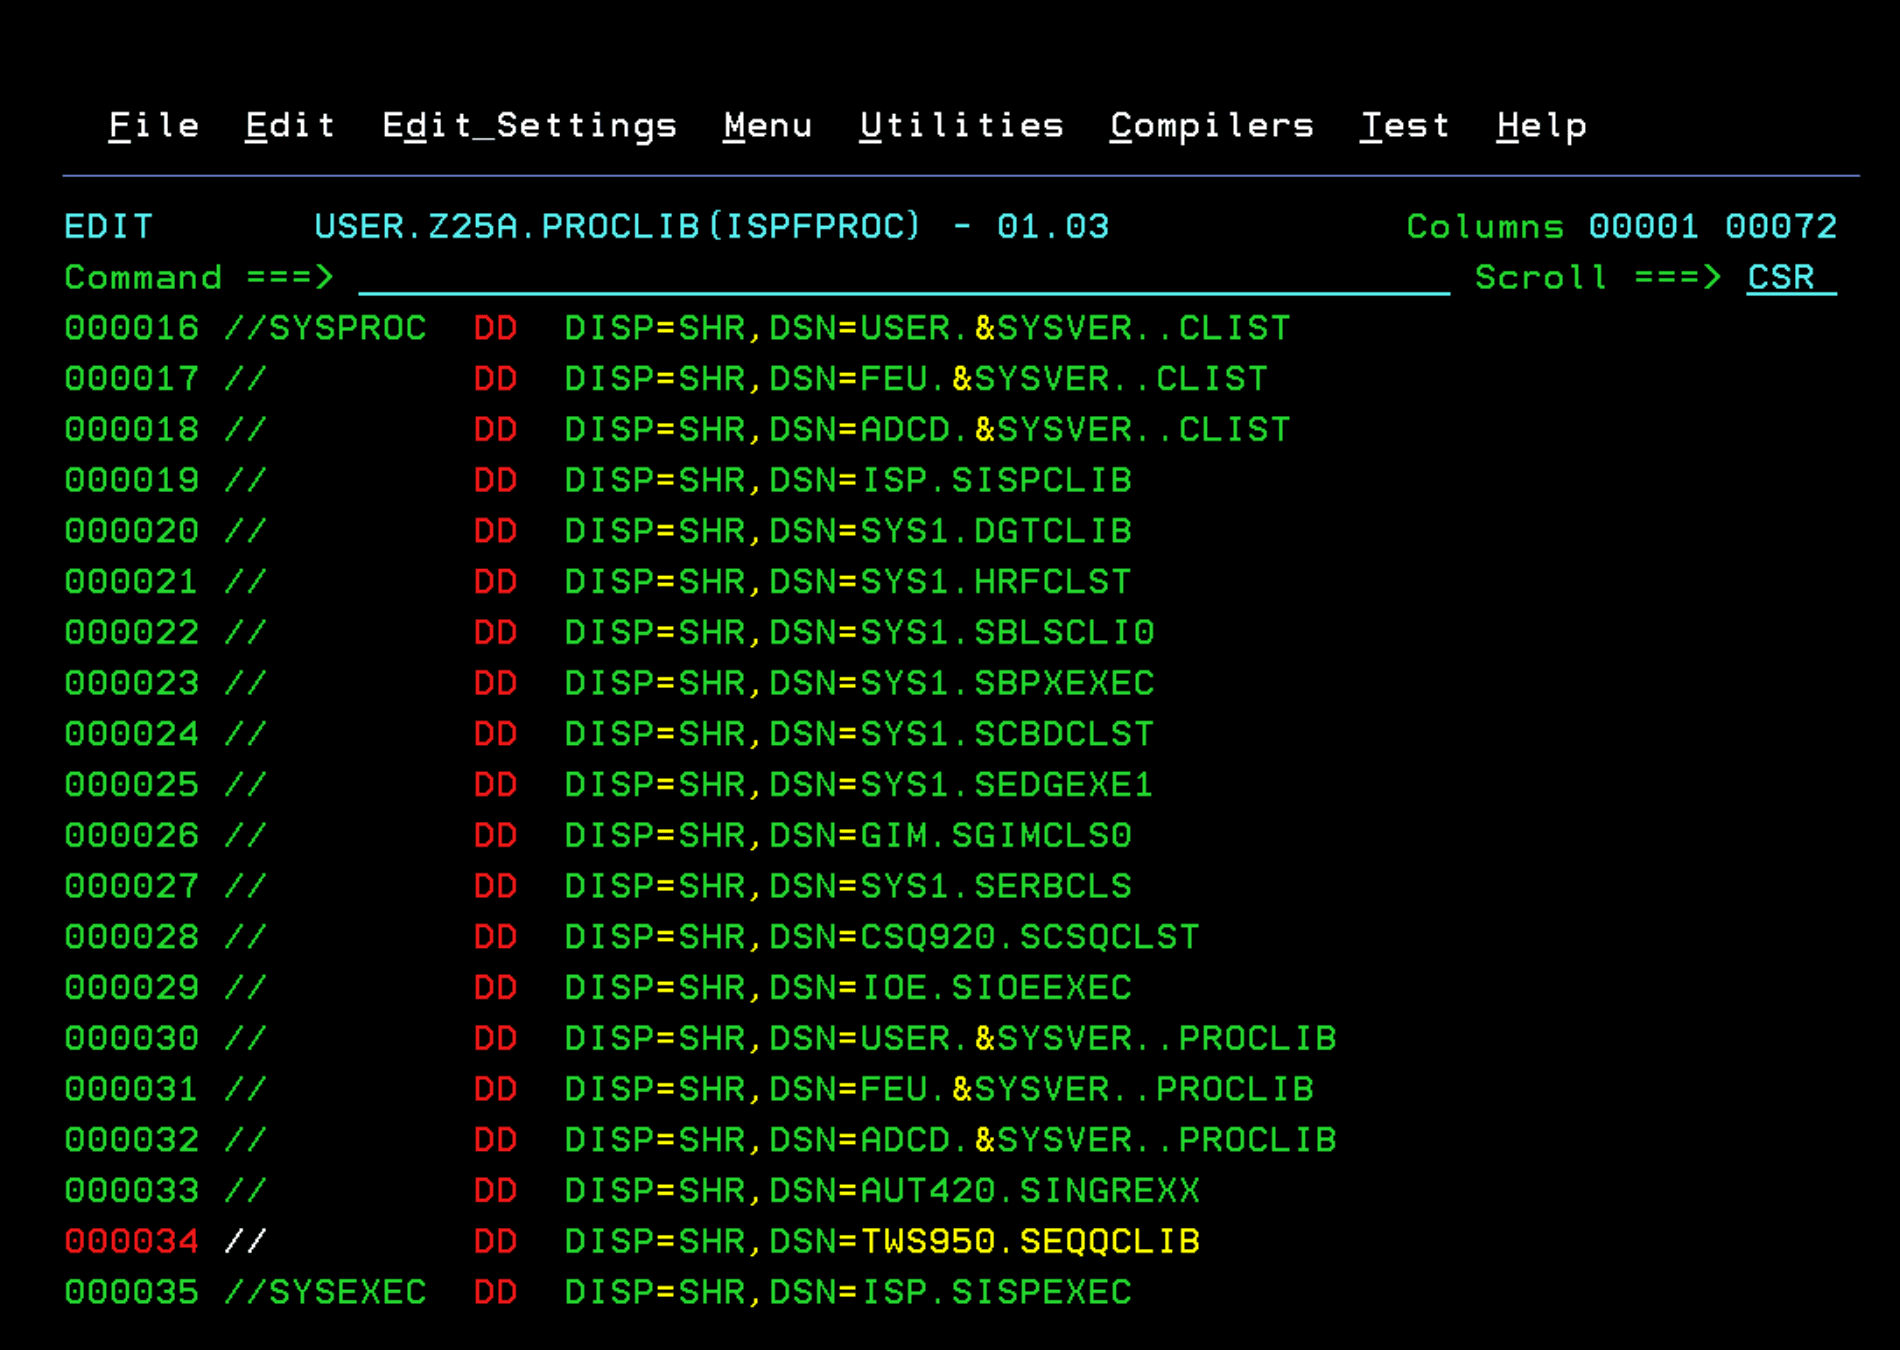
TWS950.SEQQPNL0
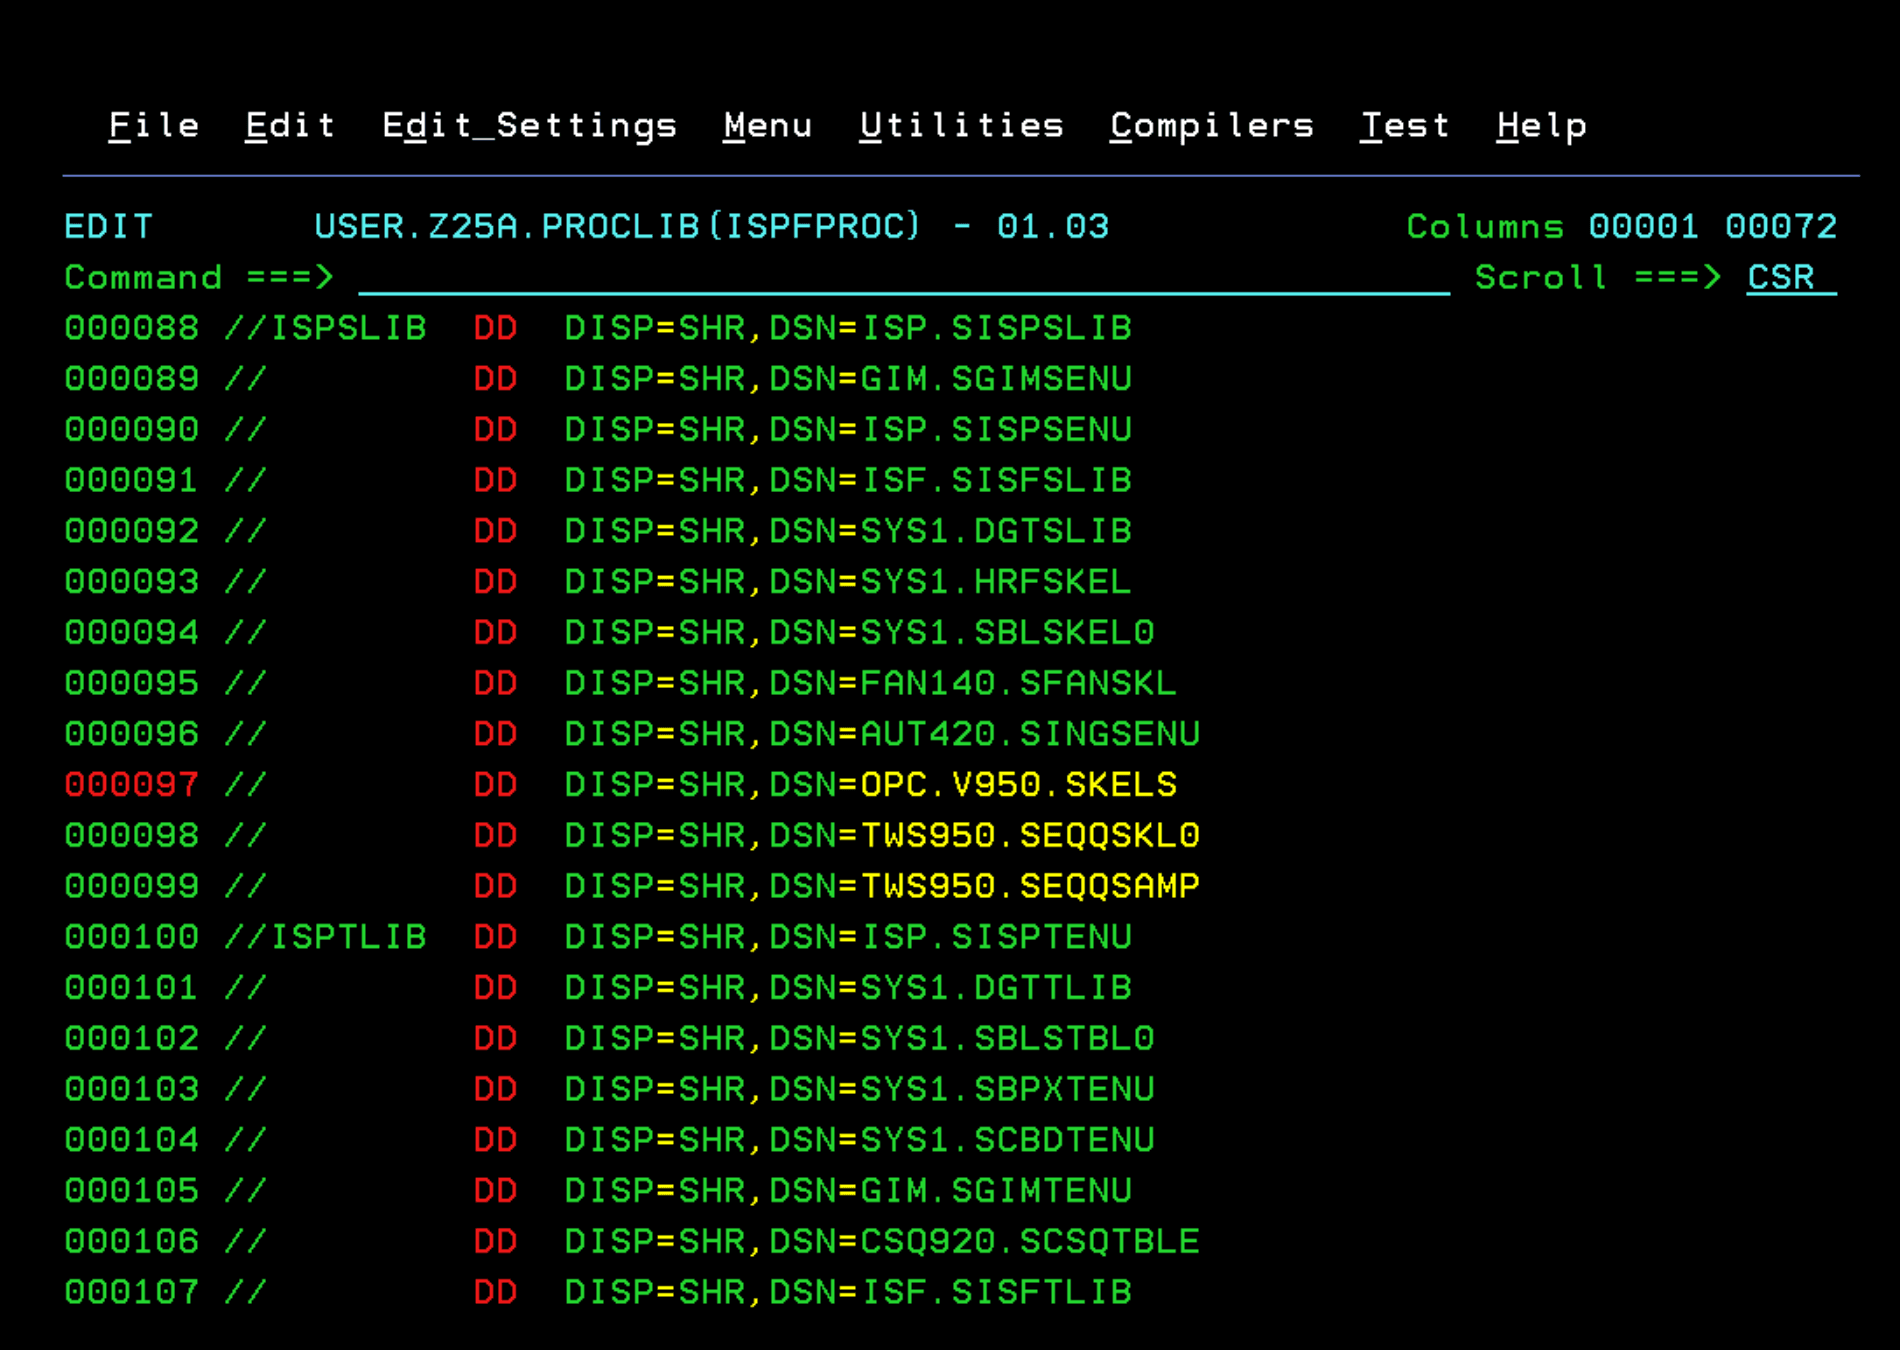
We will also add the OPC.V950.SKELS library that we created earlier:
- OPC.V950.SKELS
- TWS950.SEQQSKL0
- TWS950.SEQQSAMP
The “SKELS” library we created earlier must be placed first in the concatenation.
Run EQQJOBS
We exit the TSO session and log back in.
With the command TSO EQQJOBS we will enter the TWS installation panels.
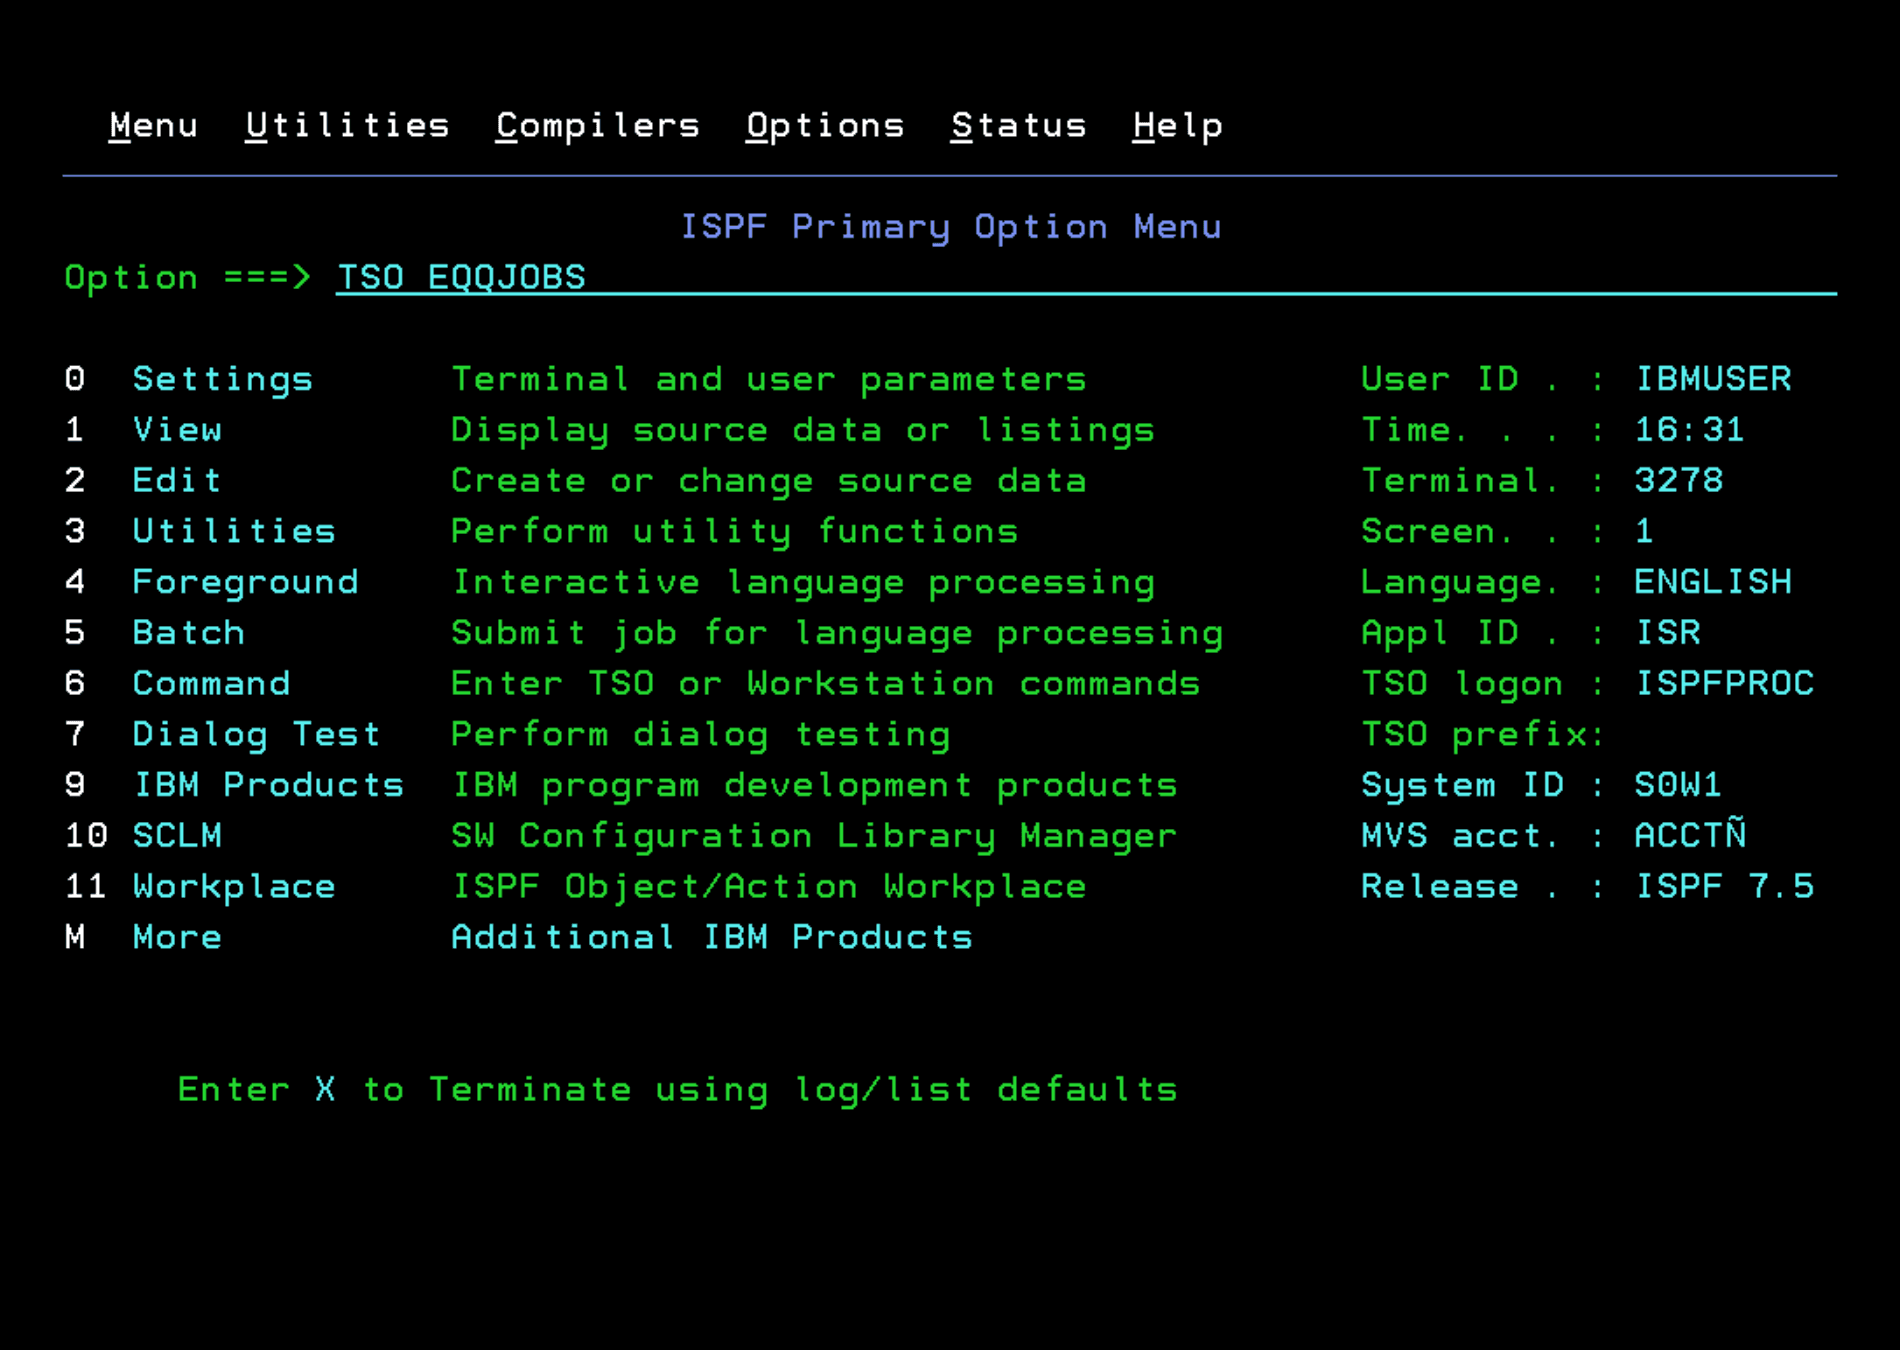
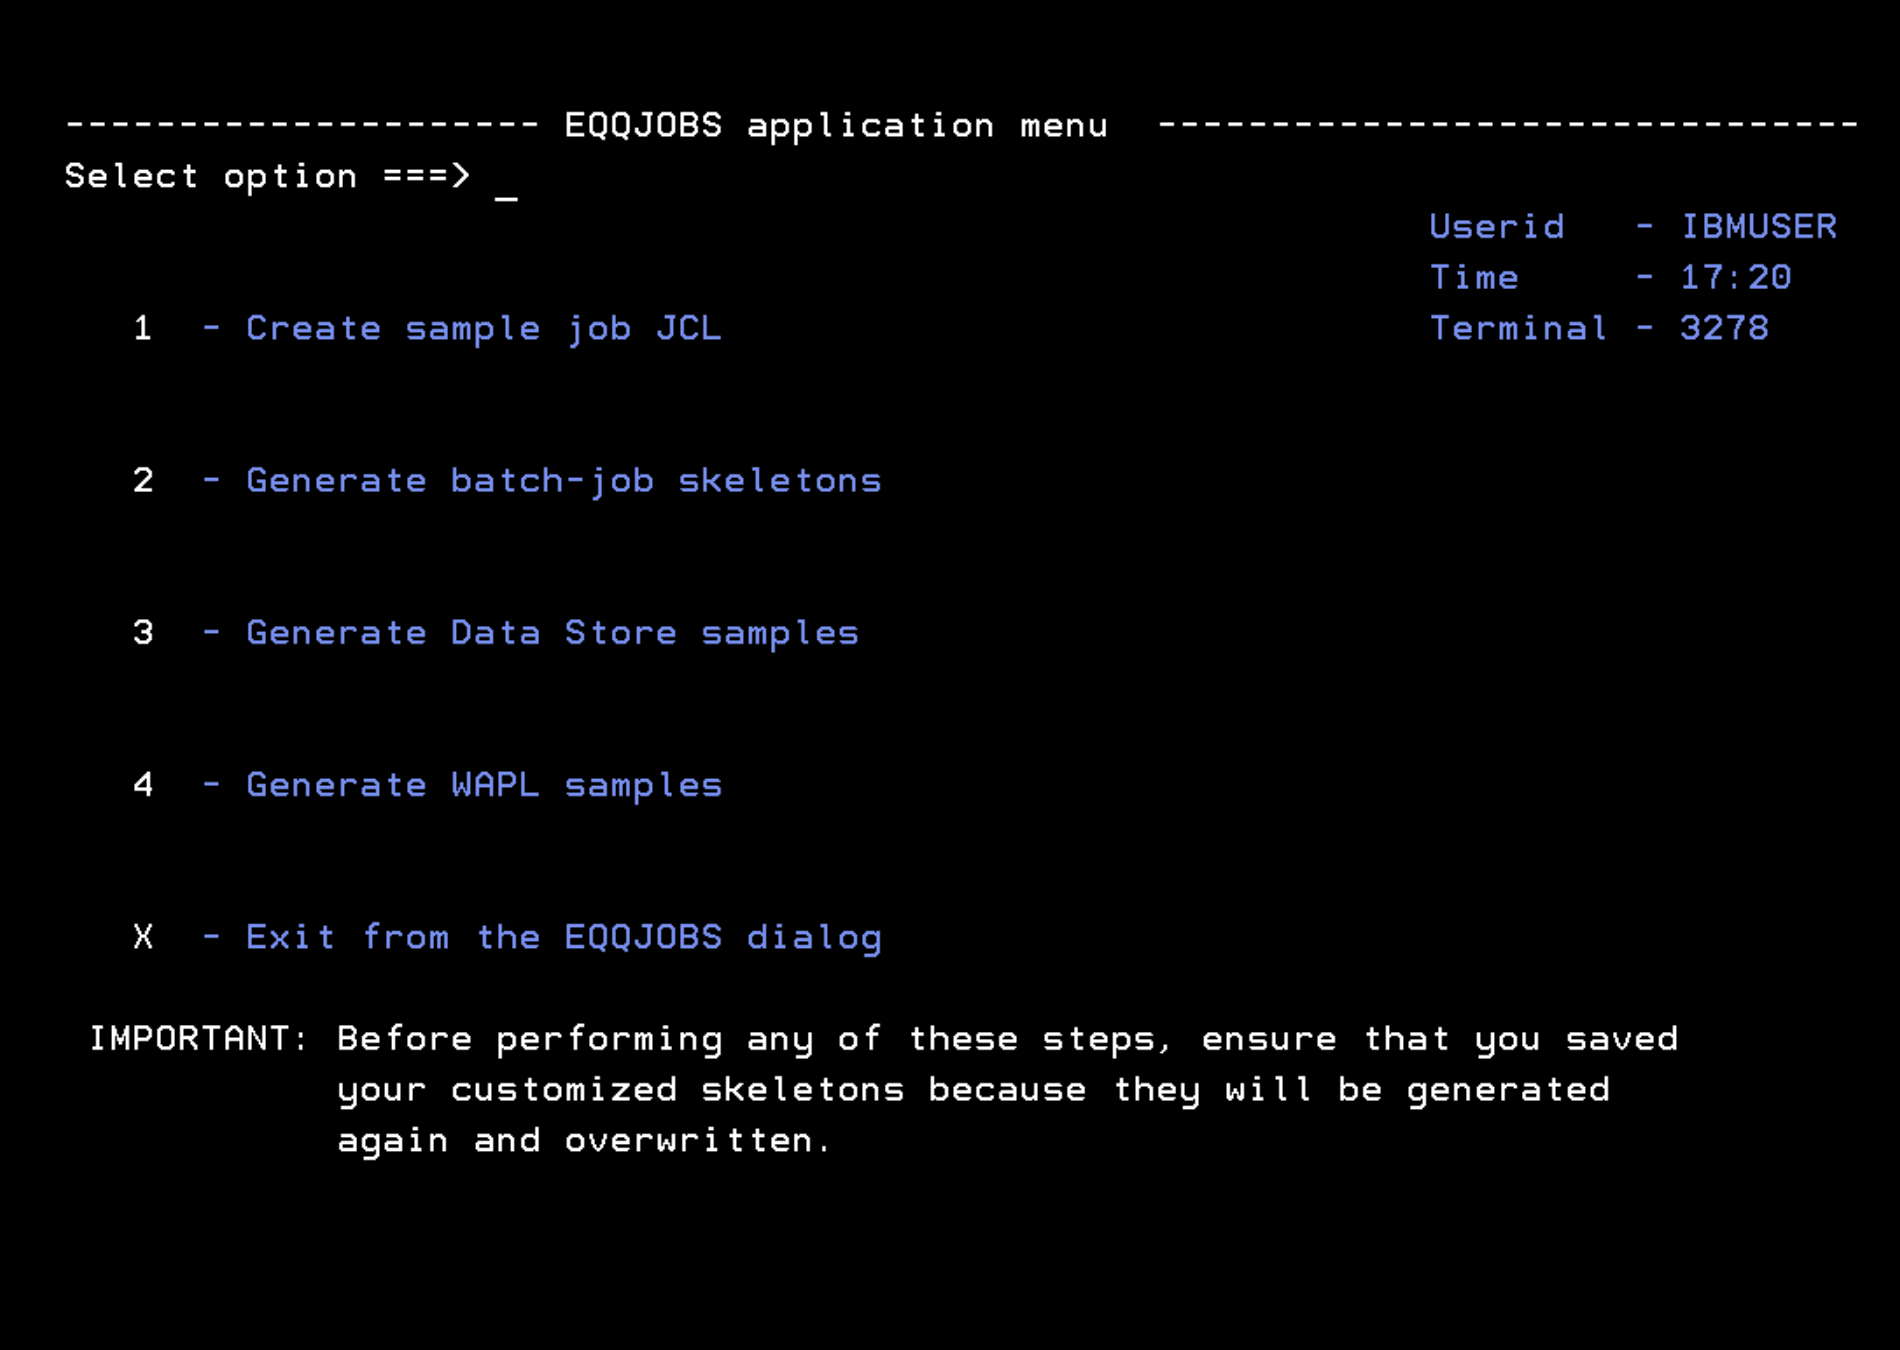
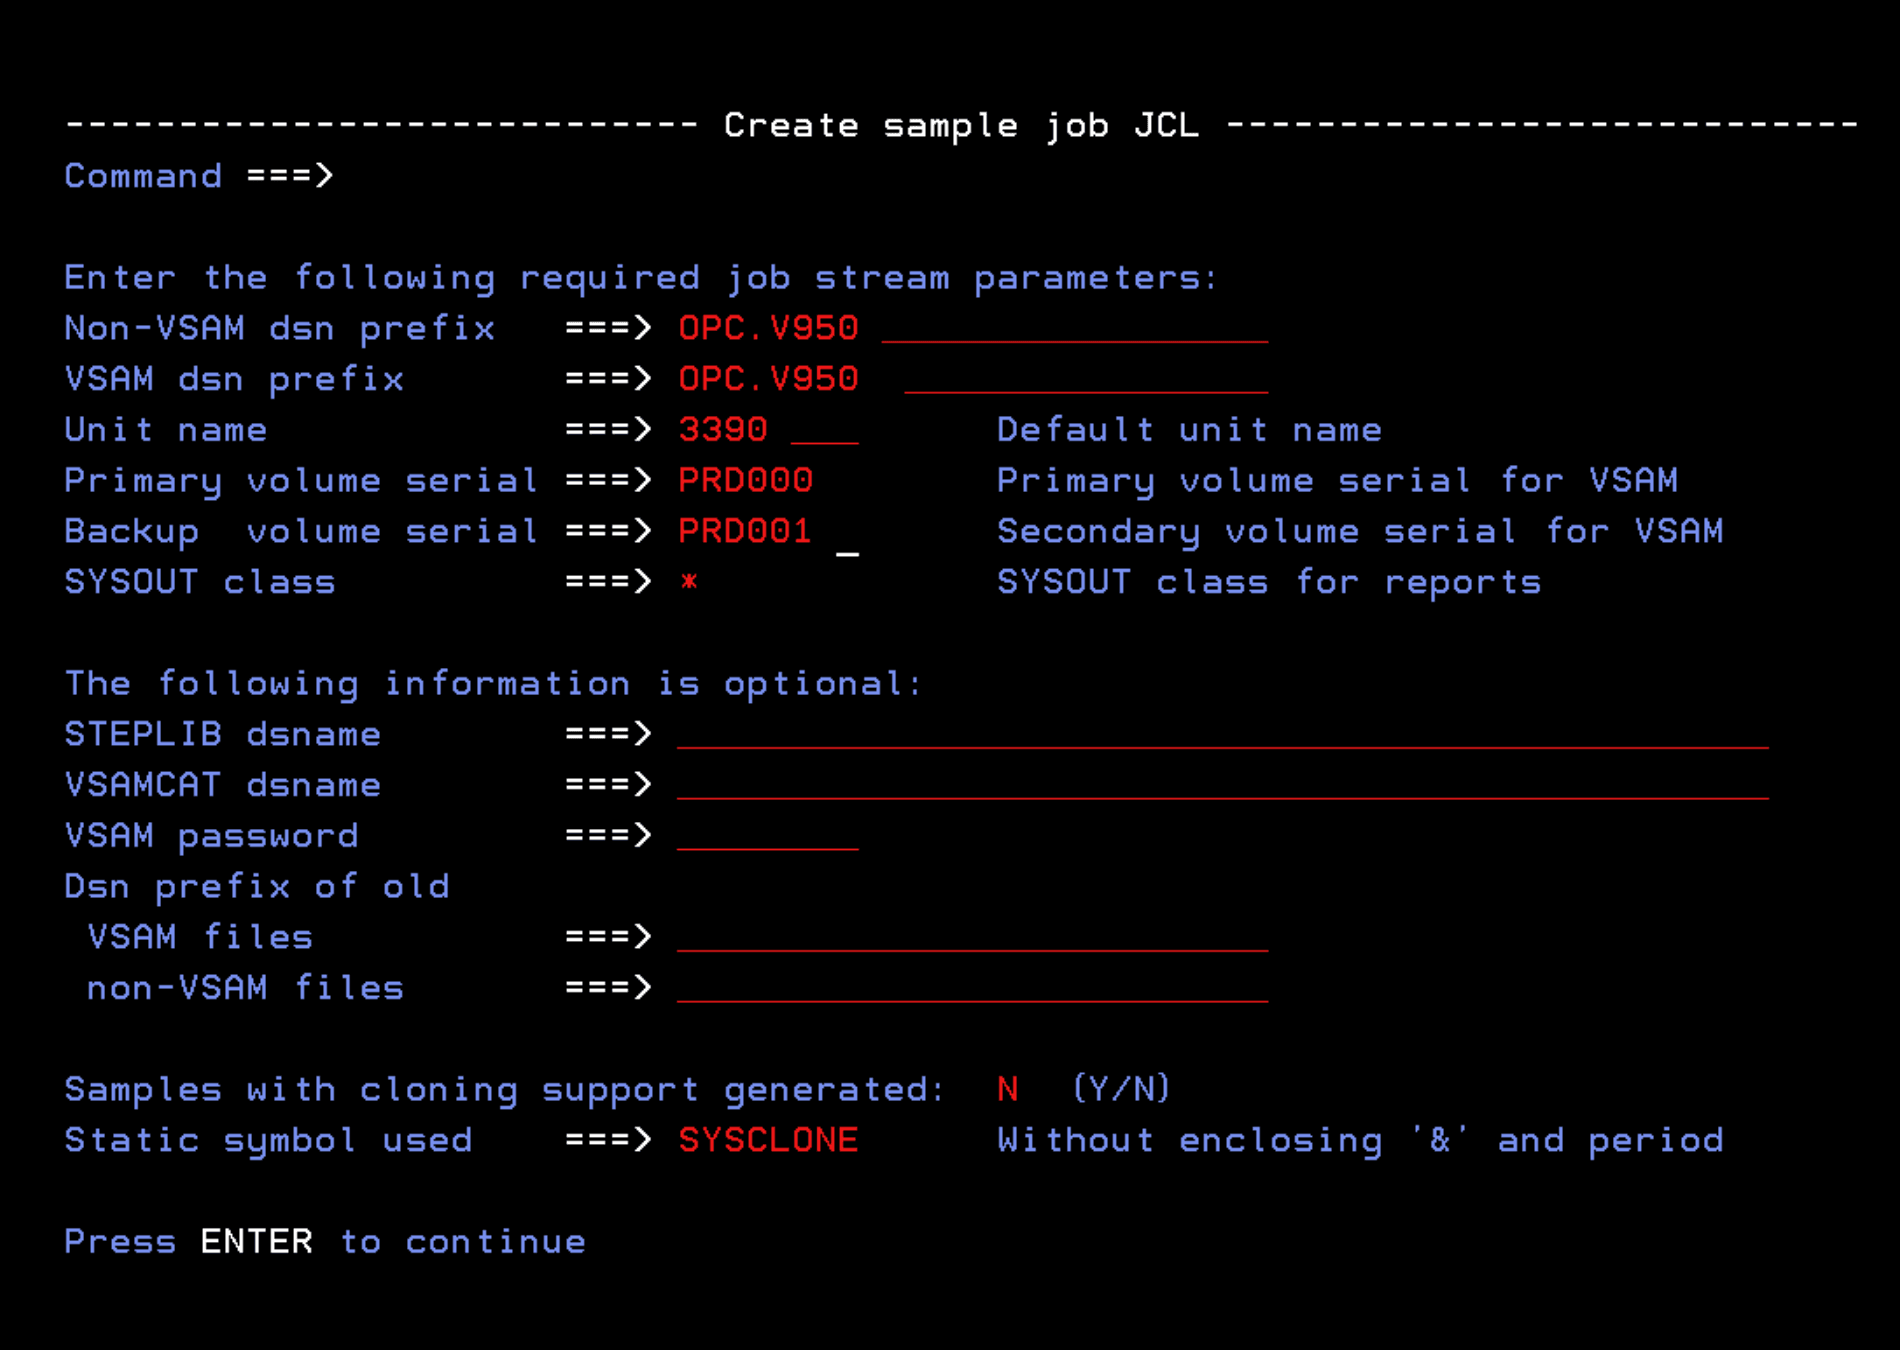
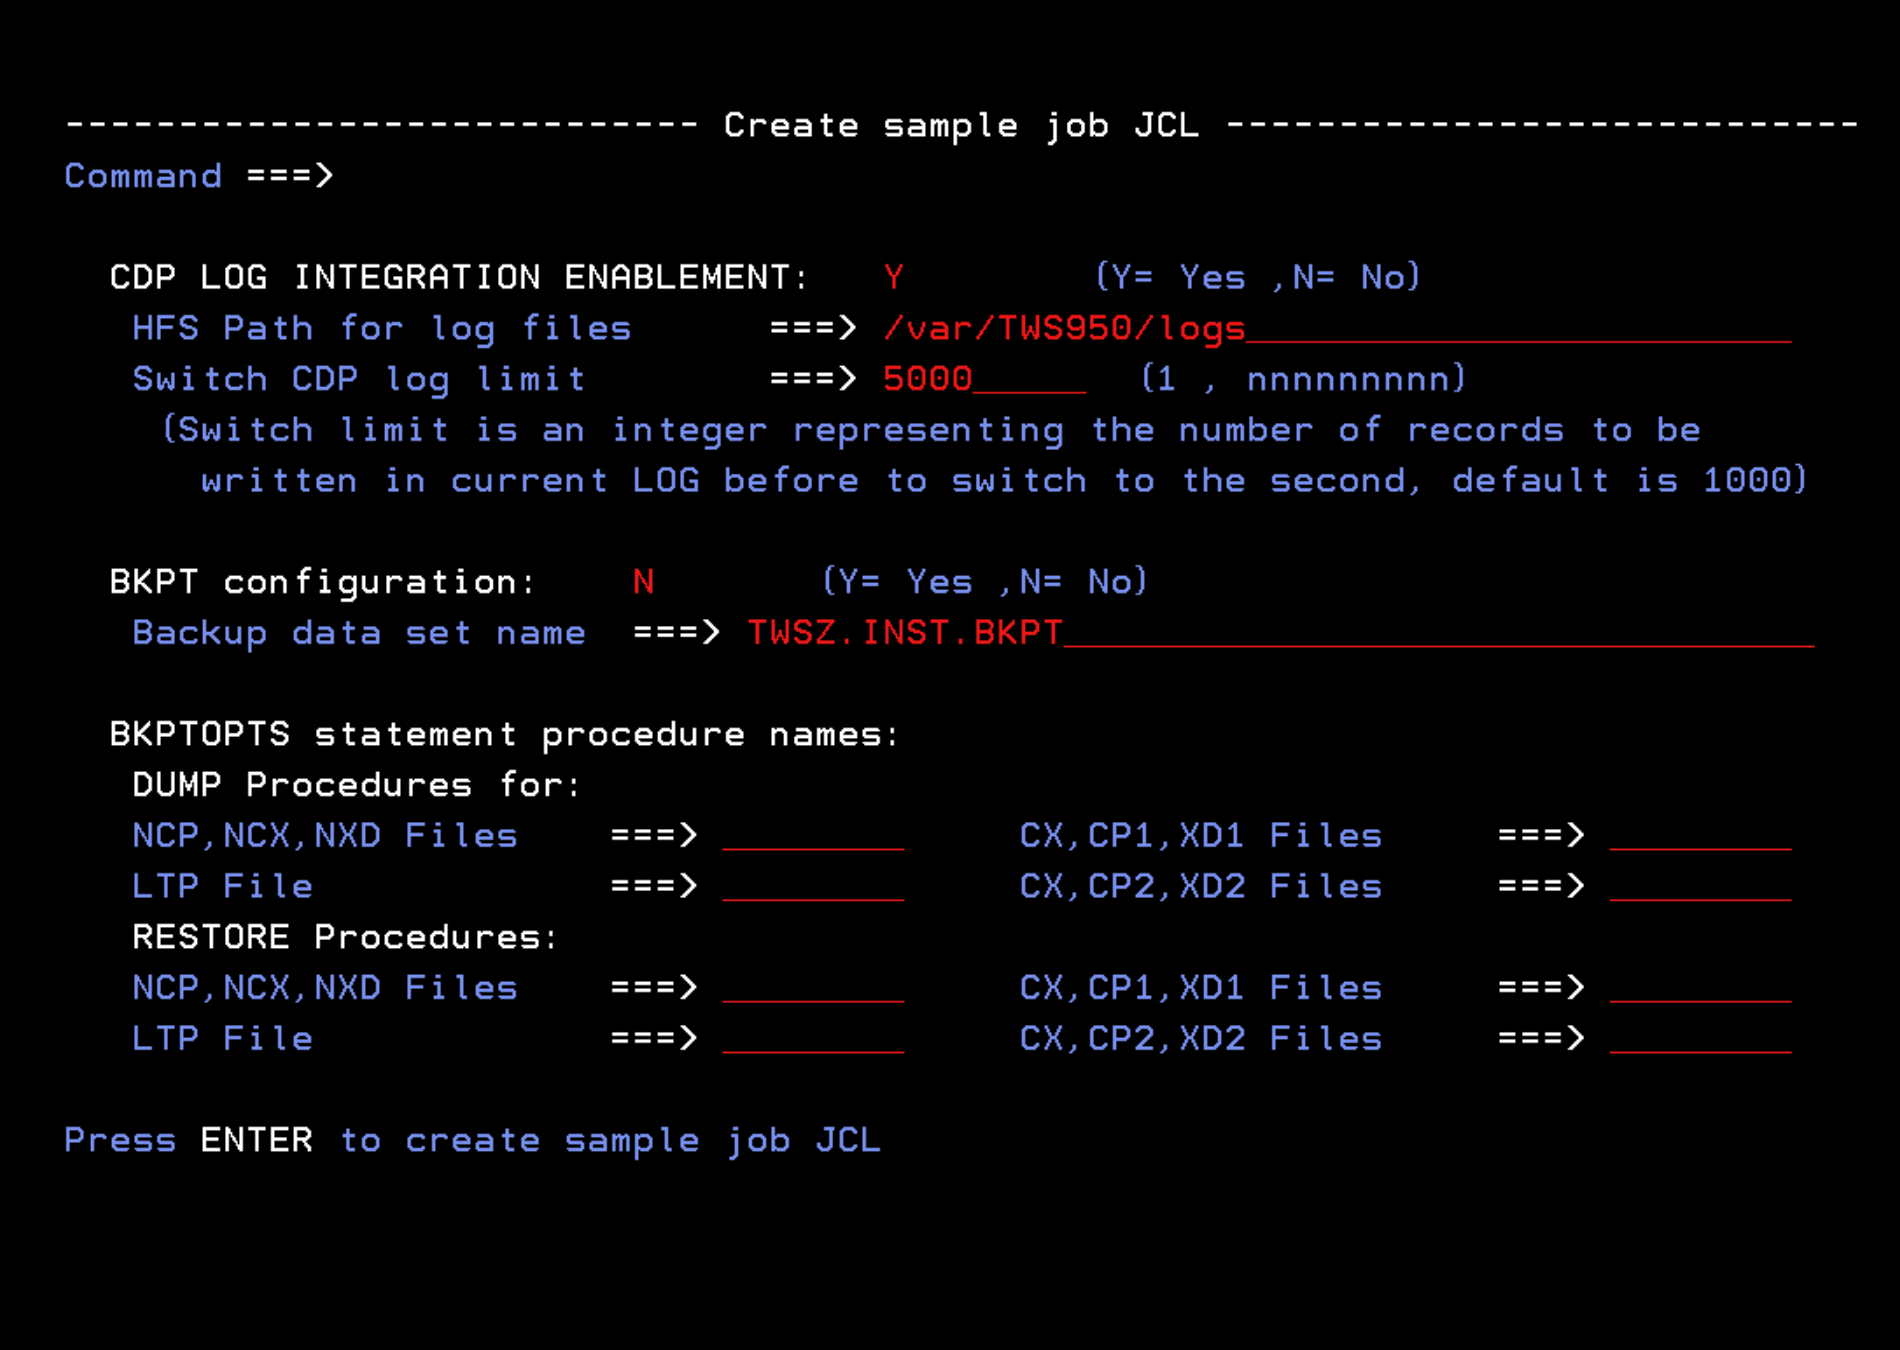
From the main TWS installation panel, we will enter option 1 - Create sample job JCL.
We add a job card:
//TWS95INS JOB 'TWS INSTALL',CLASS=A,MSGCLASS=Q,
//      MSGLEVEL=(1,1),NOTIFY=&SYSUID
We adjust the library names according to our requirements.
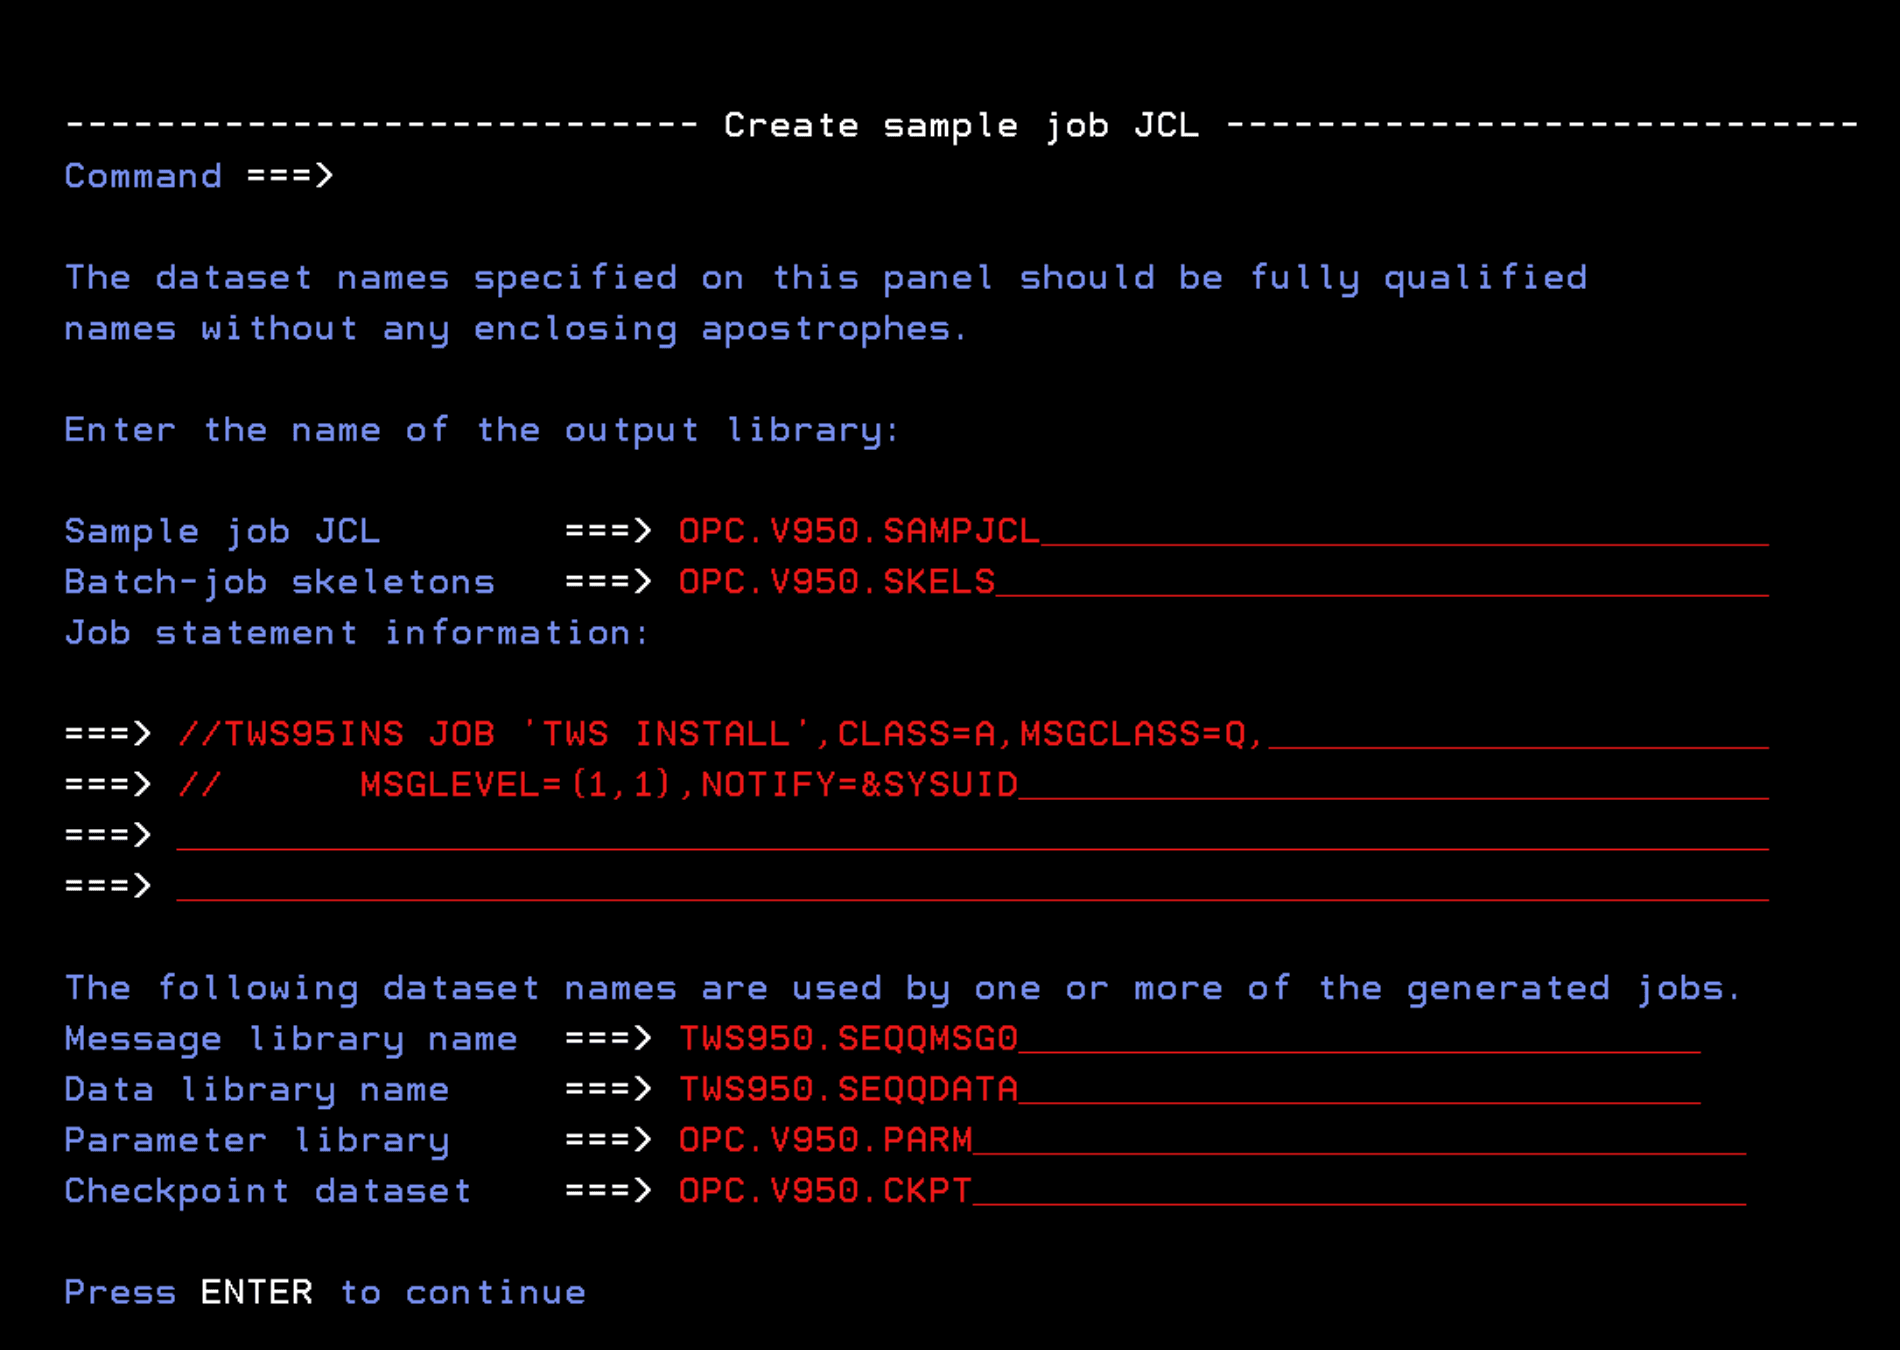
We adjust the libraries and the disk names.
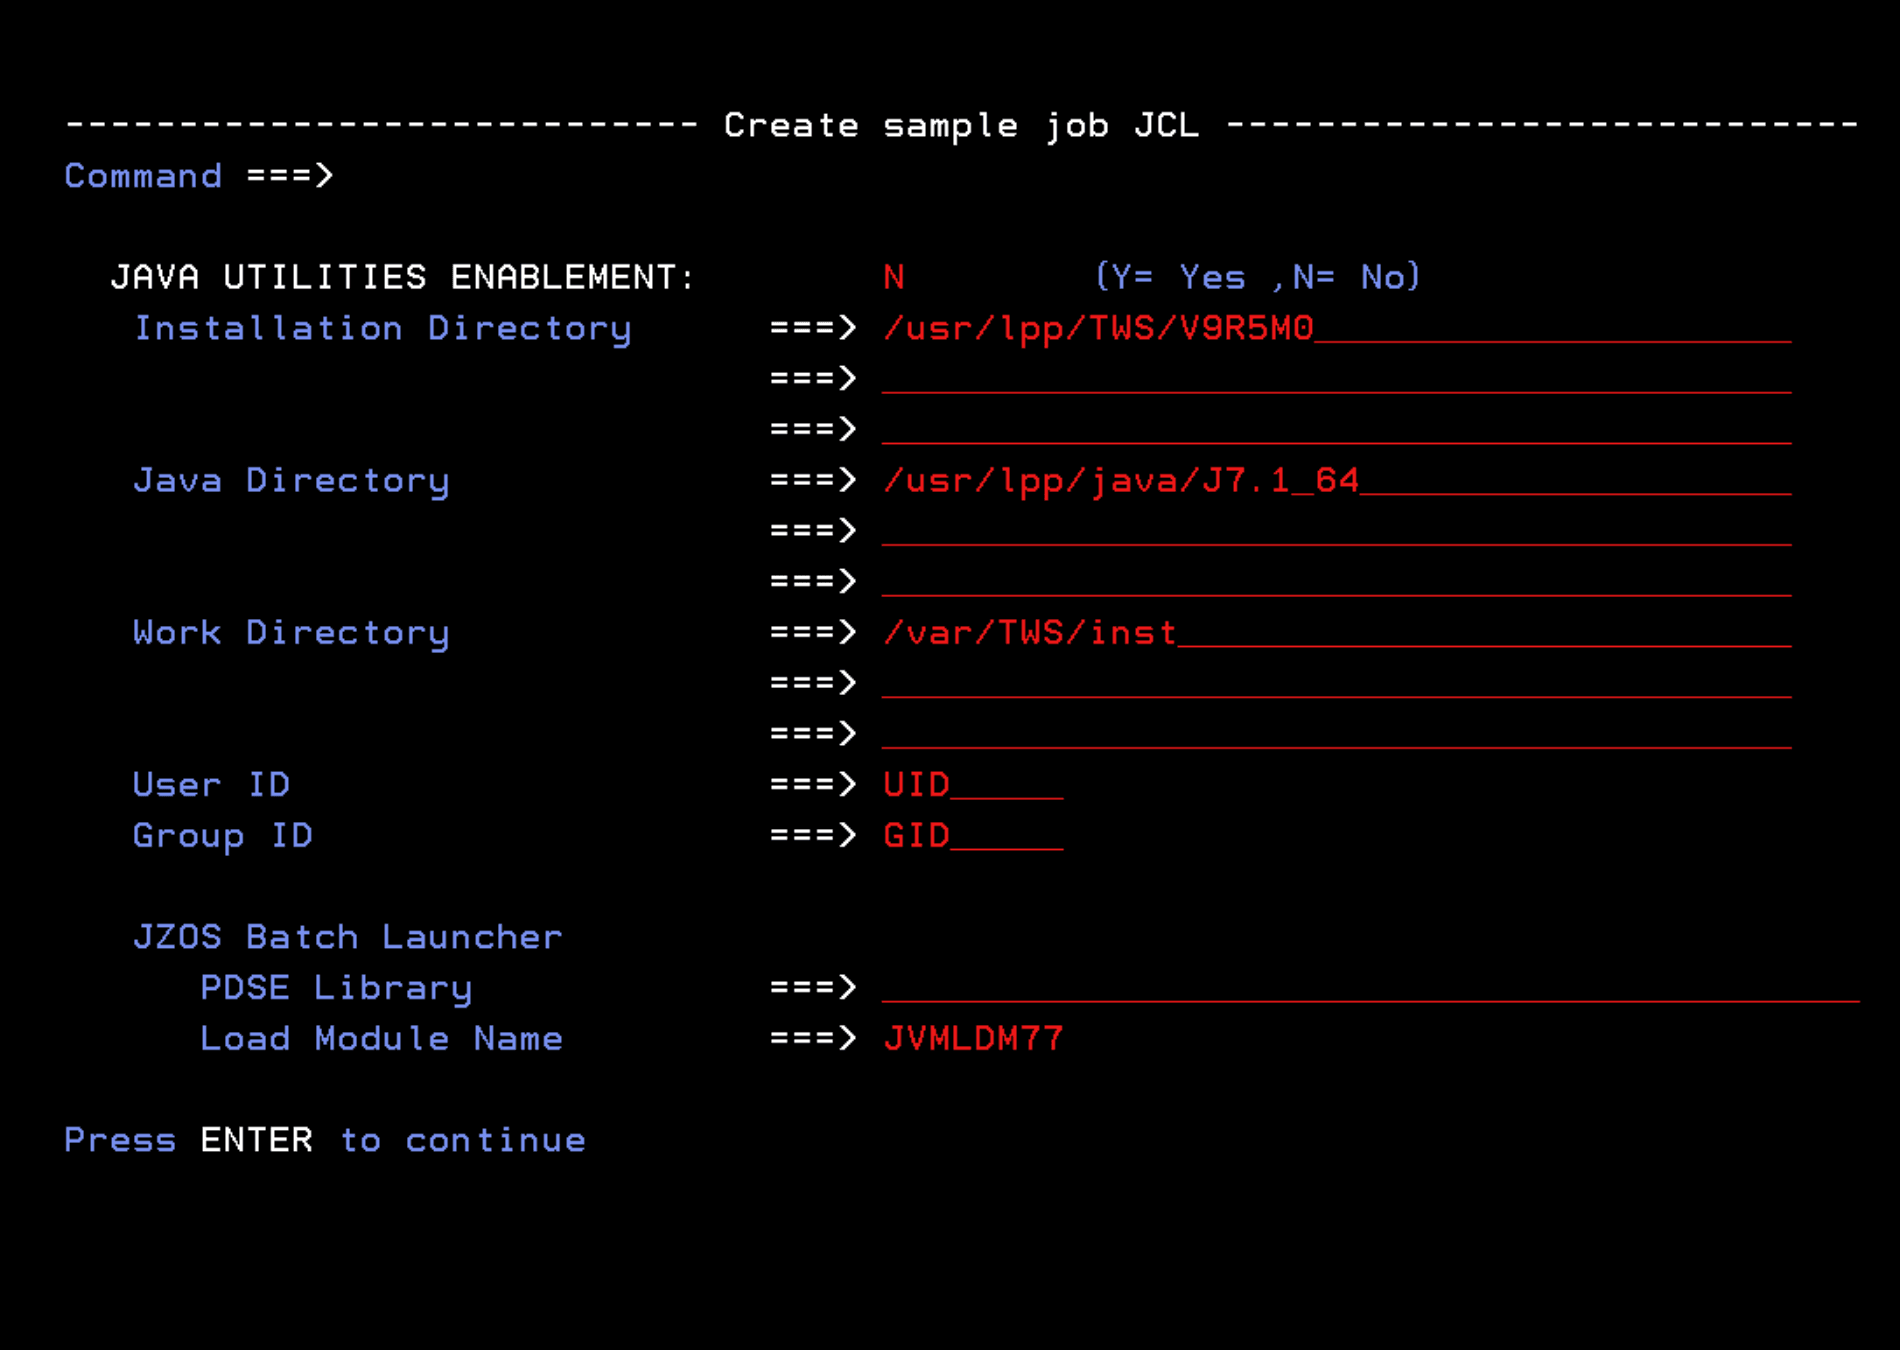
We leave the options at N (default). If I ever want to configure it, I will do it in the future.
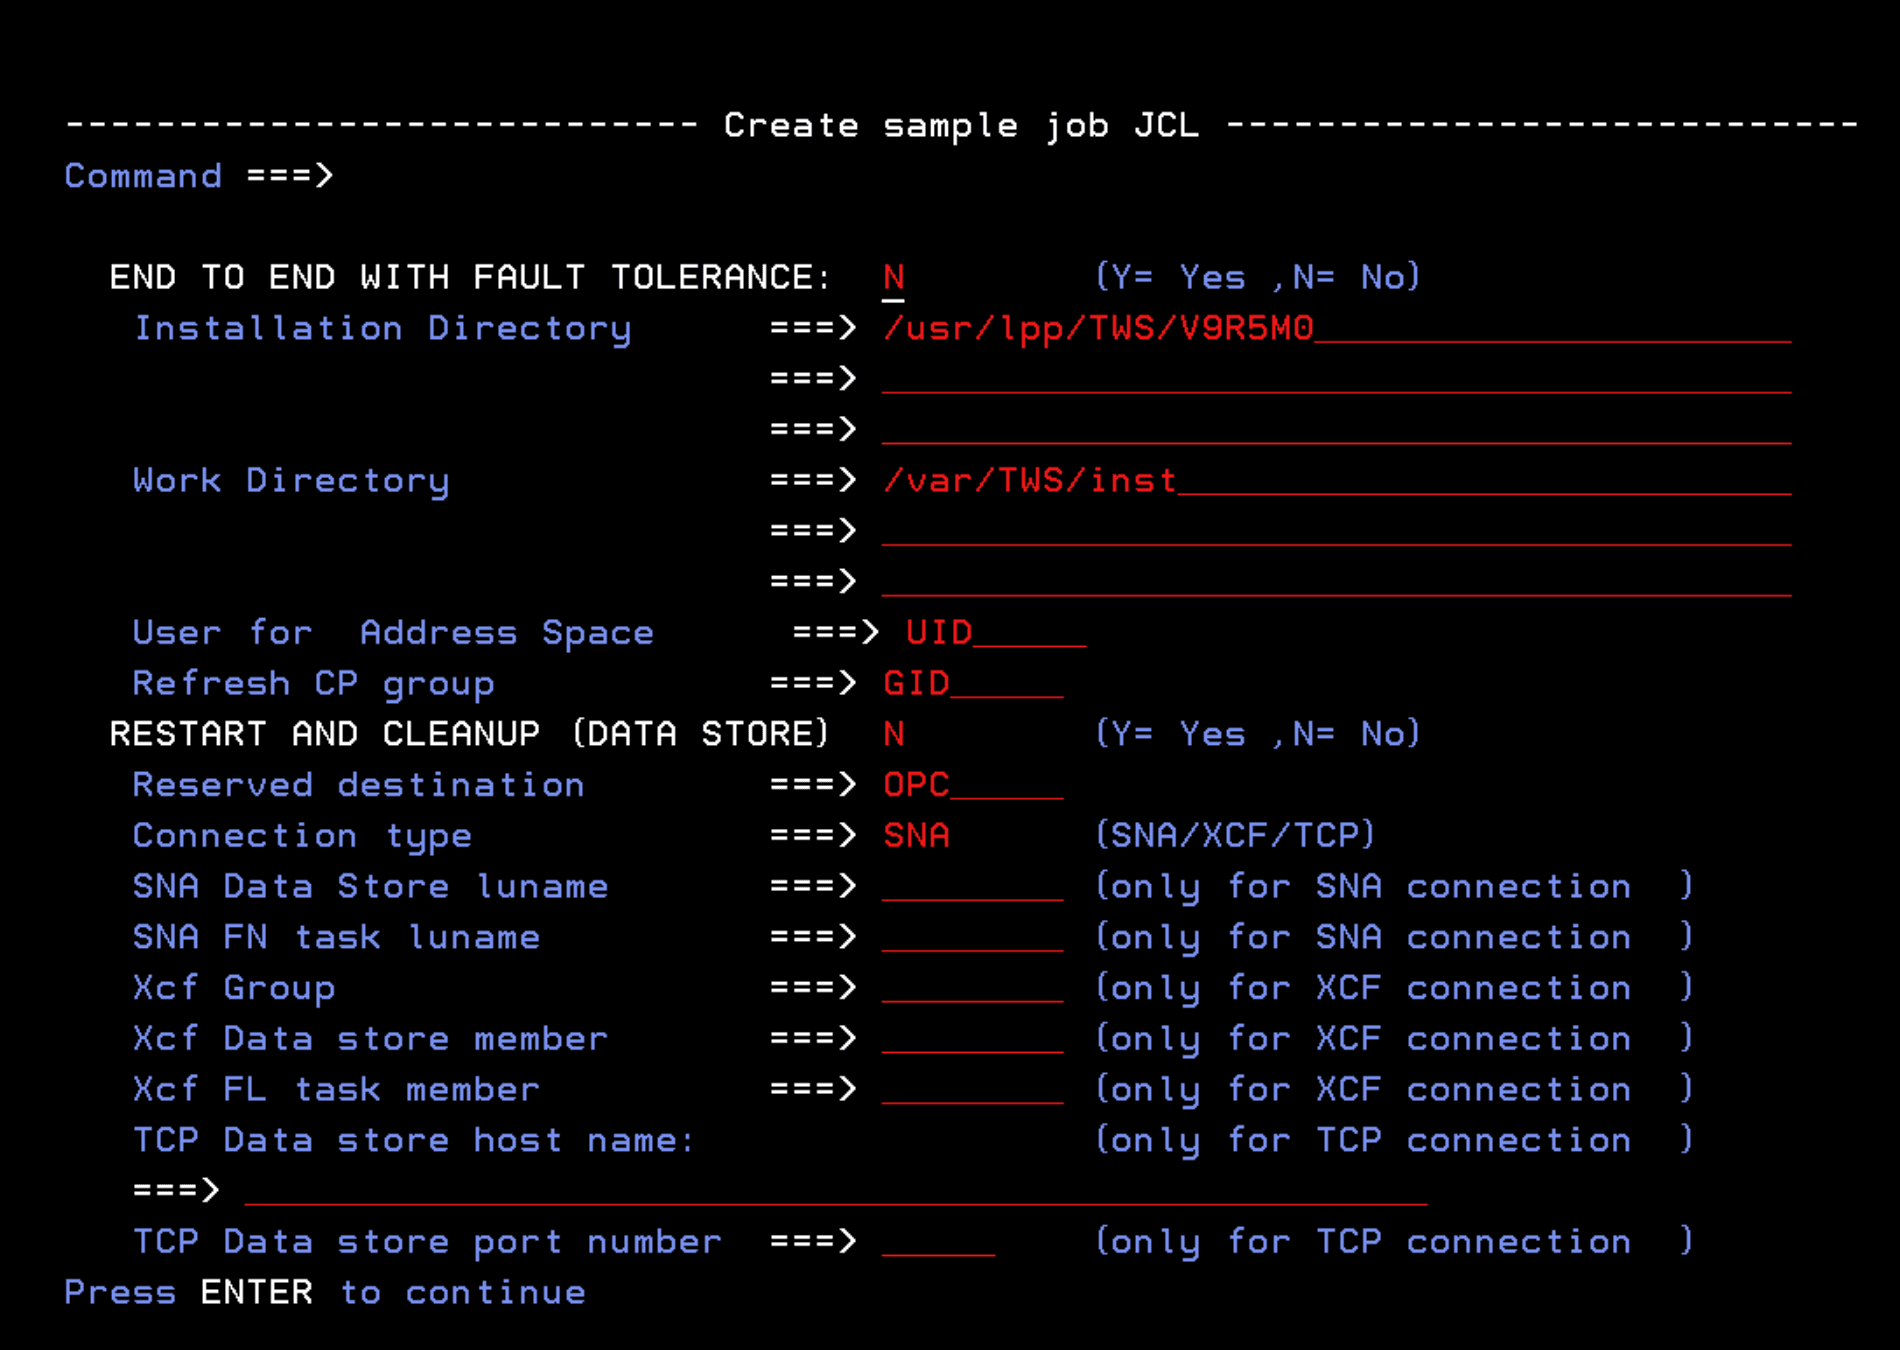
We leave the option at N.
In my case, I will activate the “MLOG SWITCH” option. This option is used to switch MLOG files when a certain number of records is reached.
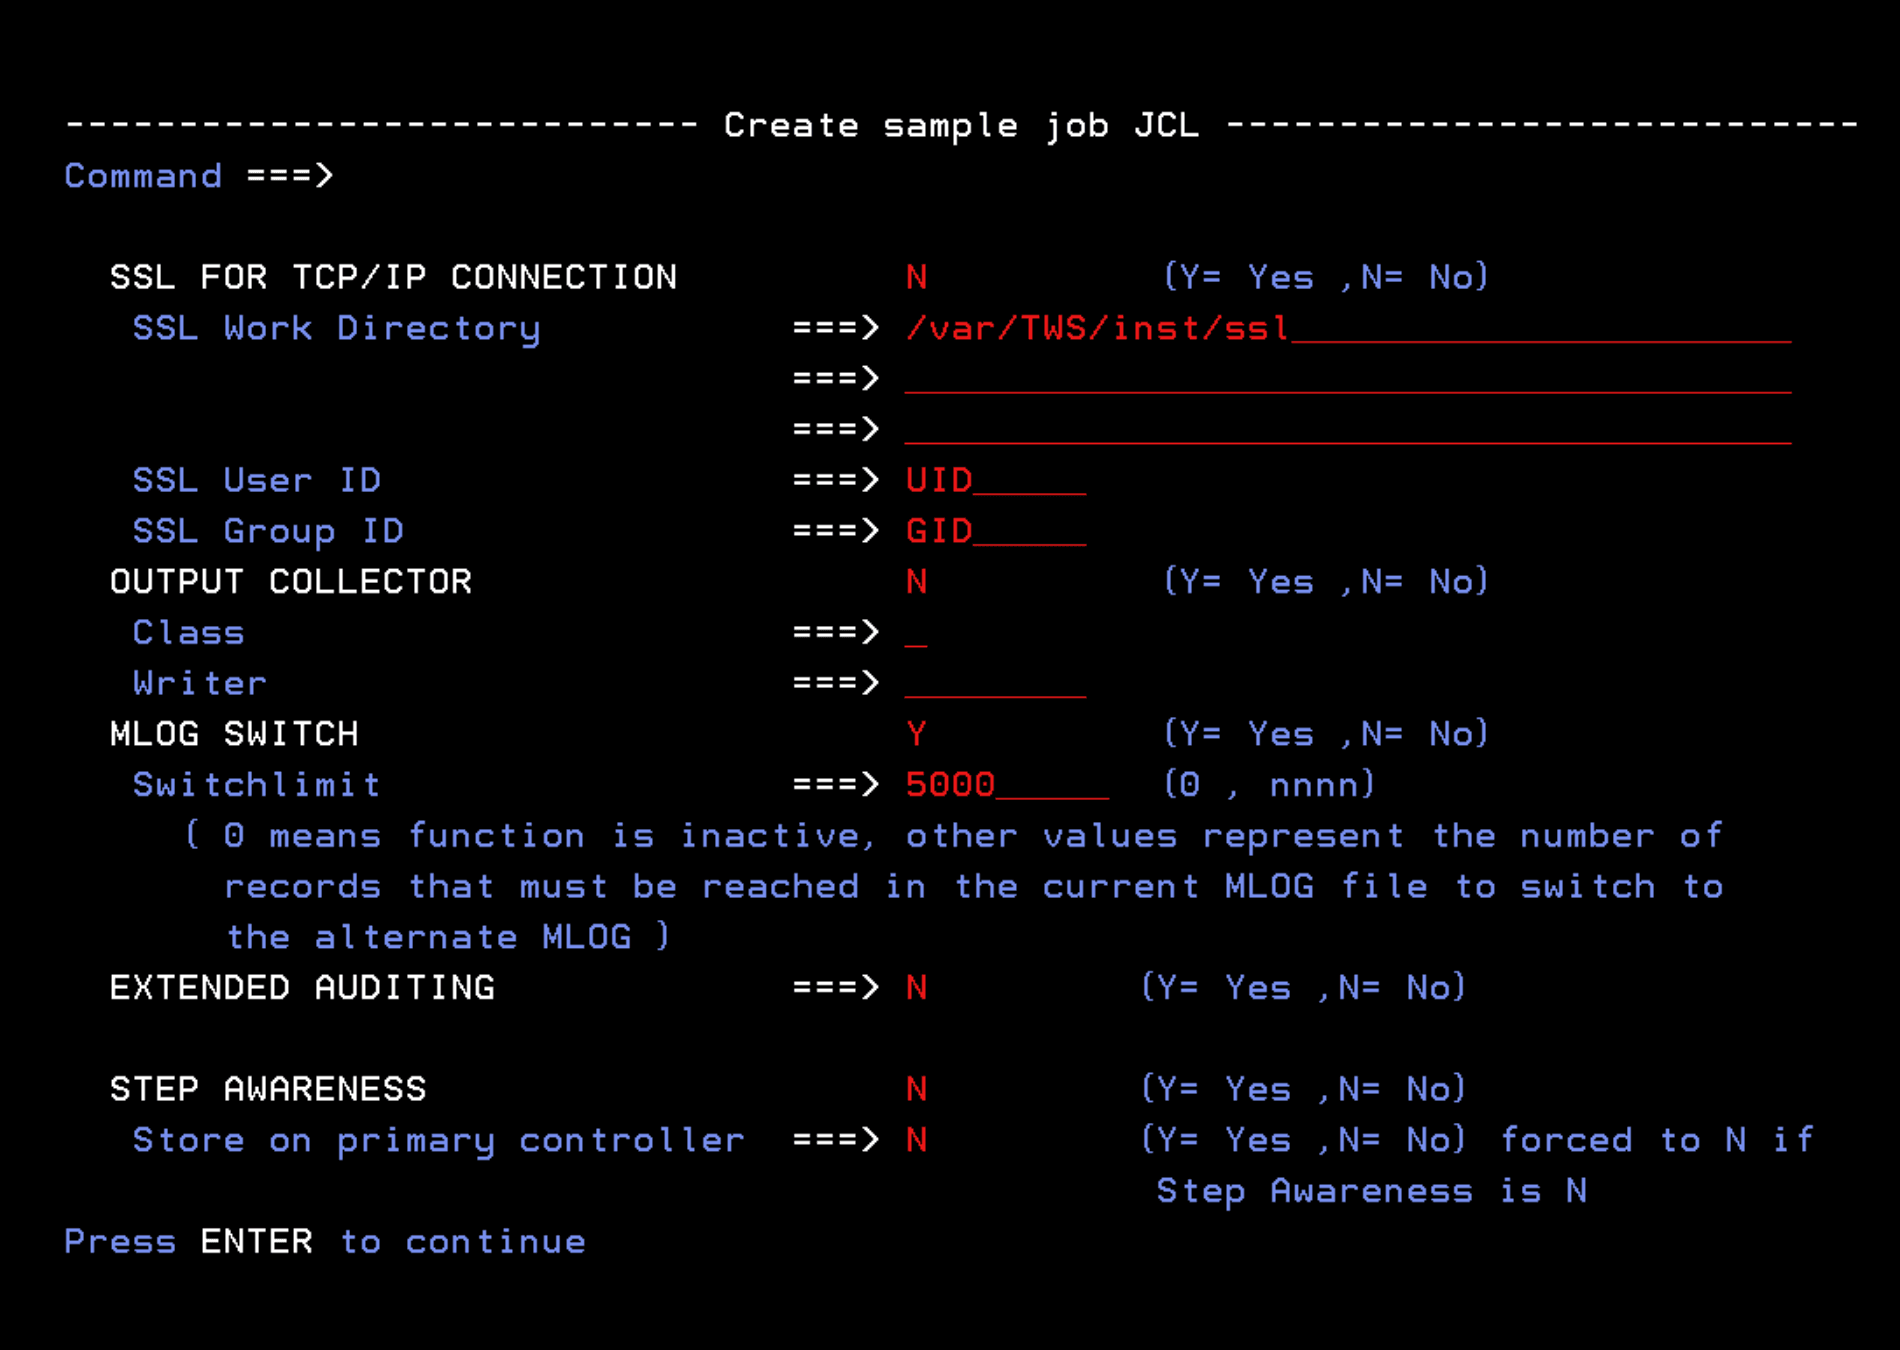
I’m going to activate the “CDP LOG INTEGRATION ENABLEMENT” option to test it. It’s used to integrate TWS logs with the “IBM Common Data Provider for z Systems” utility.
It seems like something that could be interesting for an entry.
I will use the path /var/TWS950/logs. I will modify it later if necessary.
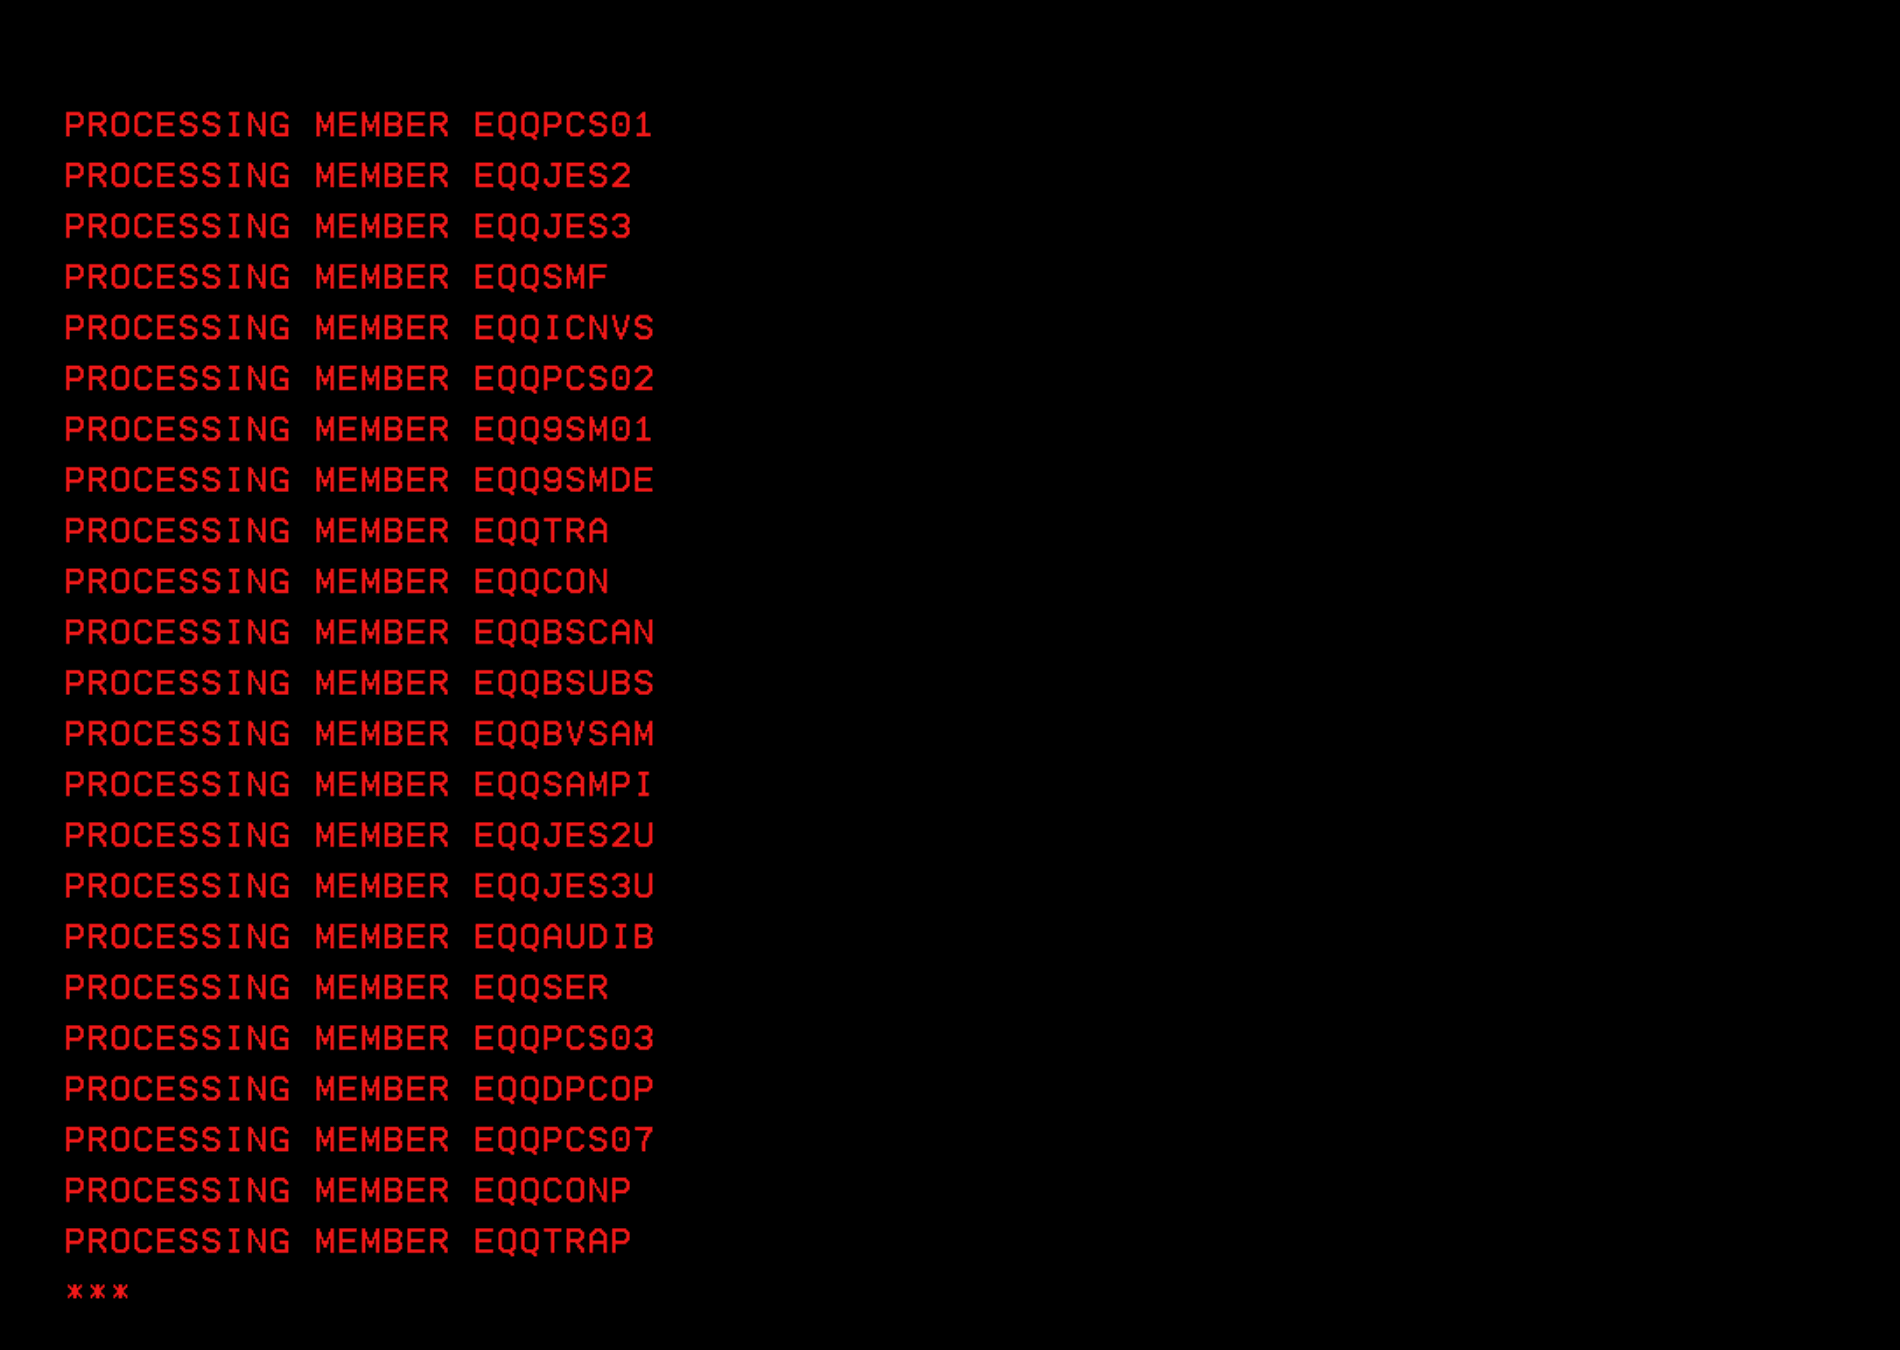
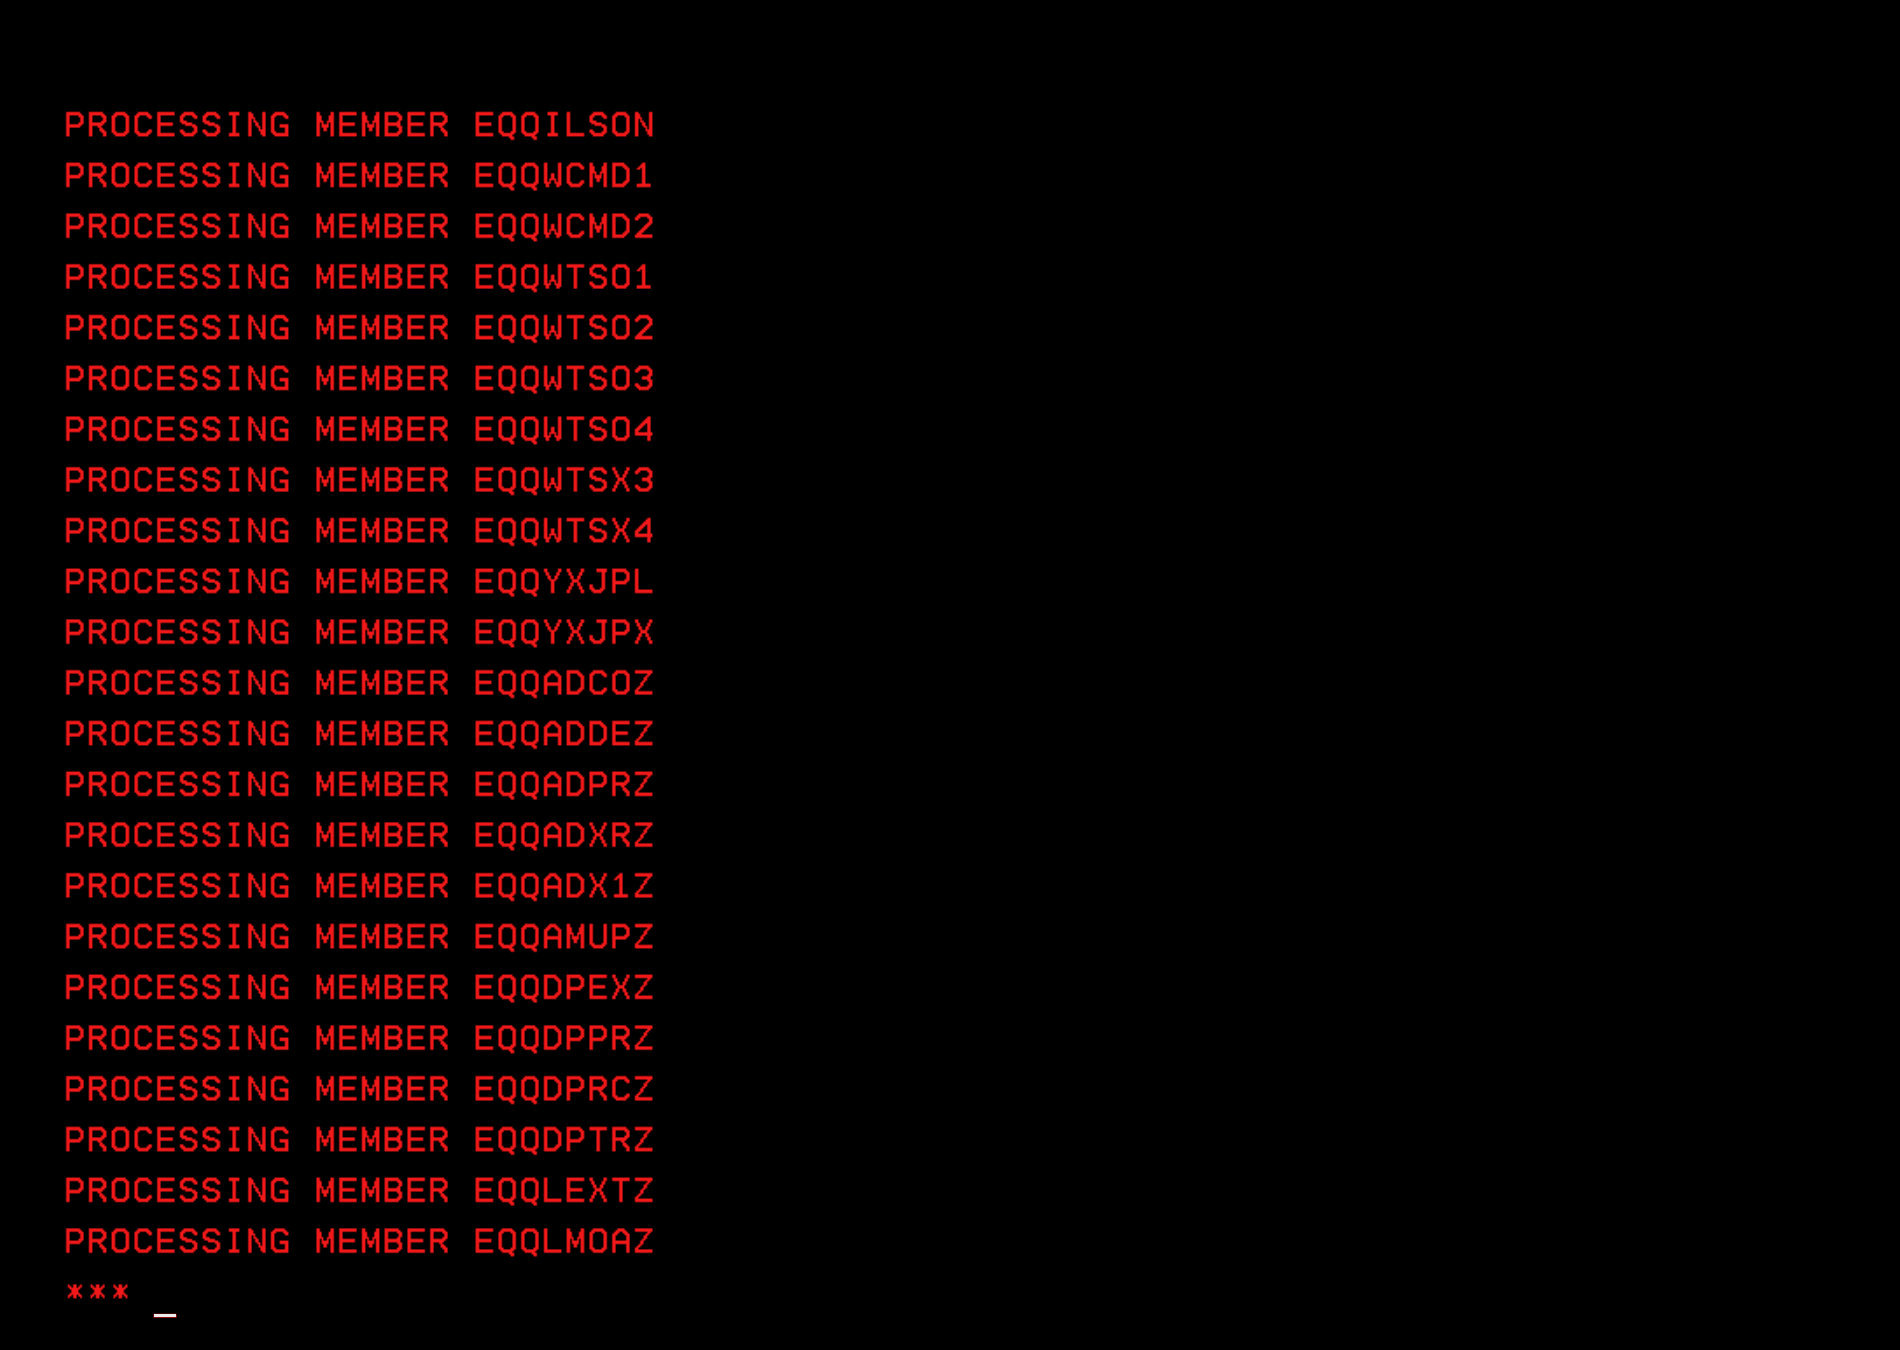
We wait until all the members are created.
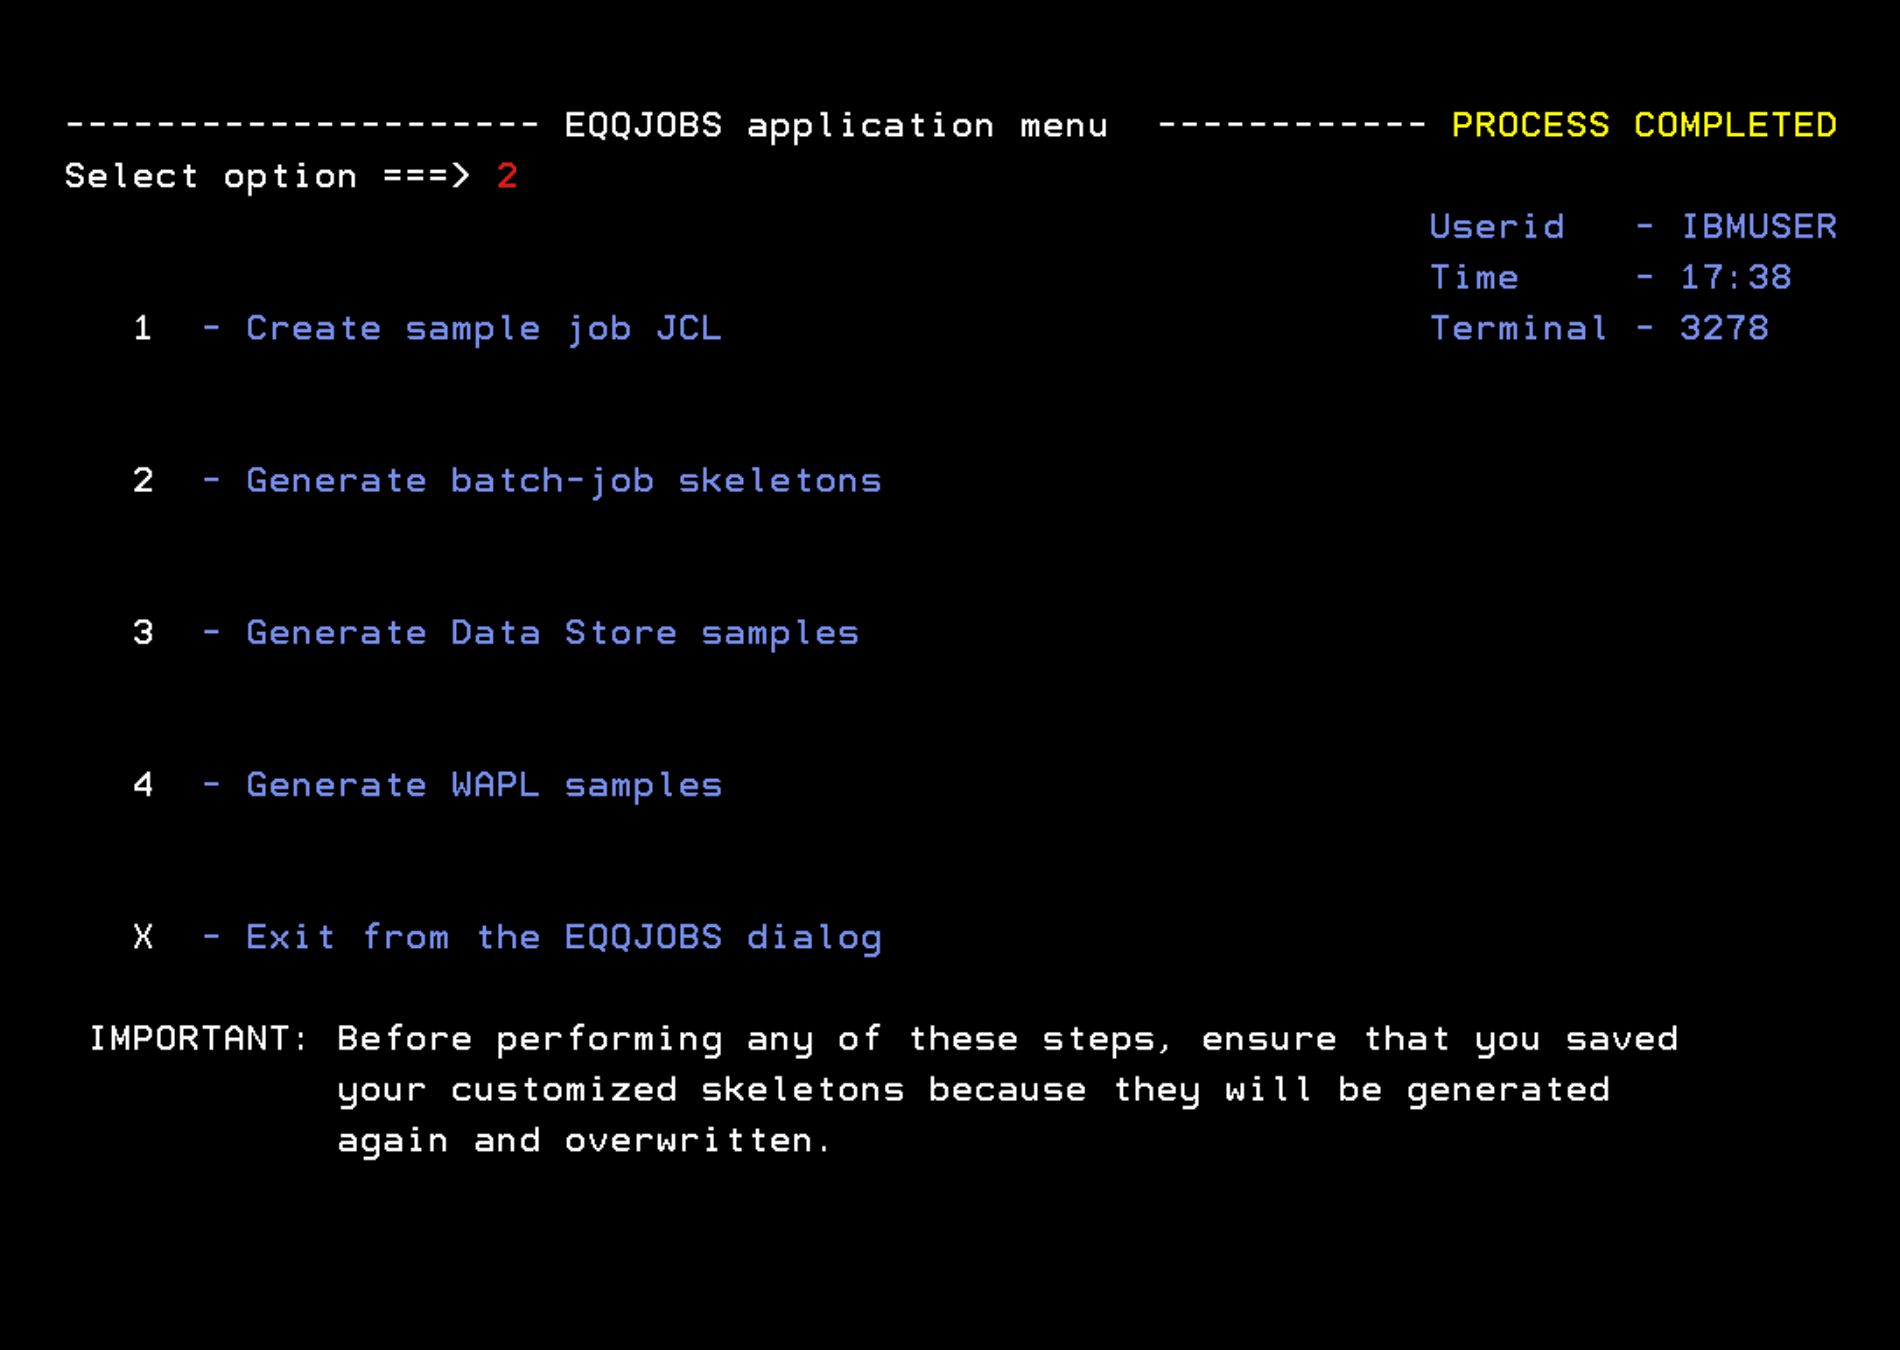
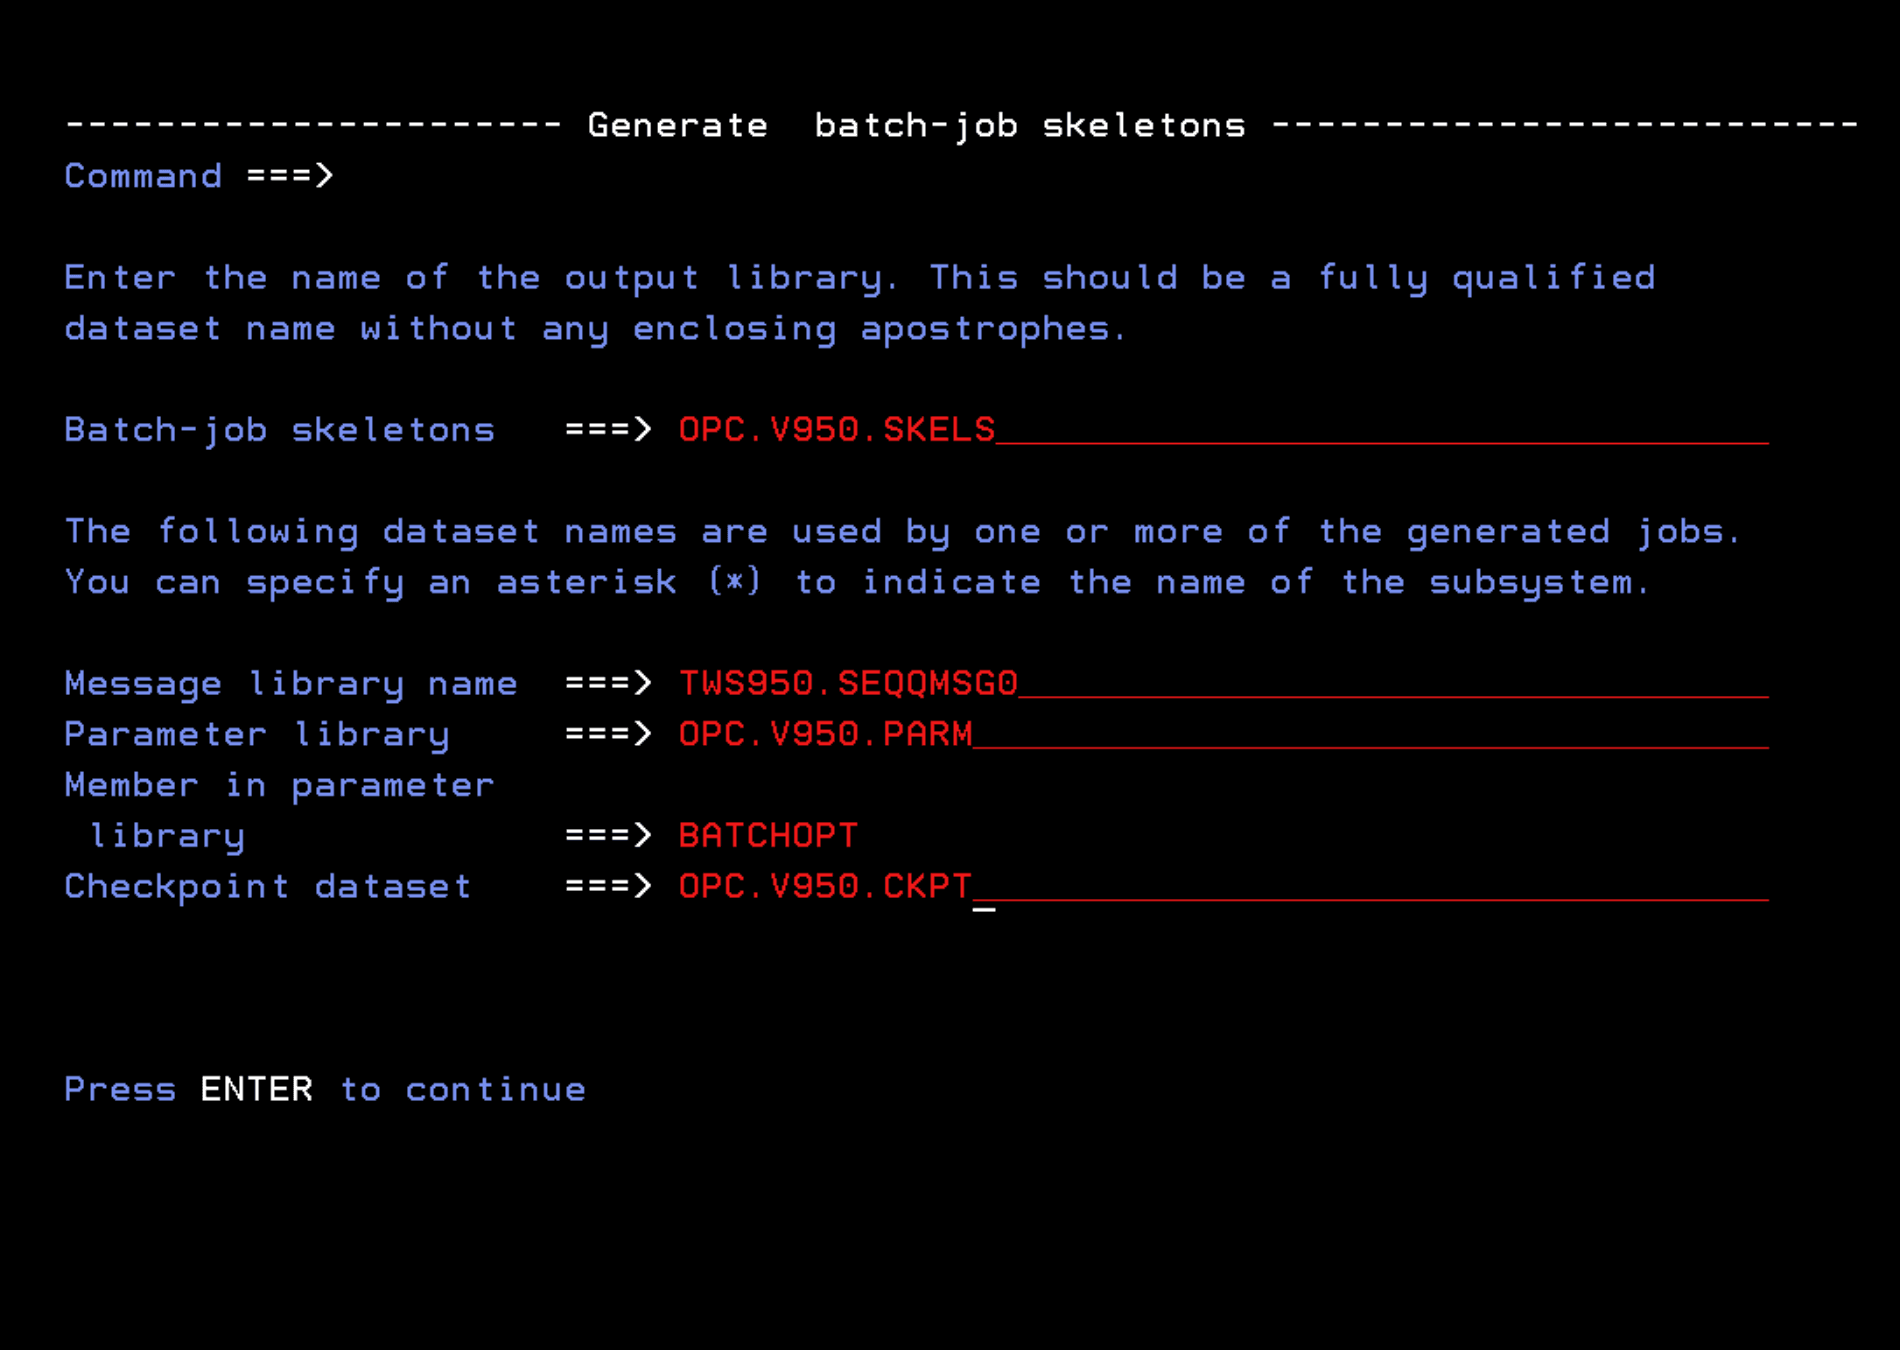
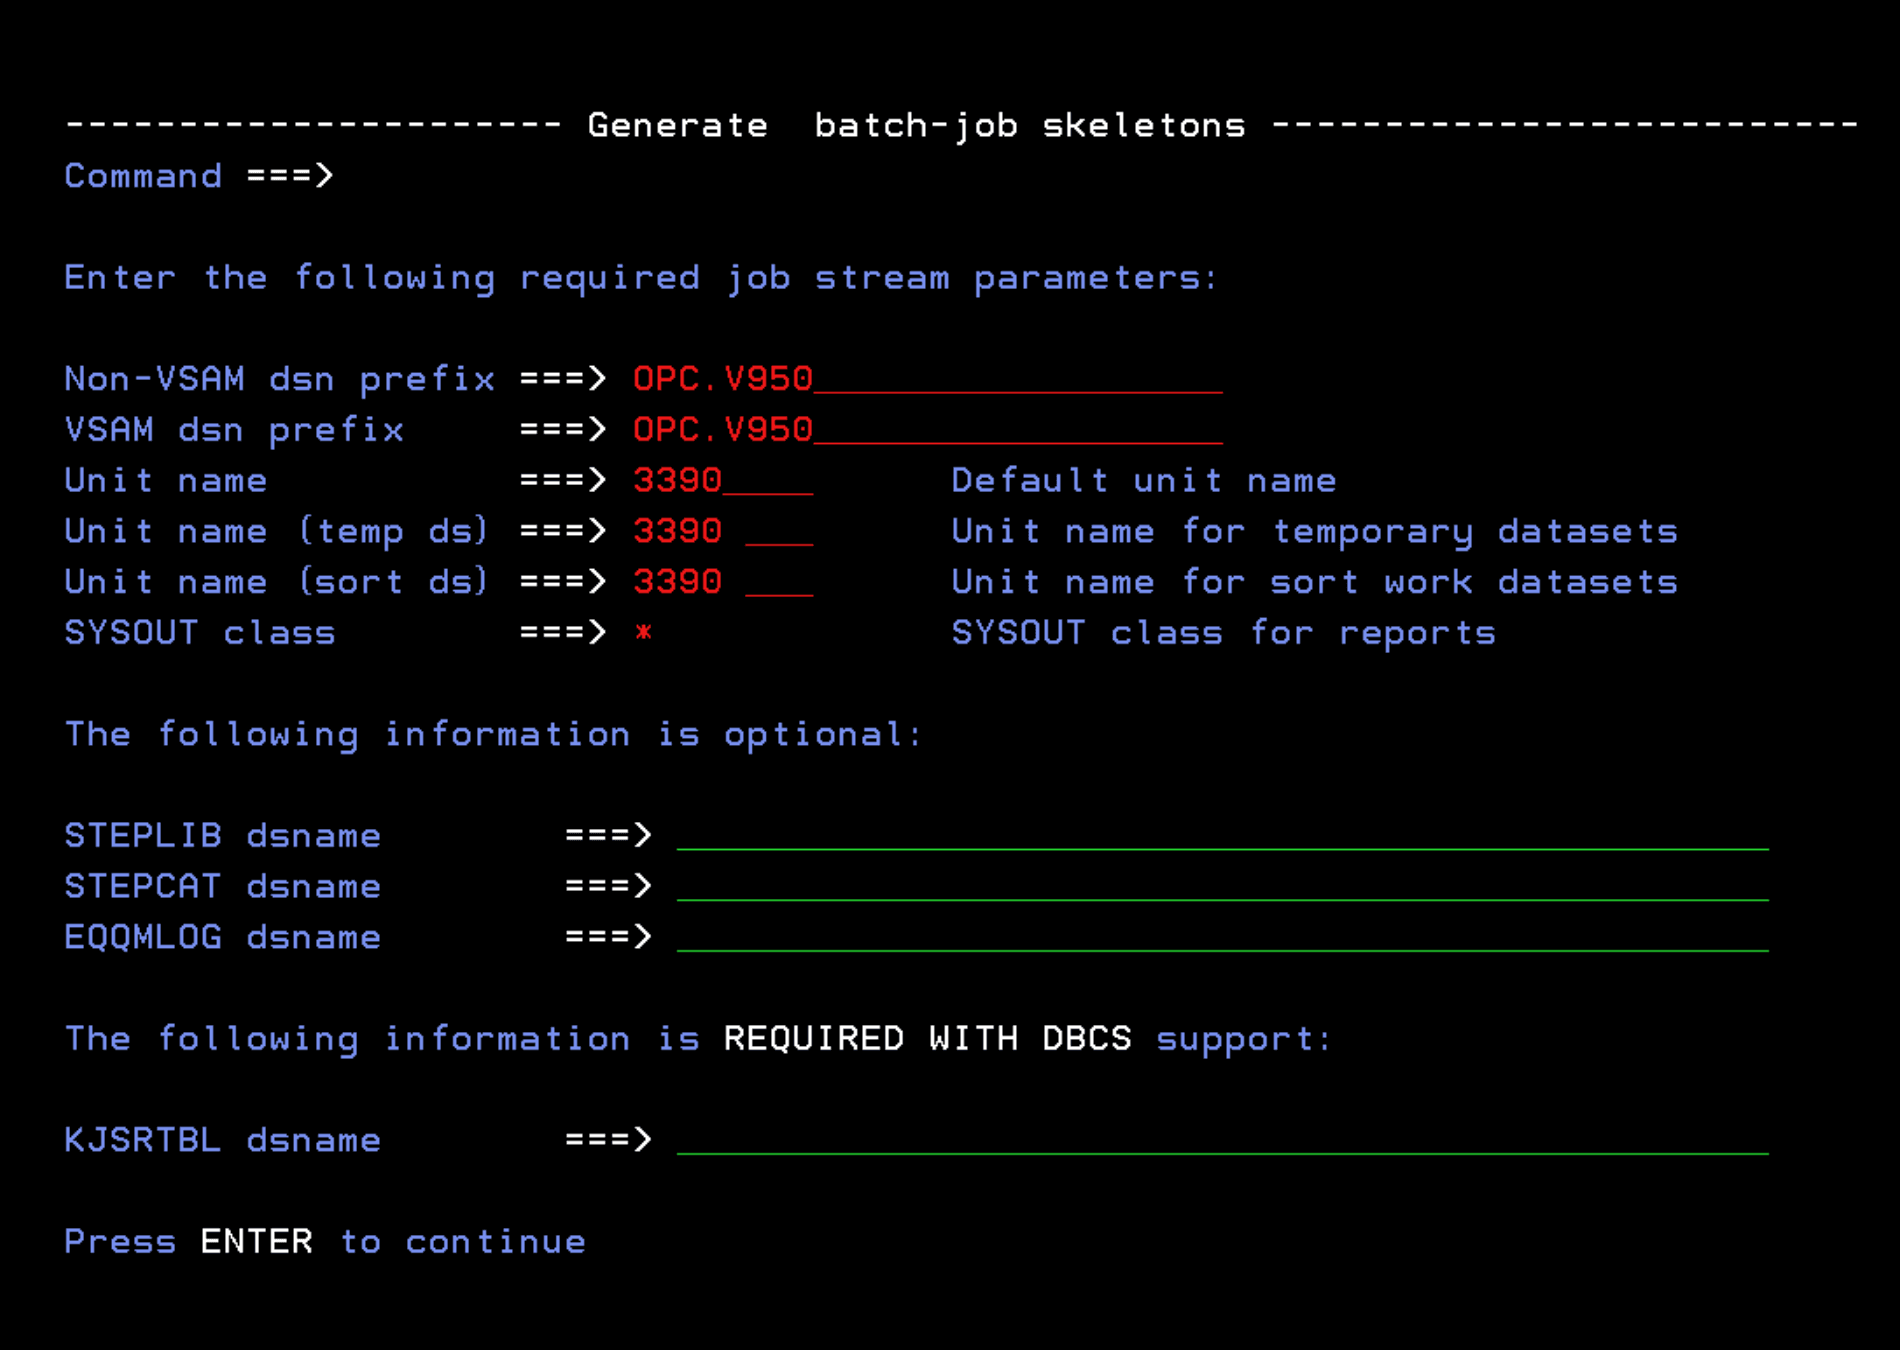
Once the process is finished, we enter option 2 - Generate batch-job skeletons.
We adapt the configuration to our installation.
I will activate the “FORMATTED REPORT OF TRACKLOG EVENTS” option.
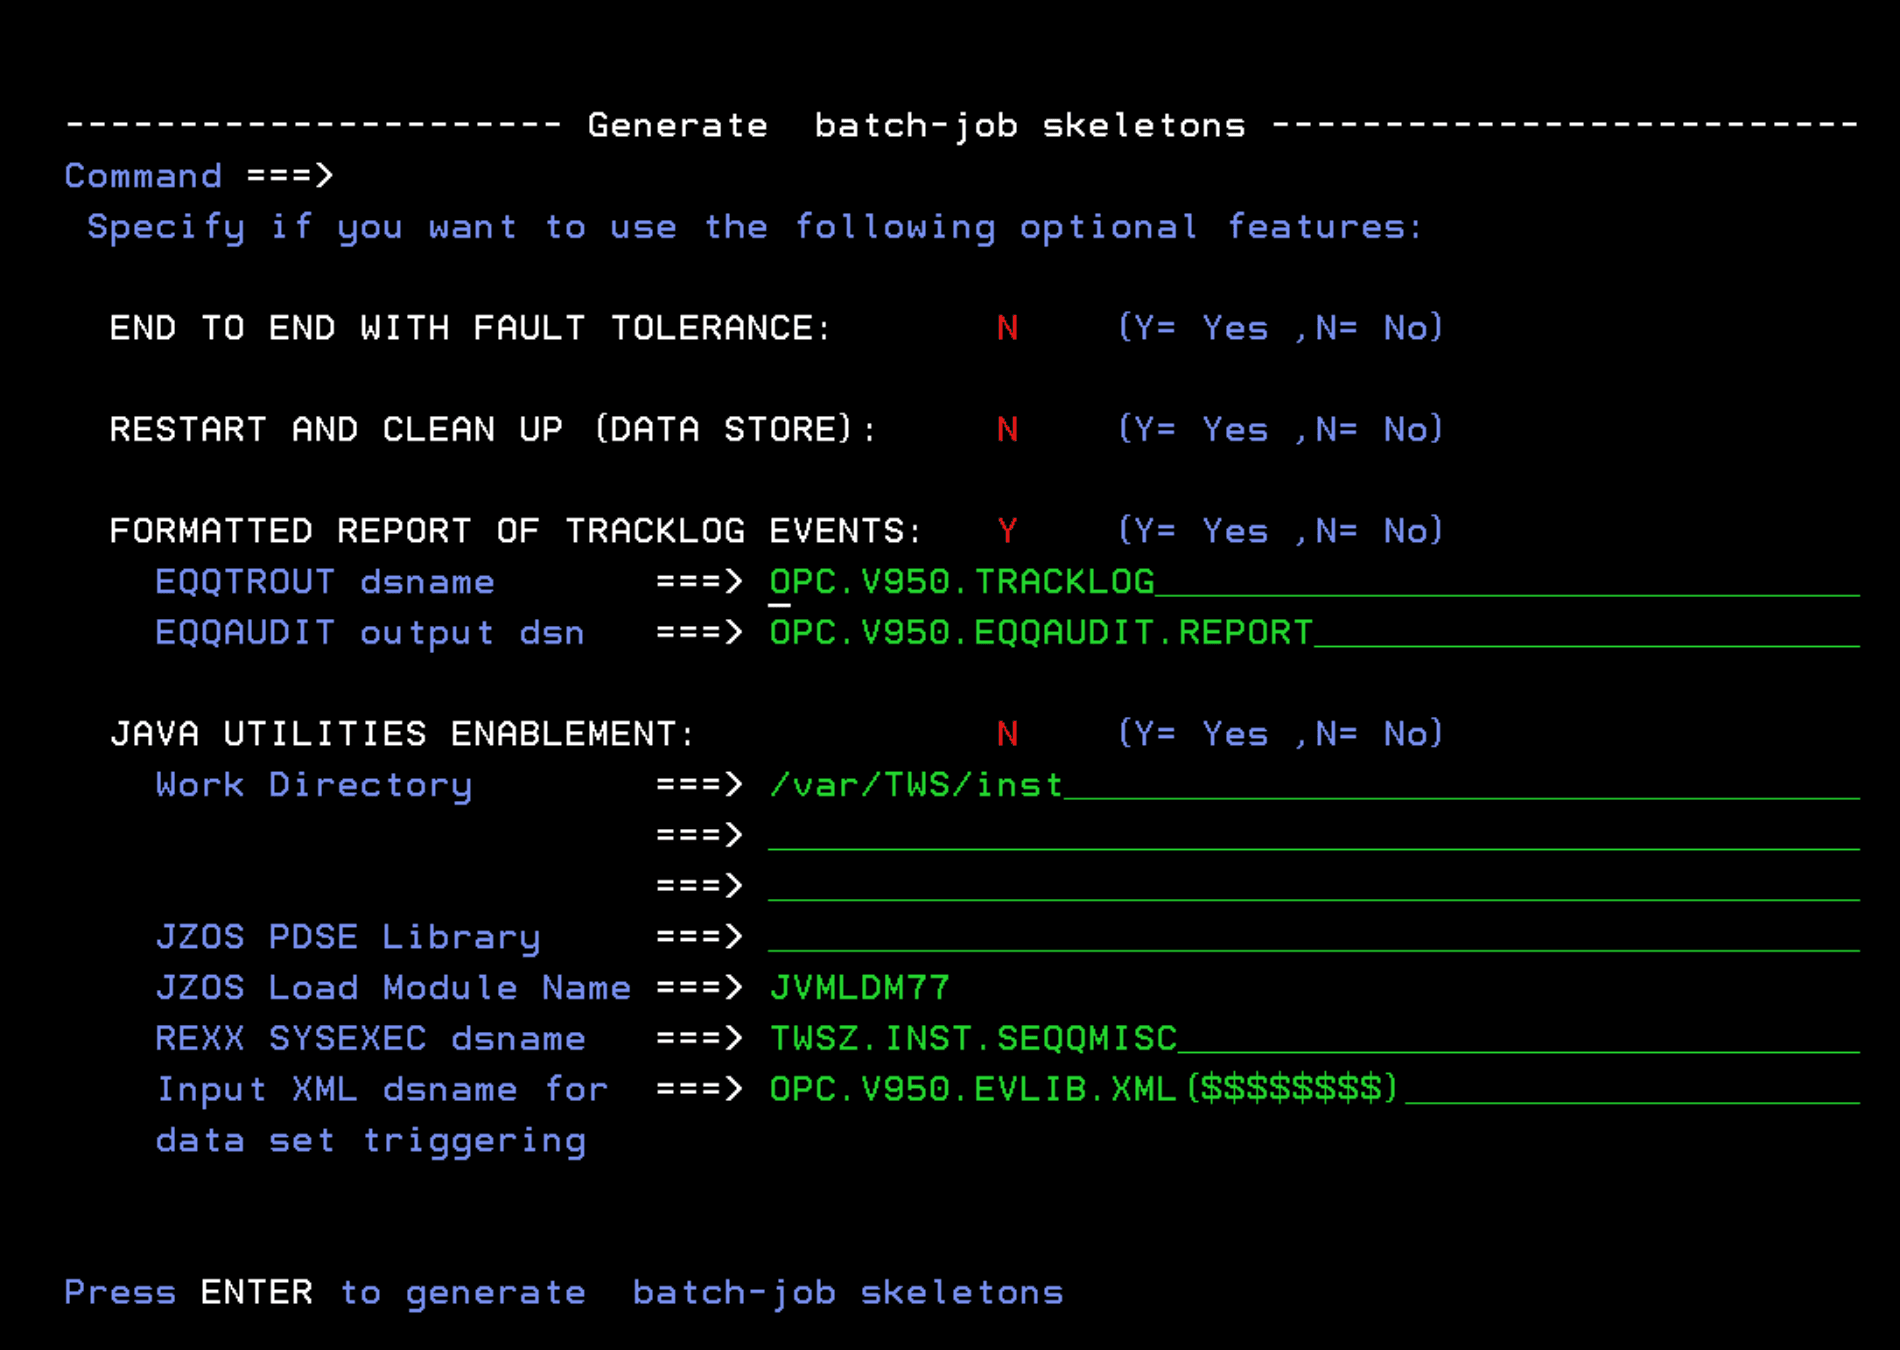
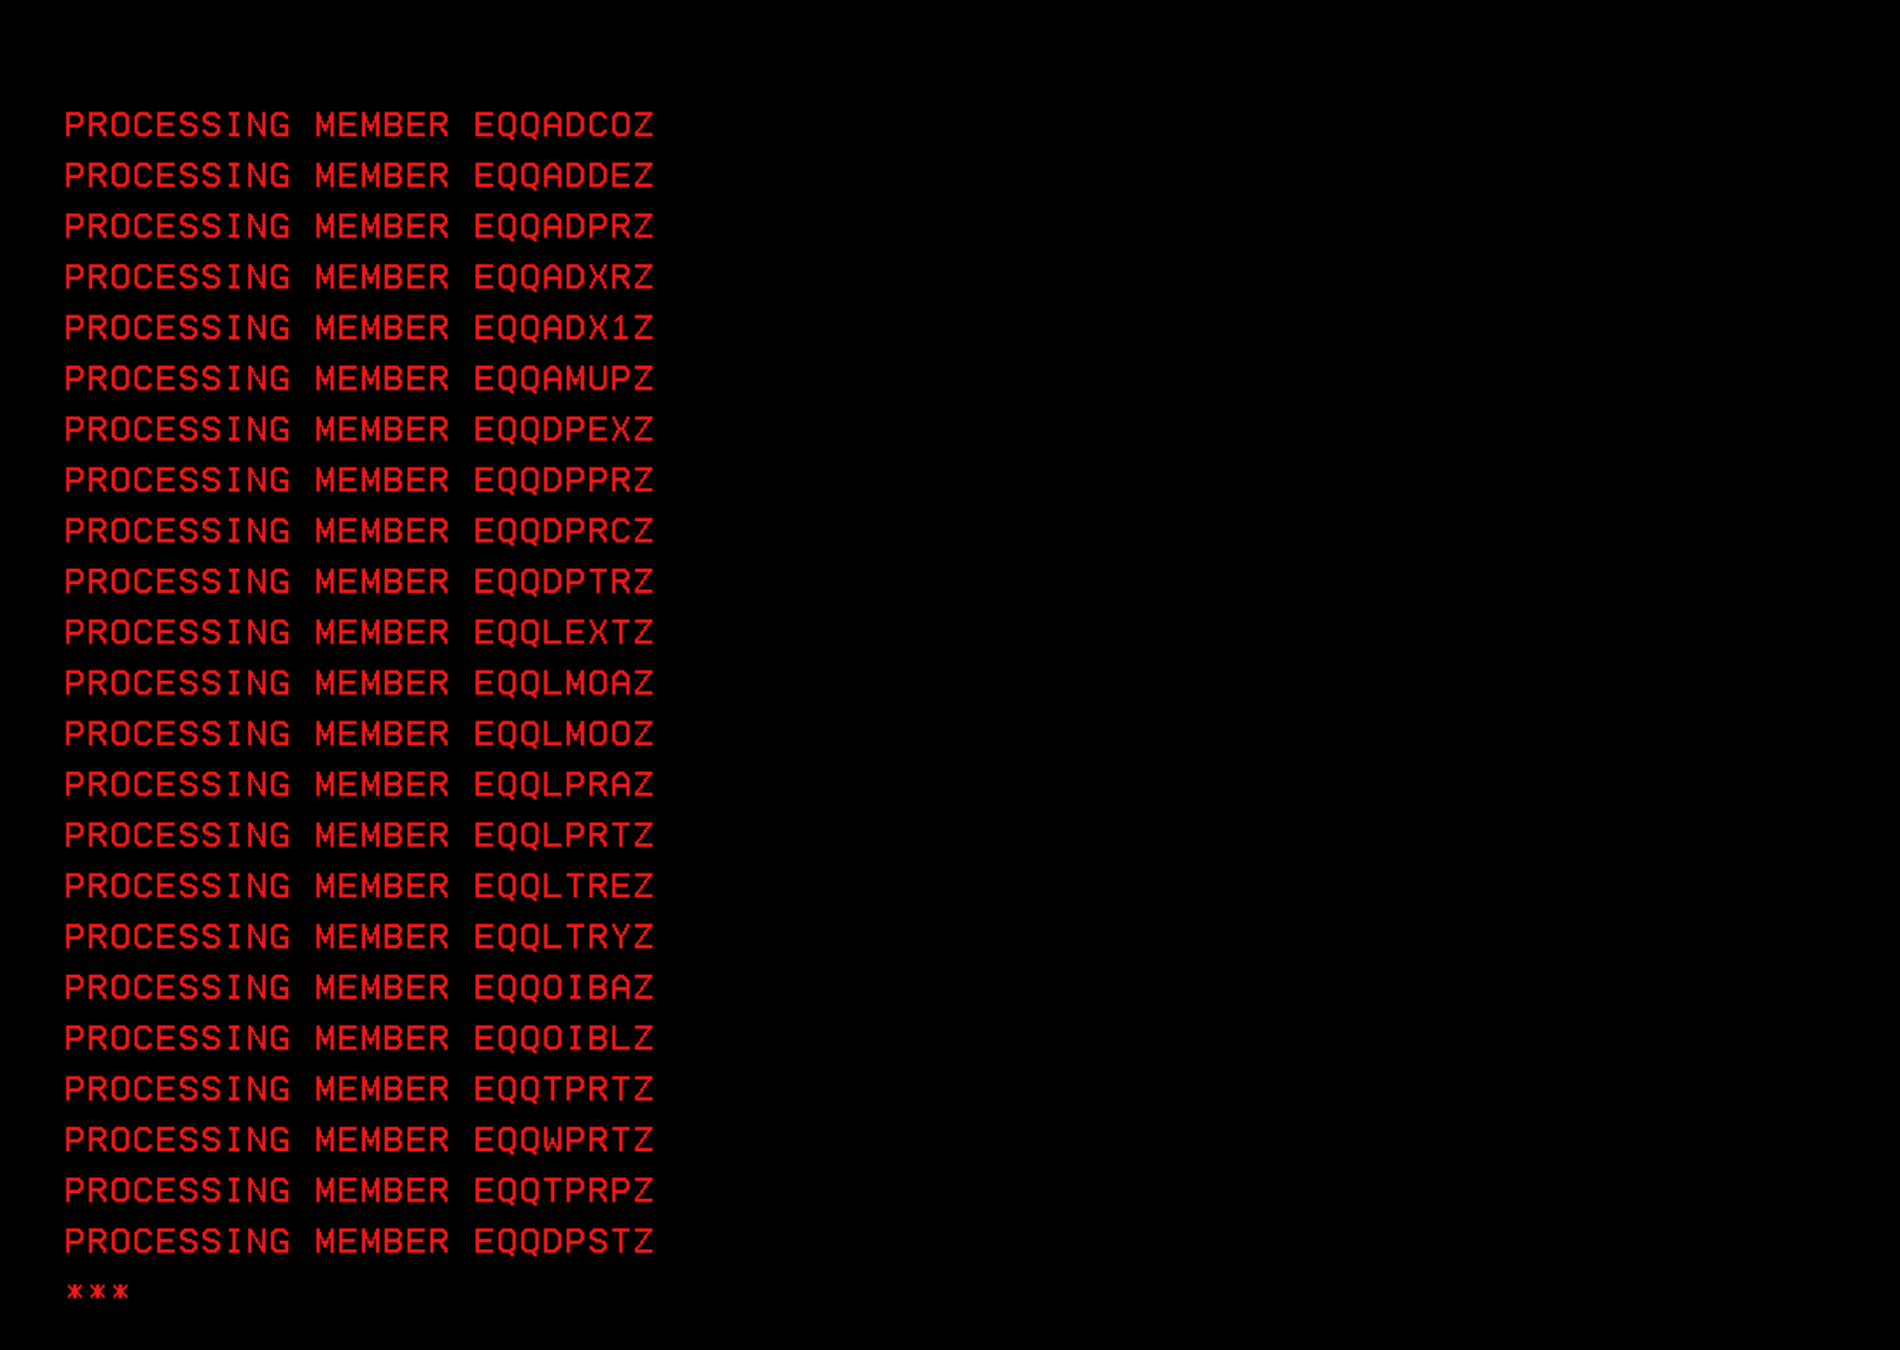
We will wait for the process to finish.
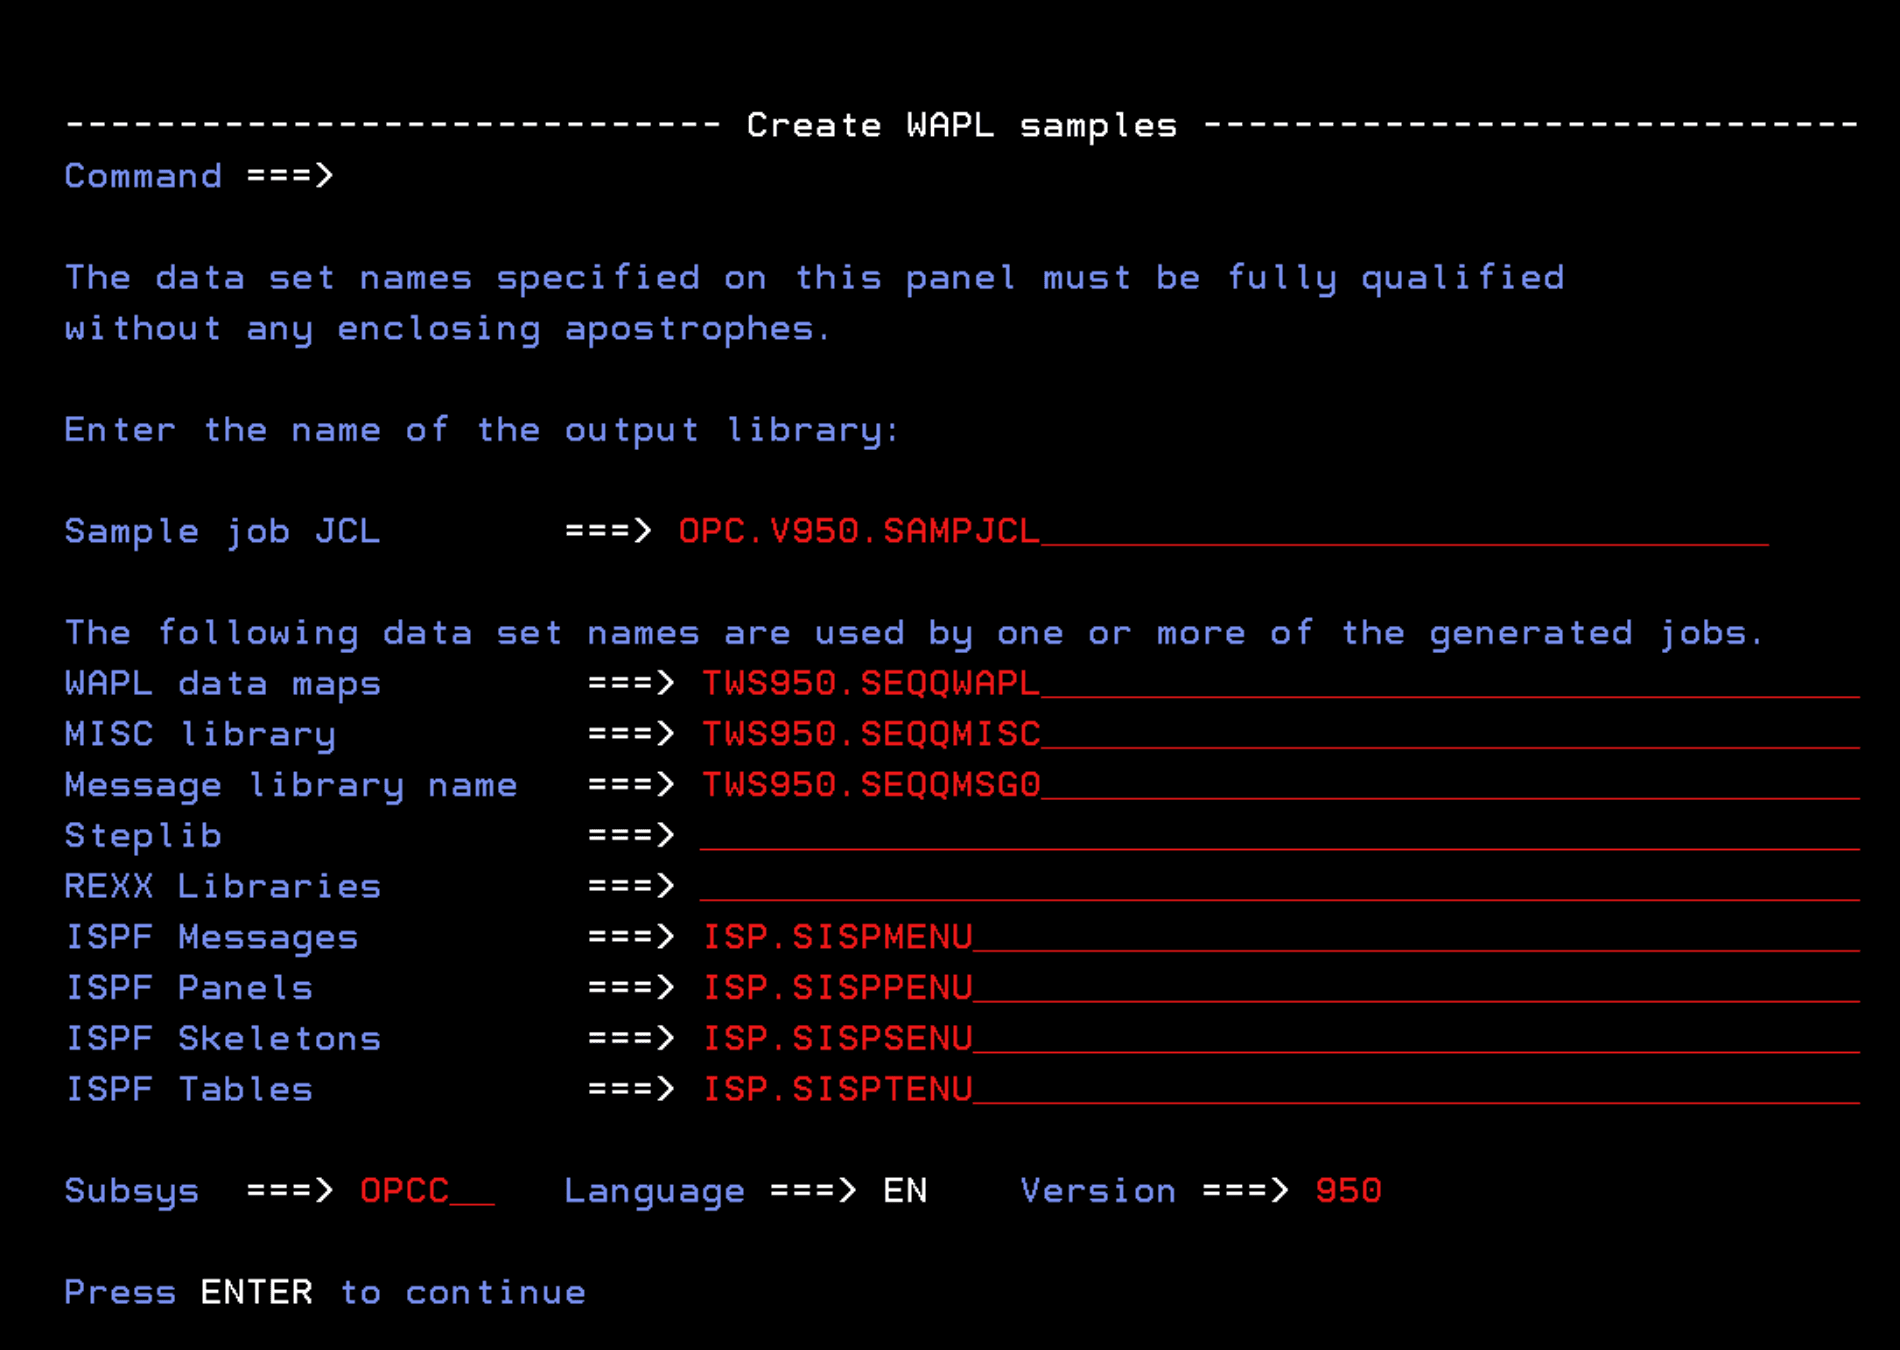
I won’t process option 3 because I don’t use Data Store. Now I will enter option 4 - Generate WAPL samples.
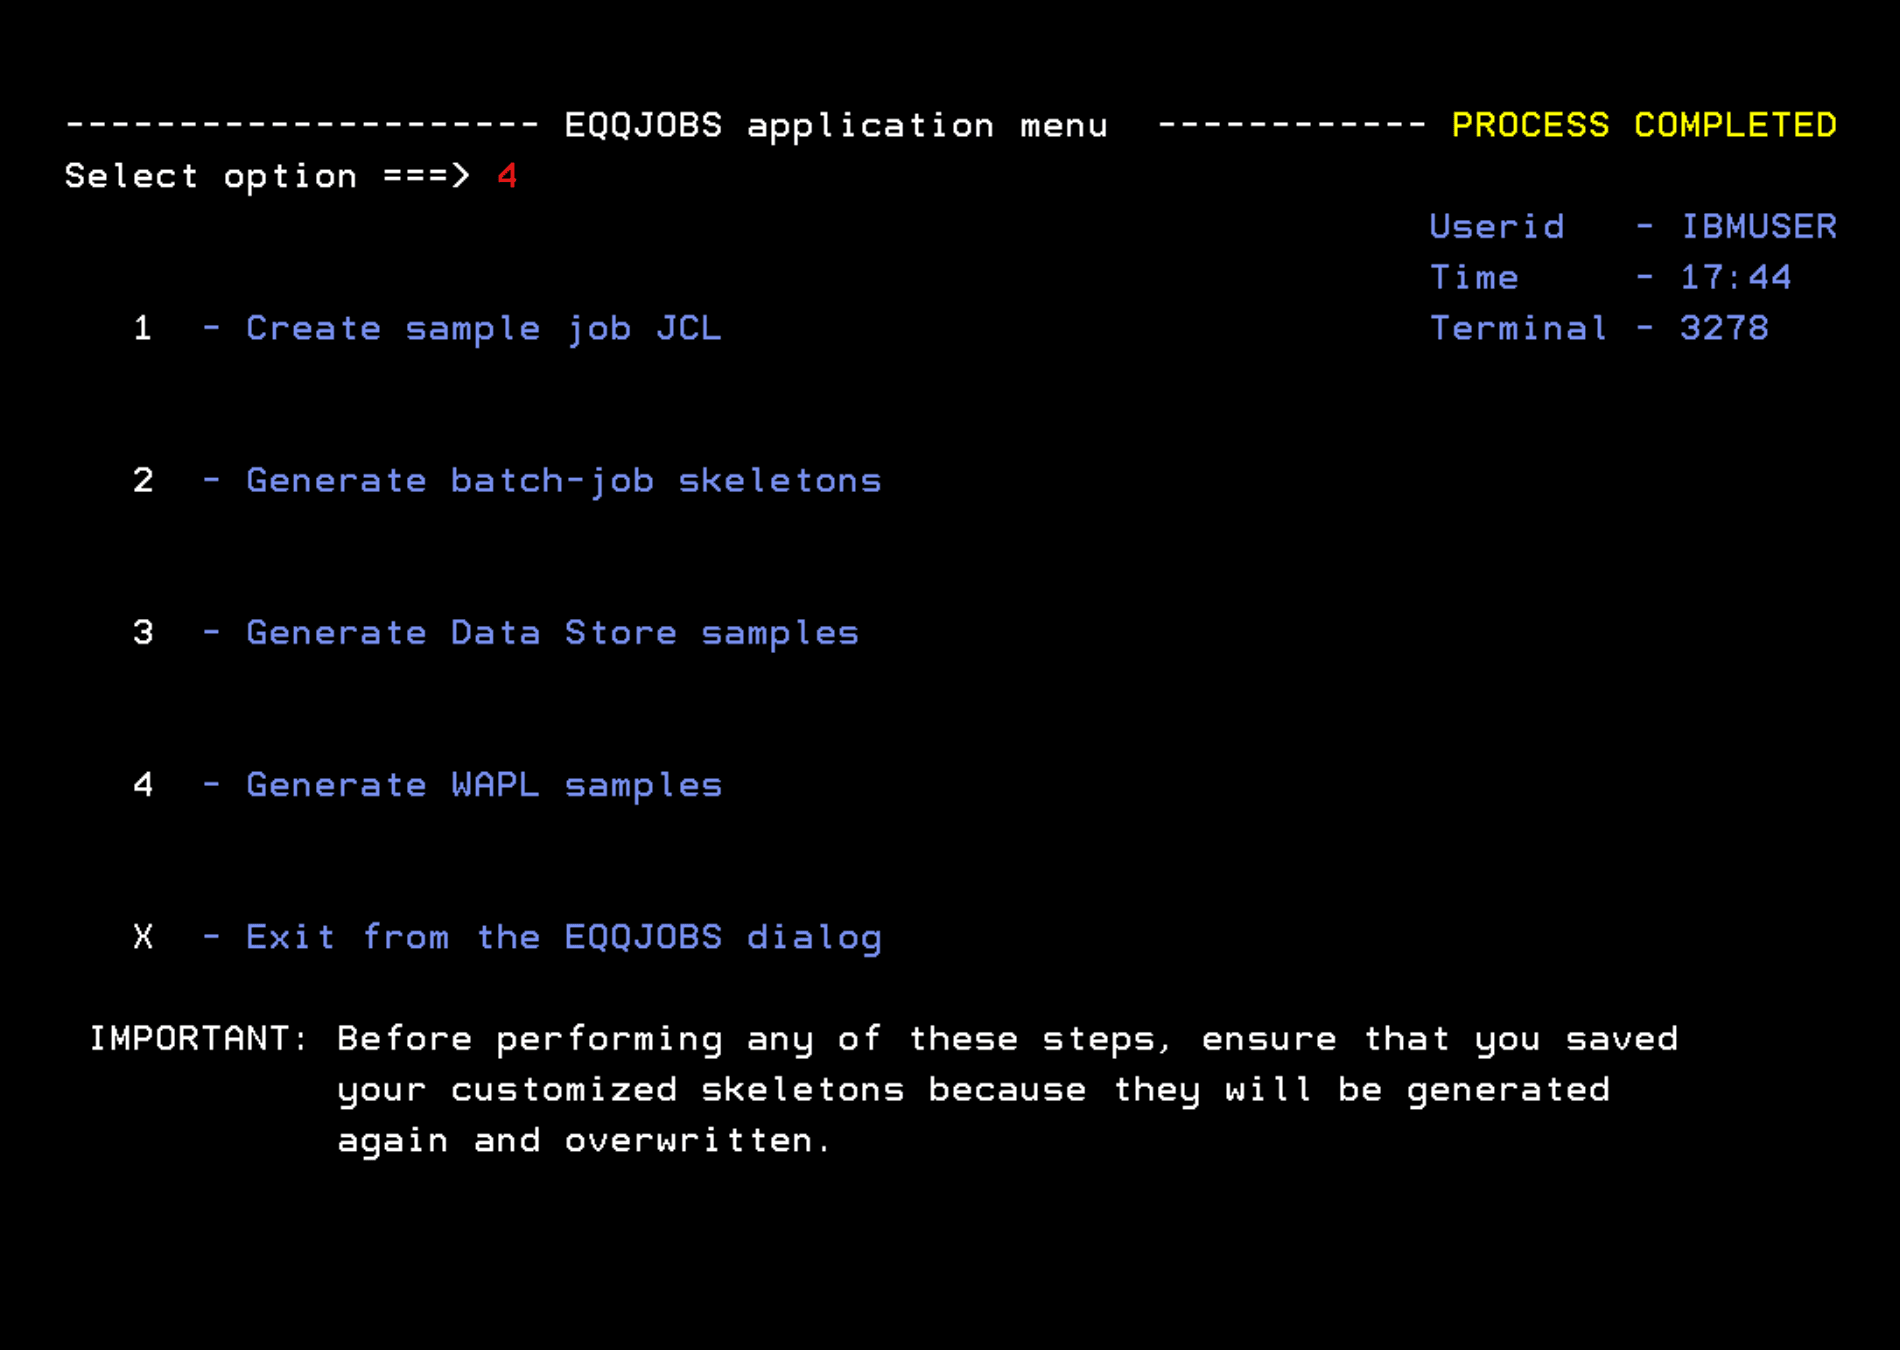
I will adjust the parameters to my system. As the subsystem name, I will use “OPCC”.
We wait for it to finish.
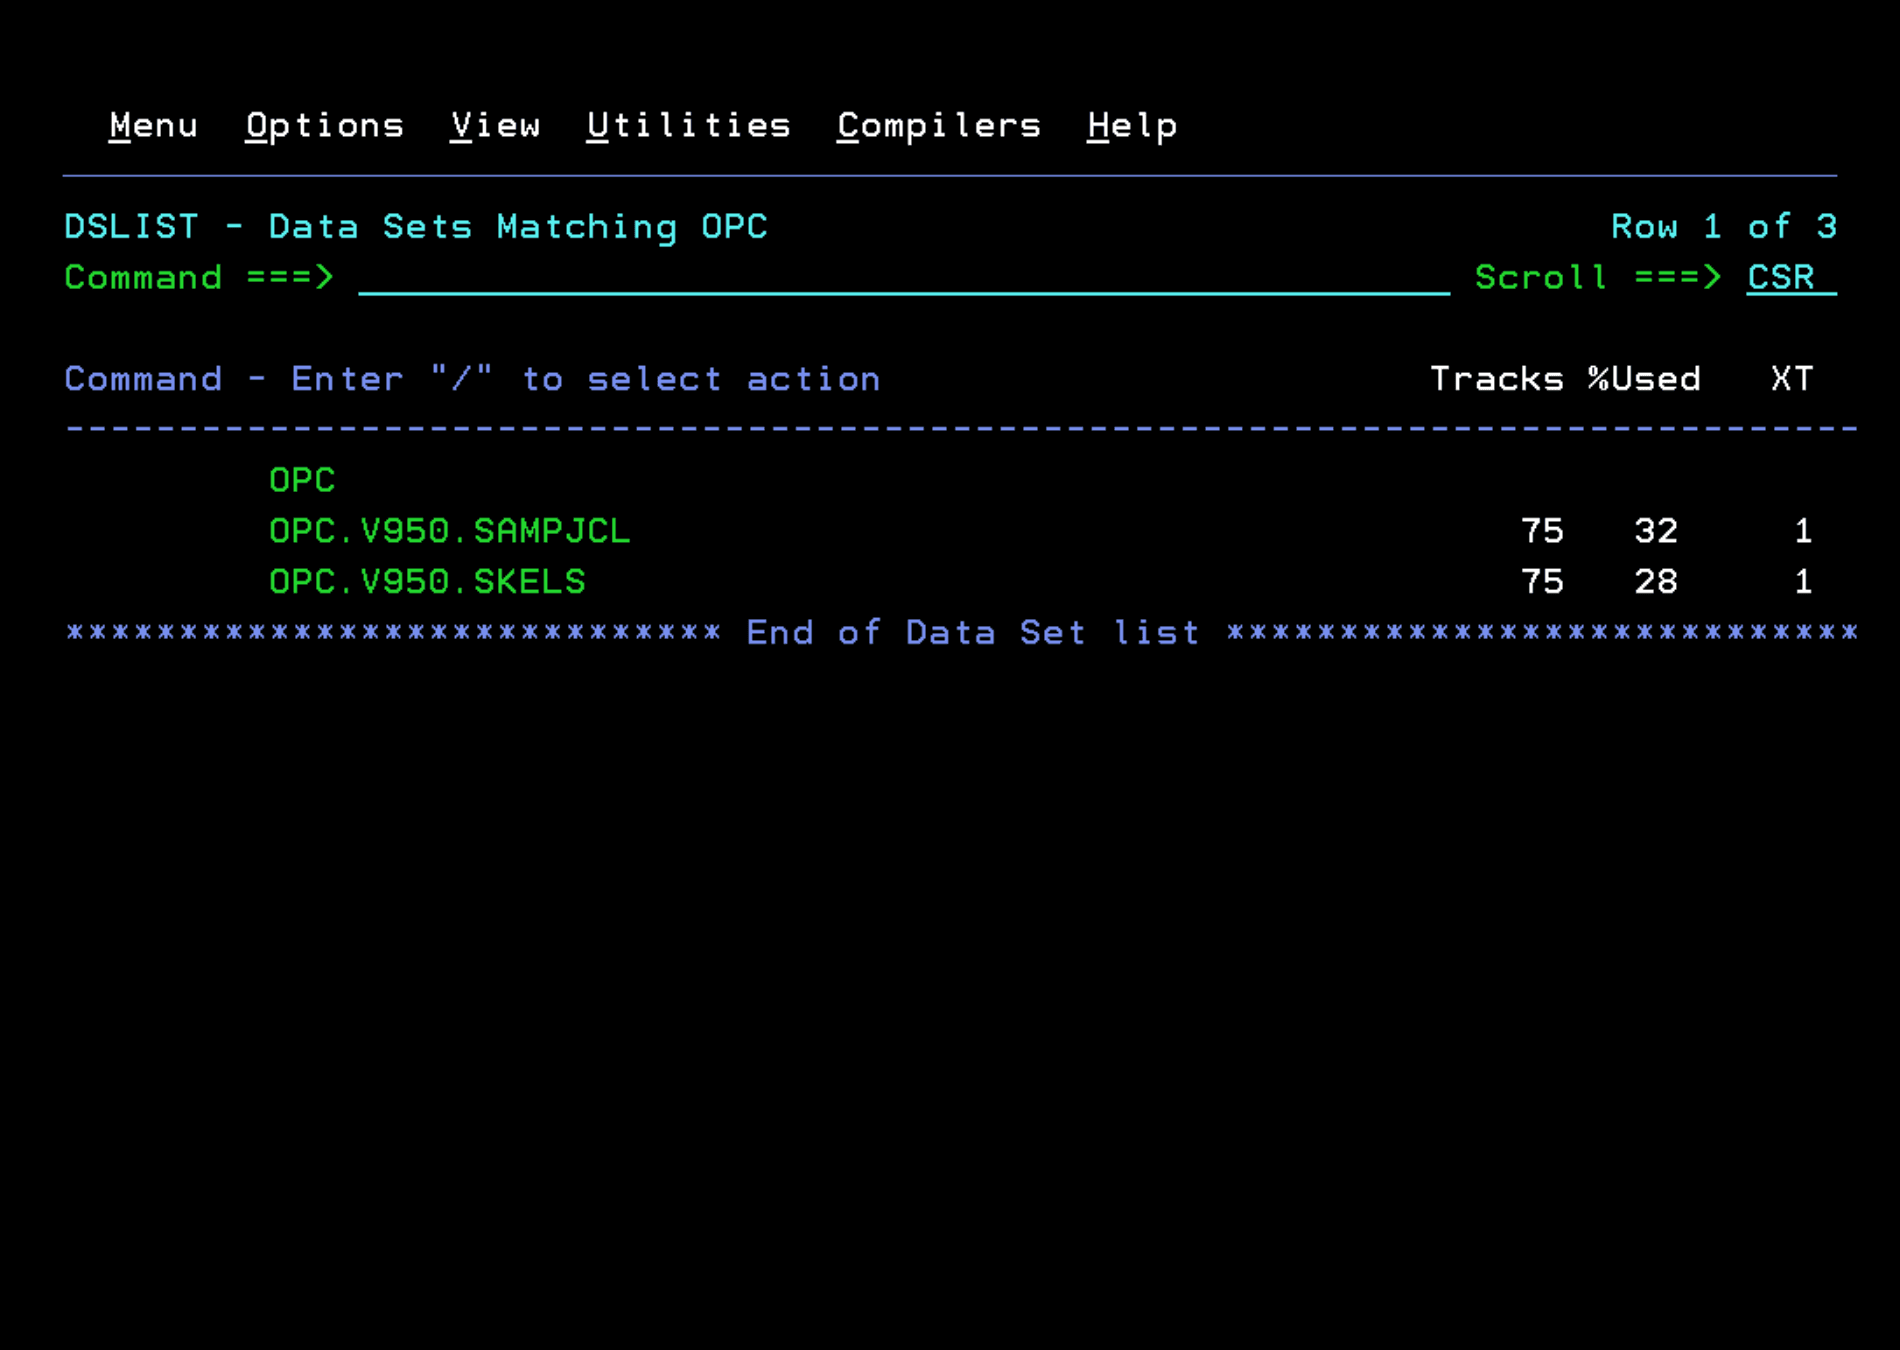
We now have both libraries with the corresponding content.
Compile SMF and JES2 EXITS
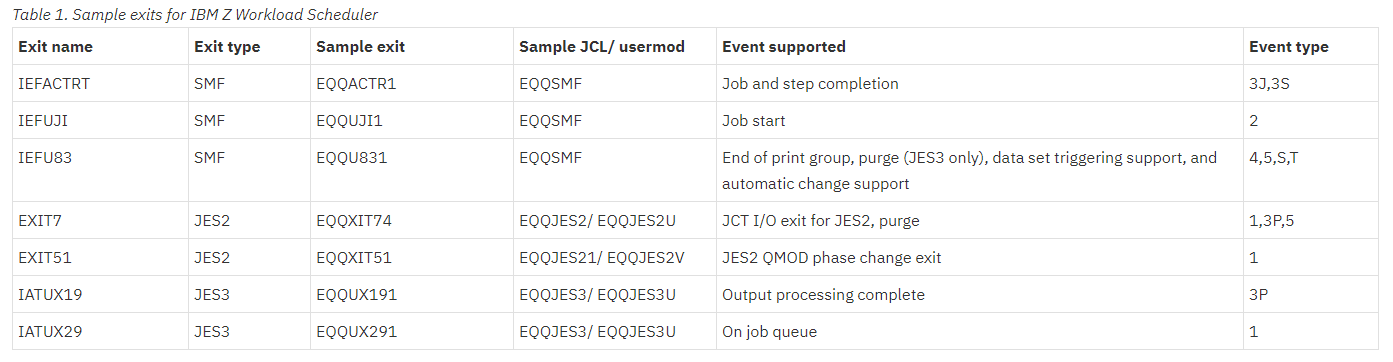
We start by compiling the SMF and JES2 “EXITS”. These are records that are generated according to the types of events that occur (job start, step completed, job end…) and they help the scheduler know the status of the jobs.
In this table taken from the IBM website, you can see the exits that exist and the type of event they control. If we had any error in the job status, we would have to review these exits.
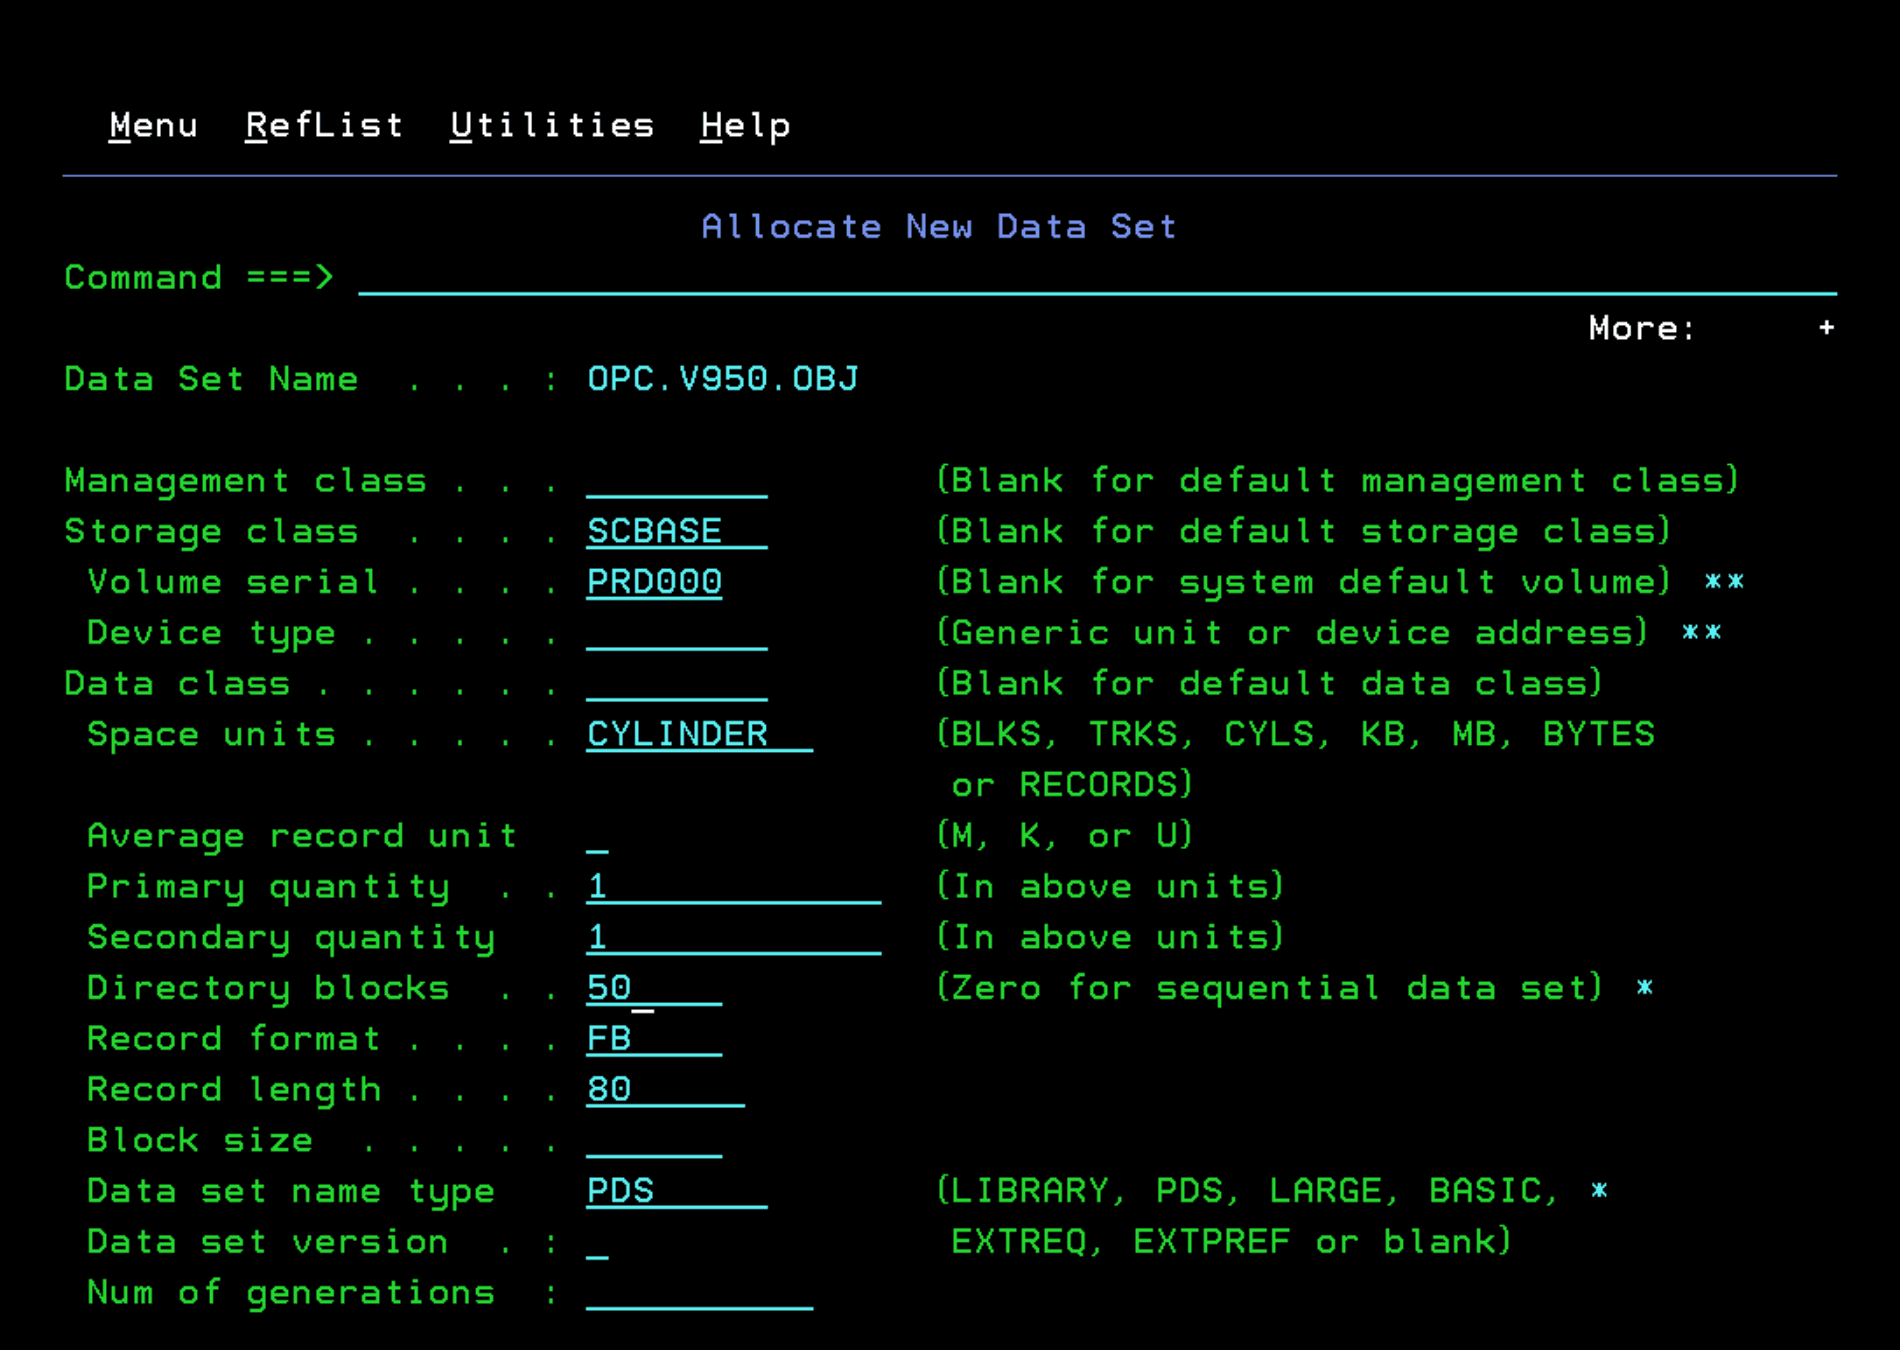
Before starting, we need to create an “intermediate” library where the assembled modules will be stored. It will be called OPC.V950.OBJ.
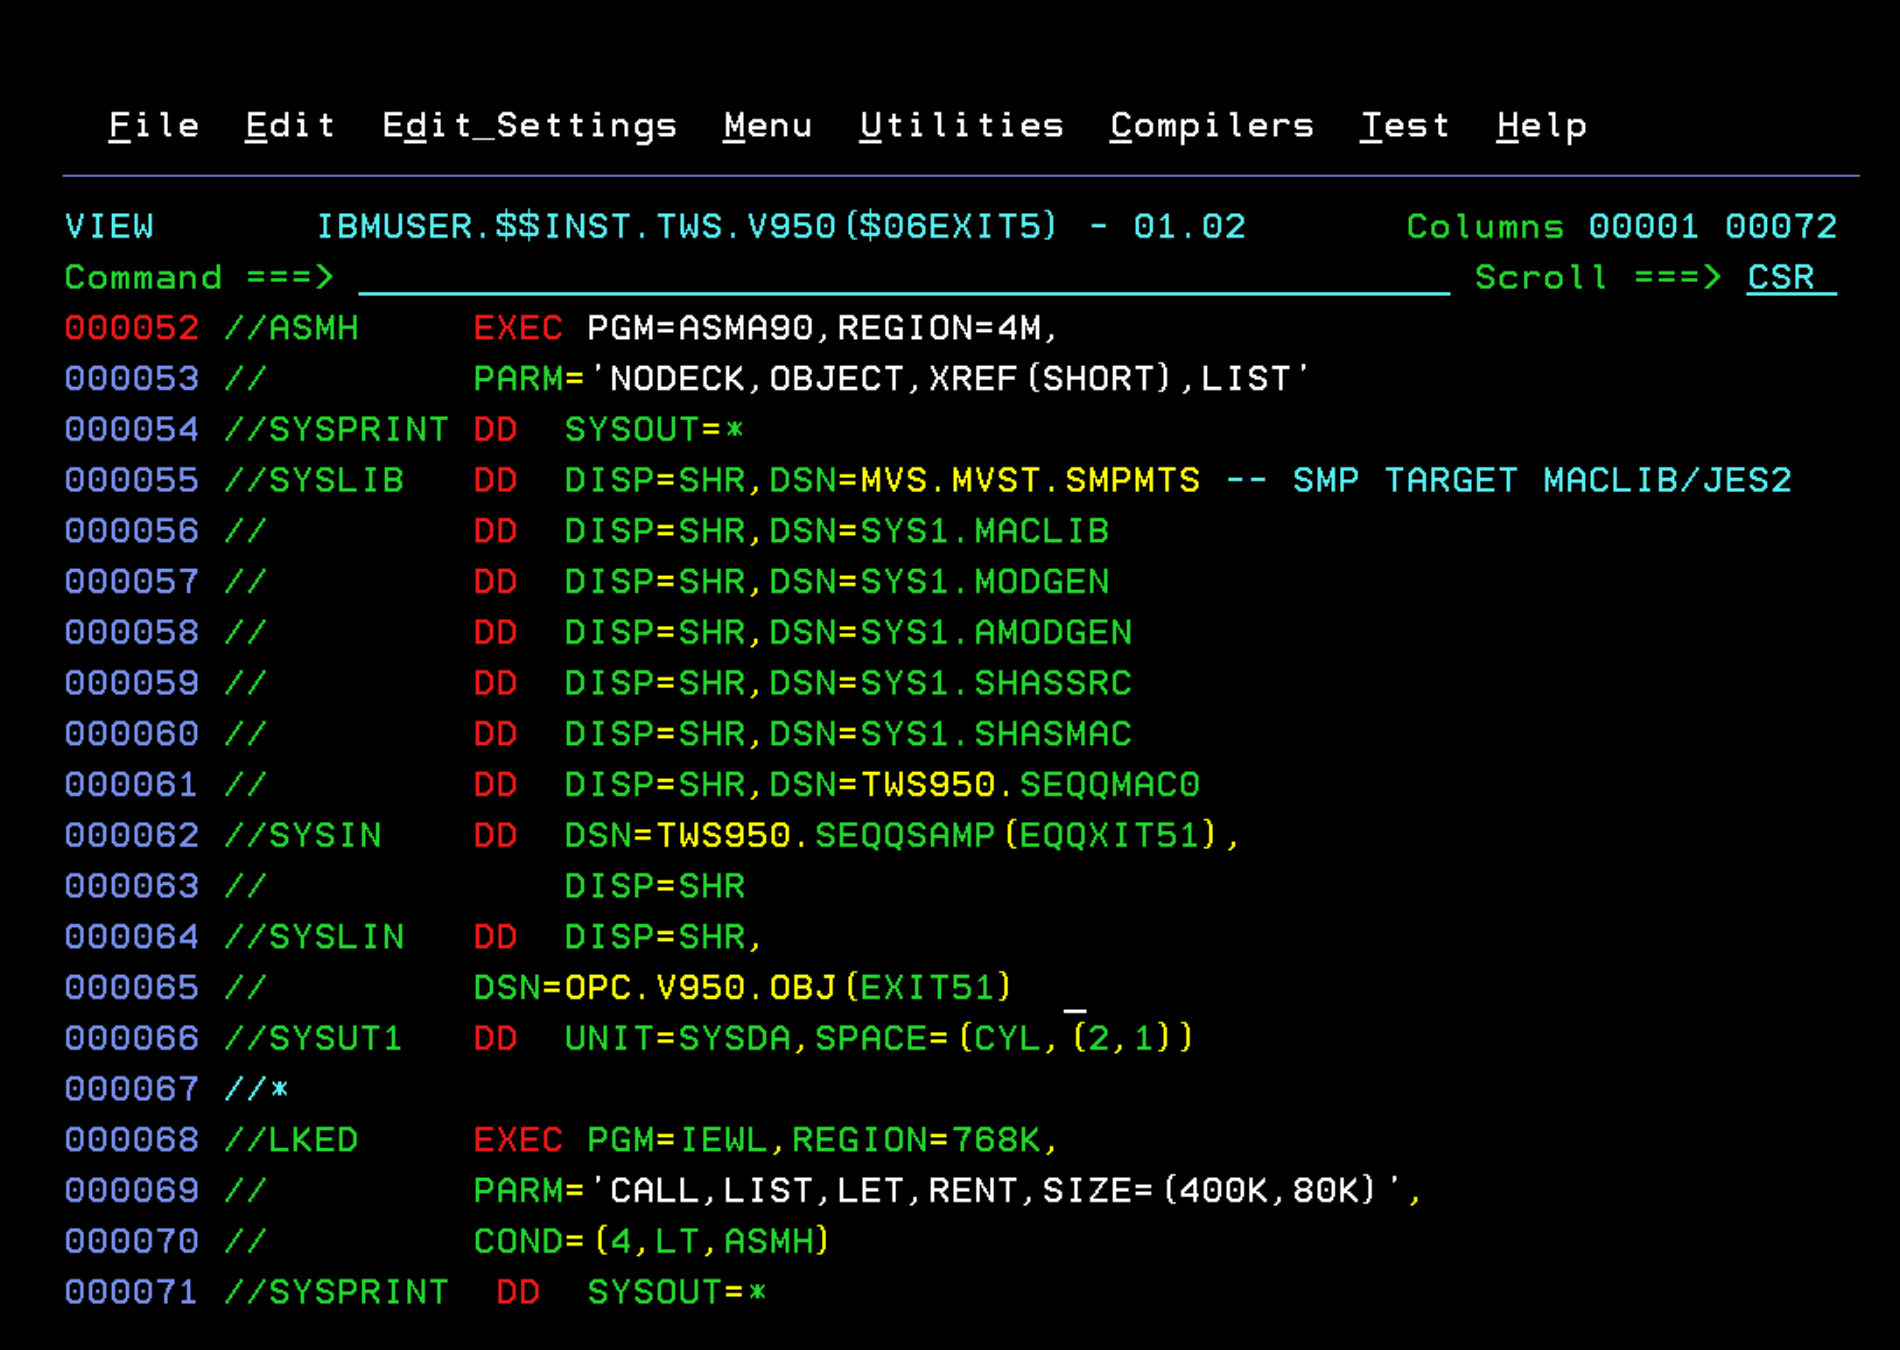
Now we look for the EQQJES2 job in the sample library (in my case, OPC.V950.SAMPJCL) and I will copy it to a different library where I keep the jobs I run for future reference. This job is used to create JES2 EXIT7. We adjust the job and run it.
In my case, the JES2 library is MVS.MVST.SMPMTS.
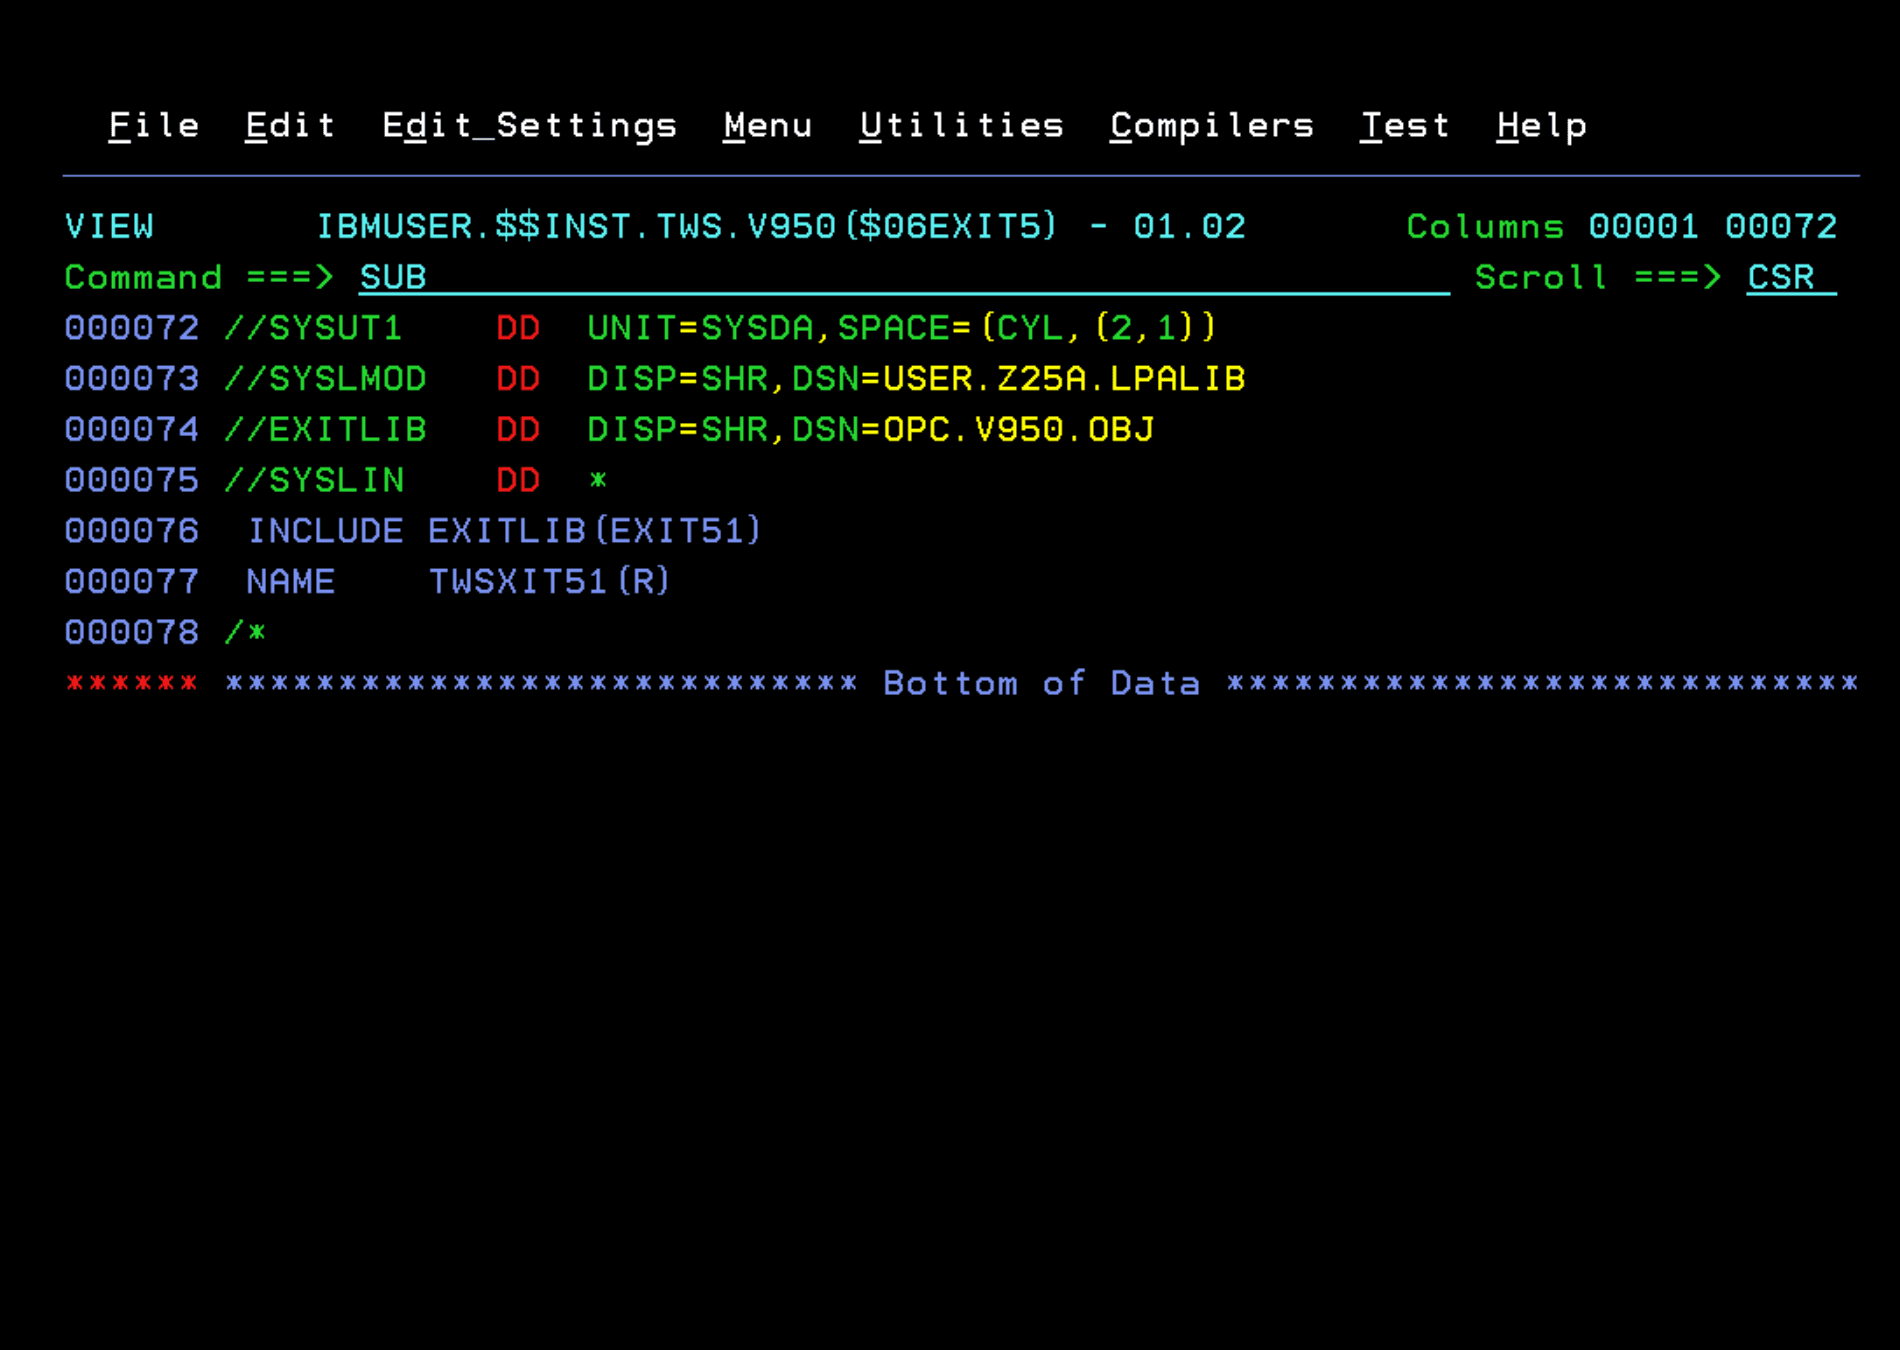
The library where the final module will be saved (DD SYSLMOD) will be USER.Z25A.LPALIB.
On ADCD systems, it’s better to save things in the “USER.**” libraries because when changing versions it’s easier to have all the changes available since you would only need to include the A5CFG1 disk (in the case of my version).

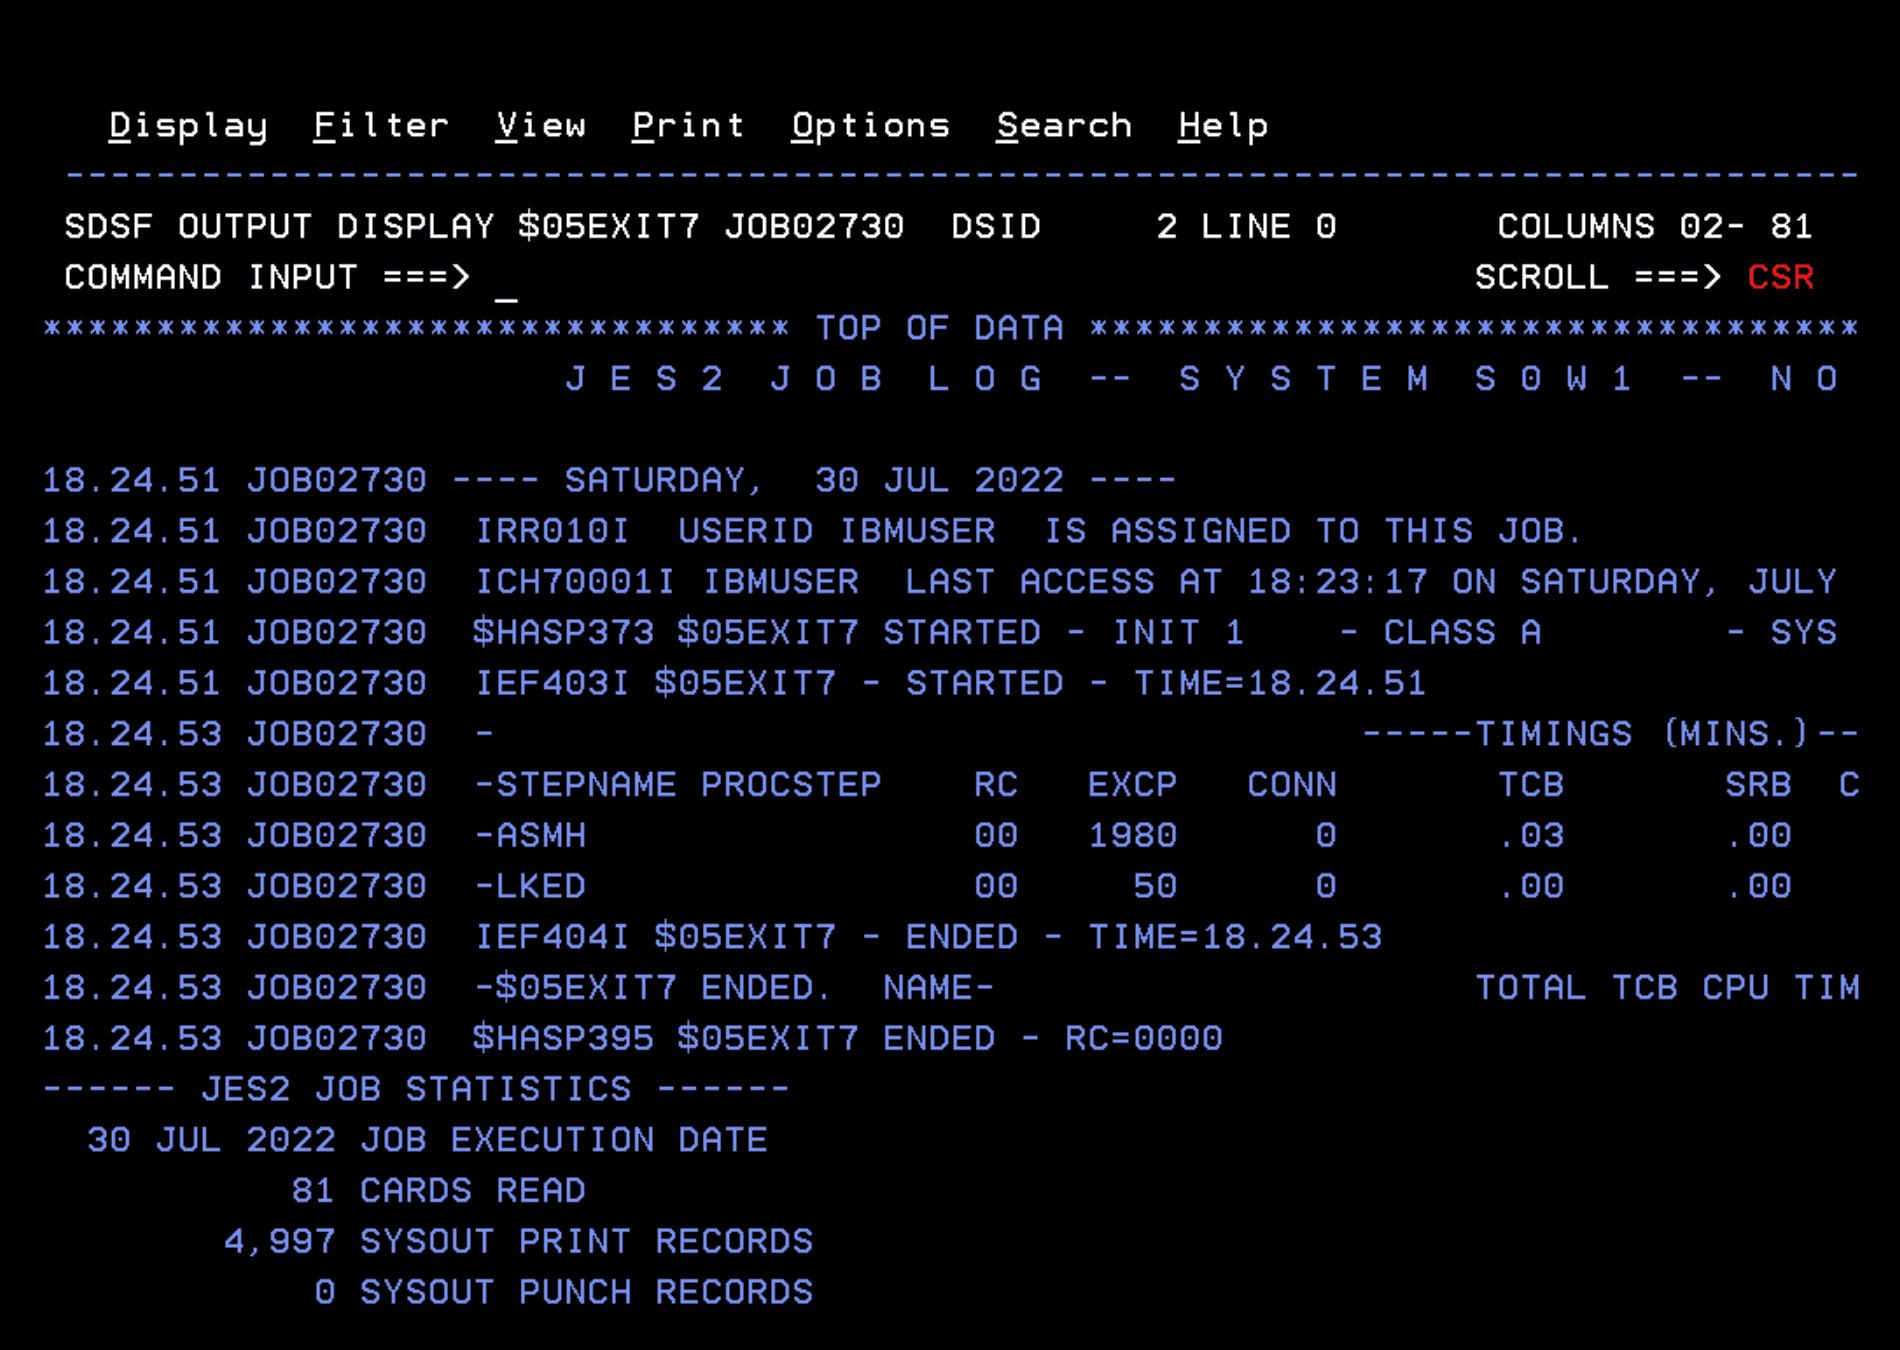
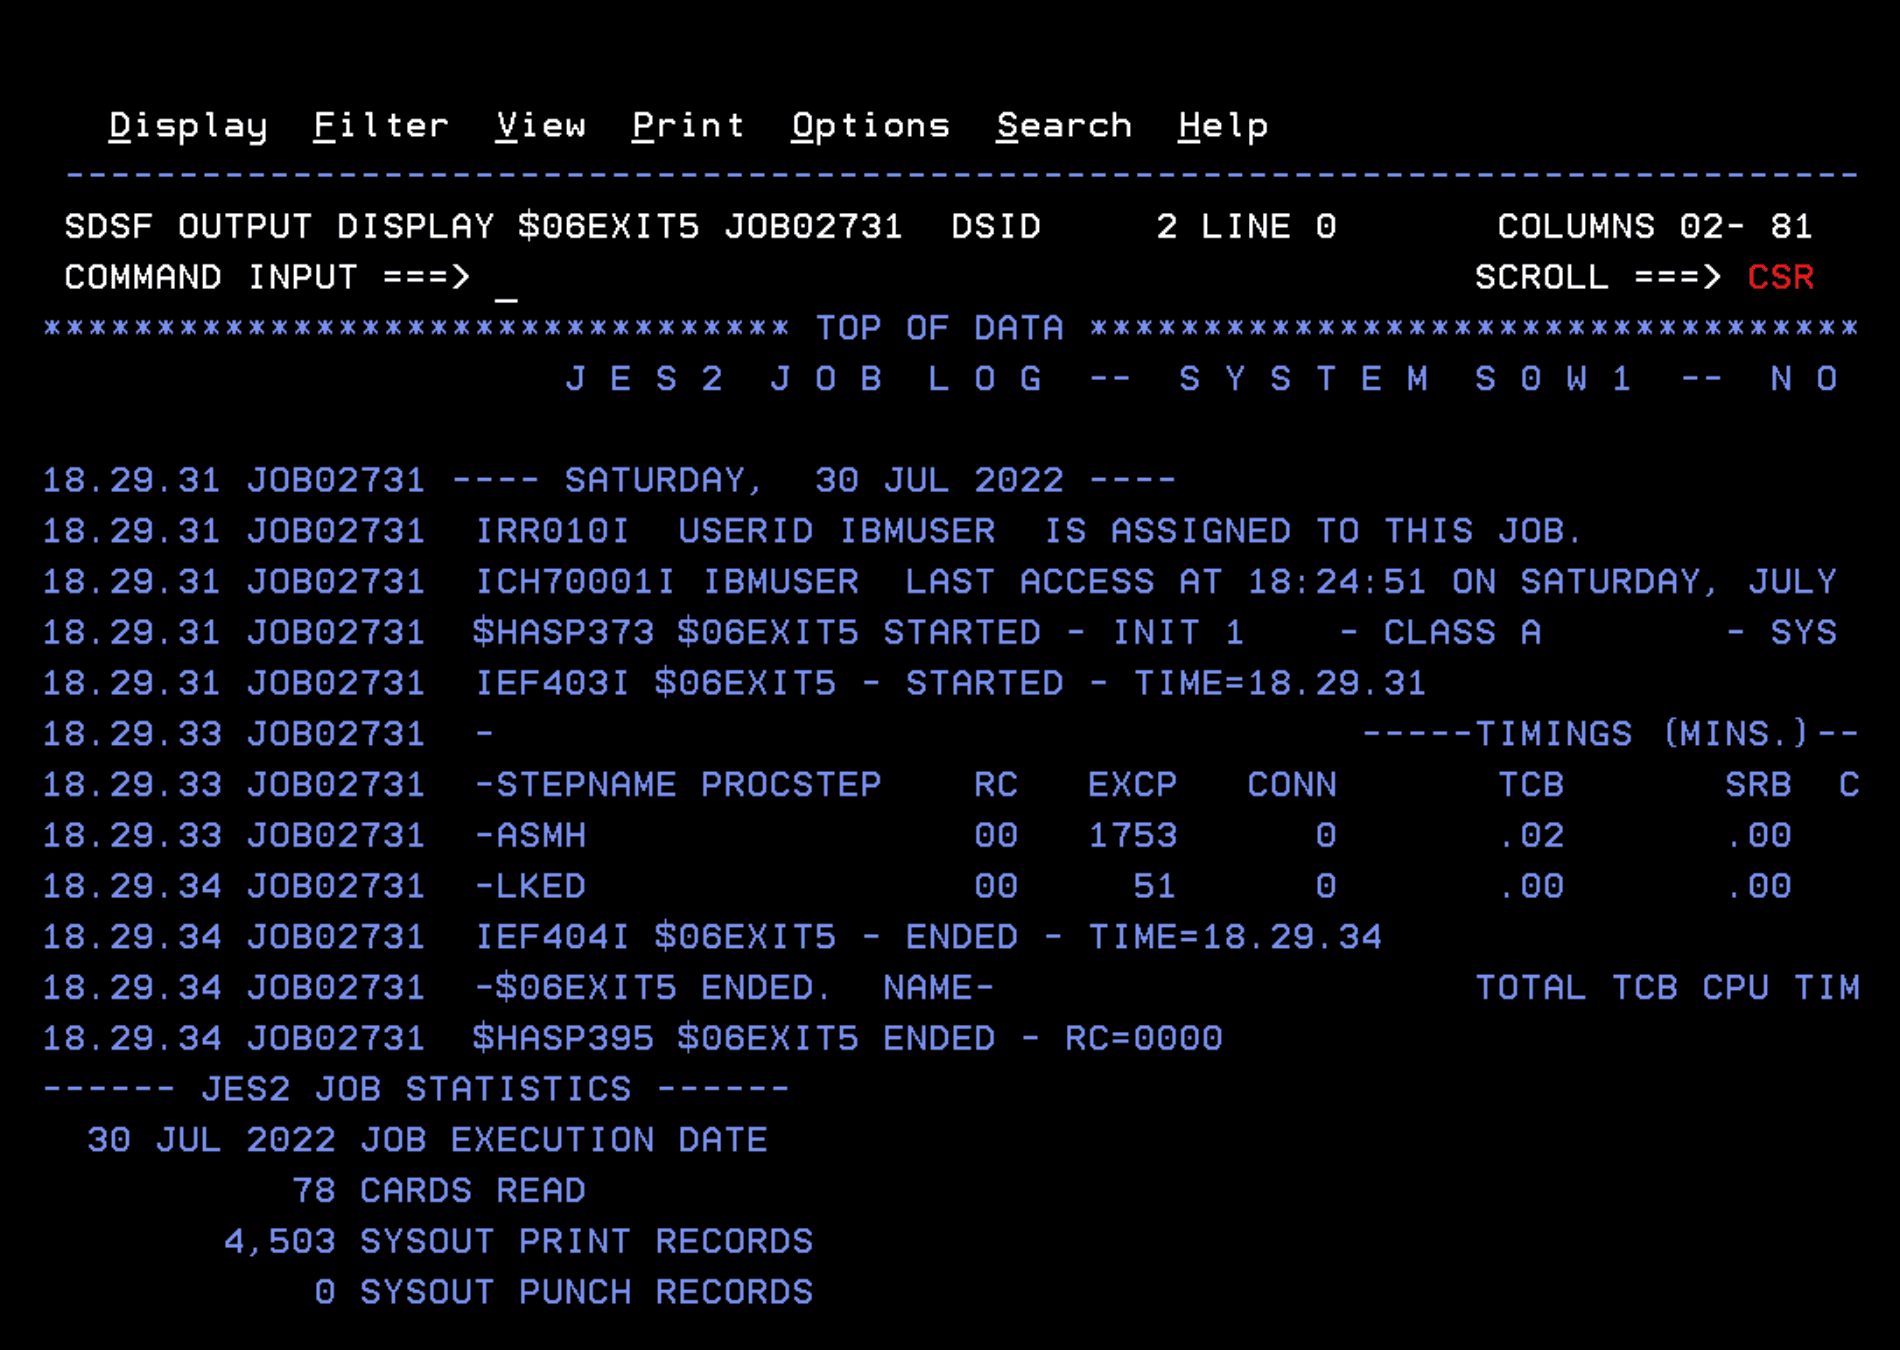
 It will complete successfully.
Now we will edit the EQQJES21 job to create exit EXIT51. The changes will be the same as in the previous job.
It will complete successfully.
Now we still need to compile the three SMF exits: IEFACTRT, IEFUJI, IEFU83. The IBM manual indicates using the EQQSMF job to do this by installing it as a USERMOD, but I will use another method.
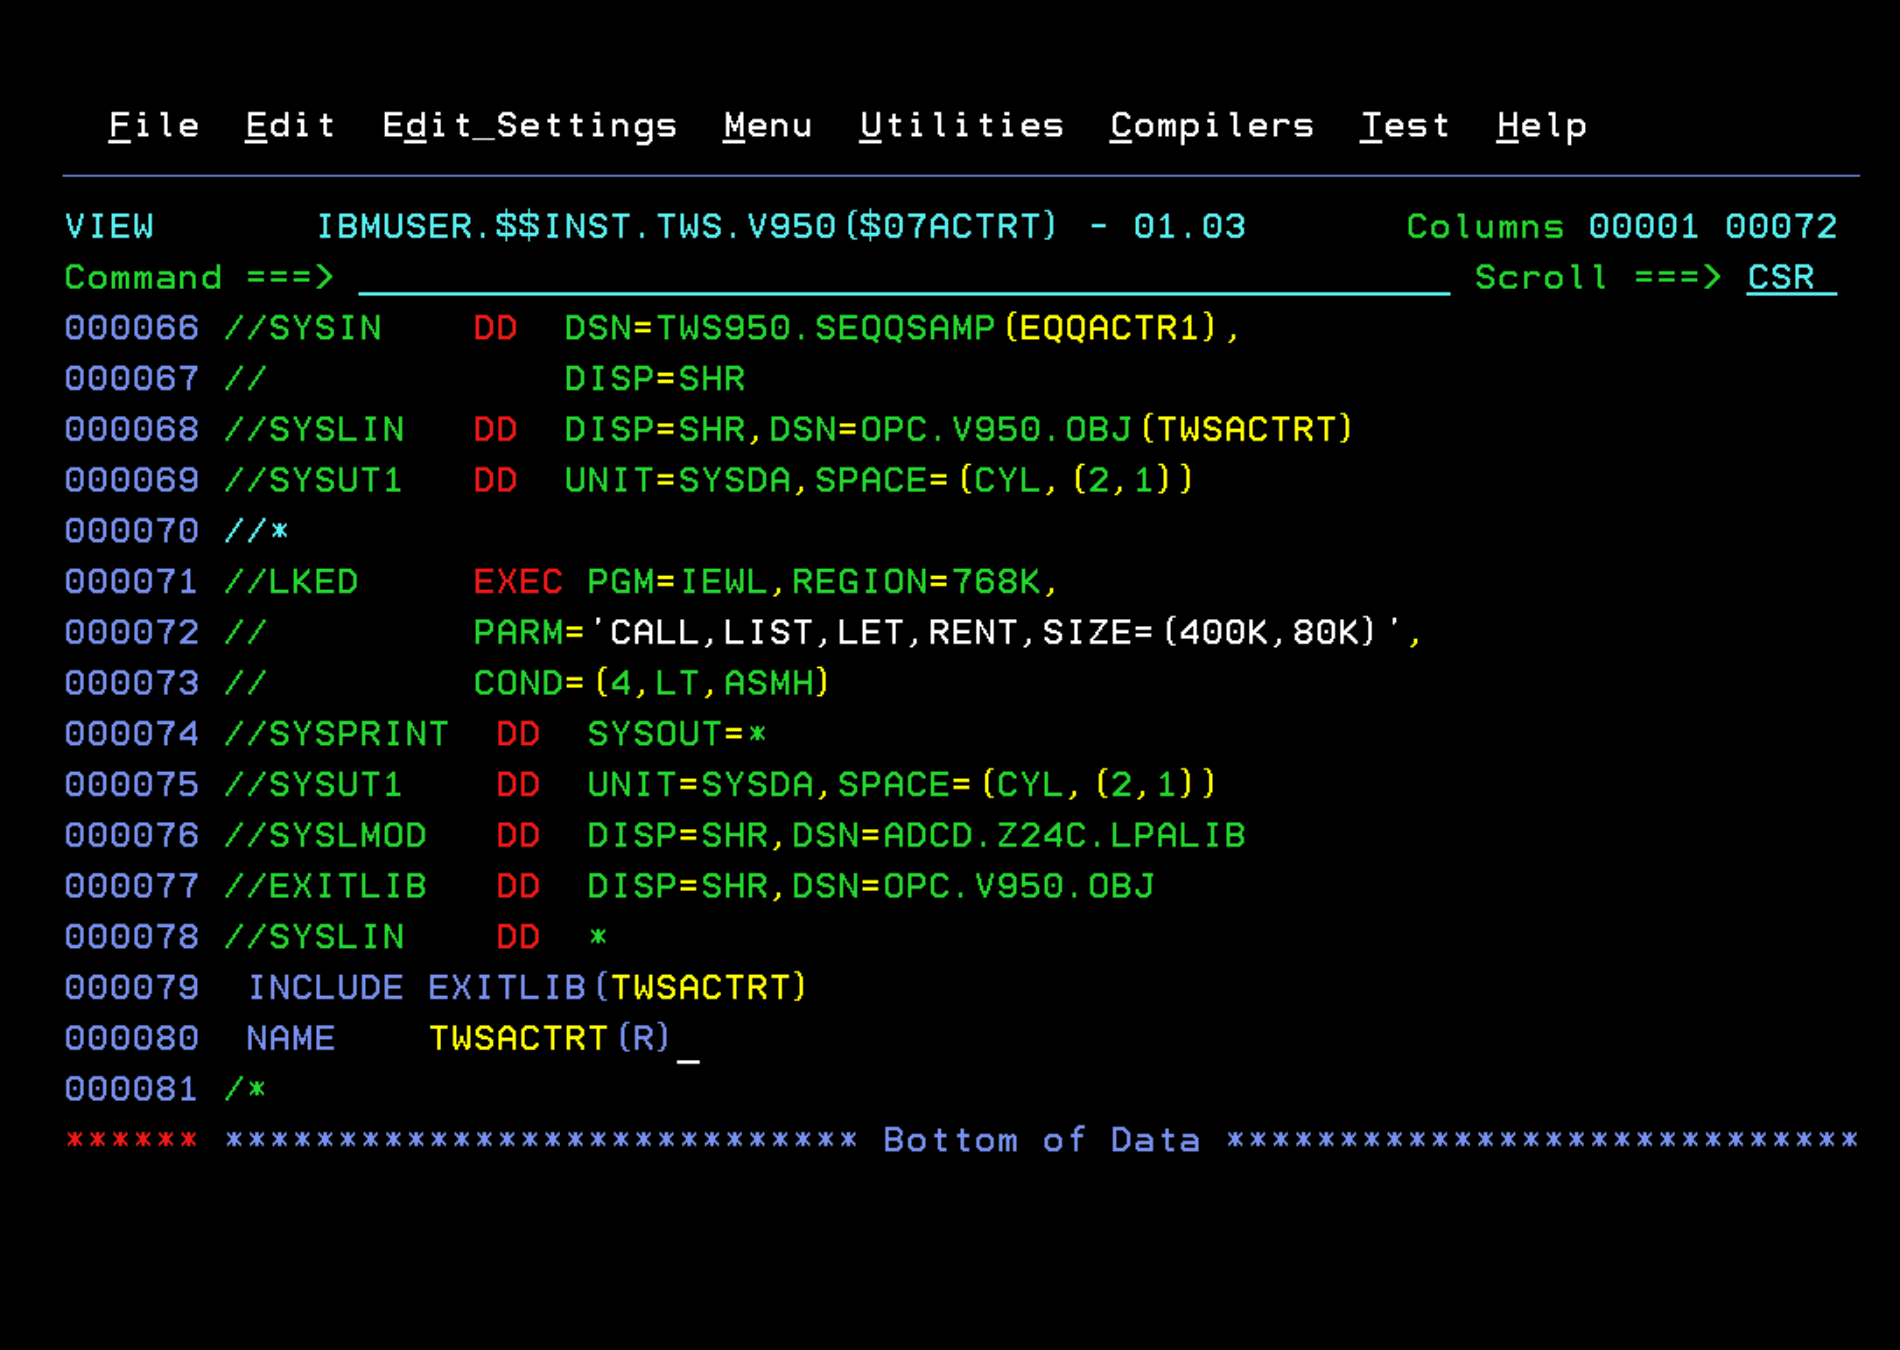
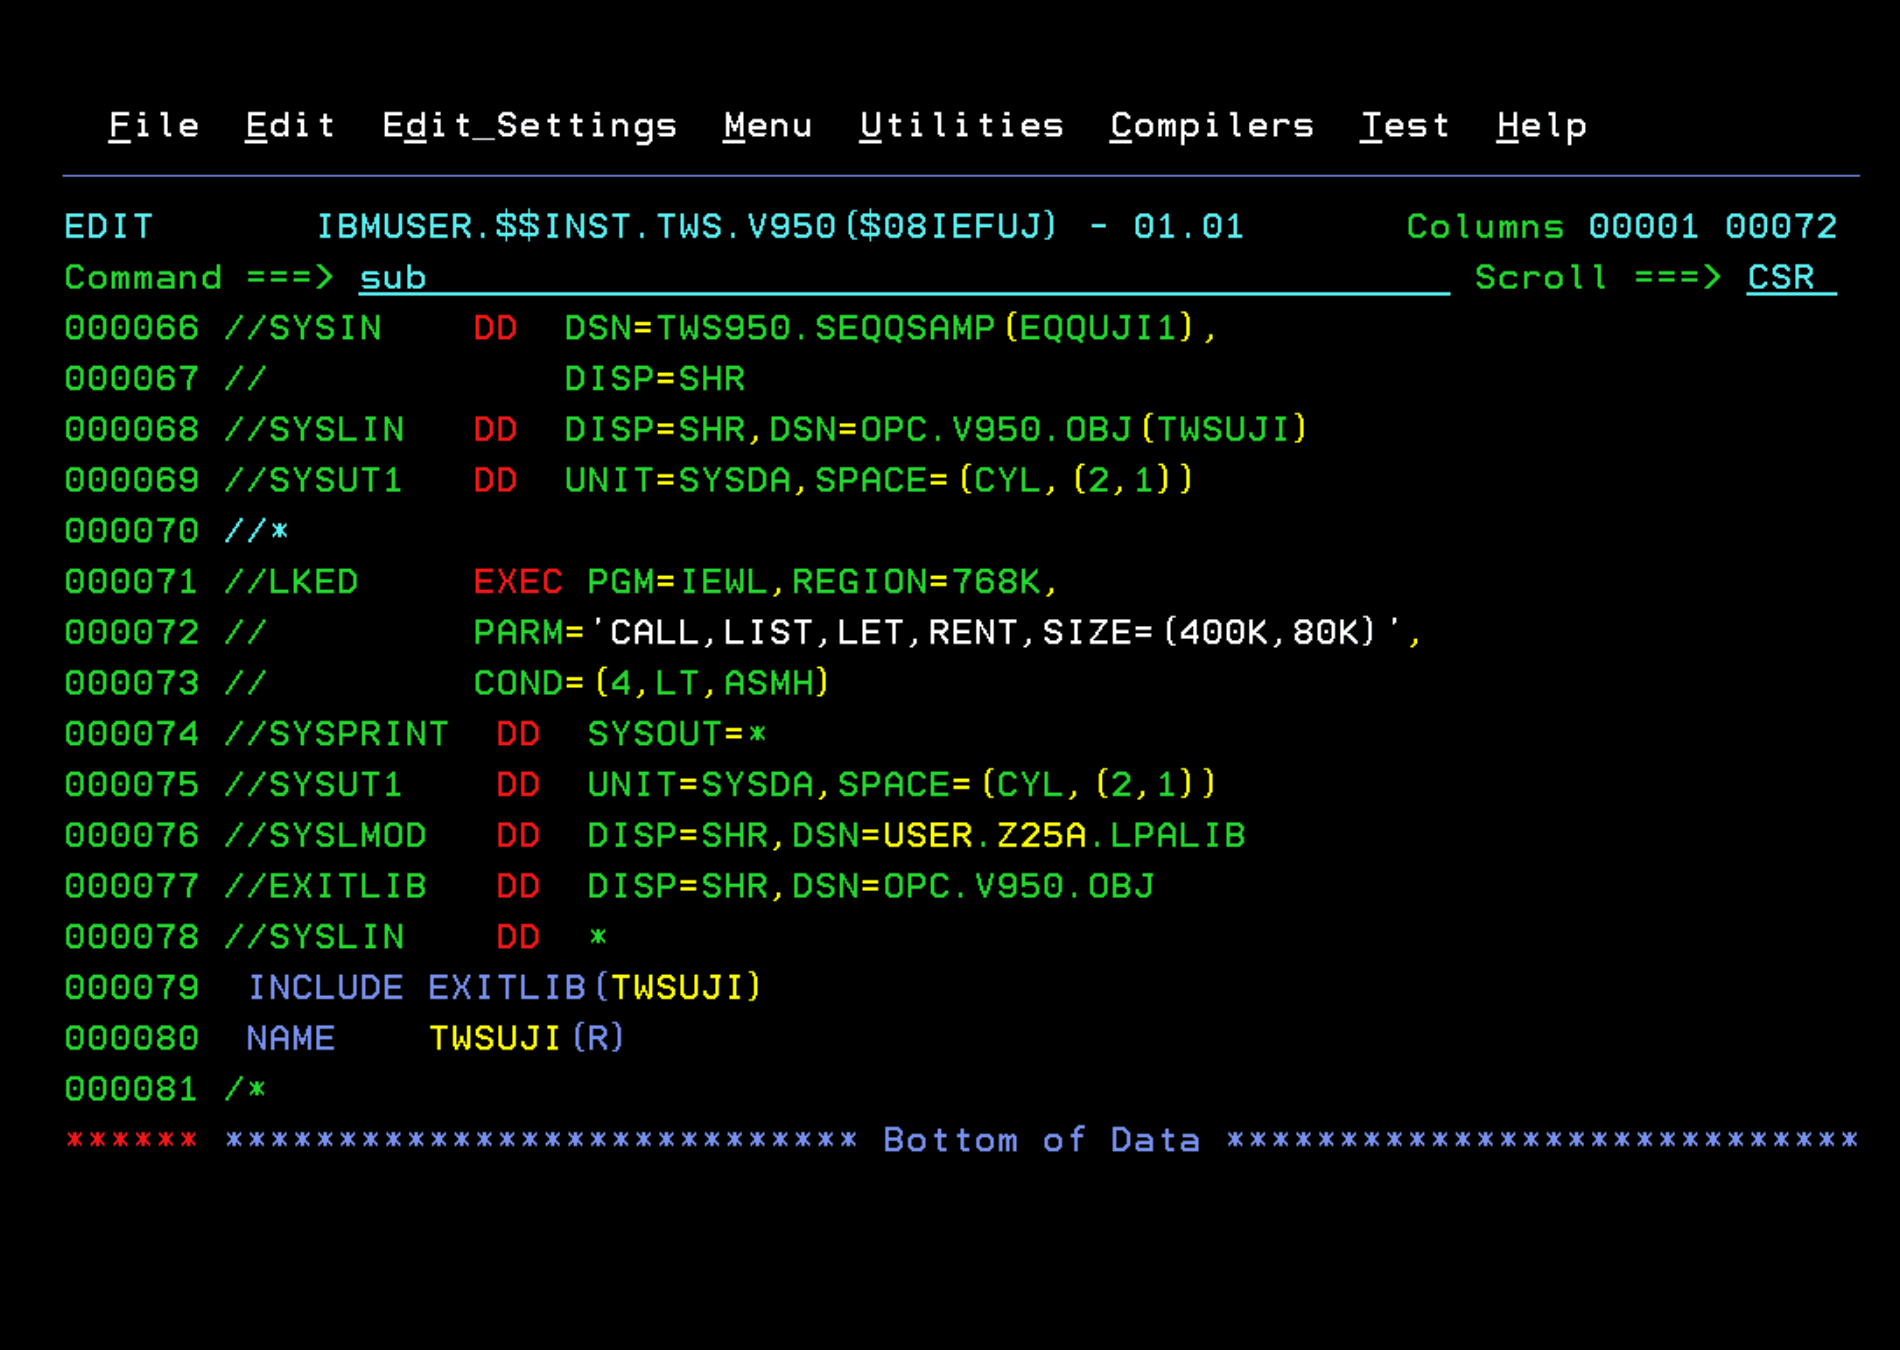
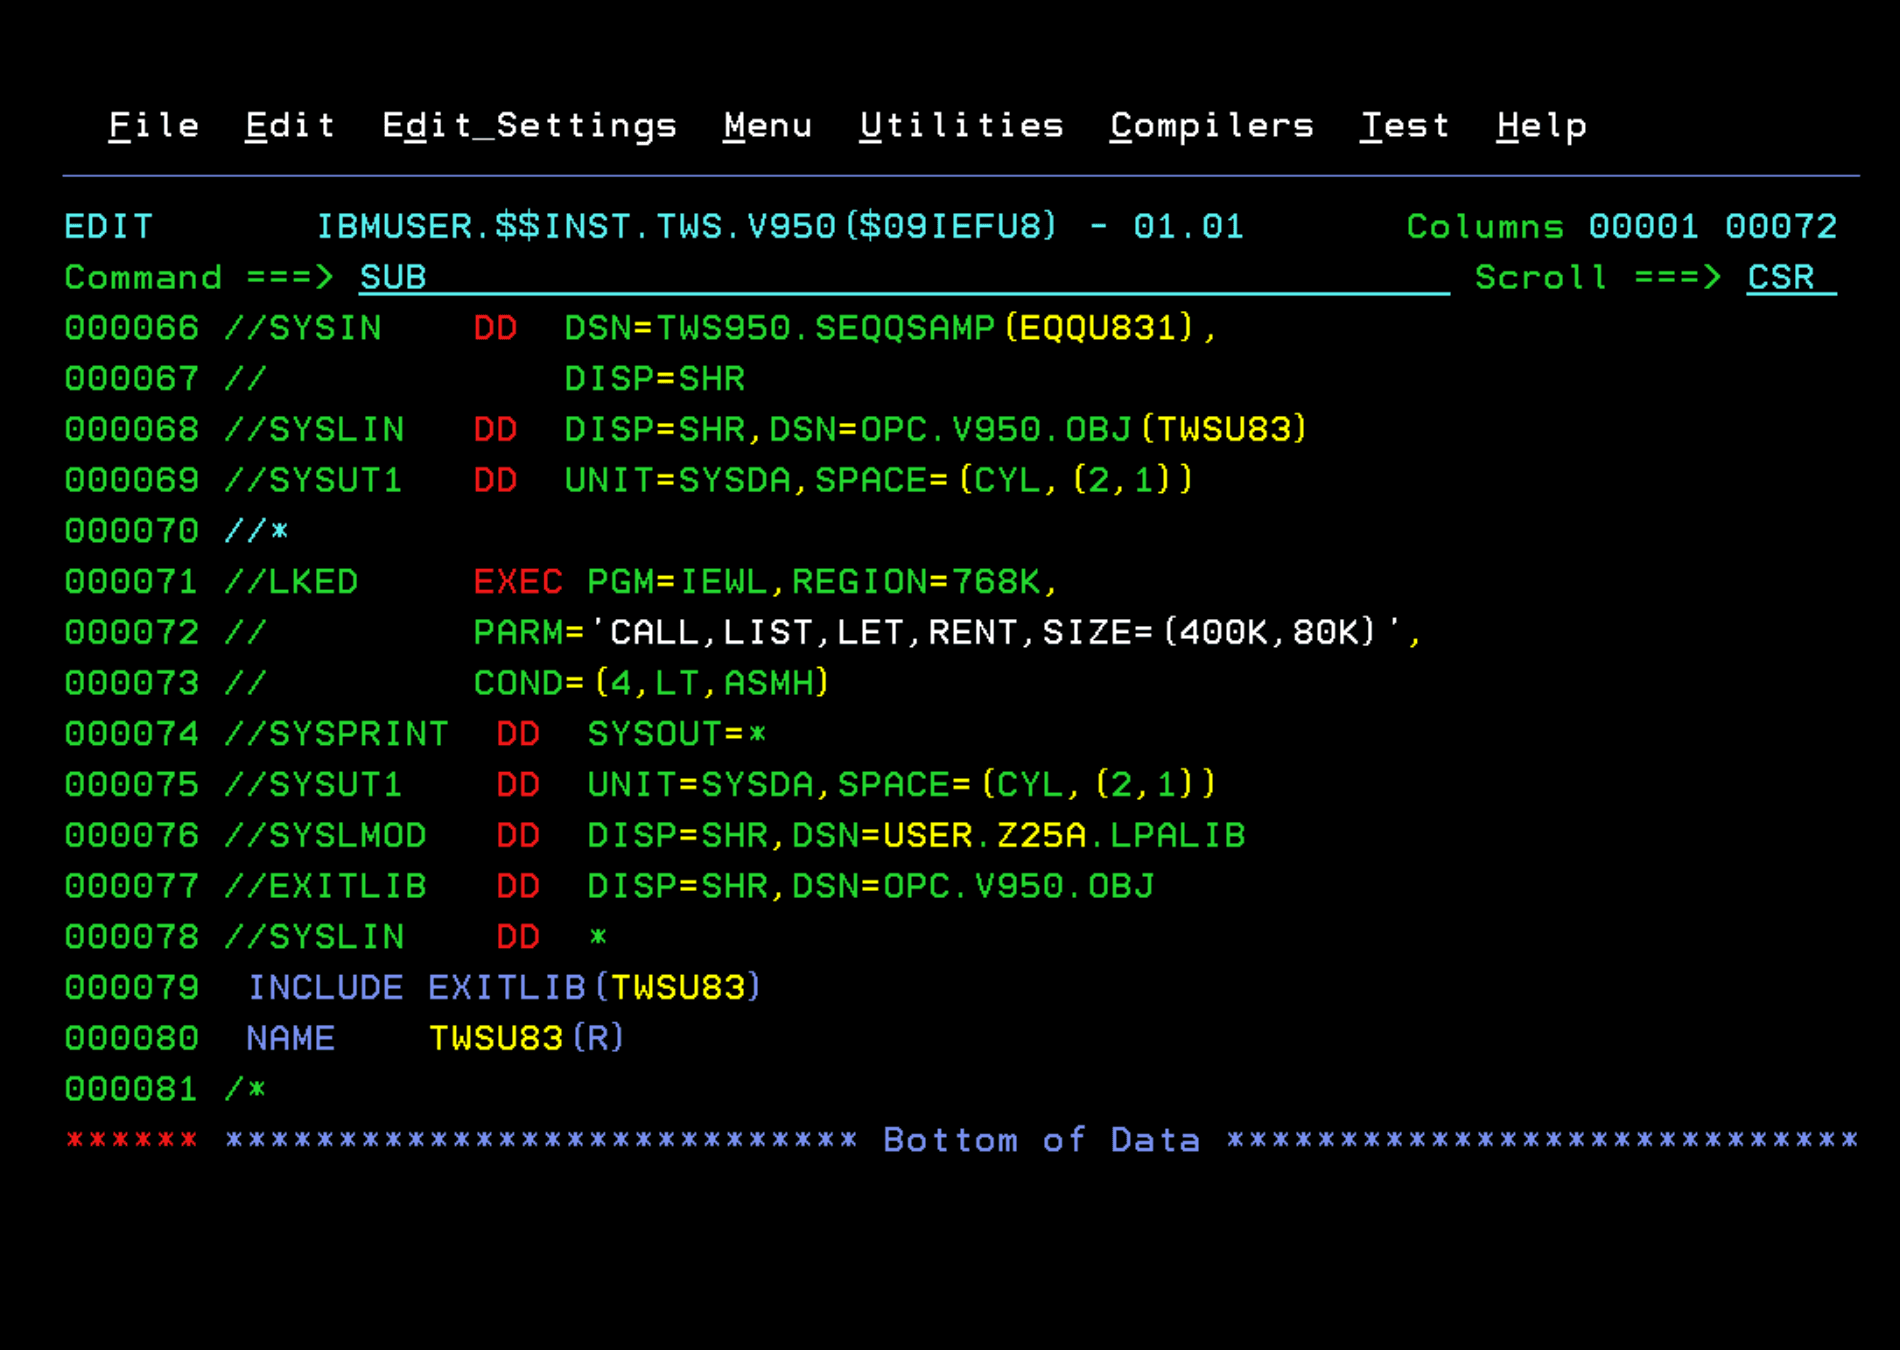
Using the EQQJES2 job as a base, we simply have to make the changes shown in the image to compile the examples EQQACTR1, EQQUJI1, EQQU831.
For the IEFACTRT exit we will make the following changes and run the job.
For the IEFUJI exit we will make the following changes and run the job.
For the IEFU83 exit we will make the following changes and run the job.
We will now have all the modules compiled.
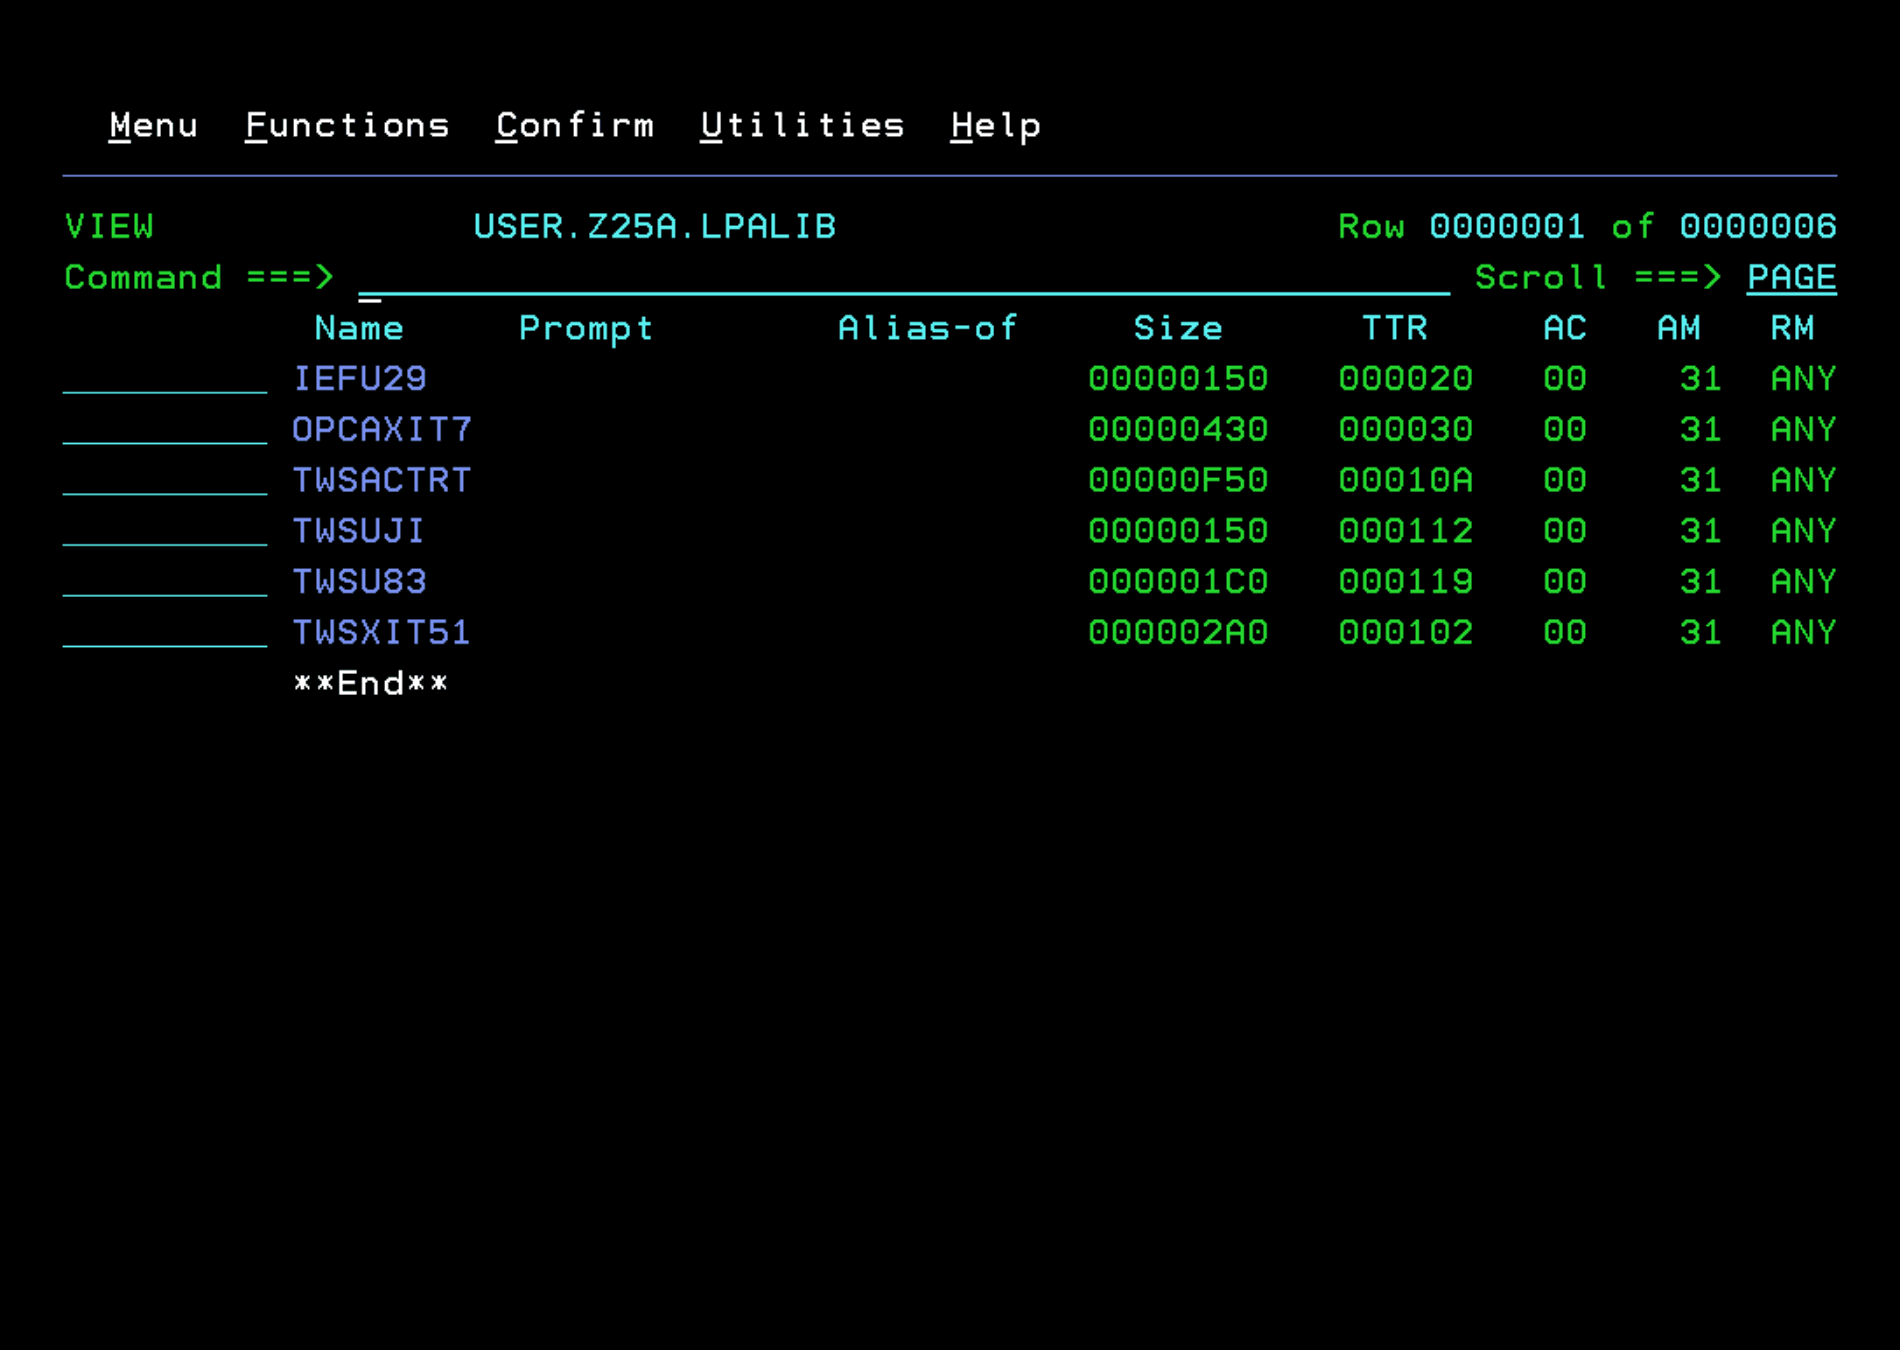
Configure JES2 and PARMLIB
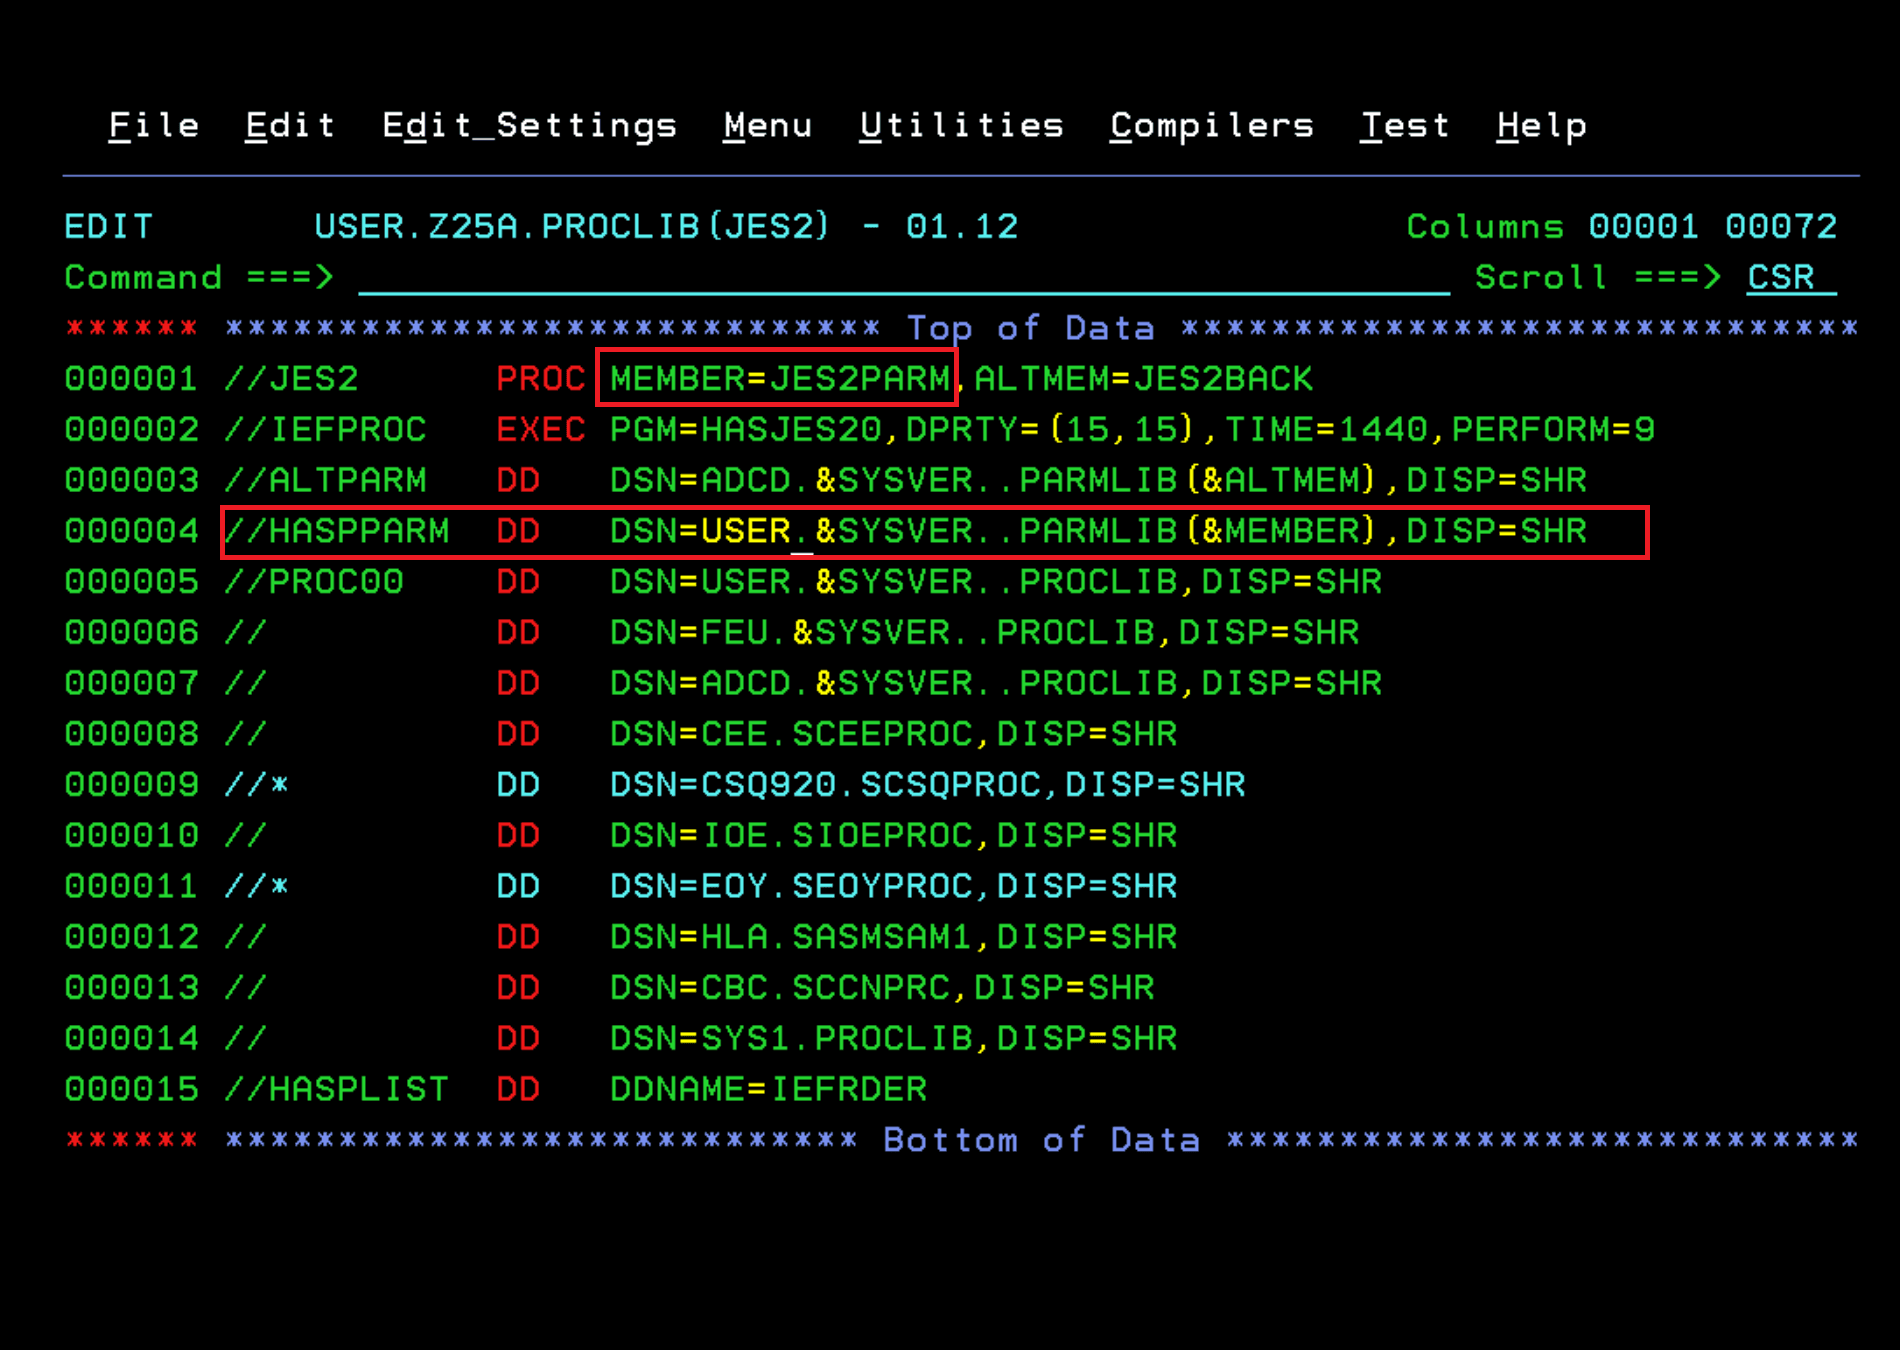
Now we will add the exits to the JES2 parameter file. To find out the parameter file, in my case, I just need to look at the task startup.
Also, since I will use the USER.** libraries to make the changes, it’s also necessary to copy the JES2 STC to the USER.Z25A.PROCLIB library to indicate that it should look in the USER.Z25A.PARMLIB library.
We edit the parameter member. We must be very careful when doing this because if we make a mistake, the task will not start.
LOAD(OPCAXIT7) /* Load IBM Z Workload Scheduler exit mod */
EXIT(7) ROUTINES=OPCAENT7,STATUS=ENABLED /* Define EXIT7 entry point */
LOAD(TWSXIT51) /* Load IBM Workload Scheduler for z/OS exit mod */
EXIT(51) ROUTINES=TWSENT51,STATUS=ENABLED /* Define EXIT51 entry */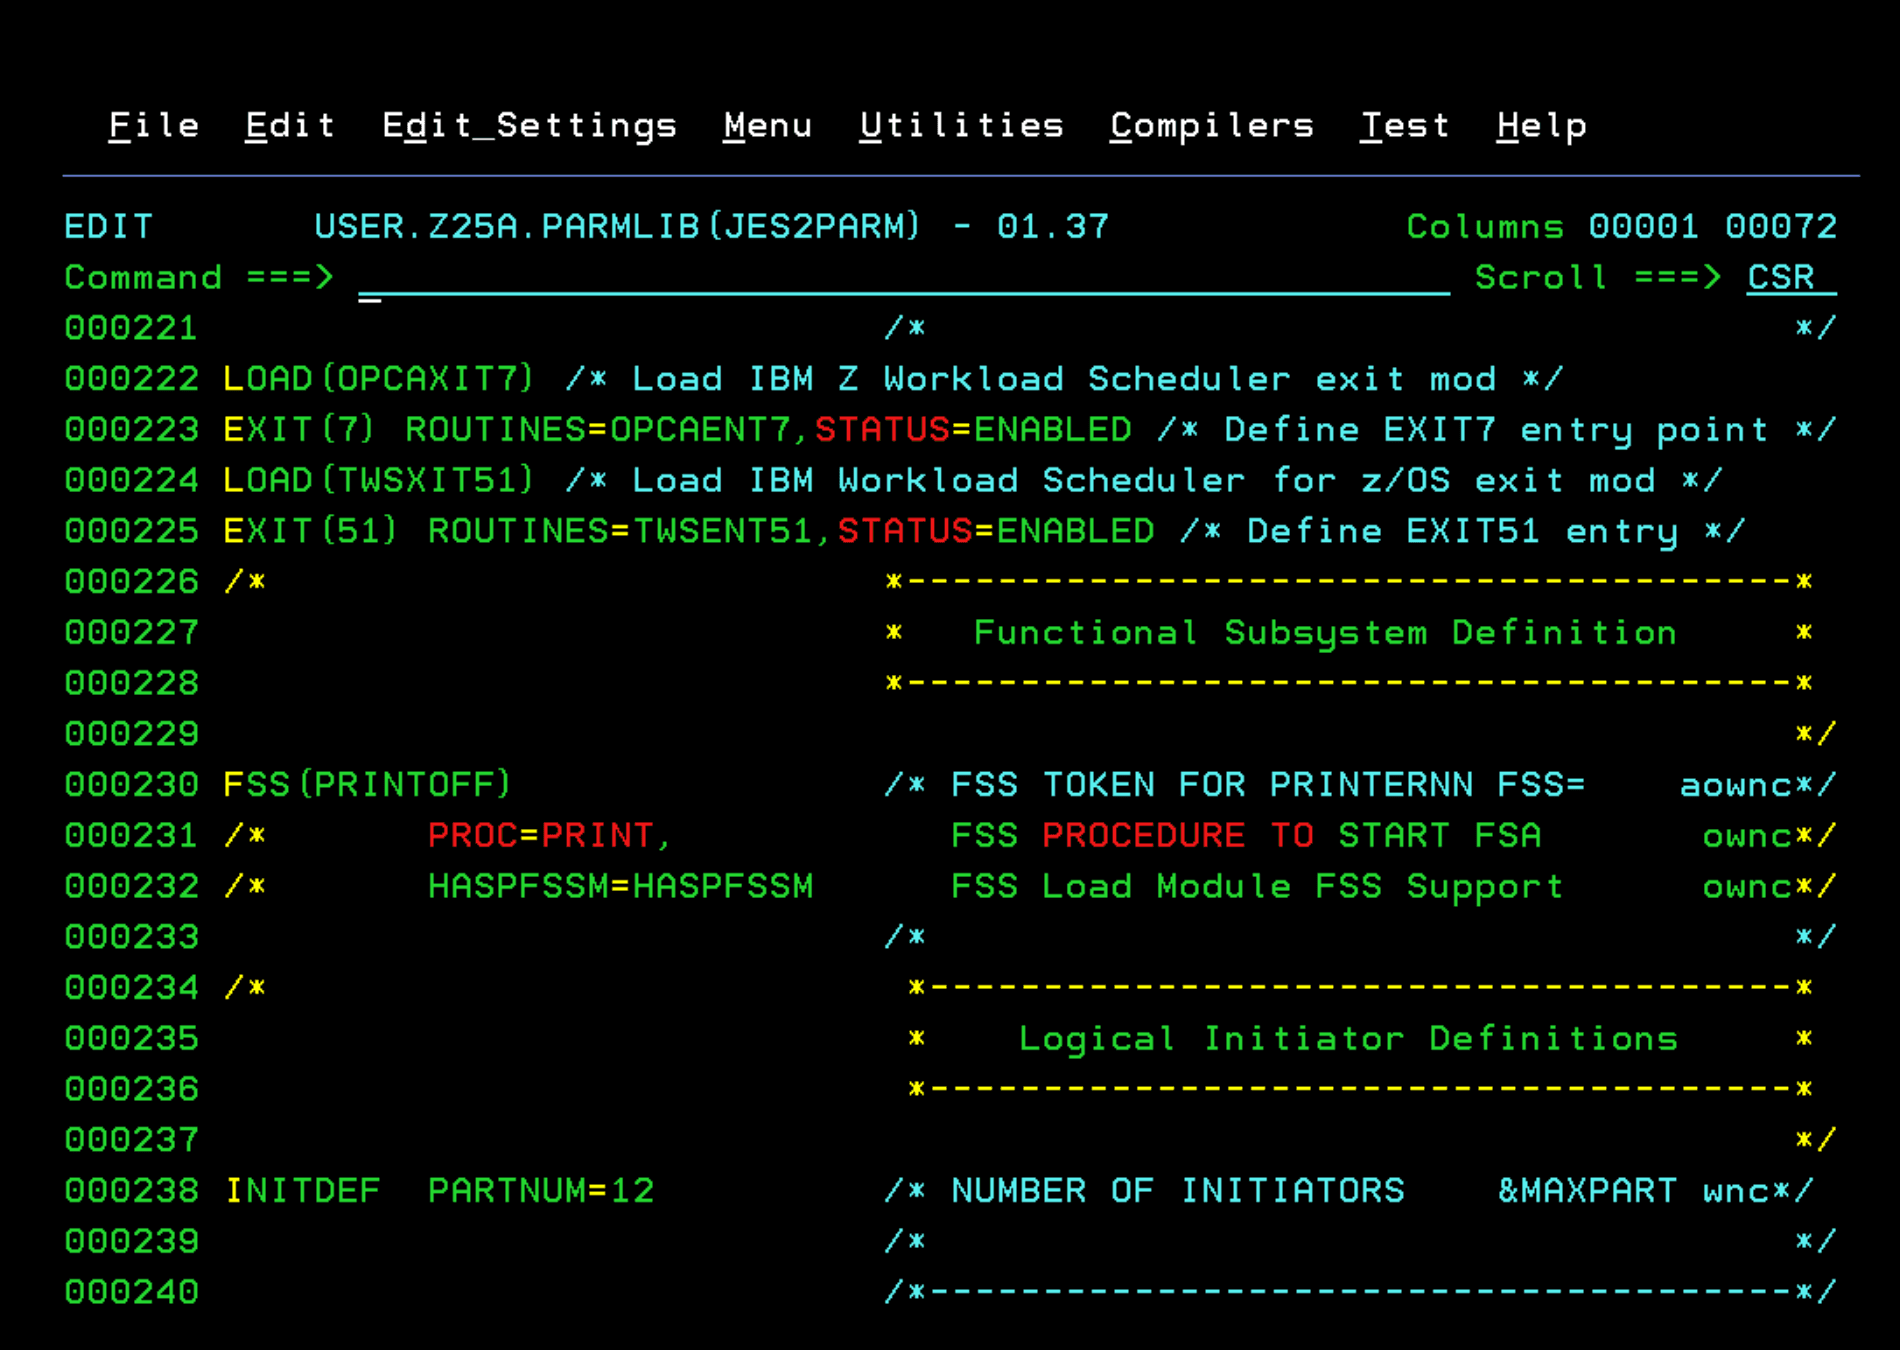
Now we need to define the subsystems (Controller and Tracker) in the IEFSSNxx member of PARMLIB. In this version, the suffix parameter will be “N”. To set the maxecsa parameter we must calculate it according to our installation.
SUBSYS SUBNAME(subsystem name) INITRTN(module name) INITPARM ('maxecsa,suffix')In my case it would be:
SUBSYS SUBNAME(OPCC) INITRTN(EQQINITN) INITPARM ('0,N')
SUBSYS SUBNAME(OPCT) INITRTN(EQQINITN) INITPARM ('100,N')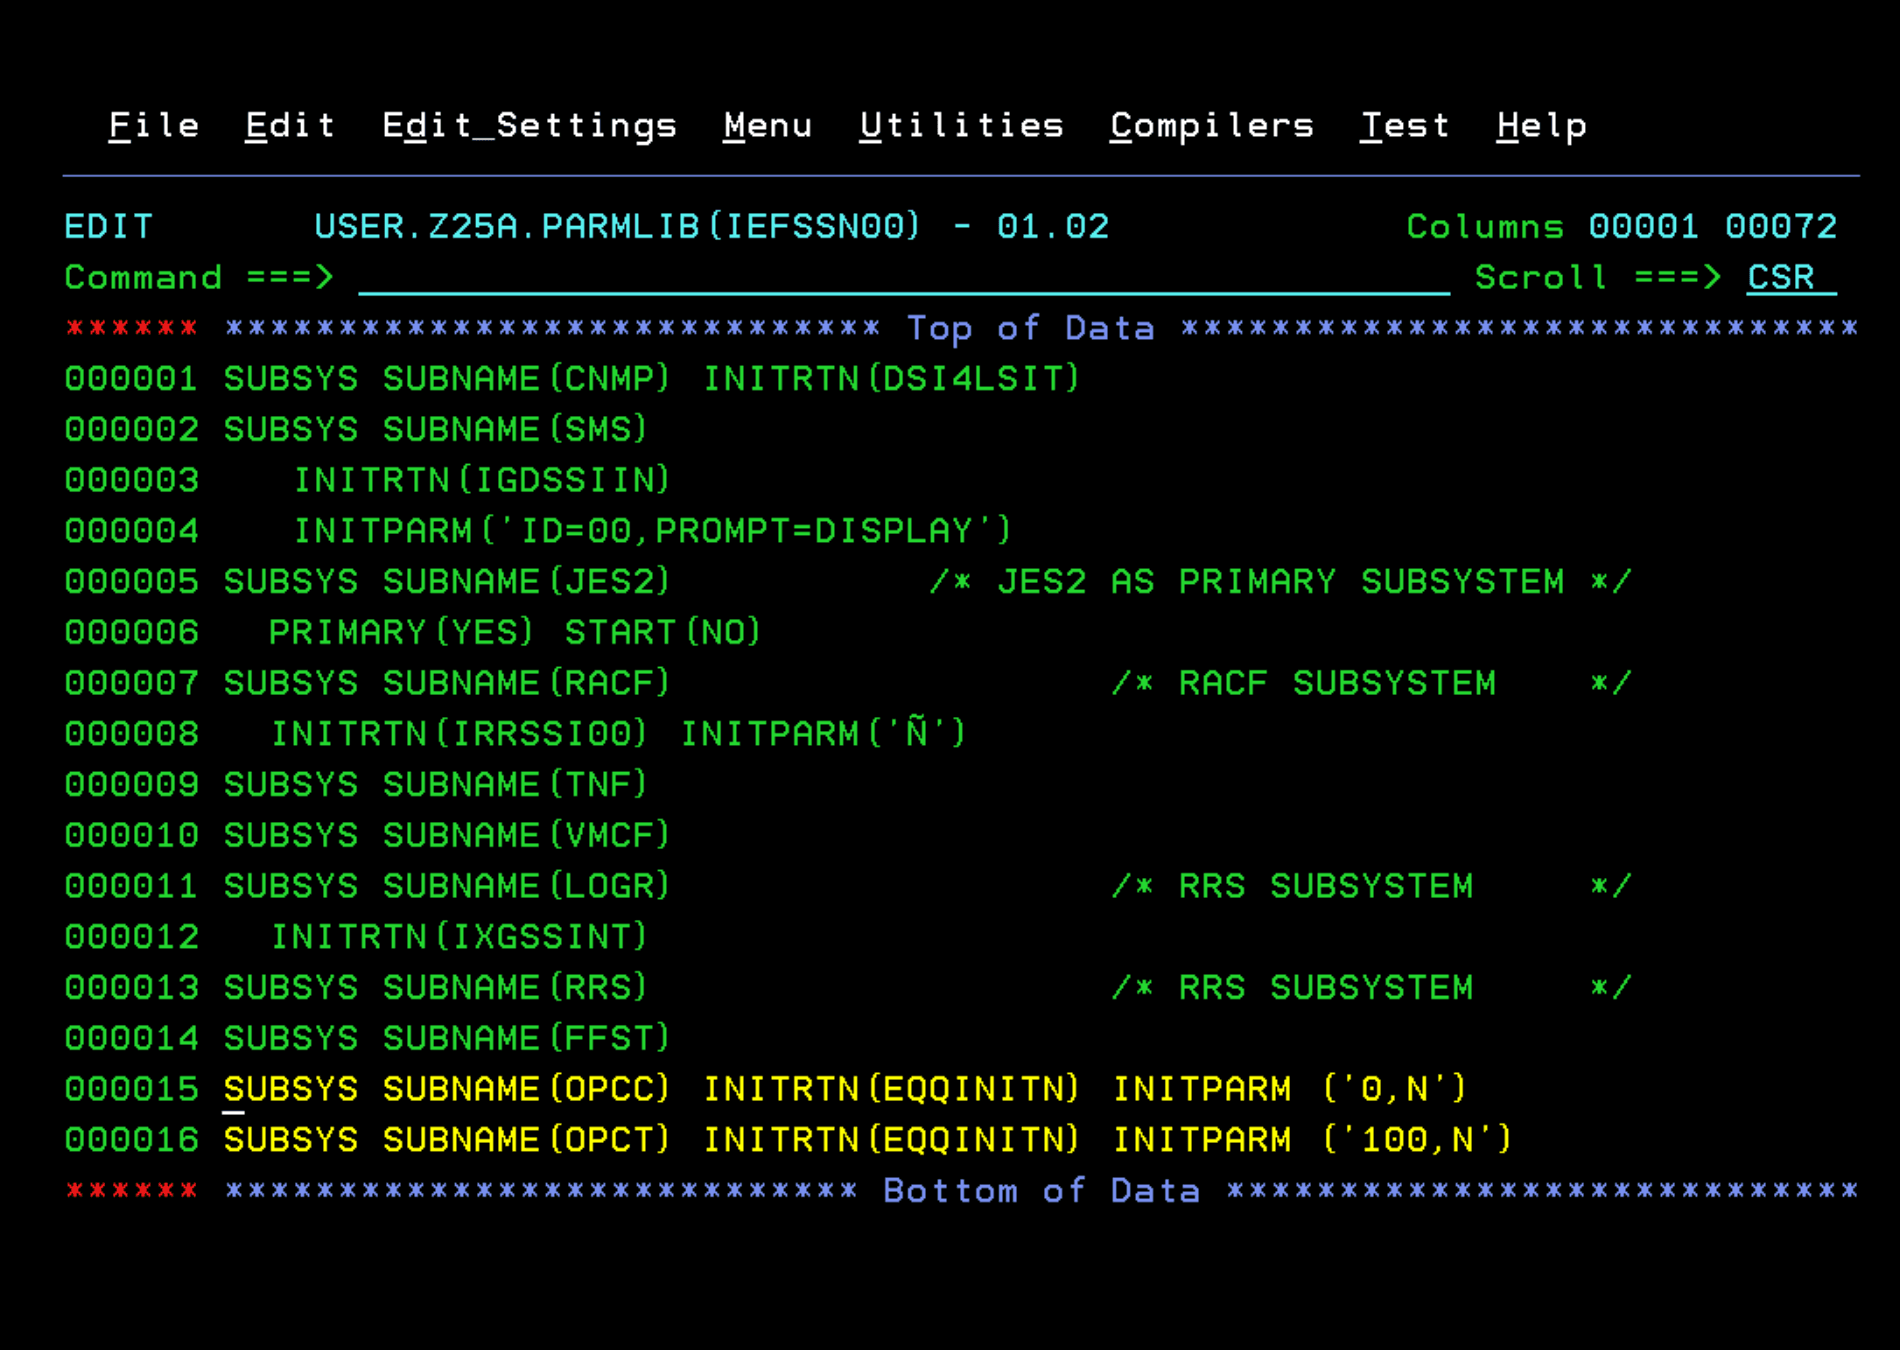
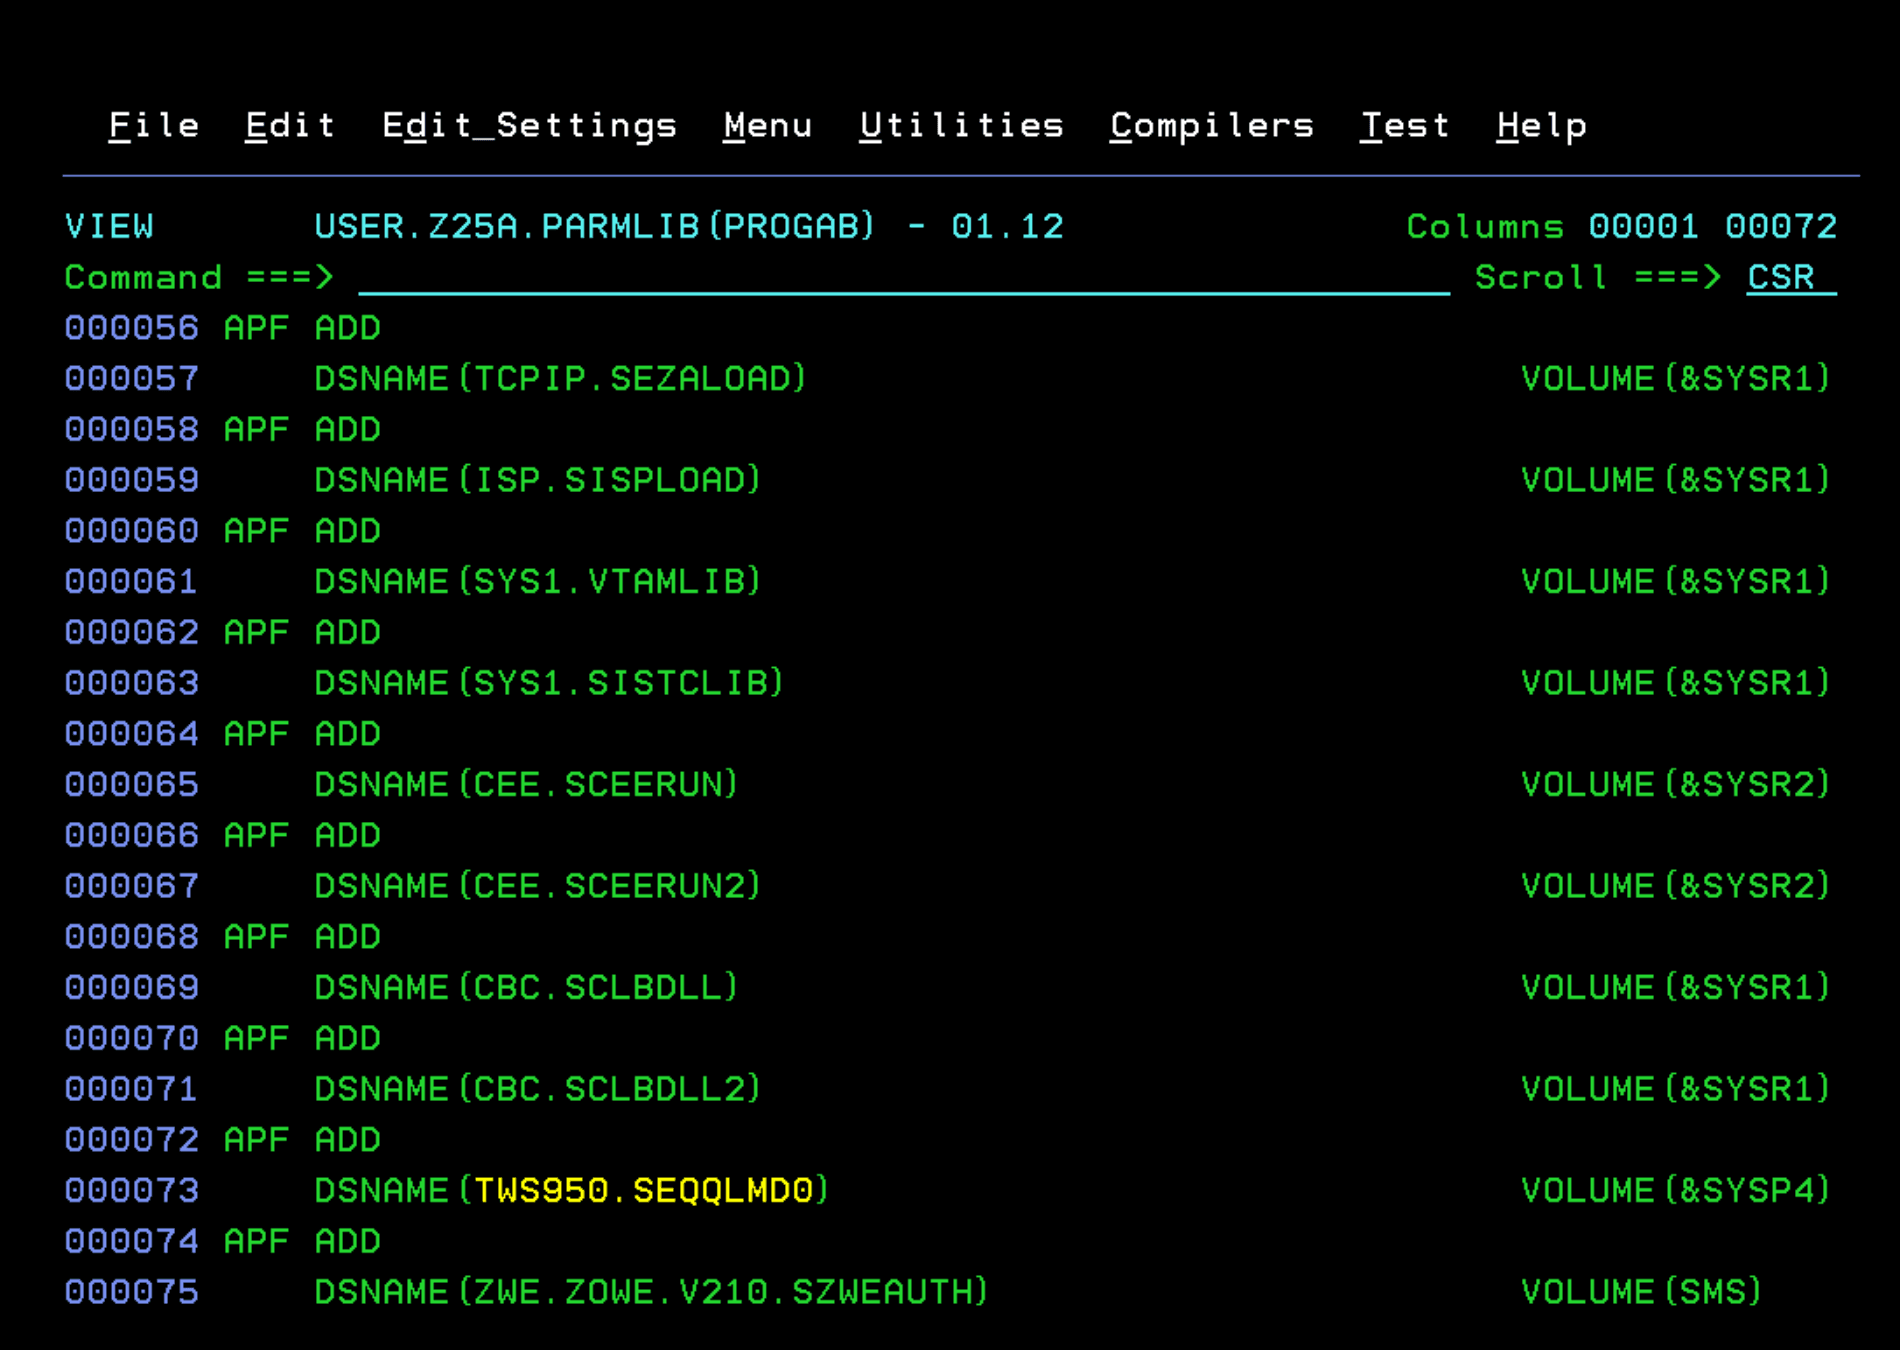
The next step is to add the module library TWS950.SEQQLMD0 to the APF library list.
Now we need to add the SMF records that are captured. We will add it to the SMFPRMxx member.
The important thing is that SMF records of the following types are captured (6, 14, 15, 18…):
/*SYS and SUBSYS keywords*/
SYS(TYPE(6,14,15,18,26,30,60,62,64,90),EXITS(IEFU83,IEFACTRT,IEFUJI))
 SUBSYS(STC,EXITS(IEFUJI,IEFACTRT,IEFU83))
 SUBSYS(JESn,EXITS(IEFUJI,IEFACTRT,IEFU83))
Since, in my case, this configuration is present, I have to change it to include the records indicated above:
SYS(NOTYPE(14:19,62:69,99),EXITS(IEFU83,IEFU84,IEFACTRT,
              IEFUSI,IEFUJI,IEFU29),NOINTERVAL,NODETAIL)
It would look like this:
SYS(NOTYPE(16,17,19,63,65:69,99),EXITS(
 IEFU83,IEFU84,IEFACTRT,IEFUSI,IEFUJI,IEFU29),NOINTERVAL,NODETAIL)
SUBSYS(STC,EXITS(IEFU29,IEFU83,IEFU84,IEFUJP,IEFUSO,IEFUJI,IEFACTRT))
SUBSYS(JES2,EXITS(IEFU83,IEFUJI,IEFACTRT))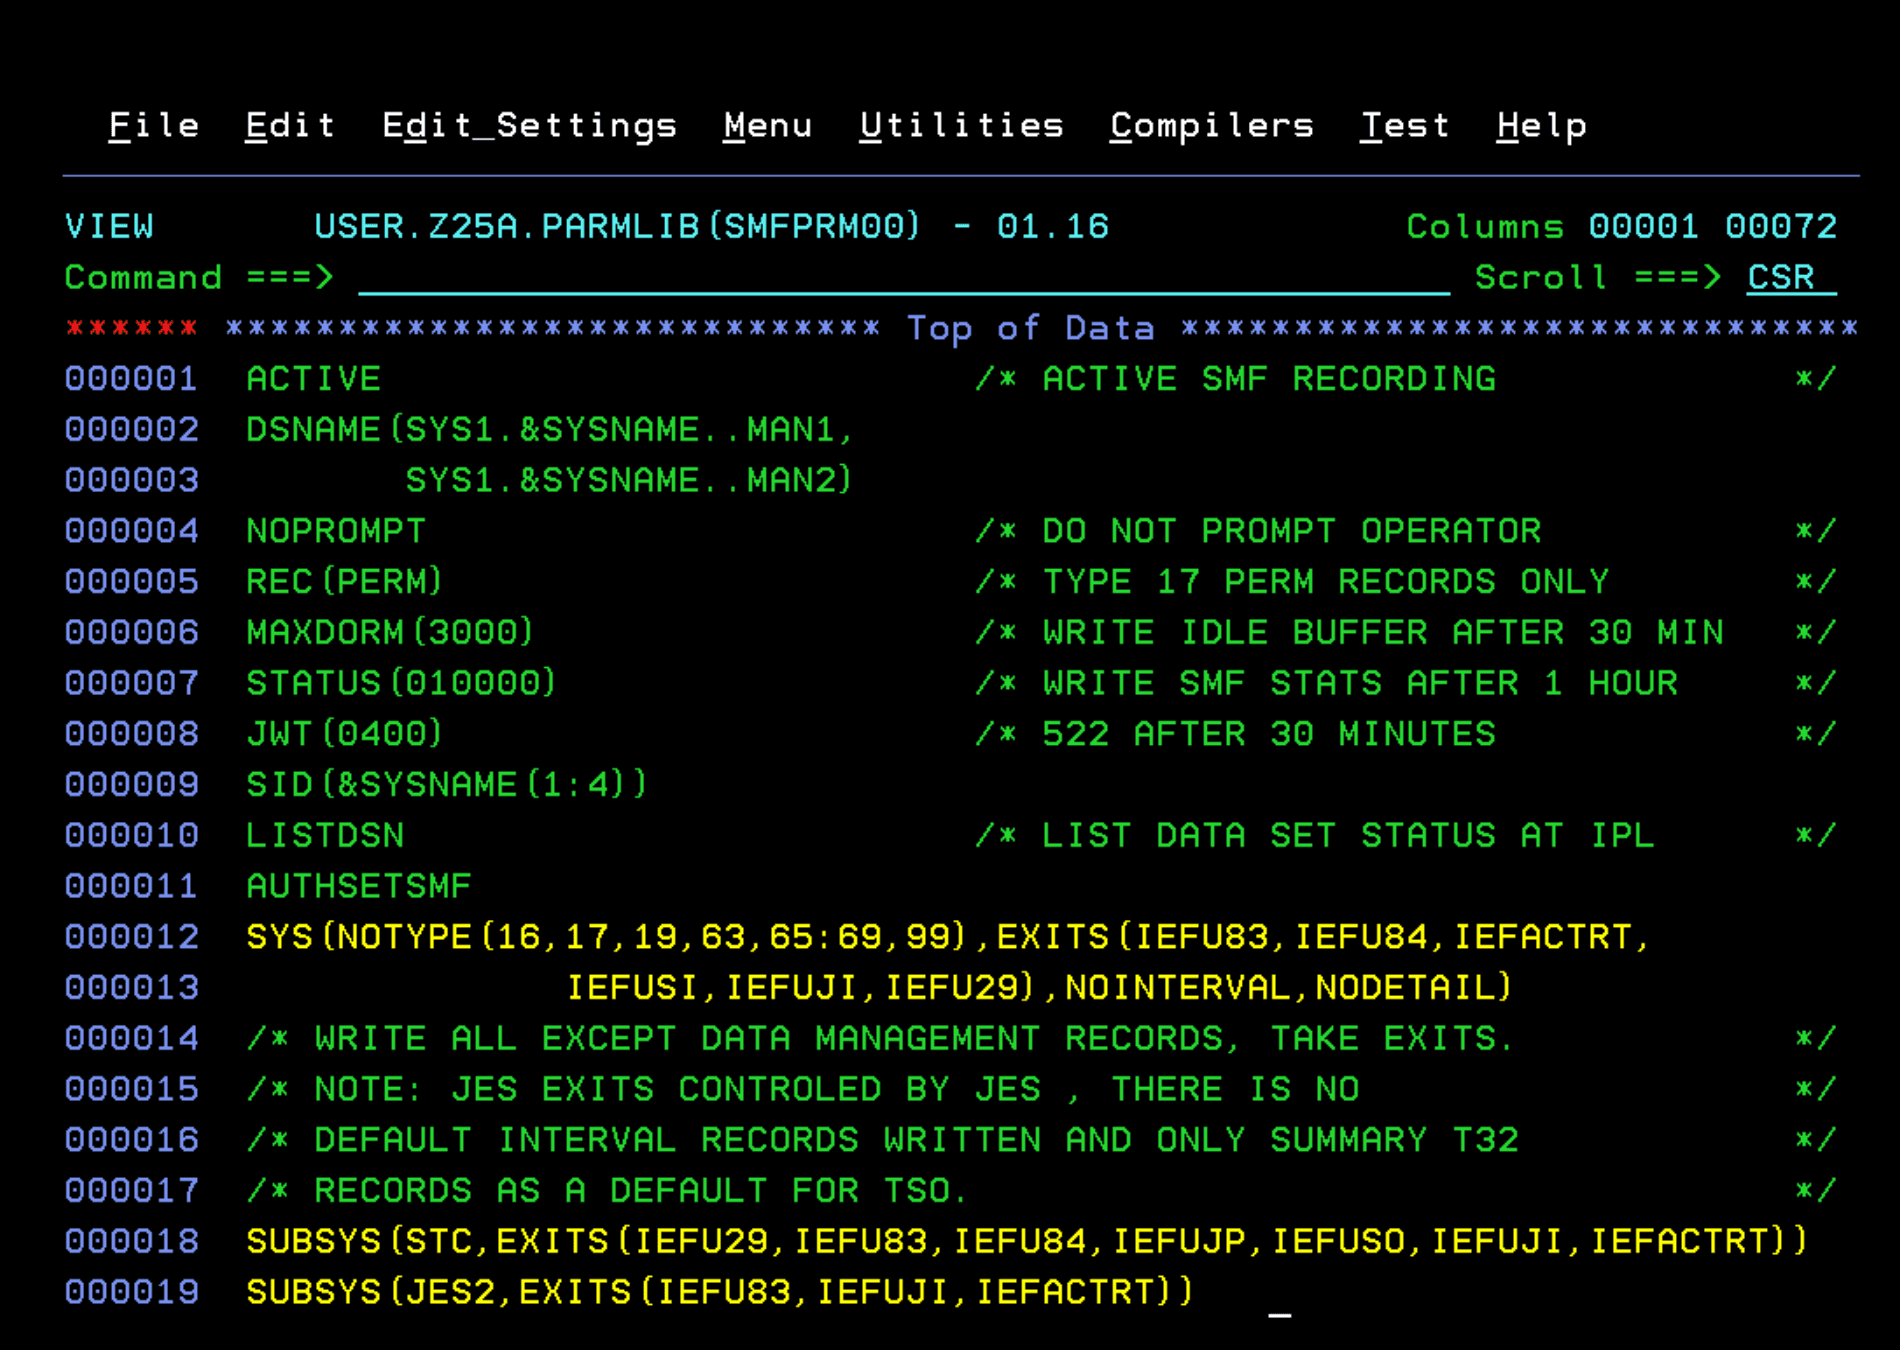
In the PROGxx member and before the LINKLST definition, we will add the definition of the EXITS so that they use the modules created earlier.
EXIT ADD EXITNAME(SYS.IEFU83) MODNAME(TWSU83)
EXIT ADD EXITNAME(SYS.IEFACTRT) MODNAME(TWSACTRT)
EXIT ADD EXITNAME(SYS.IEFUJI) MODNAME(TWSUJI)
EXIT ADD EXITNAME(SYSSTC.IEFU83) MODNAME(TWSU83)
EXIT ADD EXITNAME(SYSSTC.IEFACTRT) MODNAME(TWSACTRT)
EXIT ADD EXITNAME(SYSSTC.IEFUJI) MODNAME(TWSUJI)
EXIT ADD EXITNAME(SYSJES2.IEFU83) MODNAME(TWSU83)
EXIT ADD EXITNAME(SYSJES2.IEFACTRT) MODNAME(TWSACTRT)
EXIT ADD EXITNAME(SYSJES2.IEFUJI) MODNAME(TWSUJI)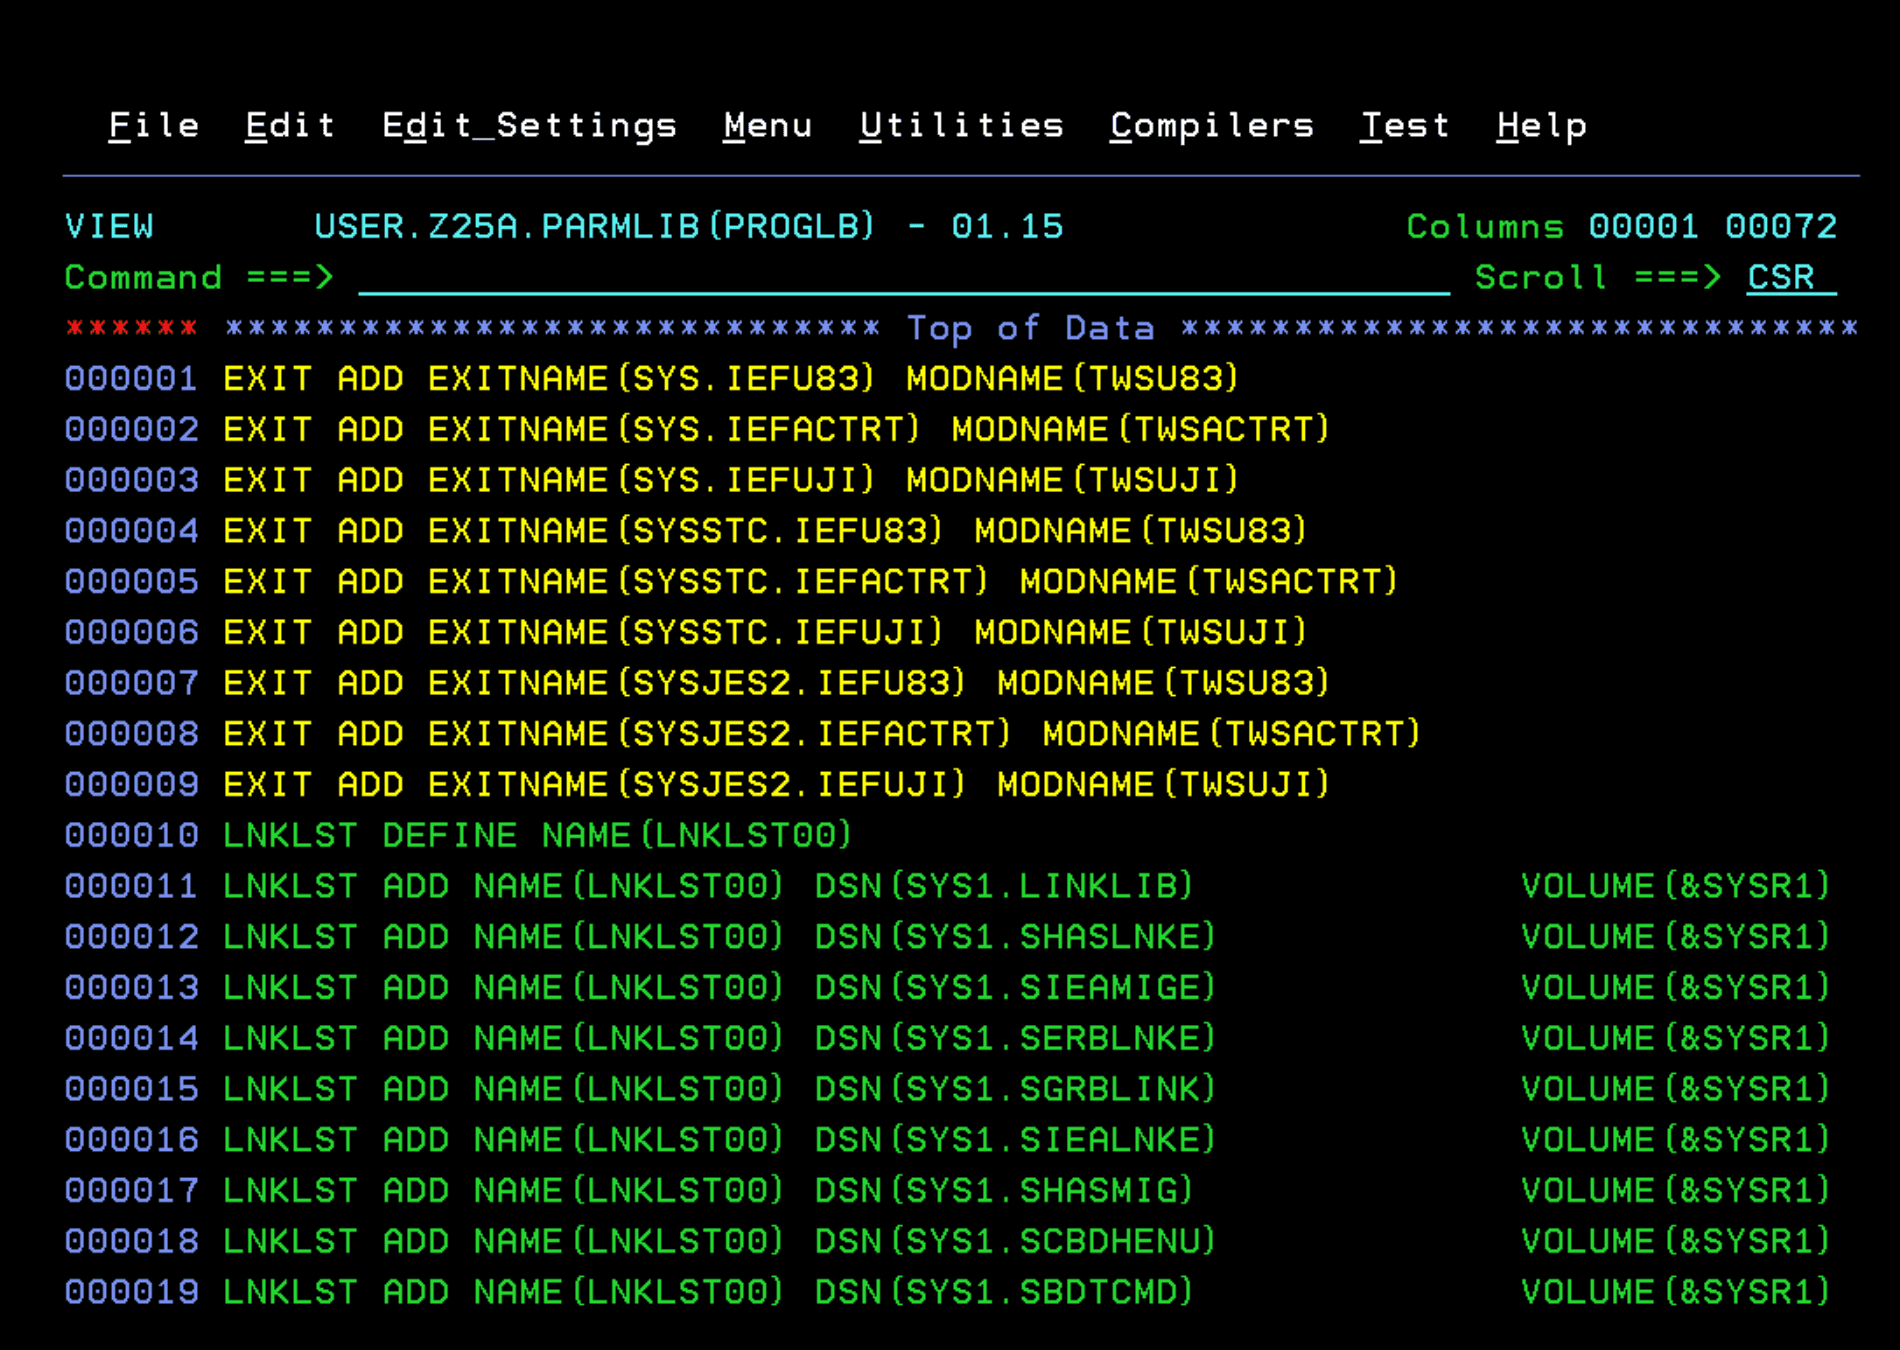
We take the opportunity to add the module library to LNKLST as well.
LNKLST ADD NAME(LNKLST00) DSN(TWS950.SEQQLMD0) VOLUME(&SYSP4)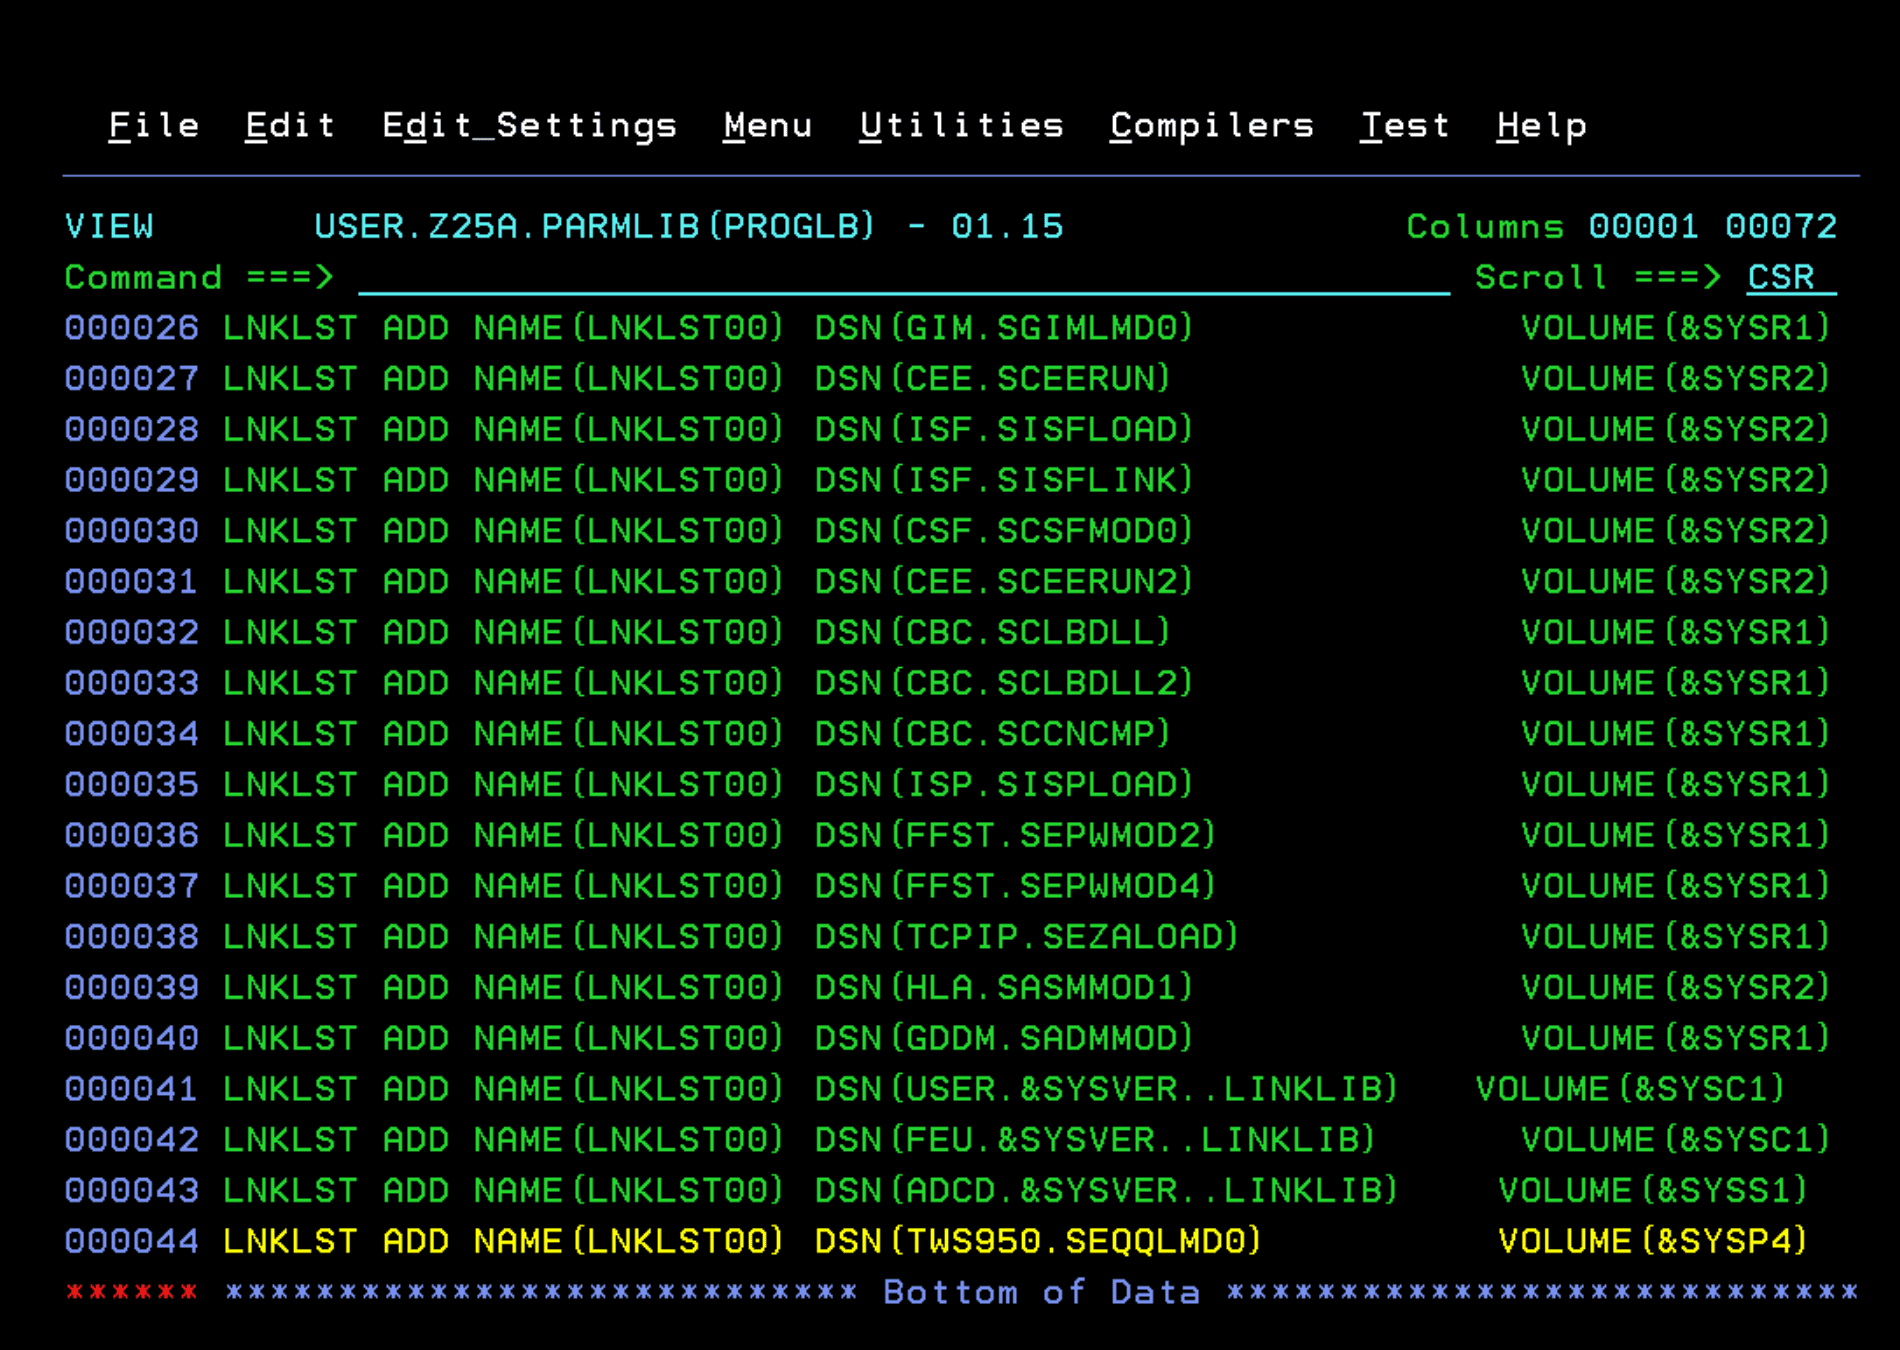
Configure TSO
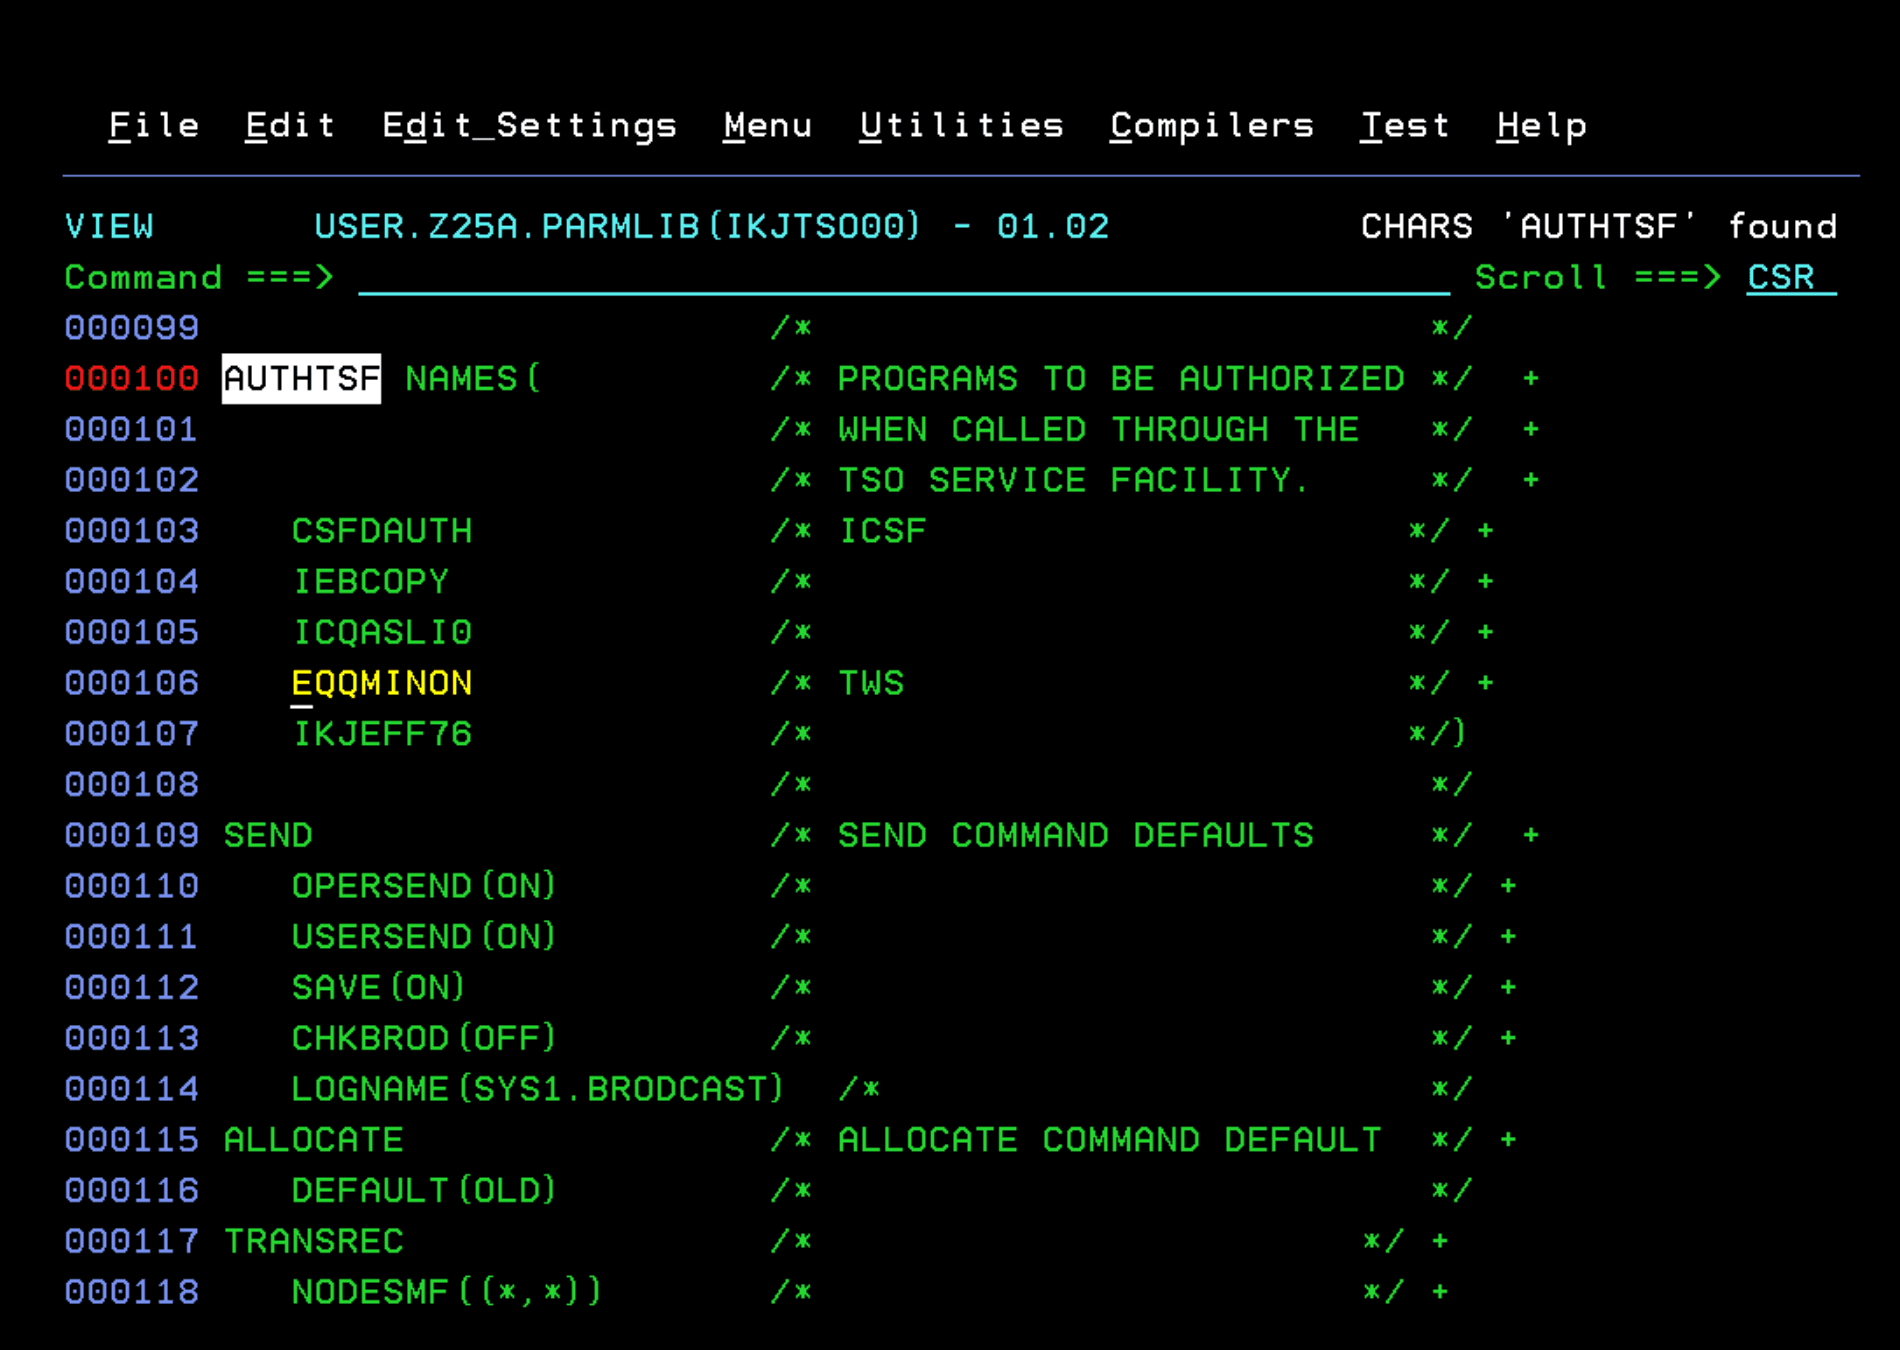
The next step is to add the EQQMINON module and some commands to TSO. To do this we need to edit the IKJTSOxx member.
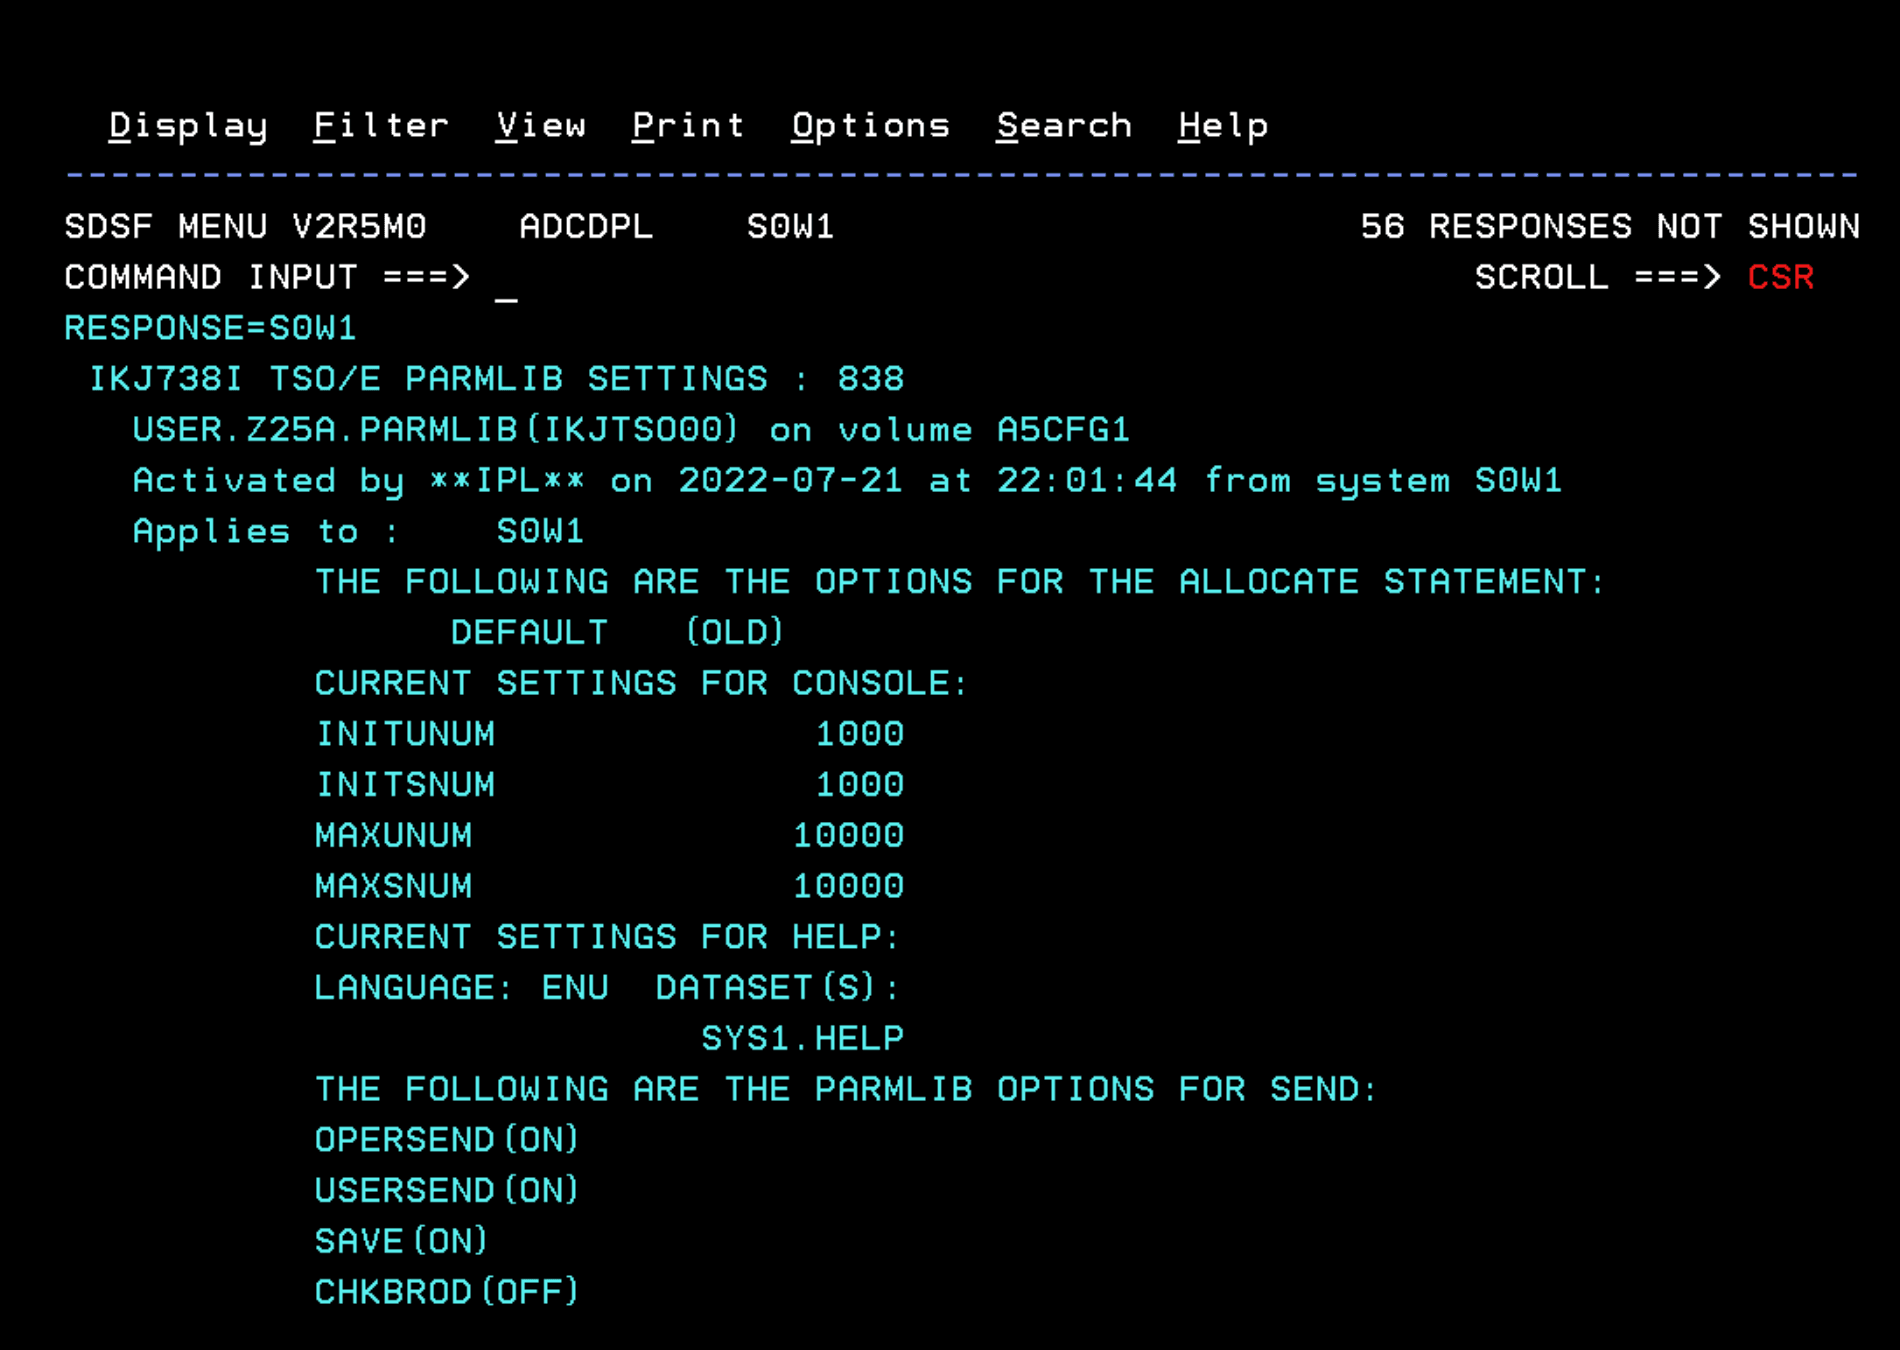
To find out which parameter file we are using we can use the command: D IKJTSO
We add EQQMINON in AUTHTSF NAMES.
We add the following commands in AUTHCMD:
BACKUP
BULKDISC
JSUACT
OPINFO
OPSTAT
SRSTAT
WSSTAT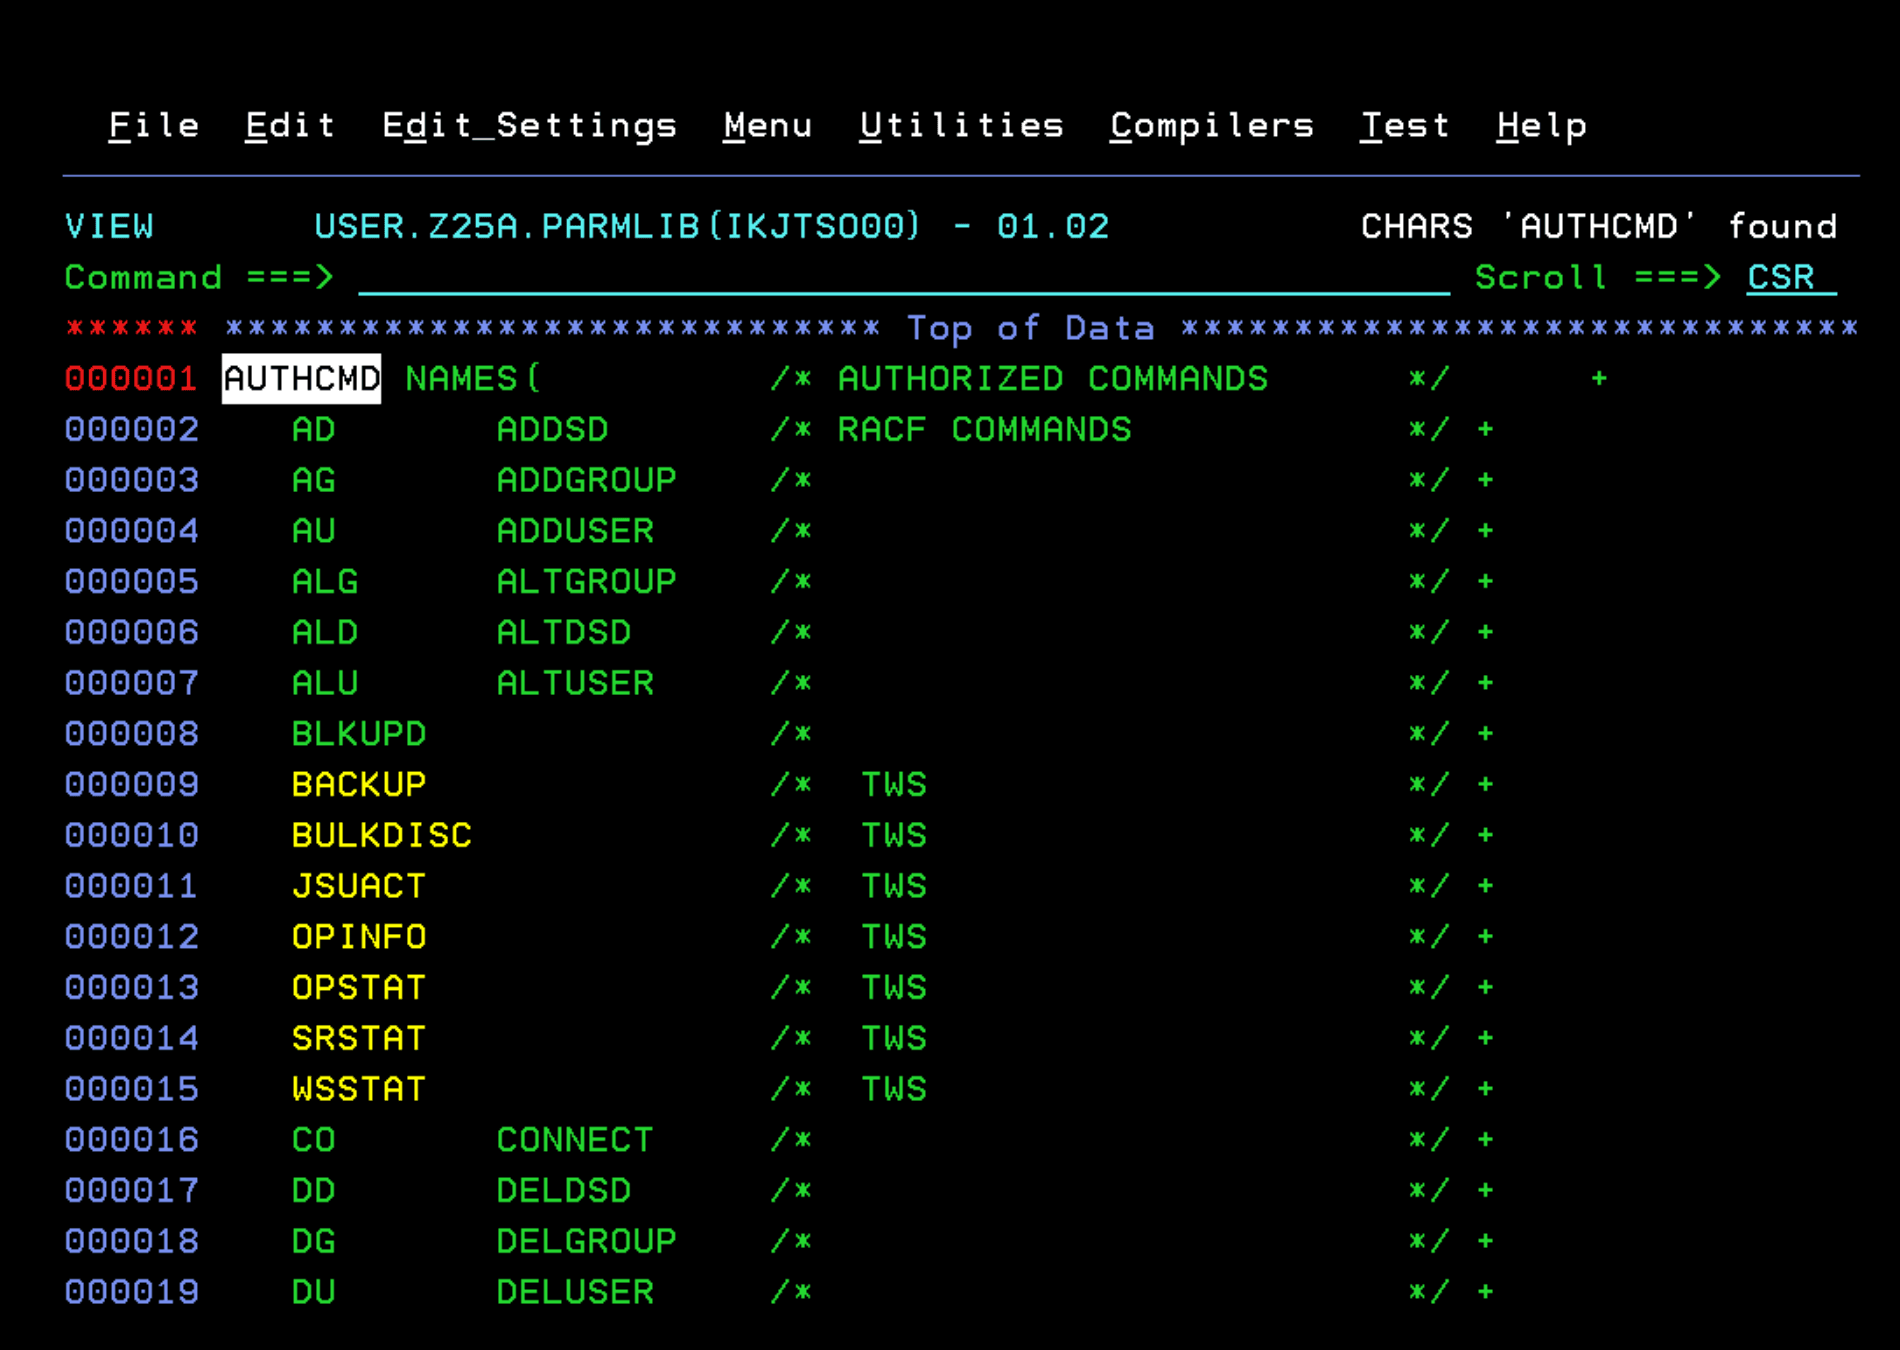
In the SCHEDxx member we add the following parameter:
PPT PGMNAME(EQQMAJOR) NOSWAP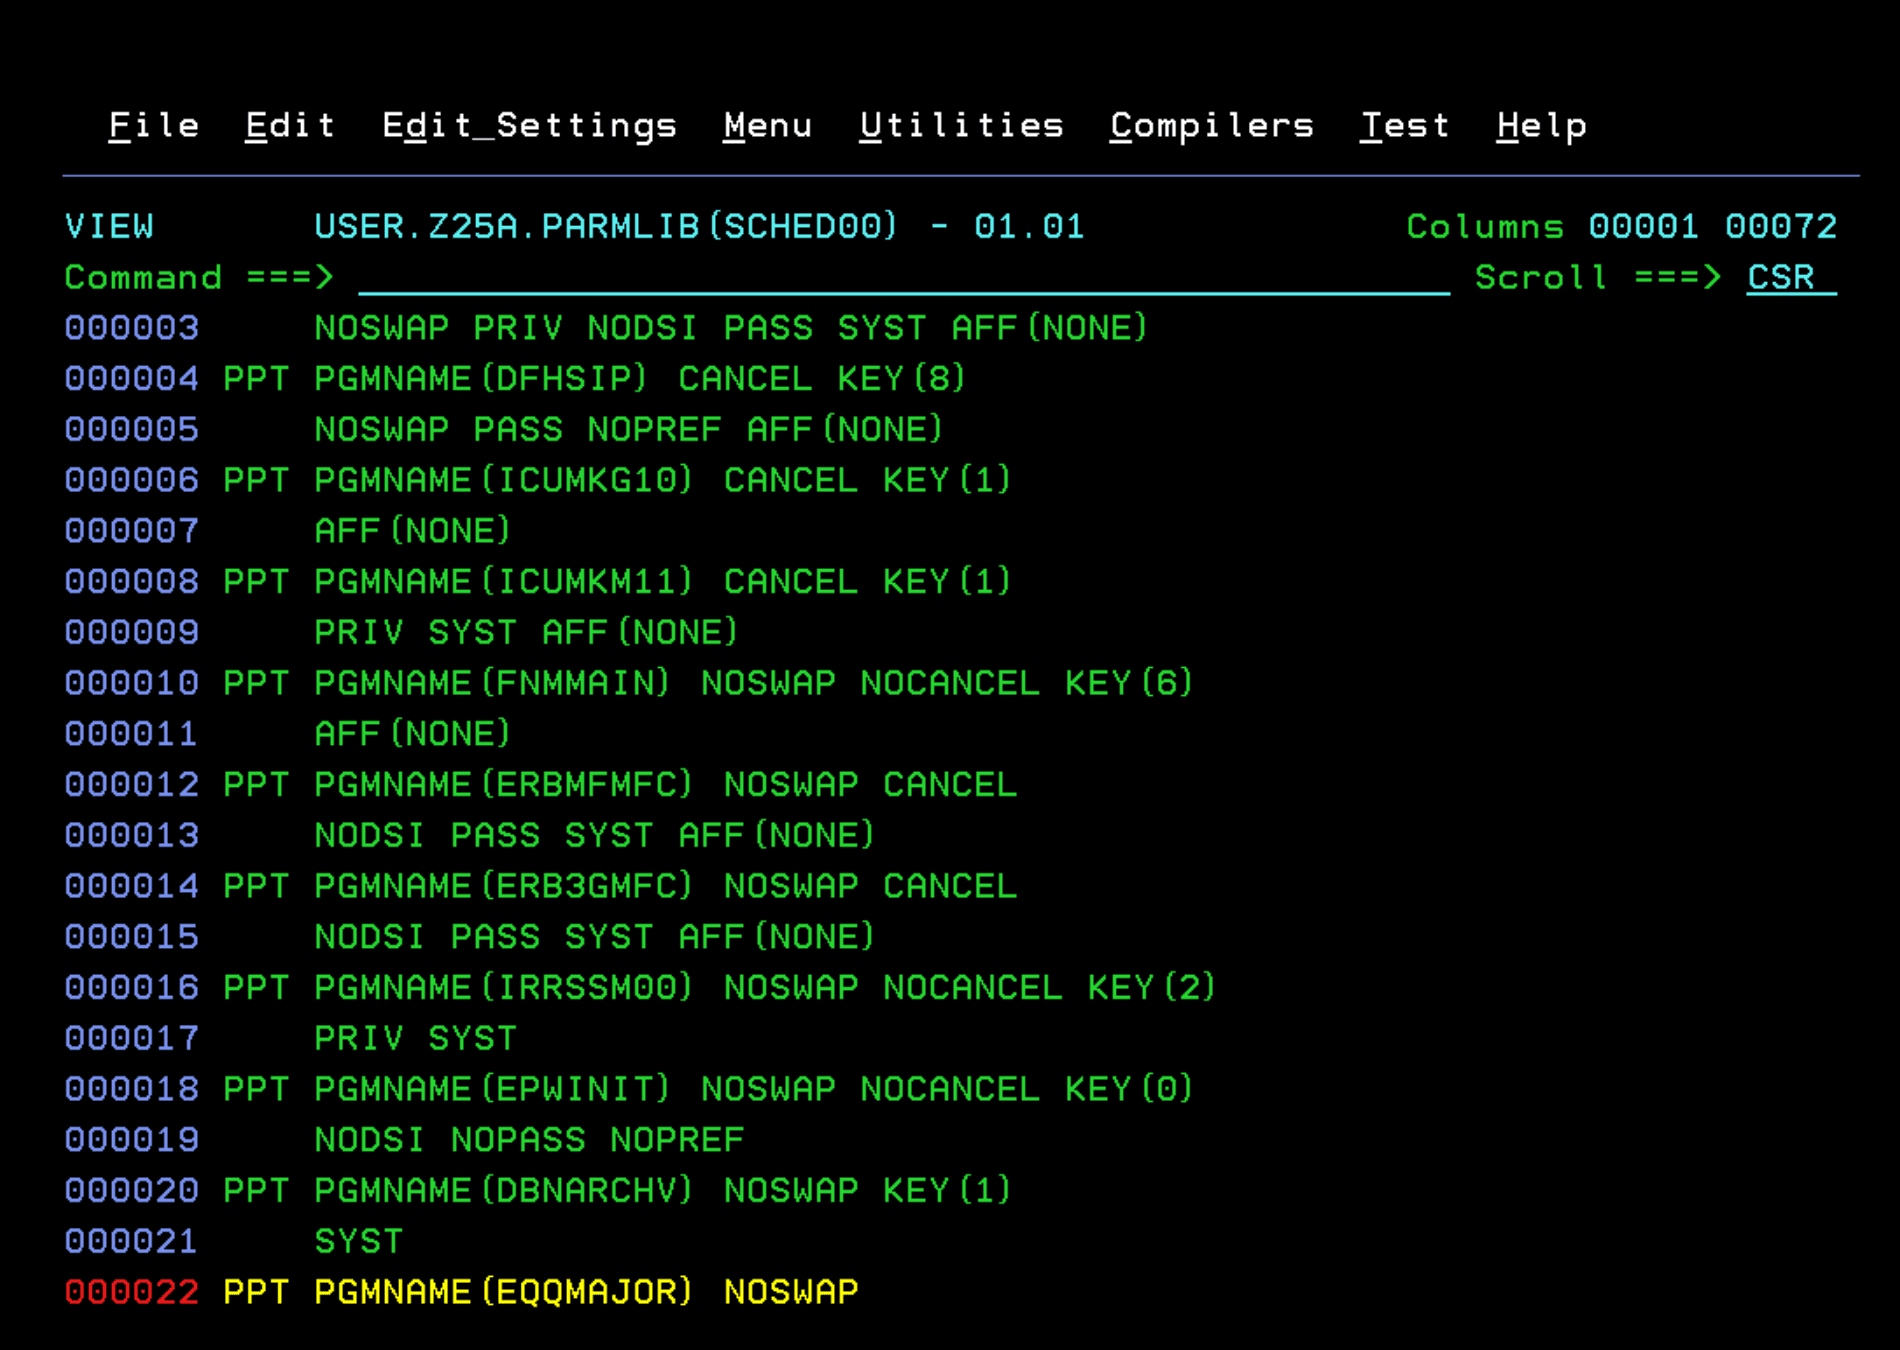
Following the IBM manual, we would now have to configure security (with RACF, in my case). I’m not going to do it yet, I’ll leave it for a future entry if necessary.
Create Configuration Datasets
We are going to run a series of jobs that are used to create the configuration data sets that the product will use.
We start with the job EQQPCS01.
This job creates several VSAM and NON-VSAM datasets. We must review the job and adjust the space of those datasets so we don’t run out of space. Optionally, if we don’t use SMS, we can add VOL=SER=xxxxxx to indicate the disk in NON-VSAM files.

We will have all the data sets created.
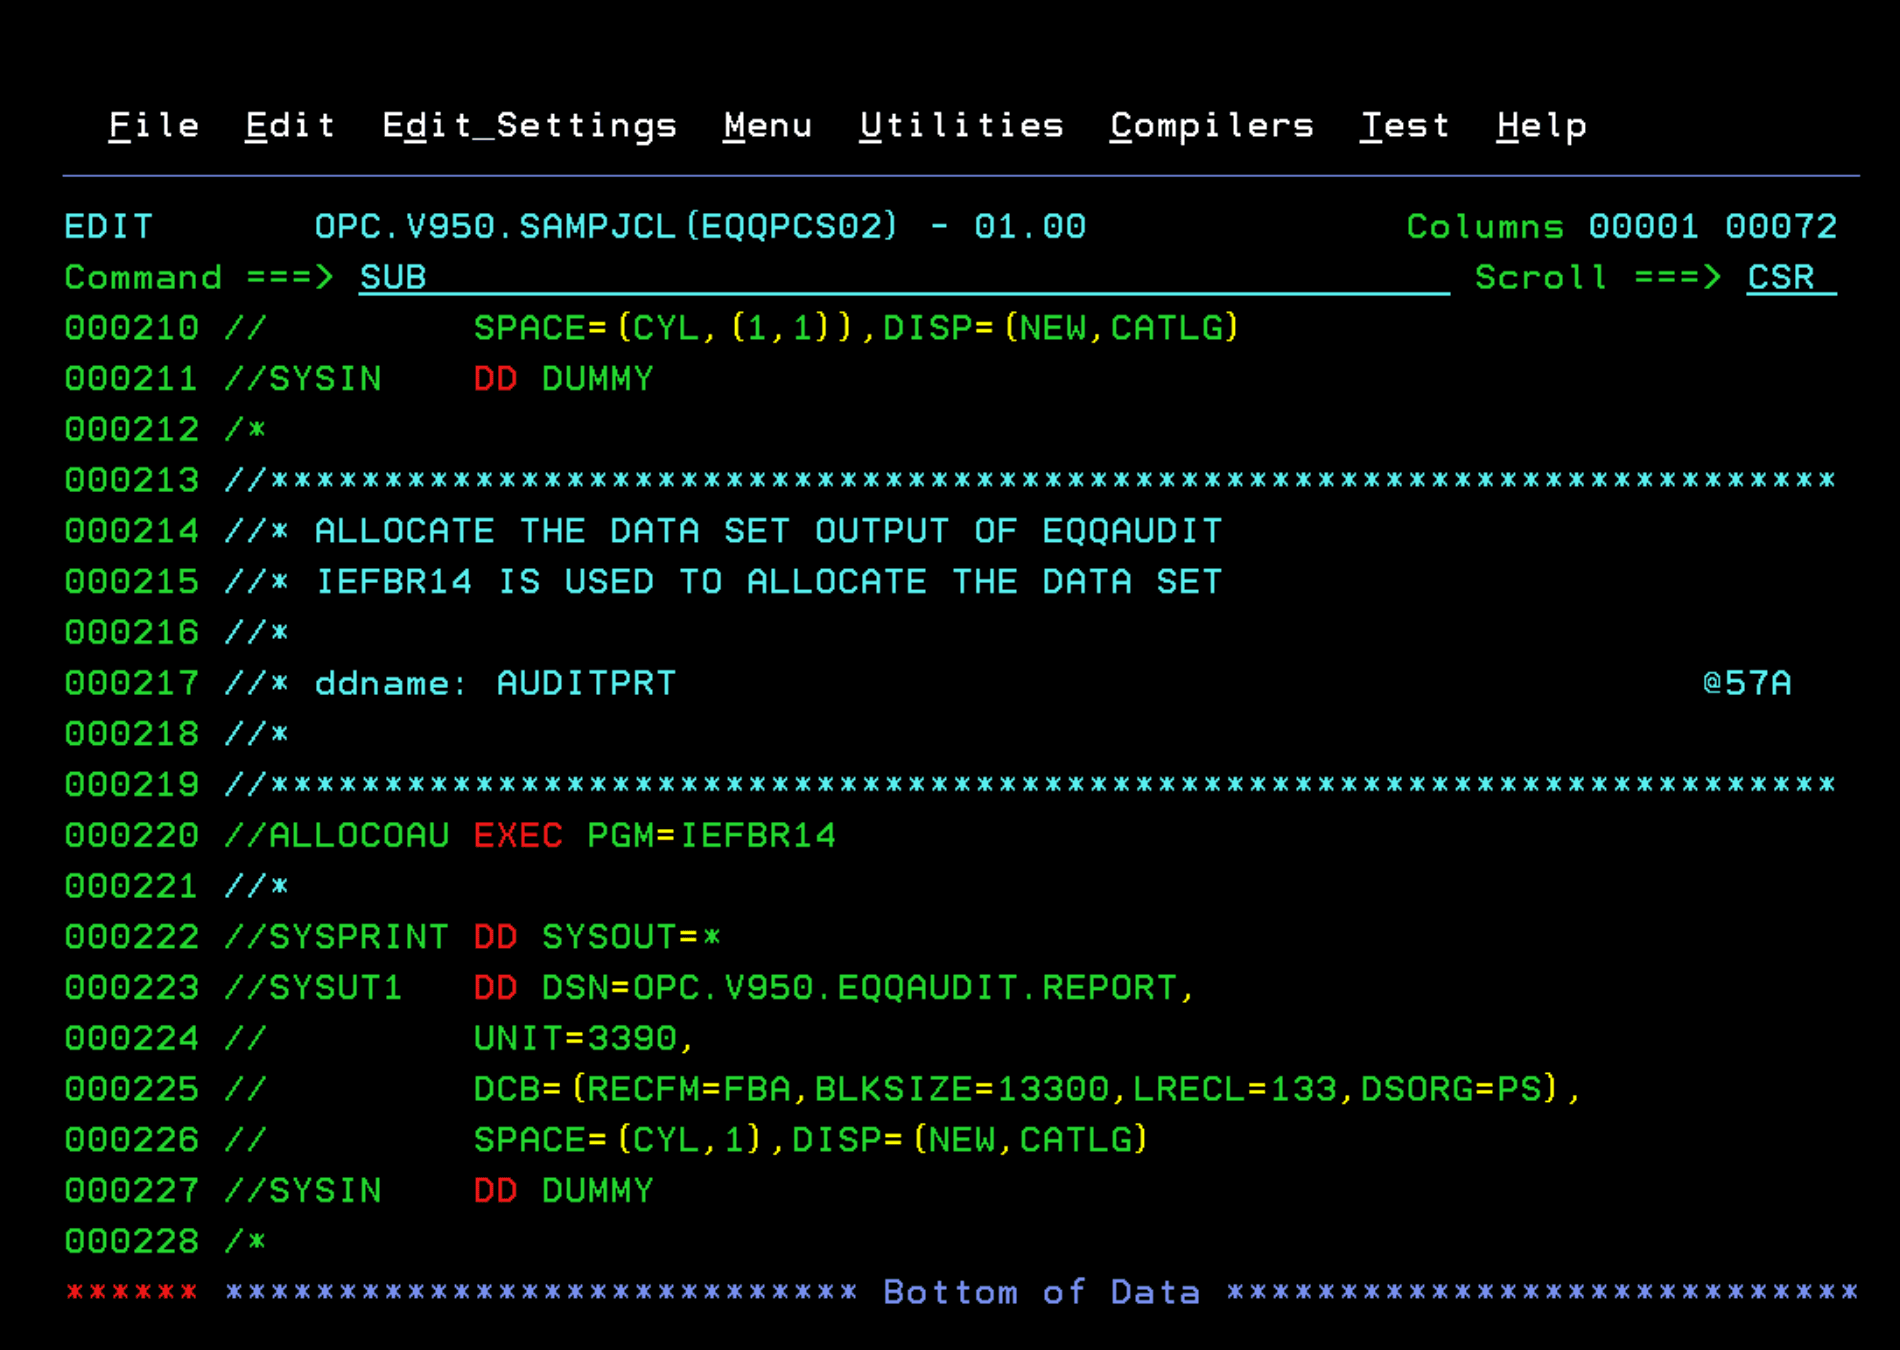
We will continue with job EQQPCS02. This job also creates data sets. We must review the space to adjust it to what we need. We run it and verify that it completes successfully.
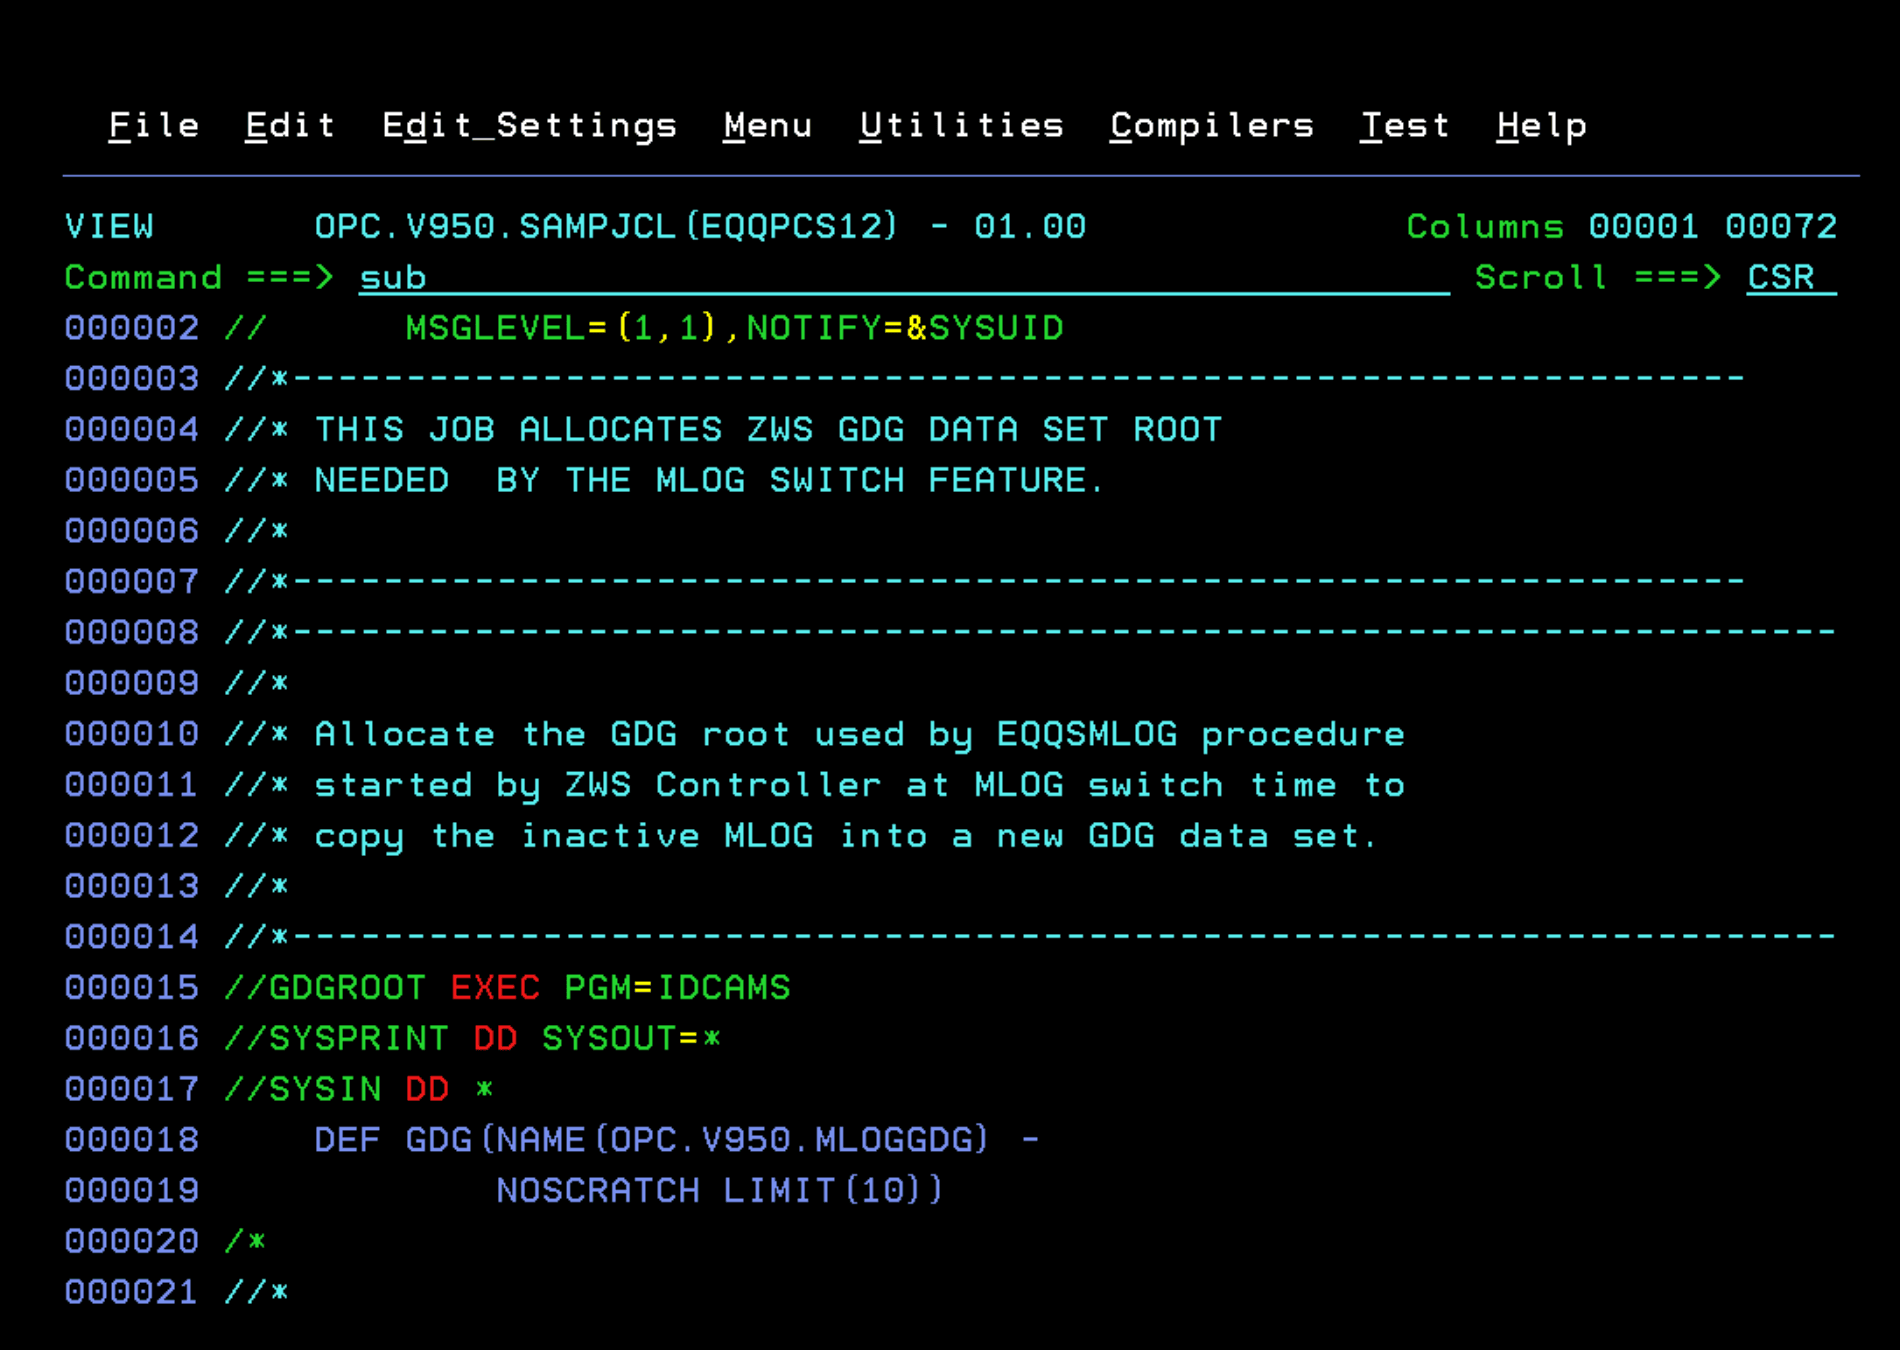
The job EQQPCS12 is used to create the GDG needed for the MLOG switch function.
It will complete successfully.
Create Controller and Tracker STCs
The next step is to create the Controller and Tracker STCs and the configuration files.
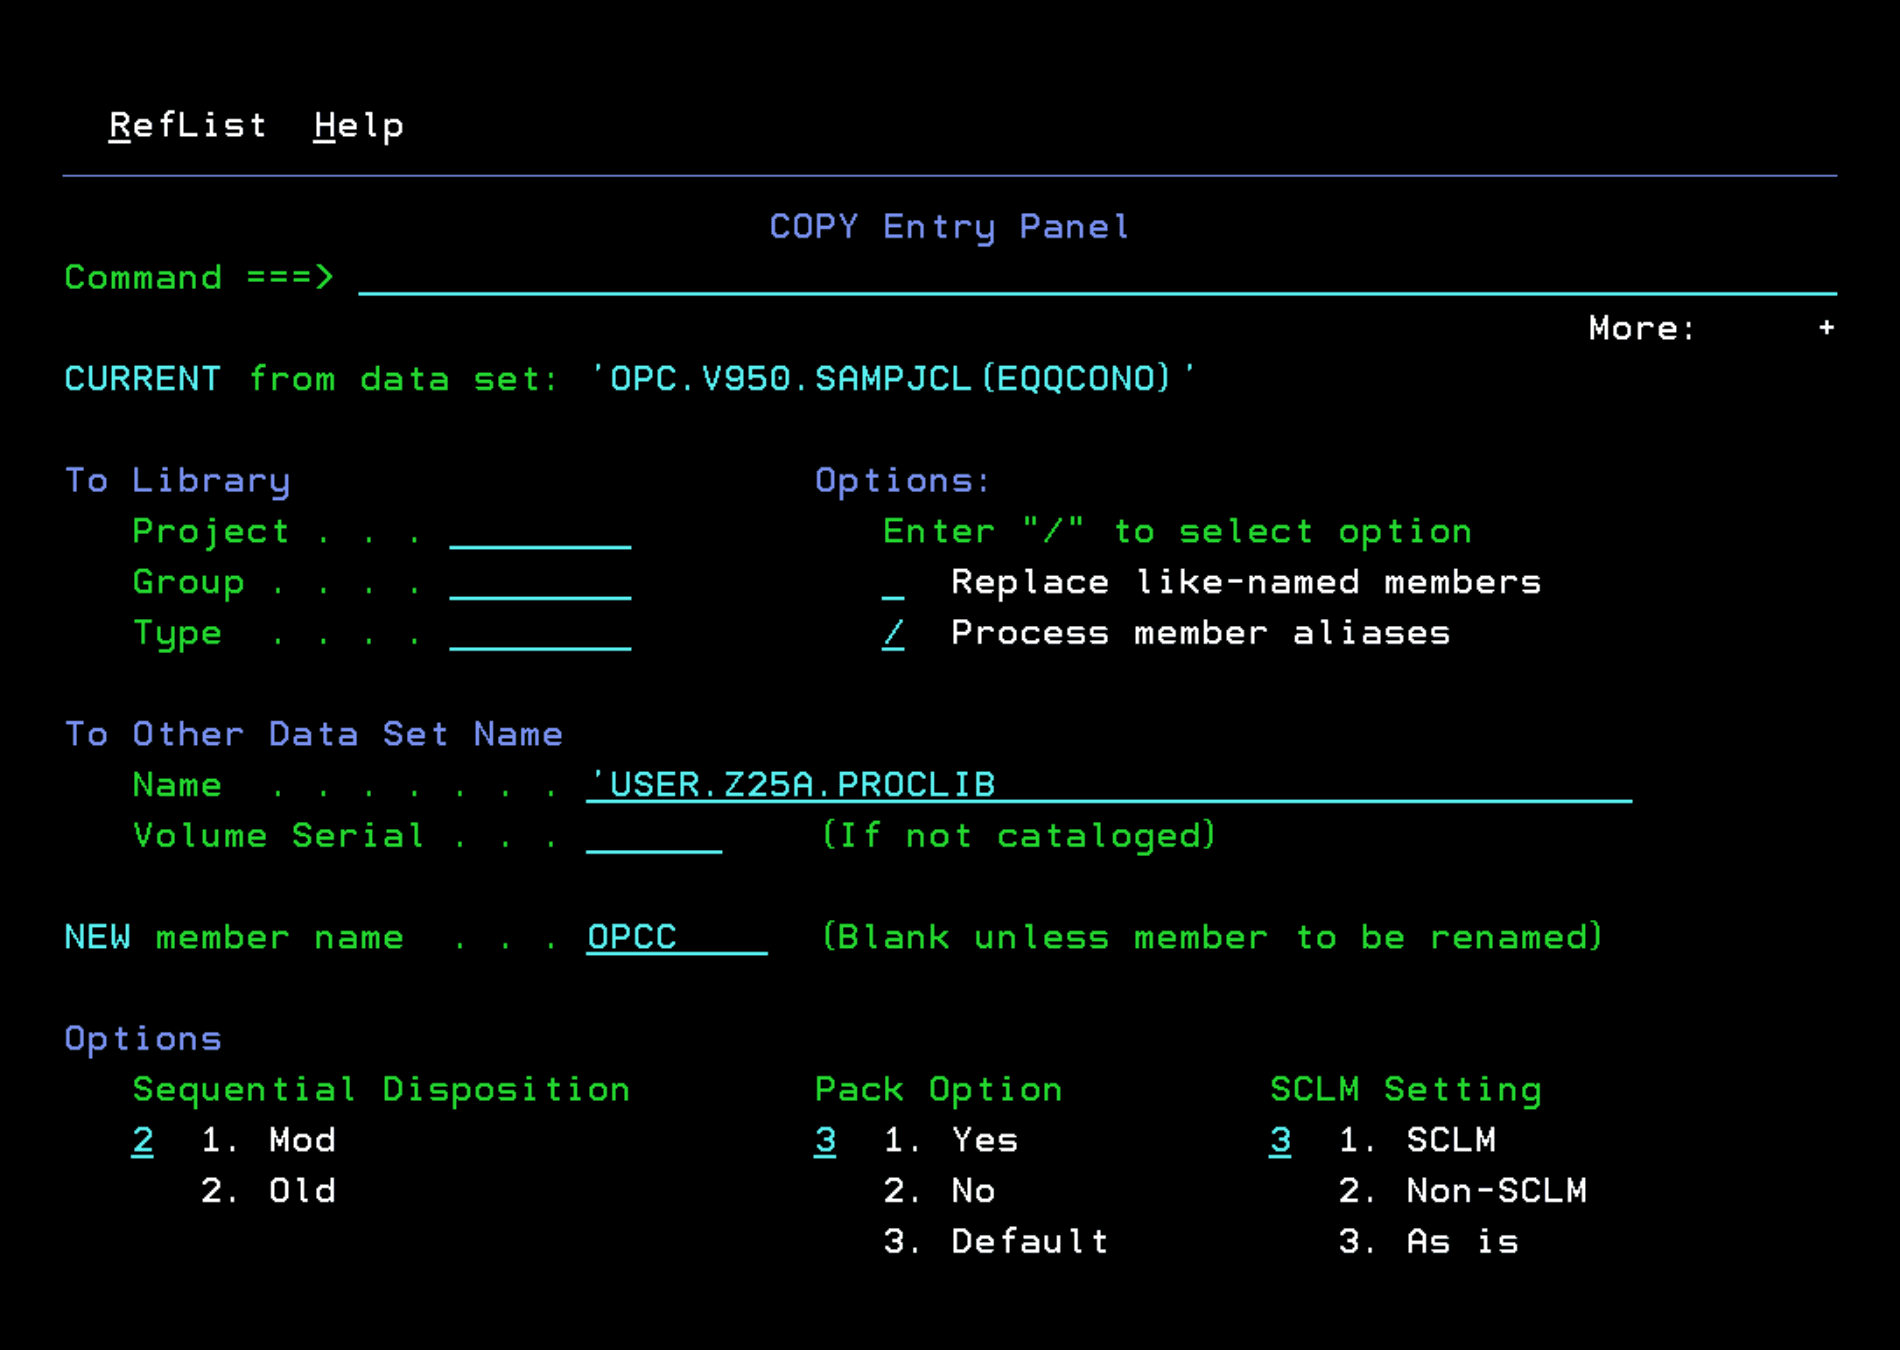
We go back to the OPC.V950.SAMPJCL library and copy the EQQCONO and EQQTRA members to the system PROCLIB. The EQQCONO member will be the Controller, with the name OPCC. The EQQTRA member will be the Tracker, with the name OPCT.

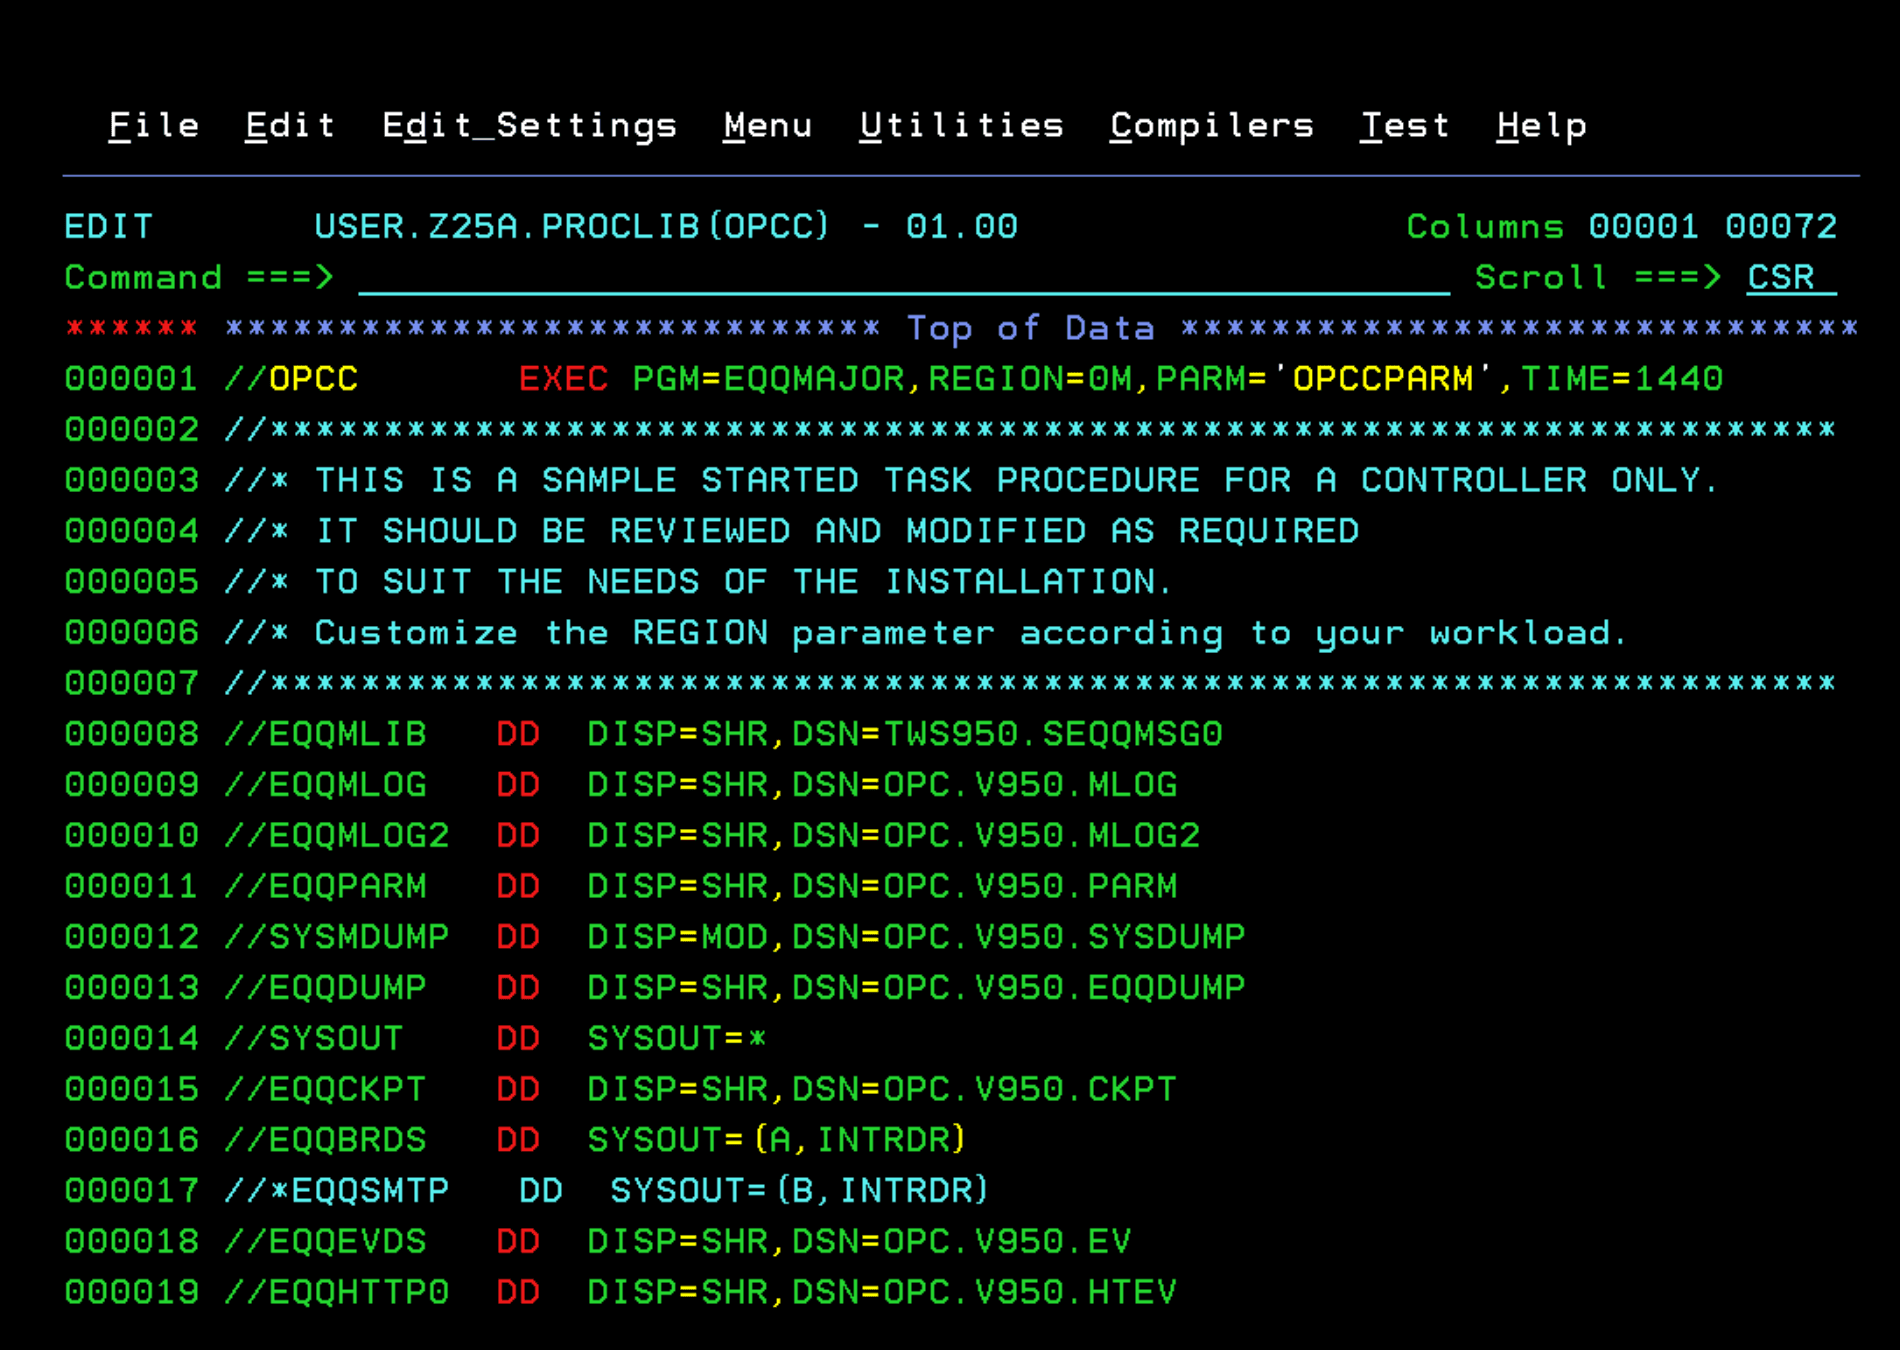
Now we edit the OPCC member that we just copied to PROCLIB.
We will put the task name in the header (OPCC) and the parameter file we created in previous steps (OPCCPARM).
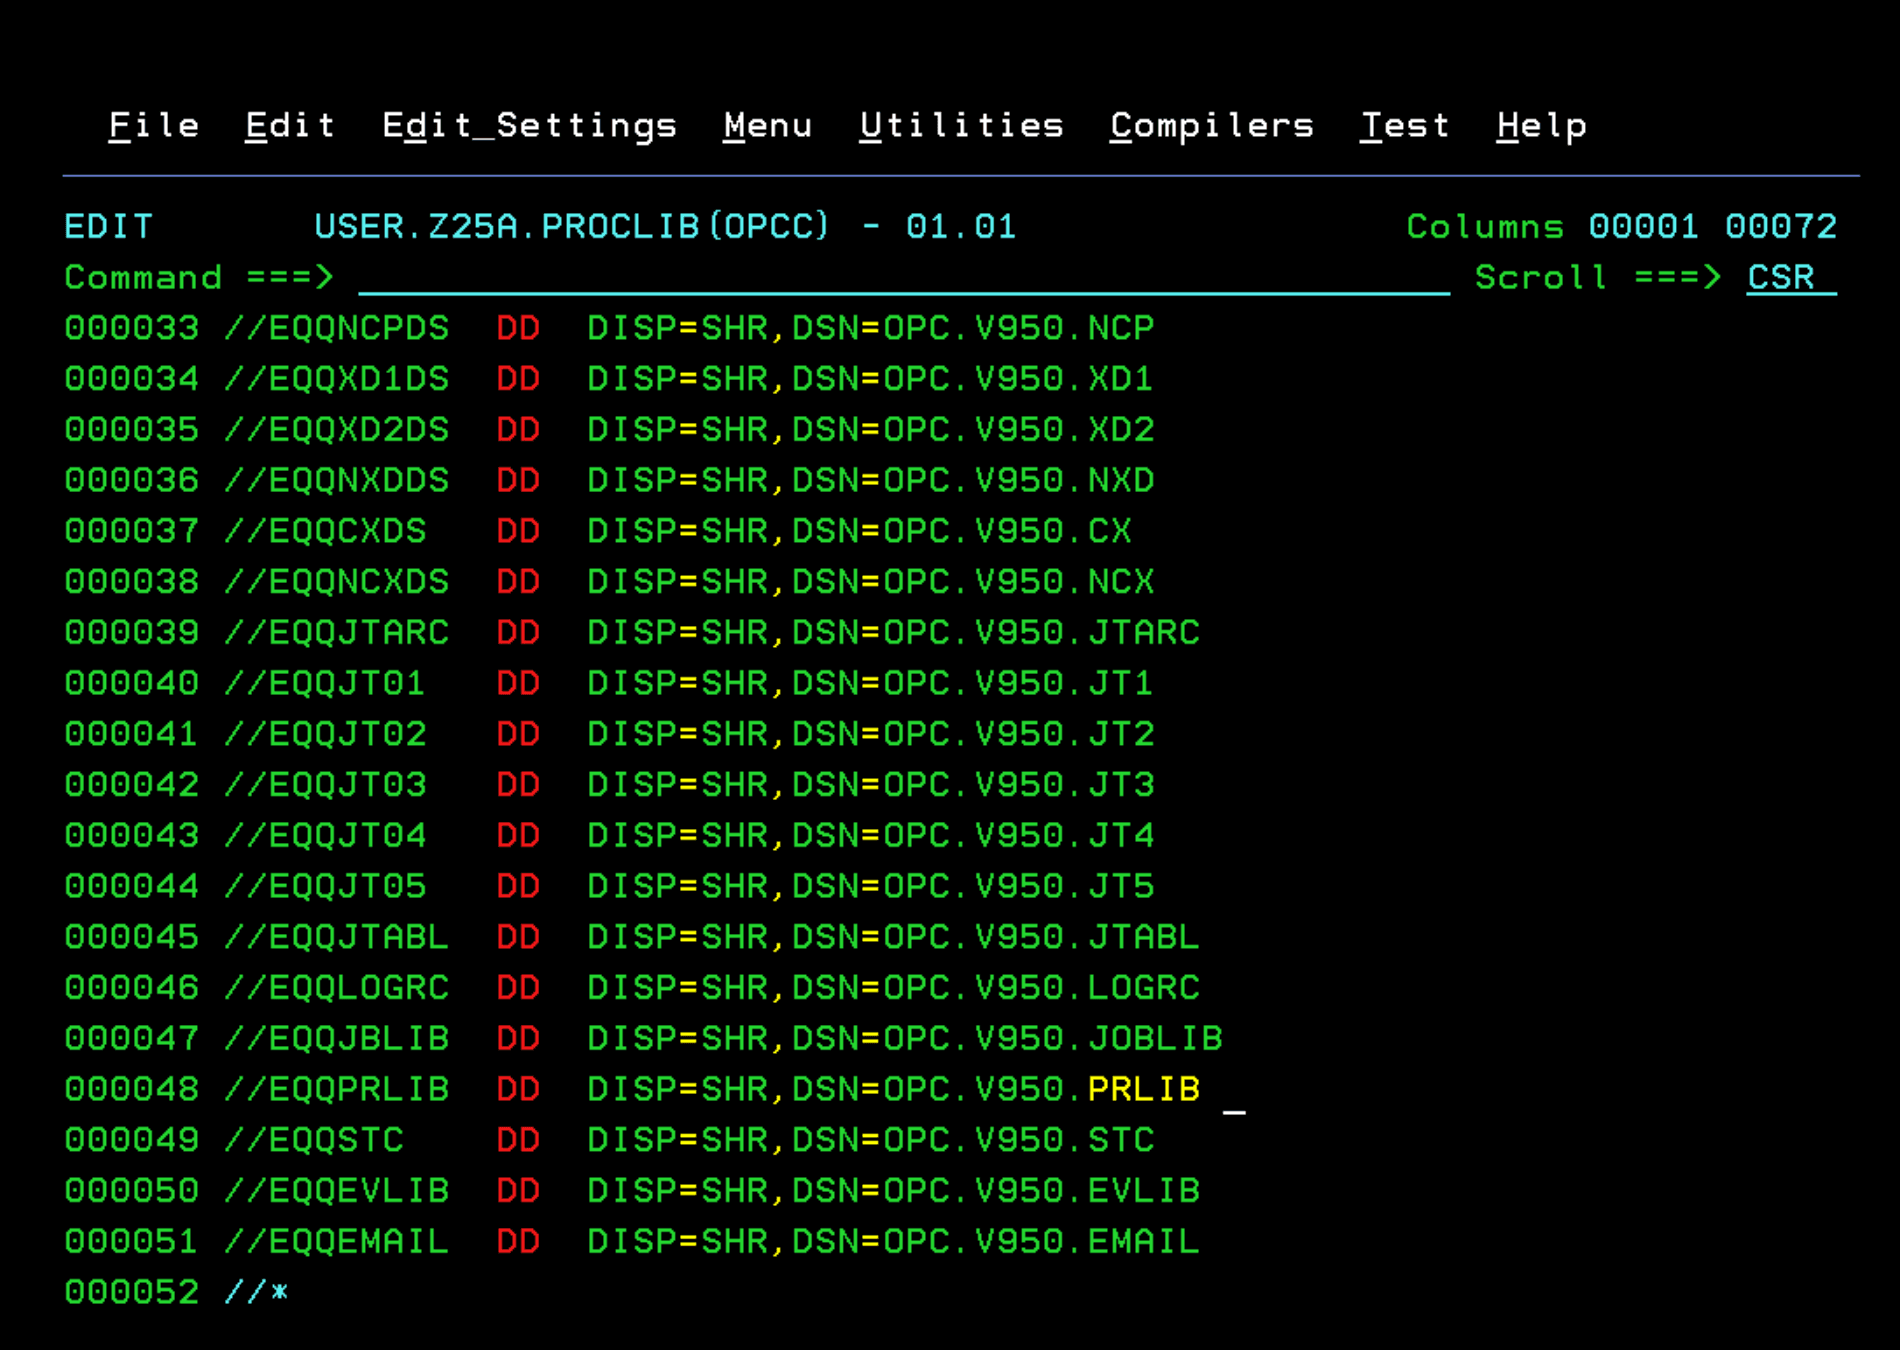
We scroll down a bit and edit the DD EQQPRLIB to put the correct library.
Now we edit the OPCT member. We will put the task name in the header (OPCT) and the parameter file we created in previous steps (OPCTPARM).
Additionally, in the DD EQQMLOG, EQQMLOG2 and EQQEVDS, we need to put two new files that we will create later. This is because they cannot be shared with the Controller.
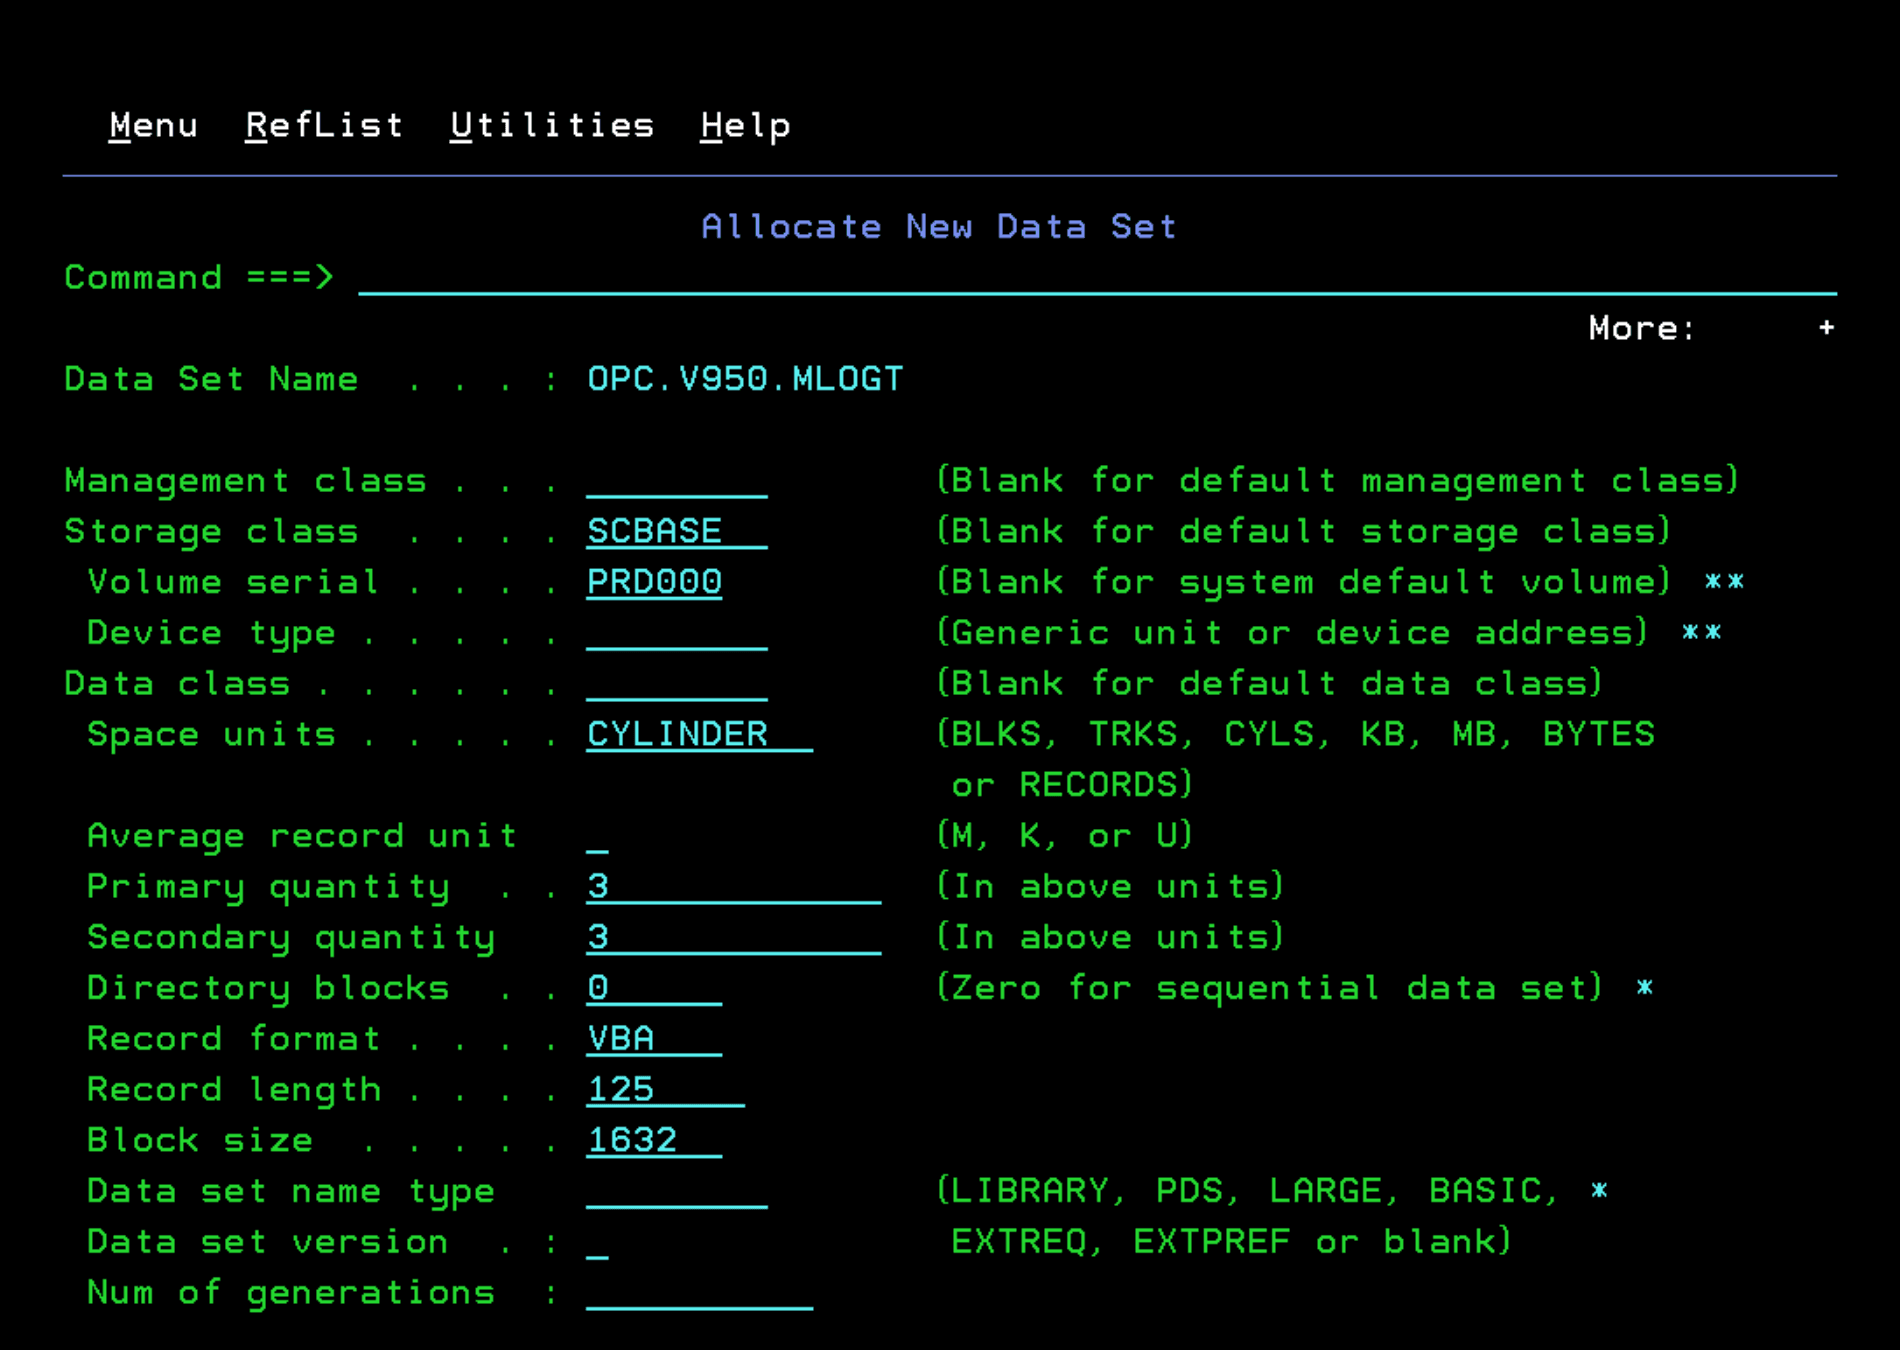
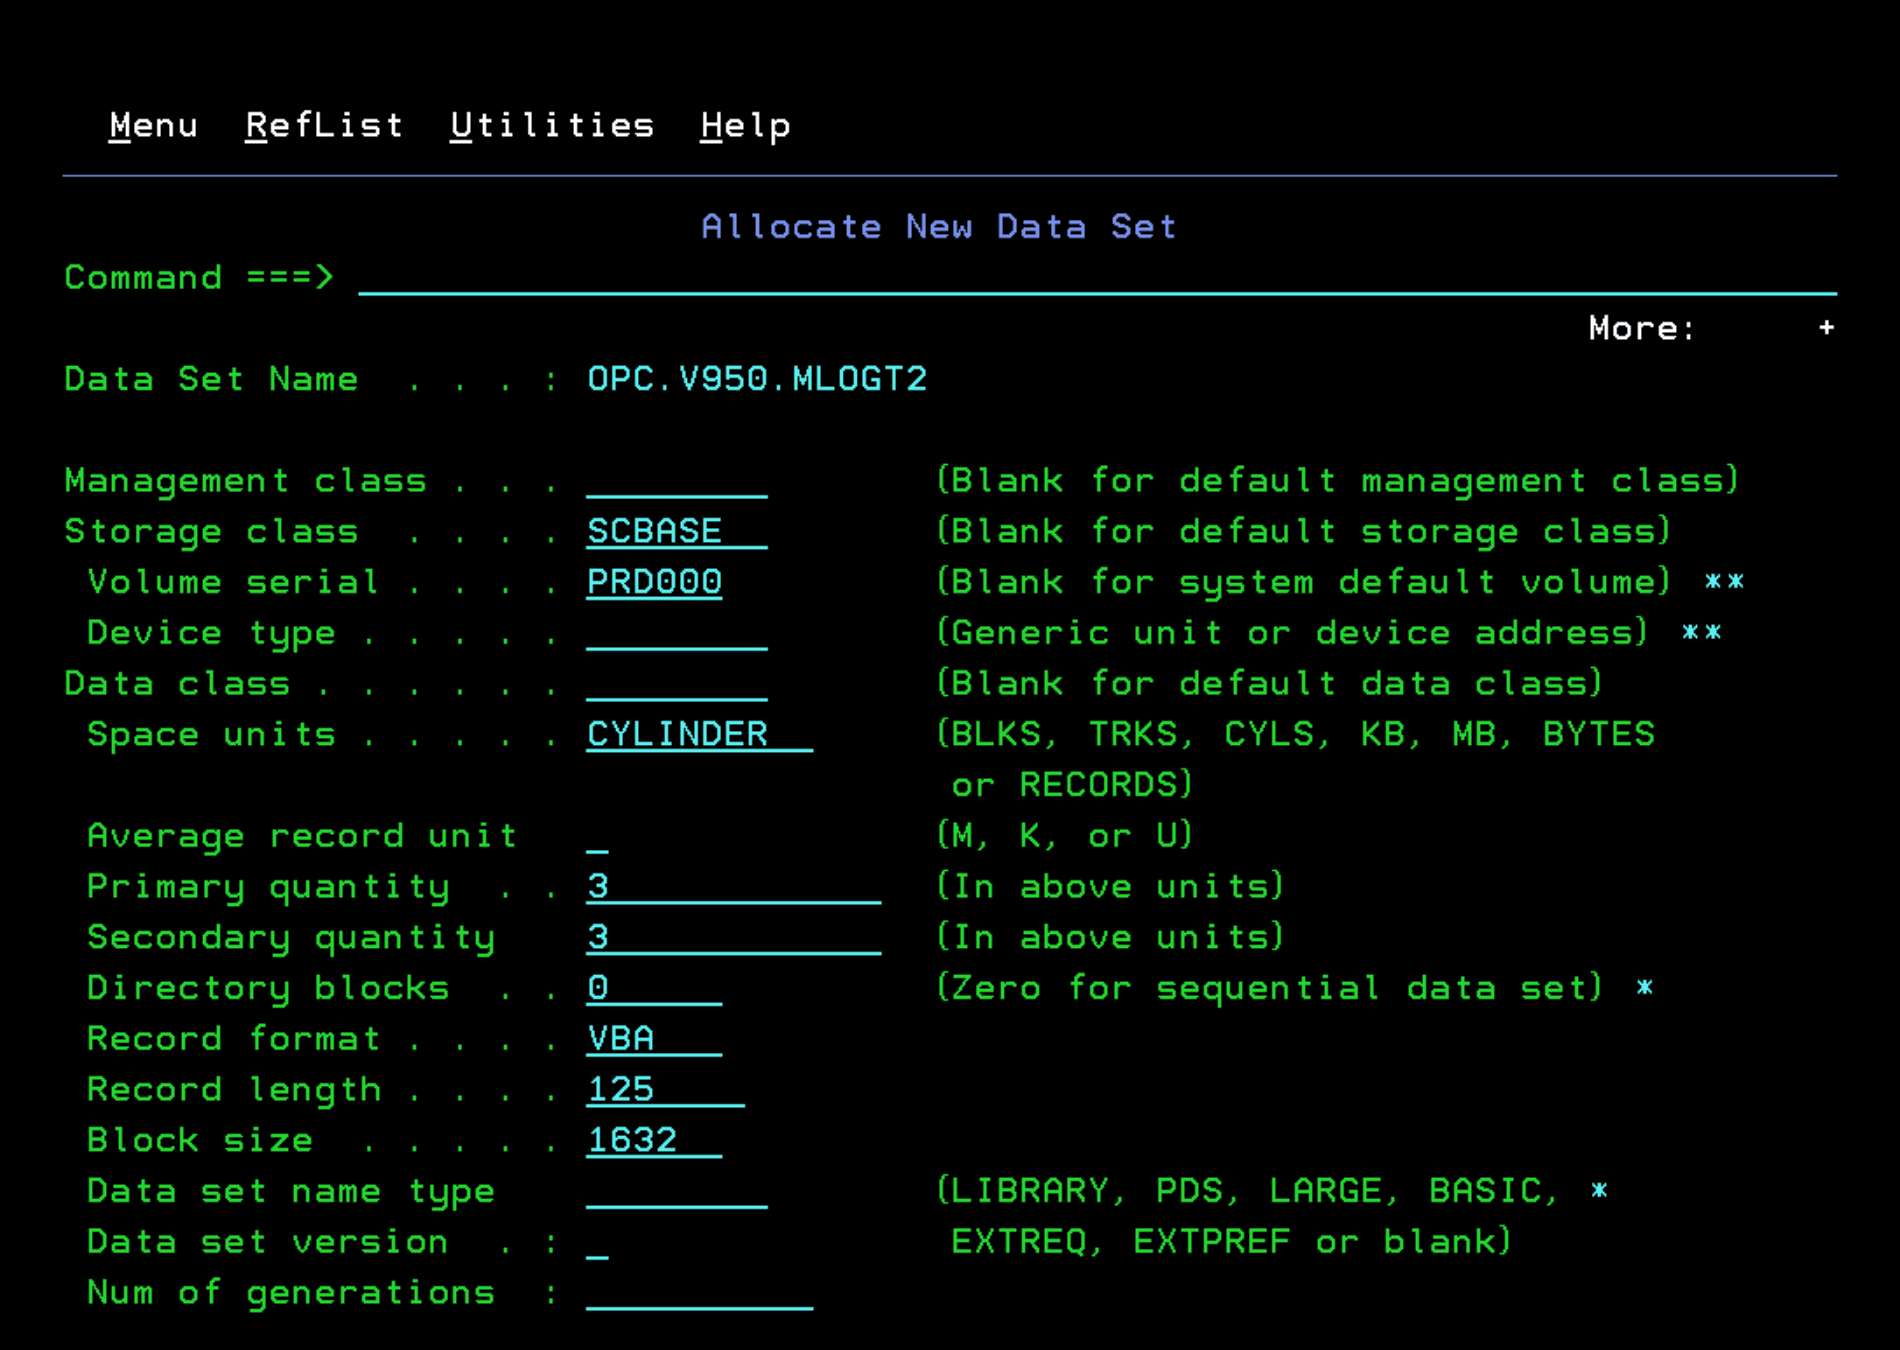
//EQQMLOG   DD  DISP=SHR,DSN=OPC.V950.MLOGT
//EQQMLOG2  DD  DISP=SHR,DSN=OPC.V950.MLOGT2
//EQQEVDS   DD  DISP=SHR,DSN=OPC.V950.OPCT.EV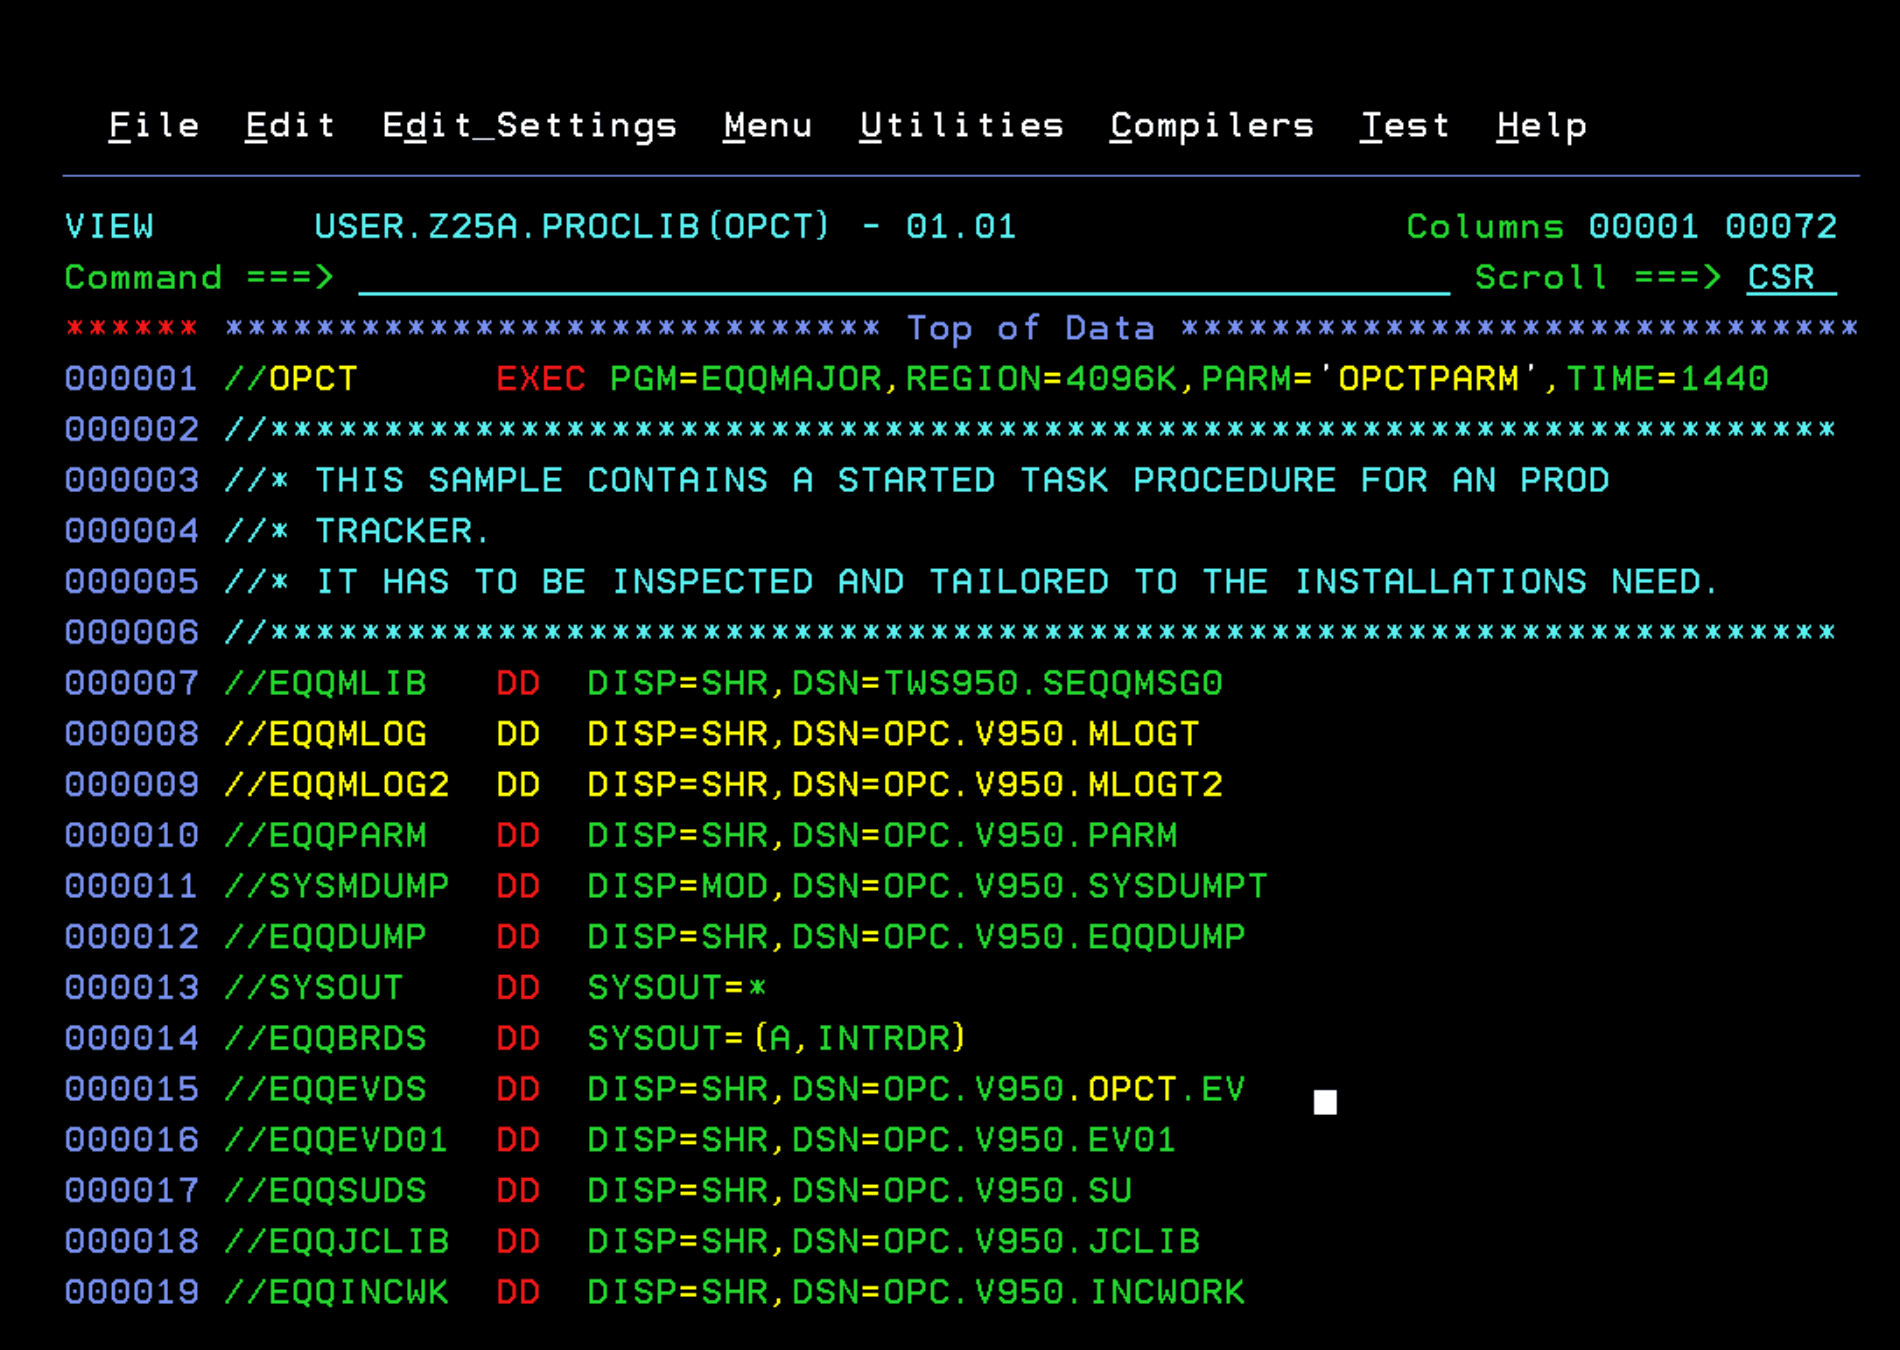
Create Parameter Files
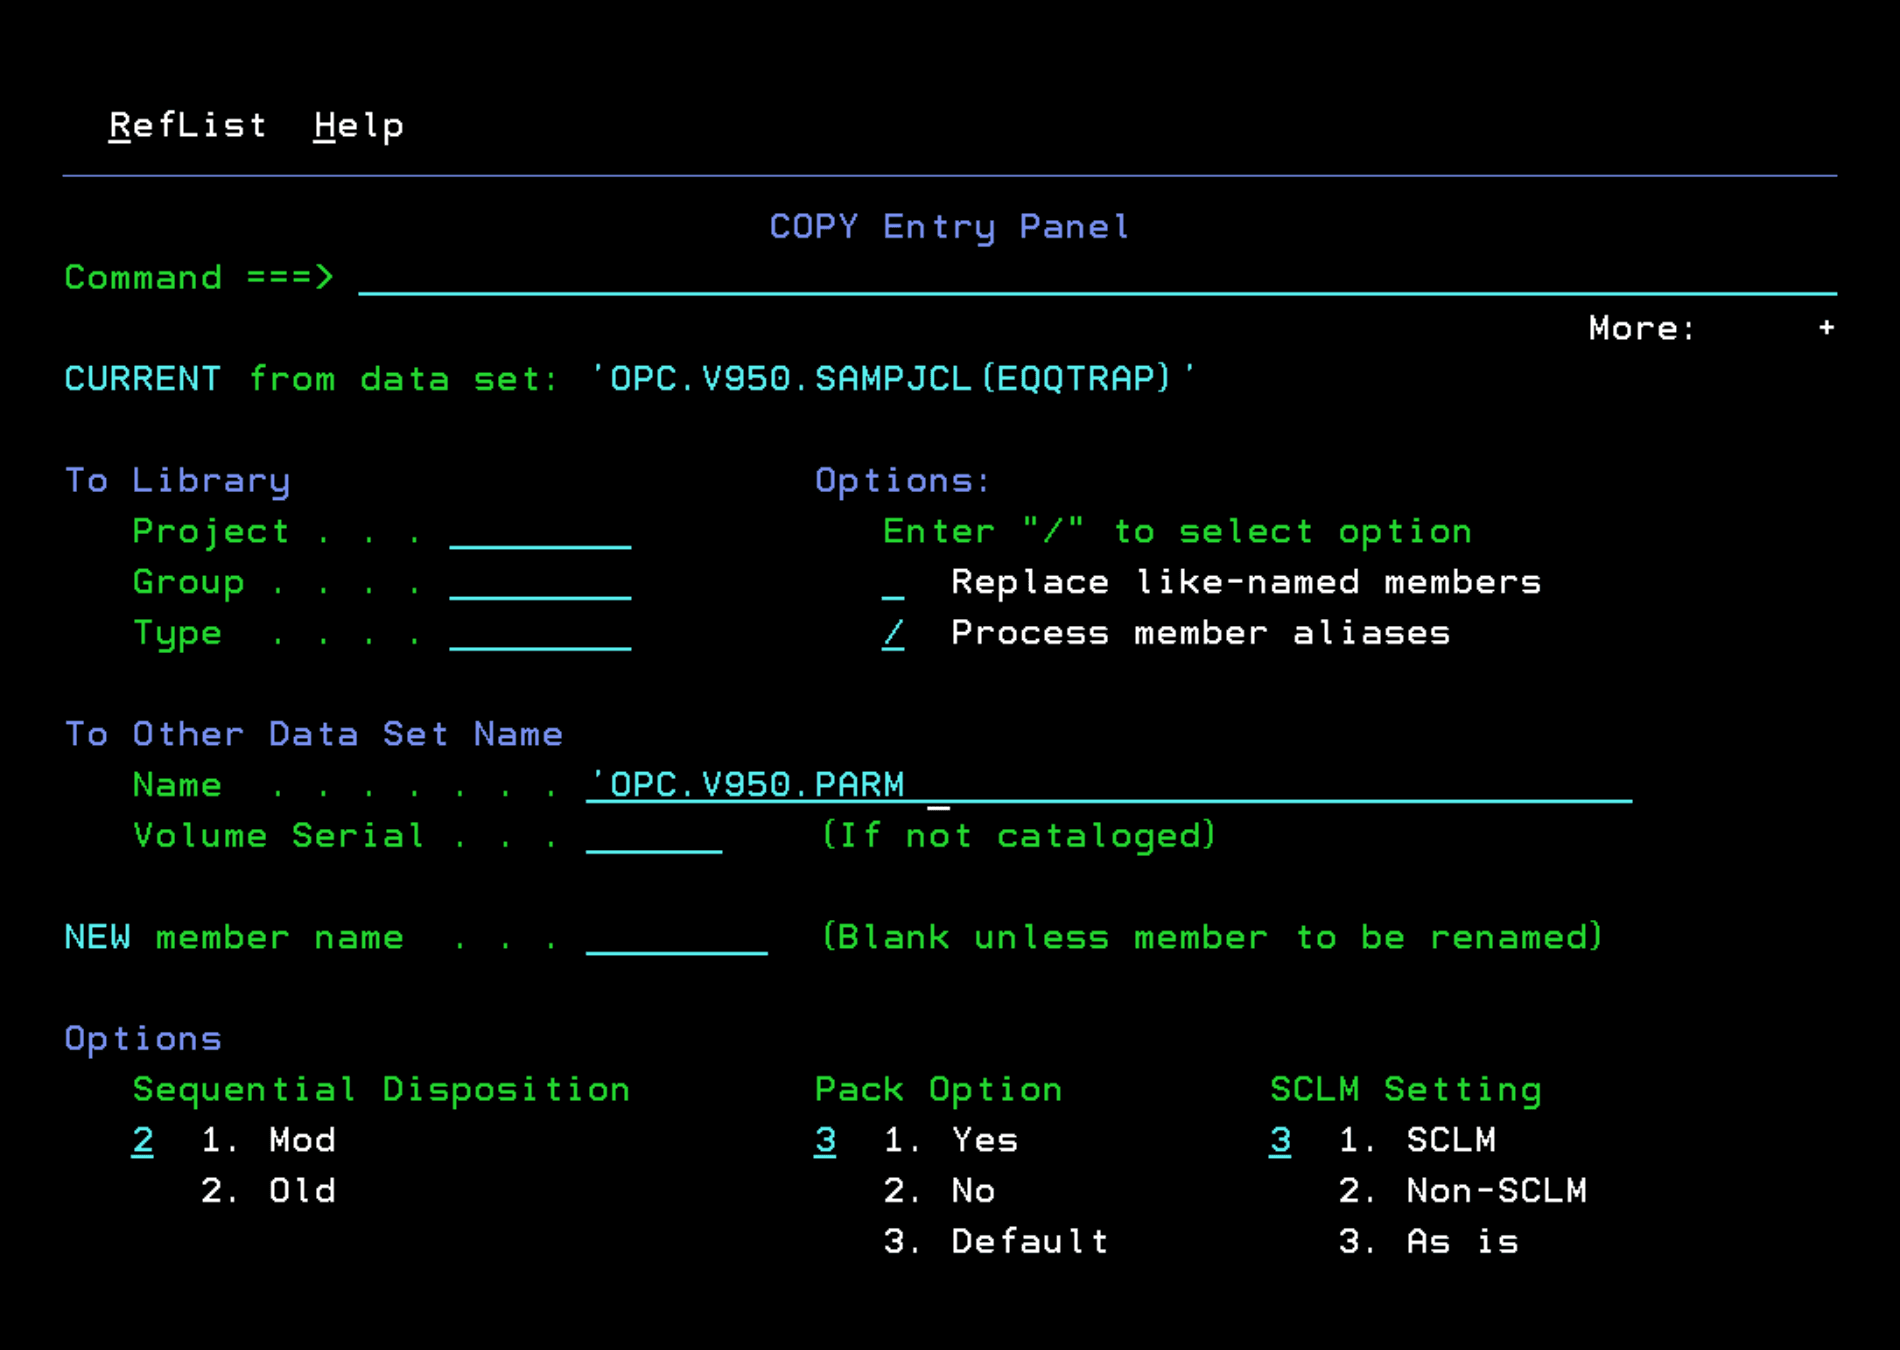
To be able to create the parameter files, we copy the EQQCONOP and EQQTRAP members from SAMPJCL to the OPC parameter library (in my case, OPC.V950.PARM).

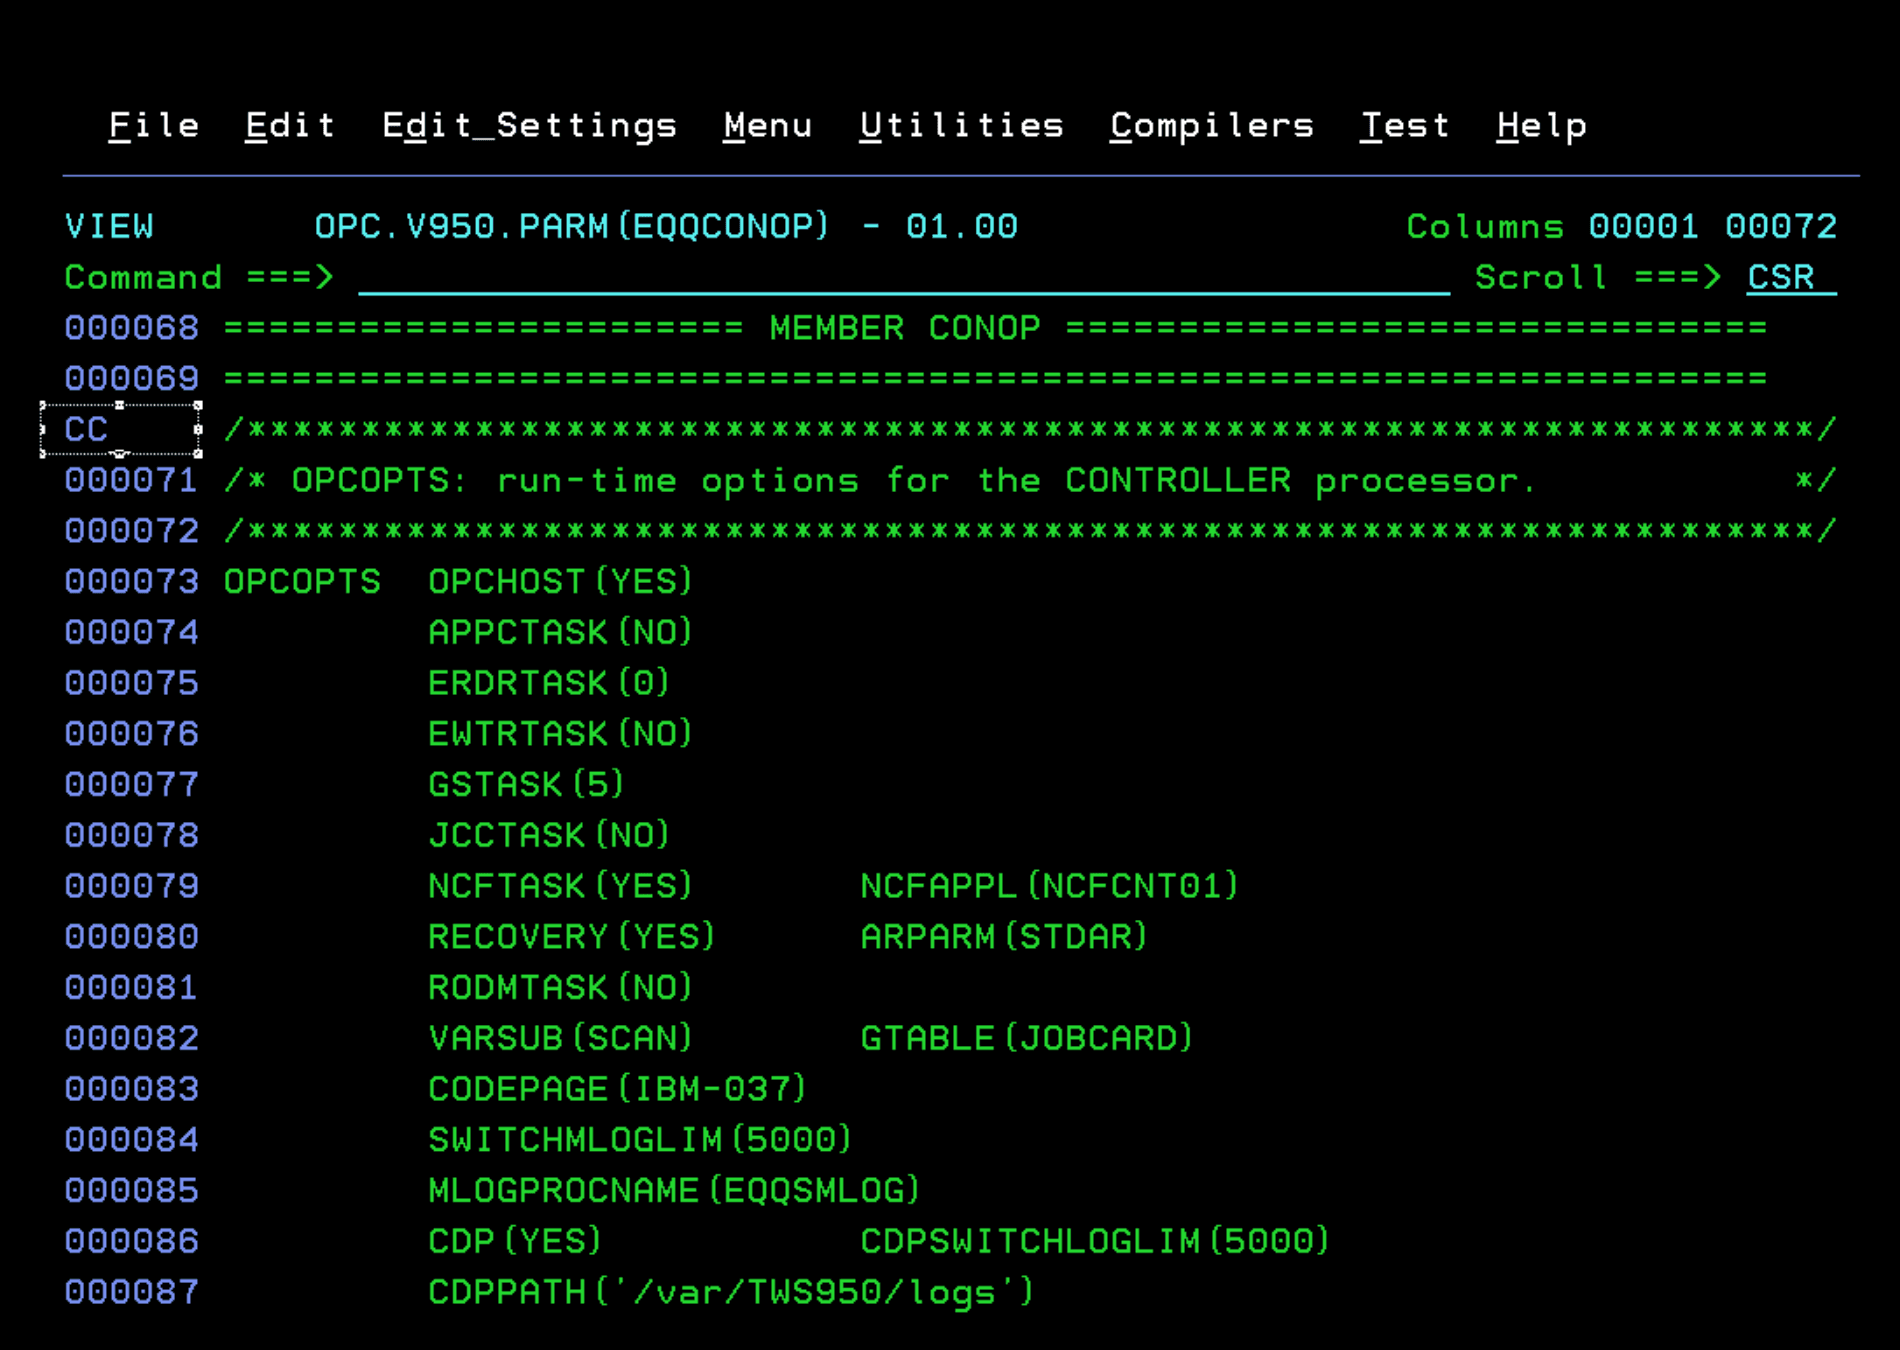
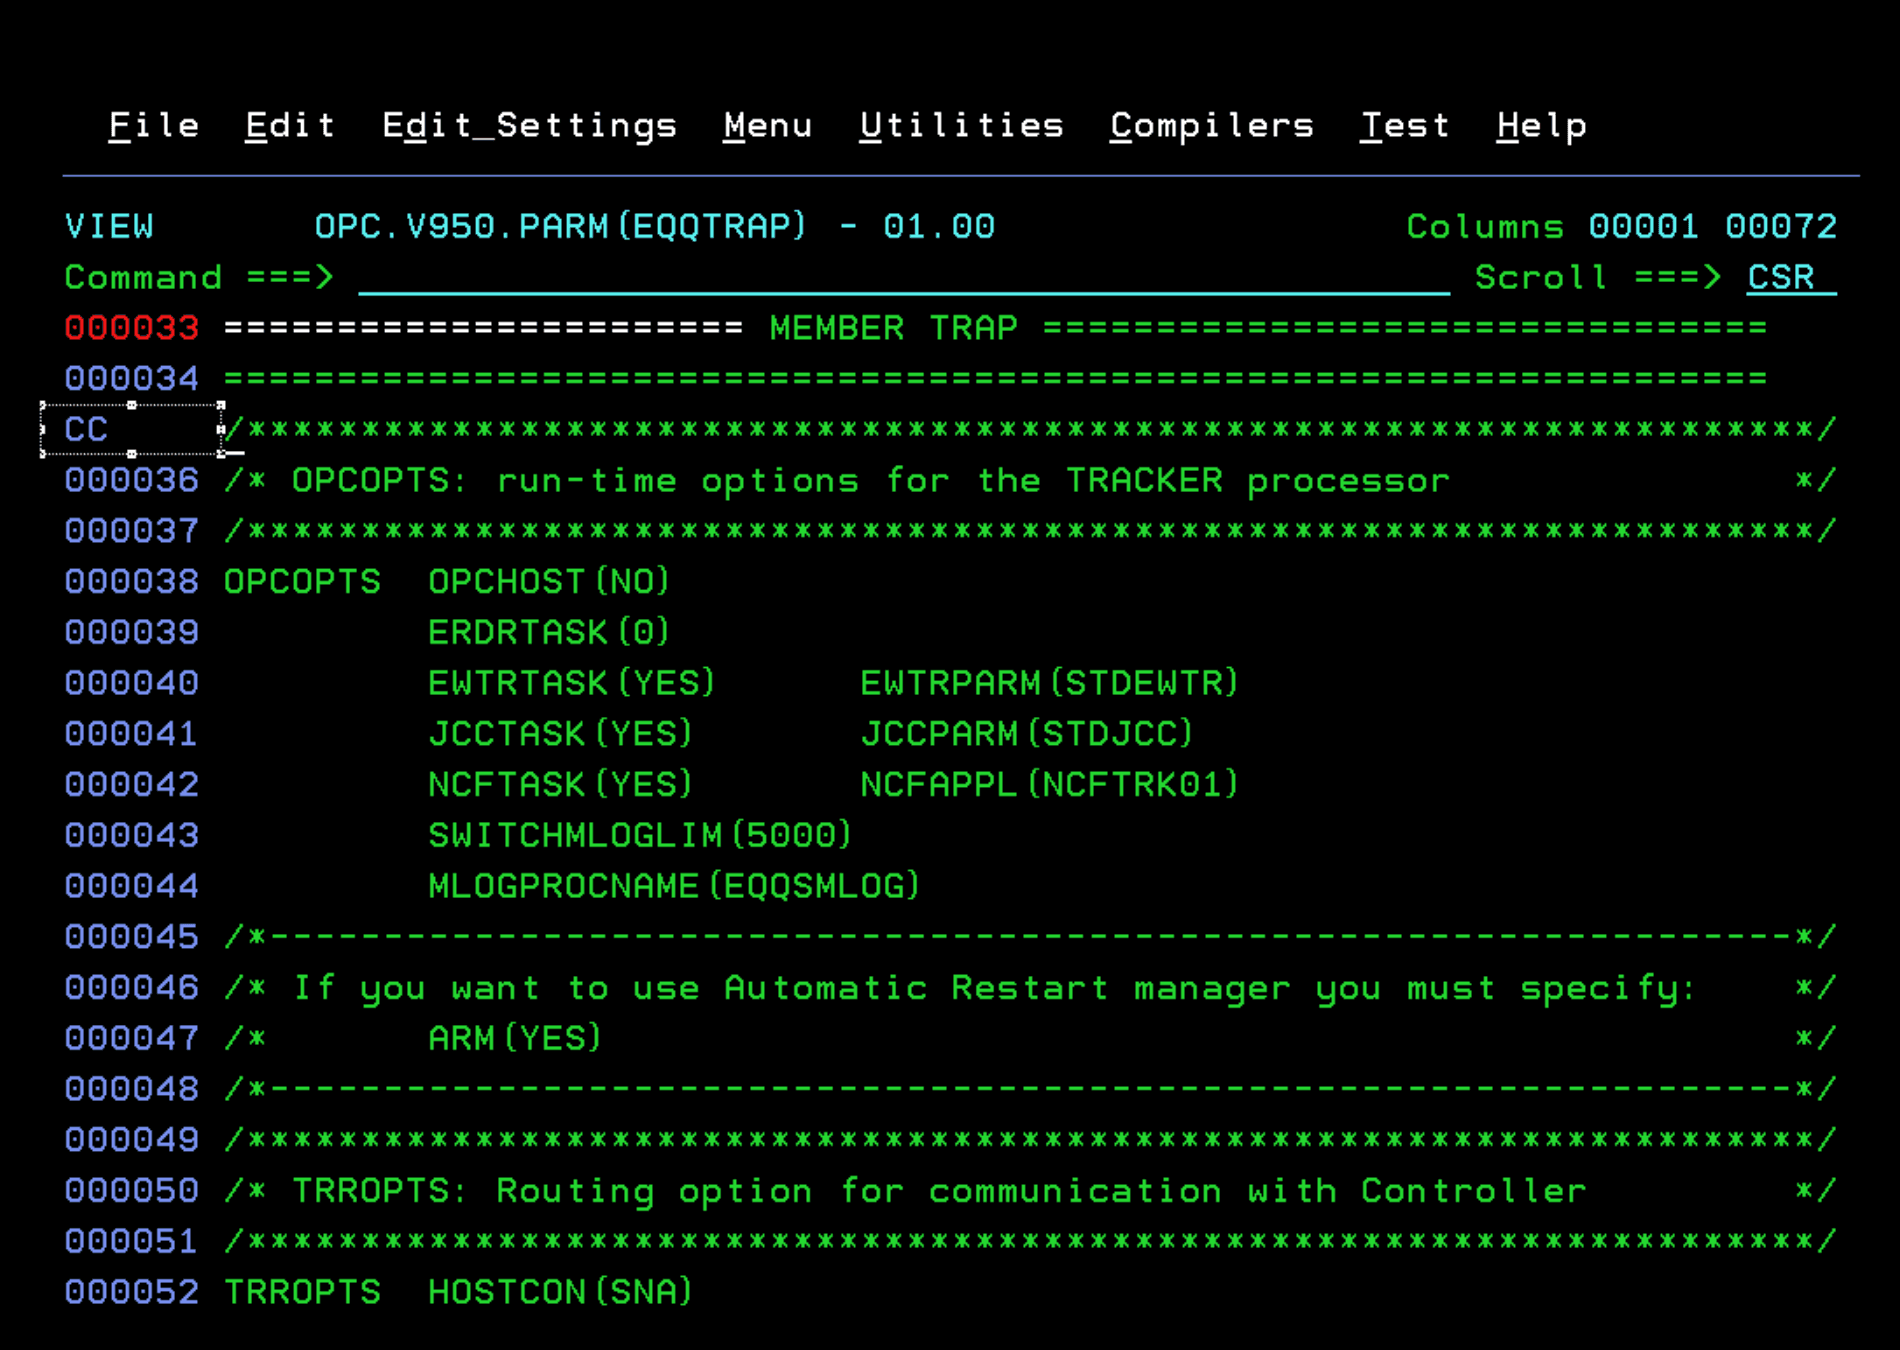
Now we enter the EQQCONOP member and we are going to create new members with the corresponding parts of the JCL. We will use the block command CC – CC, to copy the parts we want, and the CREATE command.
We are going to create the CONOP member. To do this we mark with “CC” on the line shown in the image.
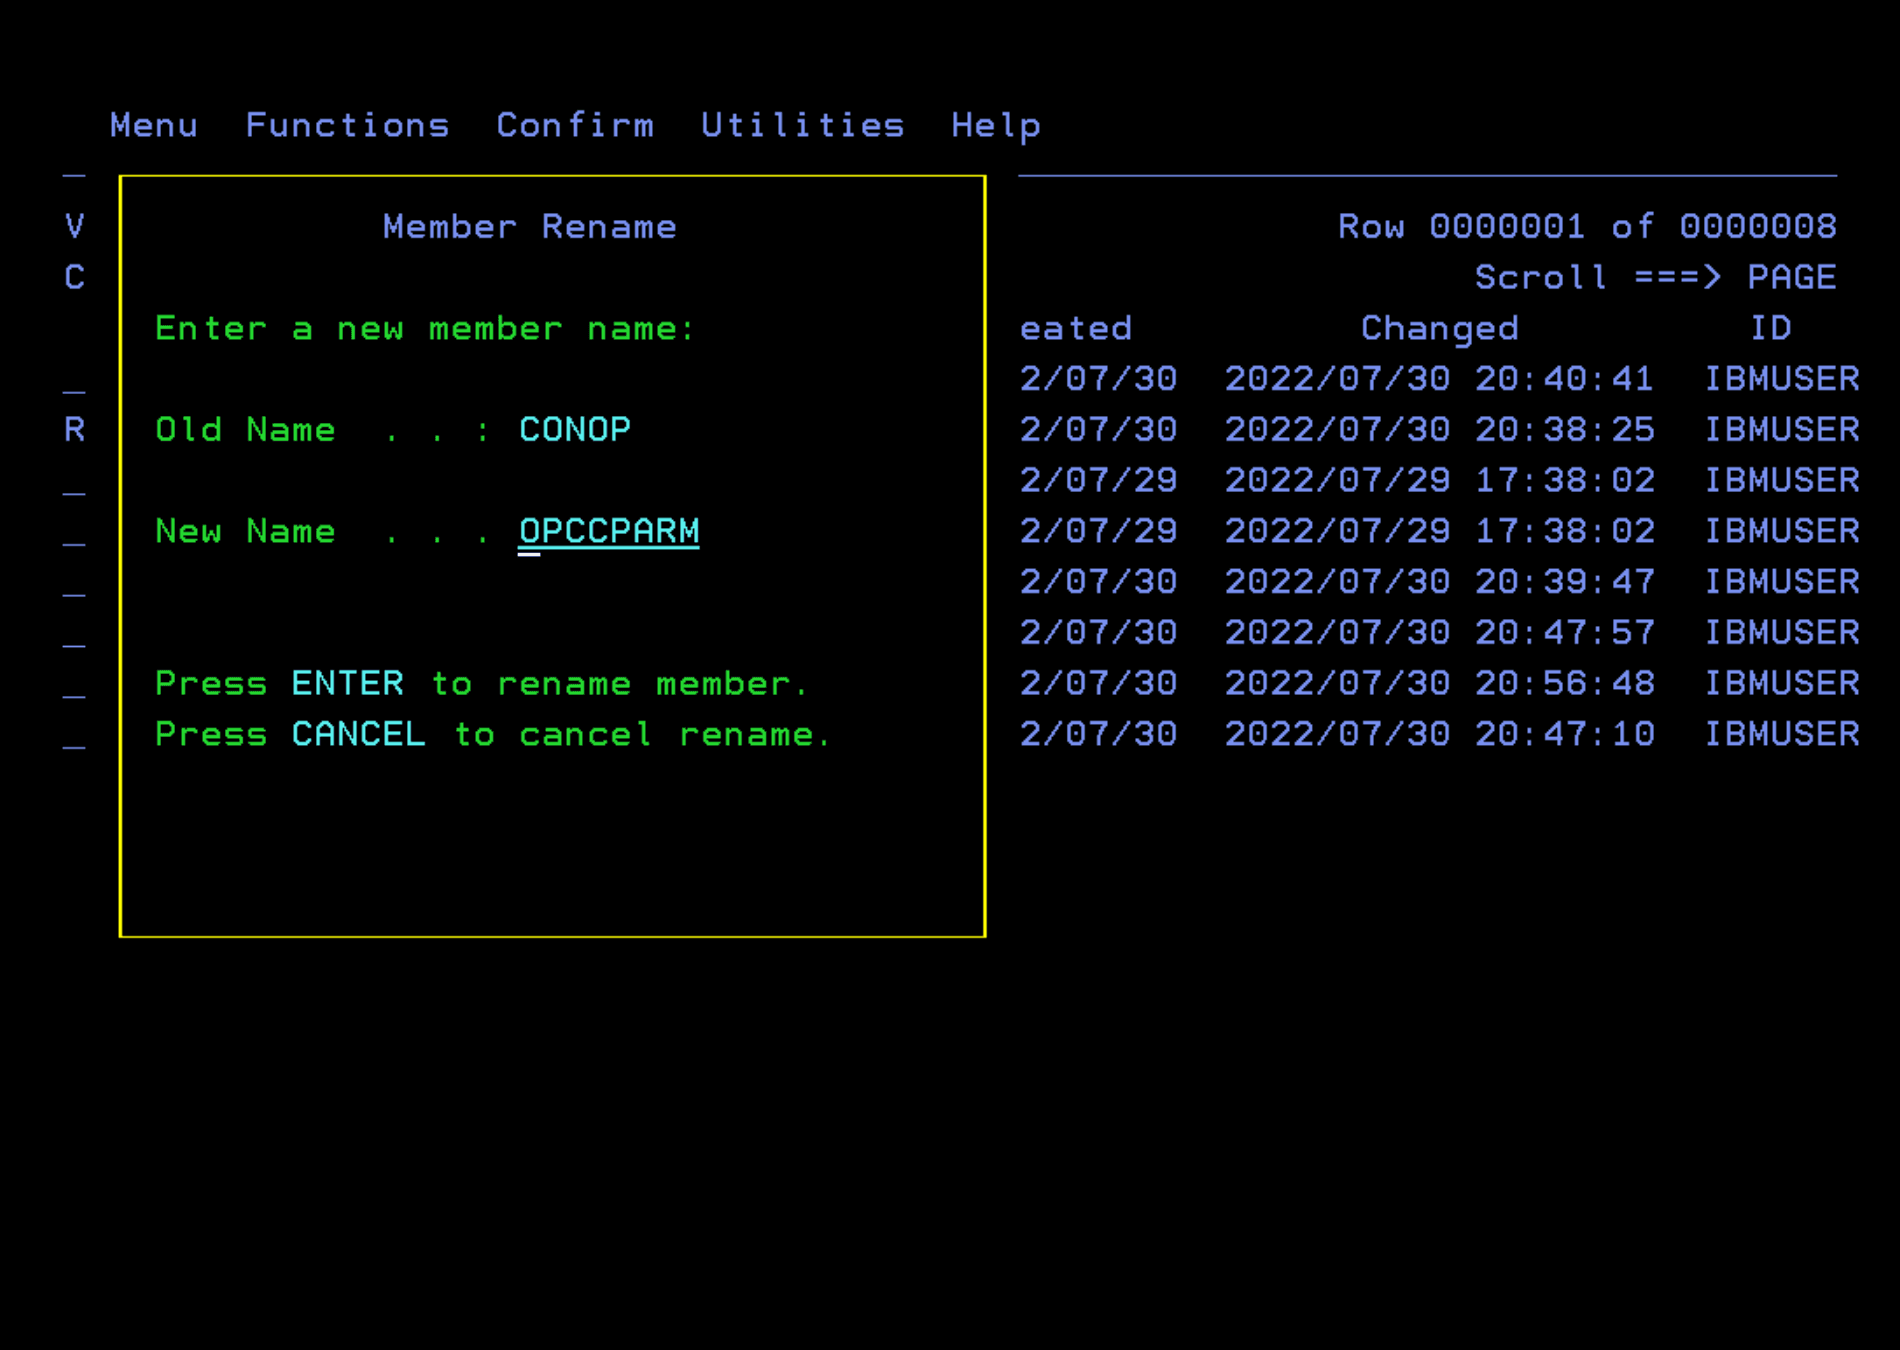
Now we go to the line shown in the image and put “CC” again, to close the block we want to copy, and in the command line we put “CREATE CONOP”.
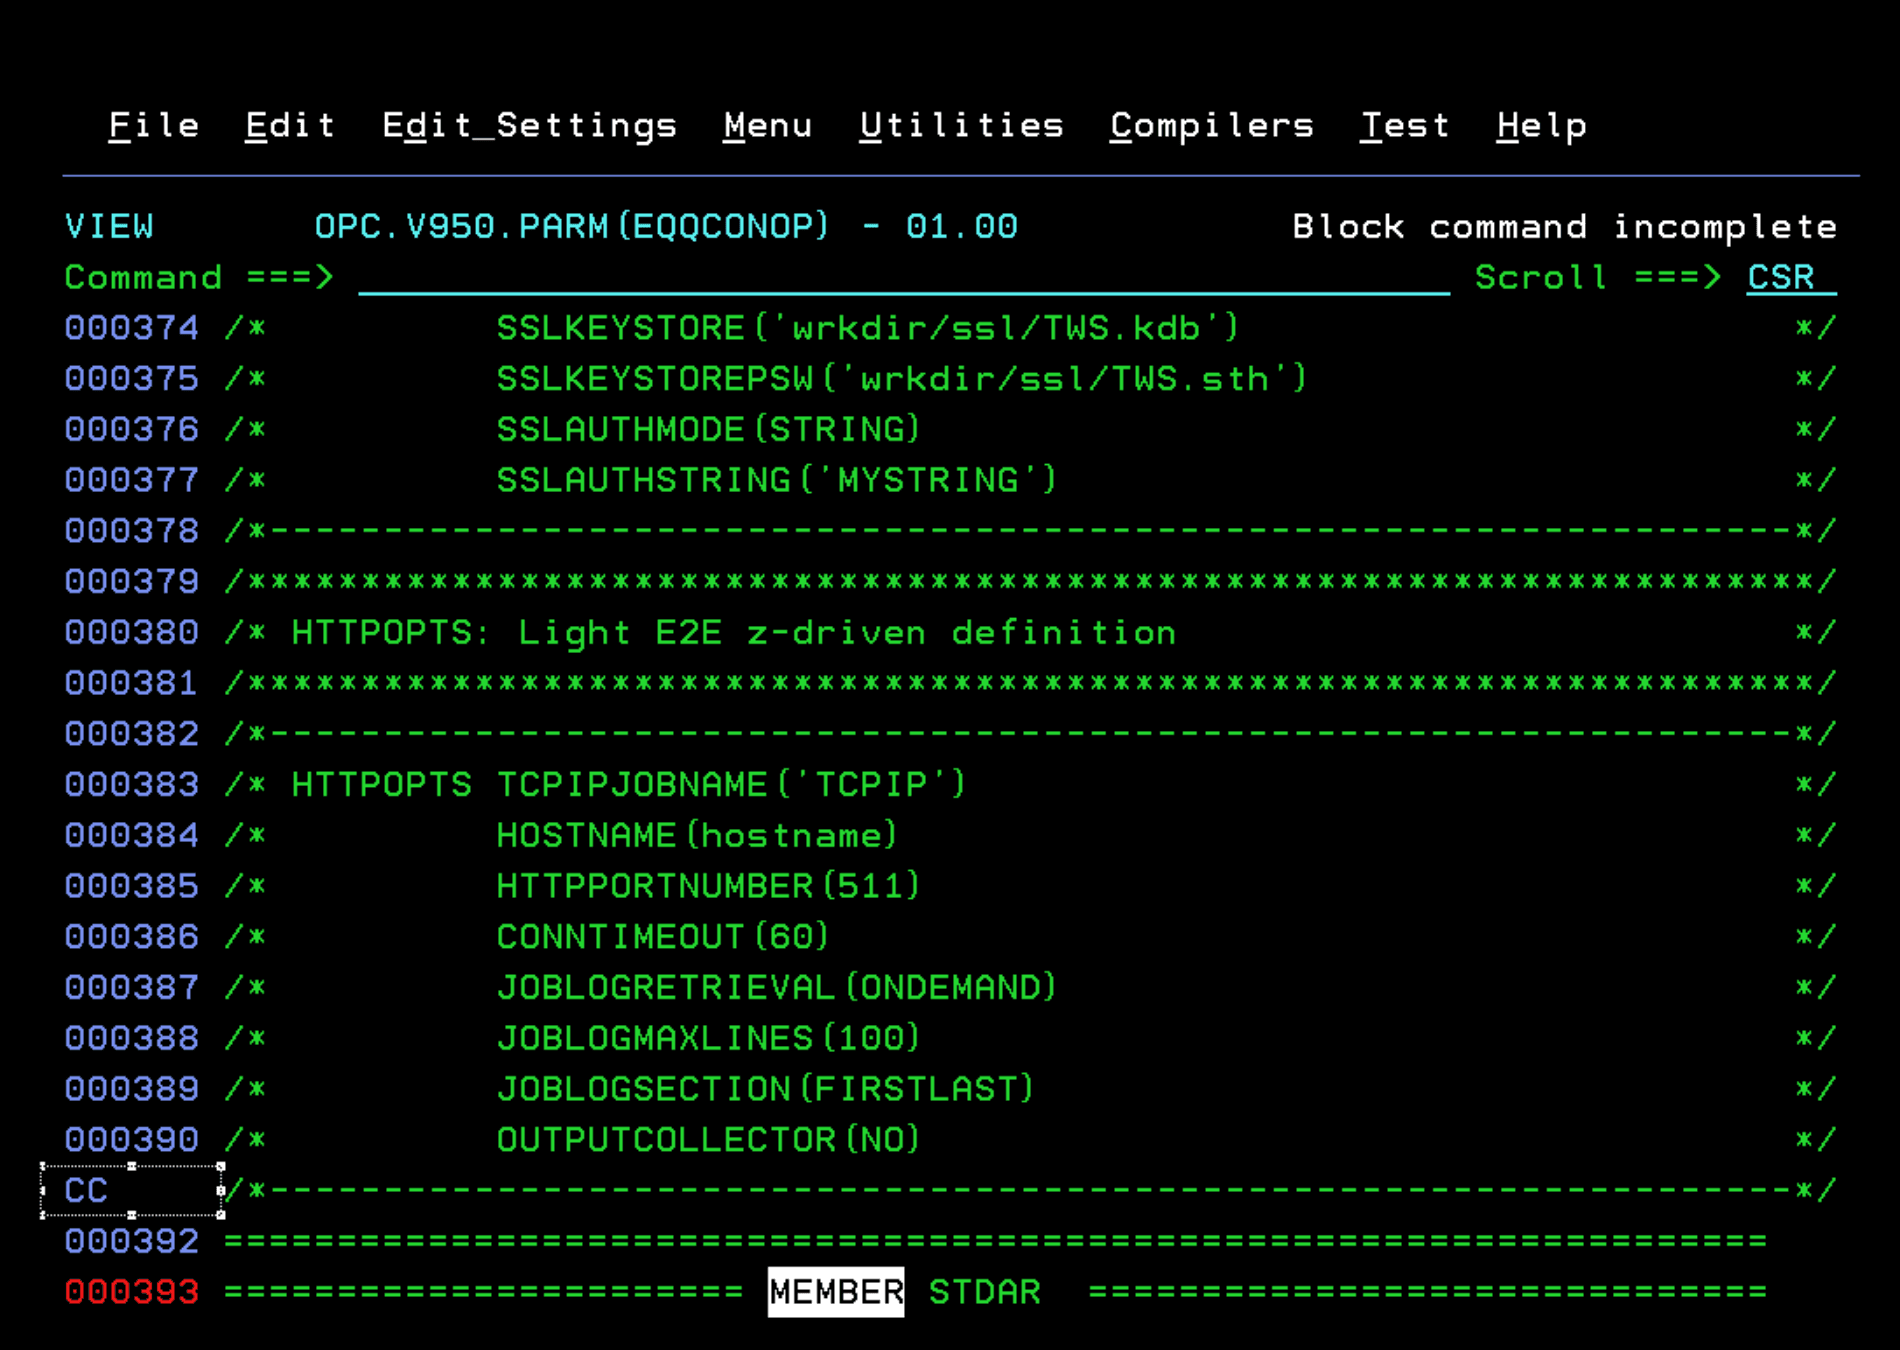
We do the same to create the STDAR member.
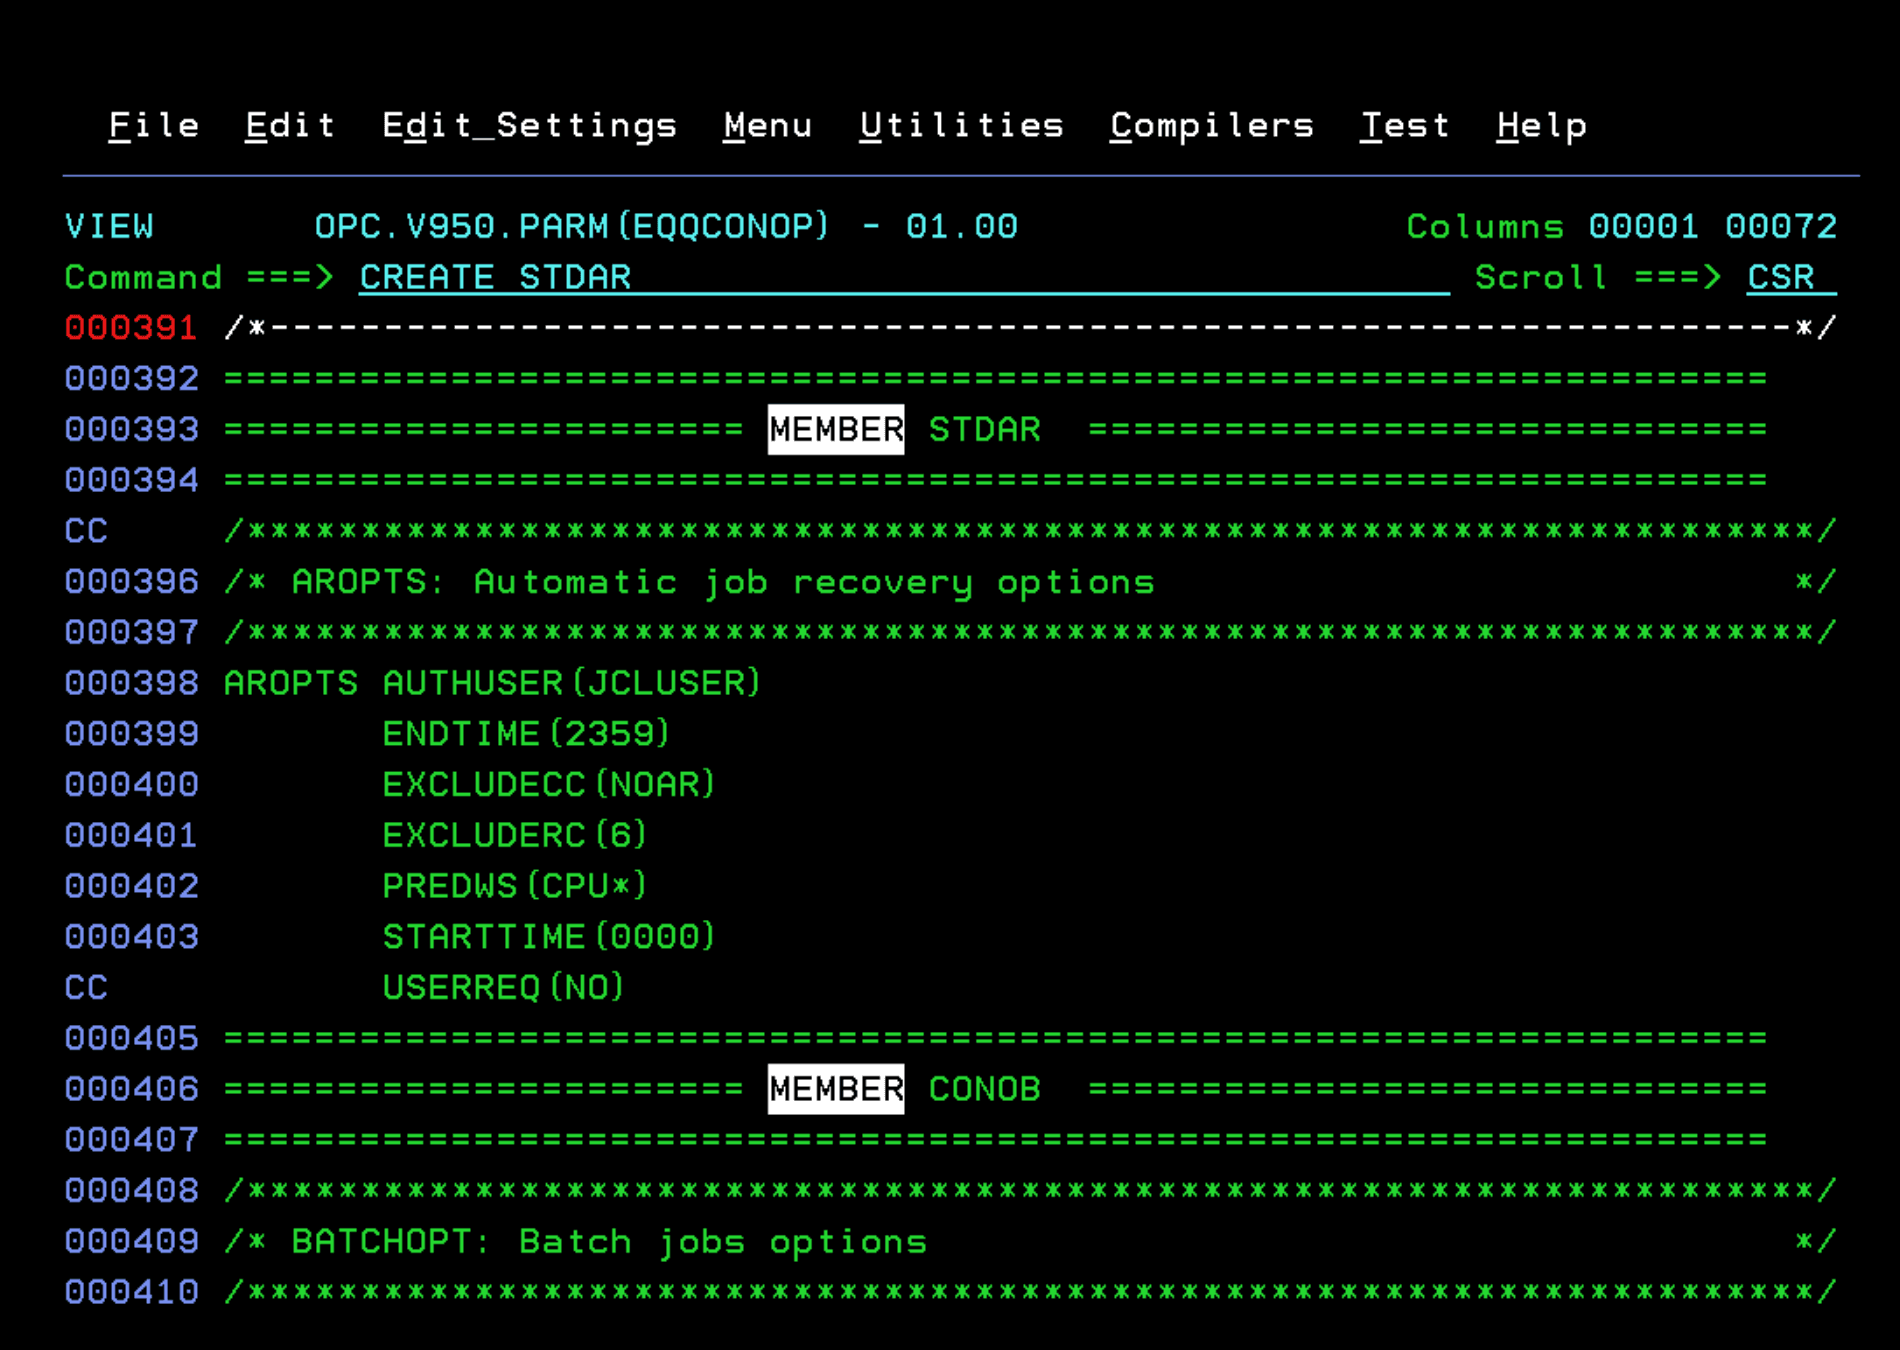
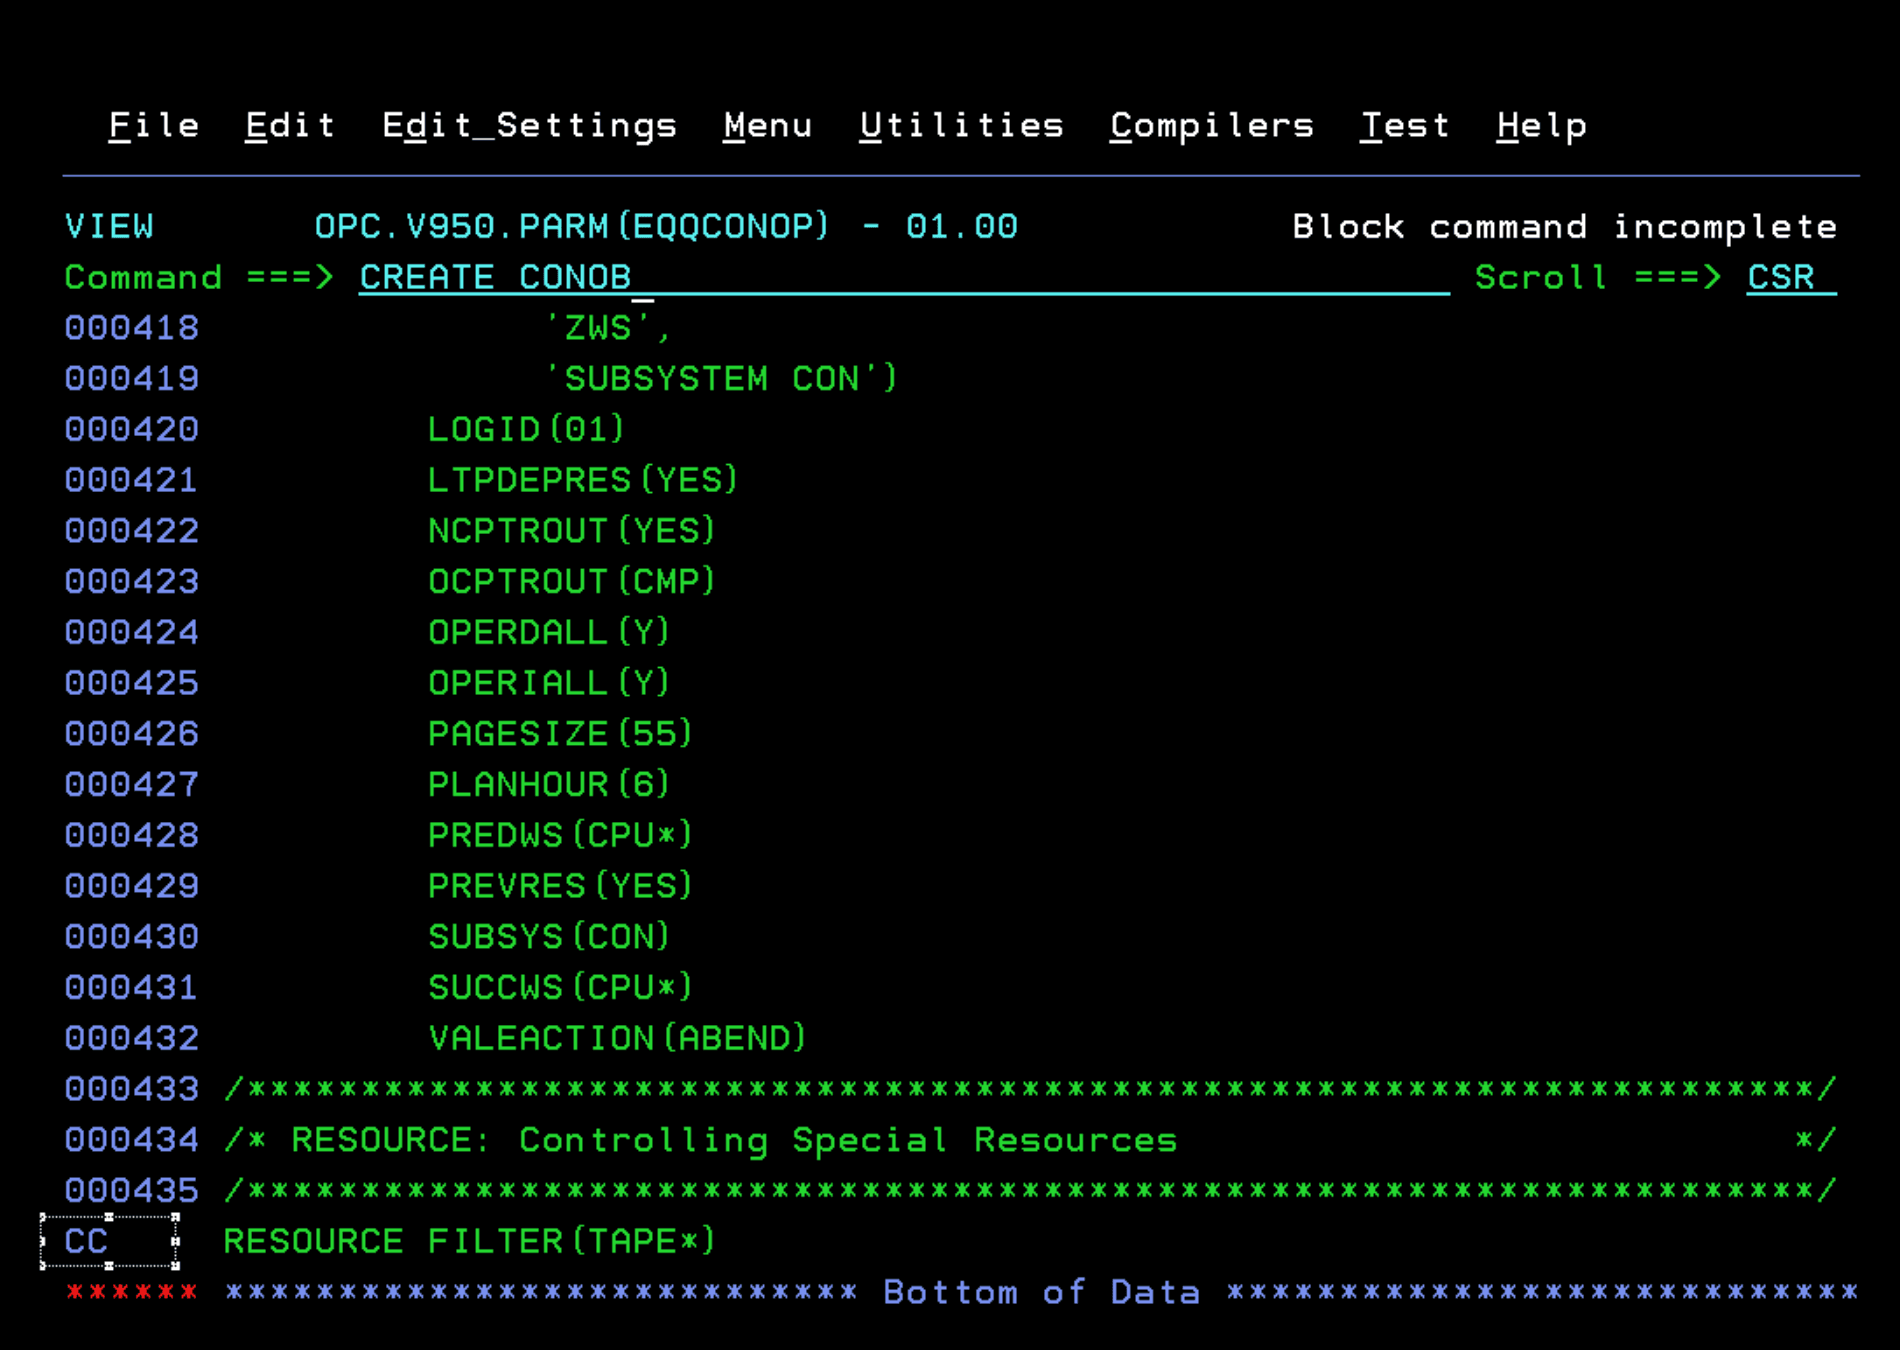
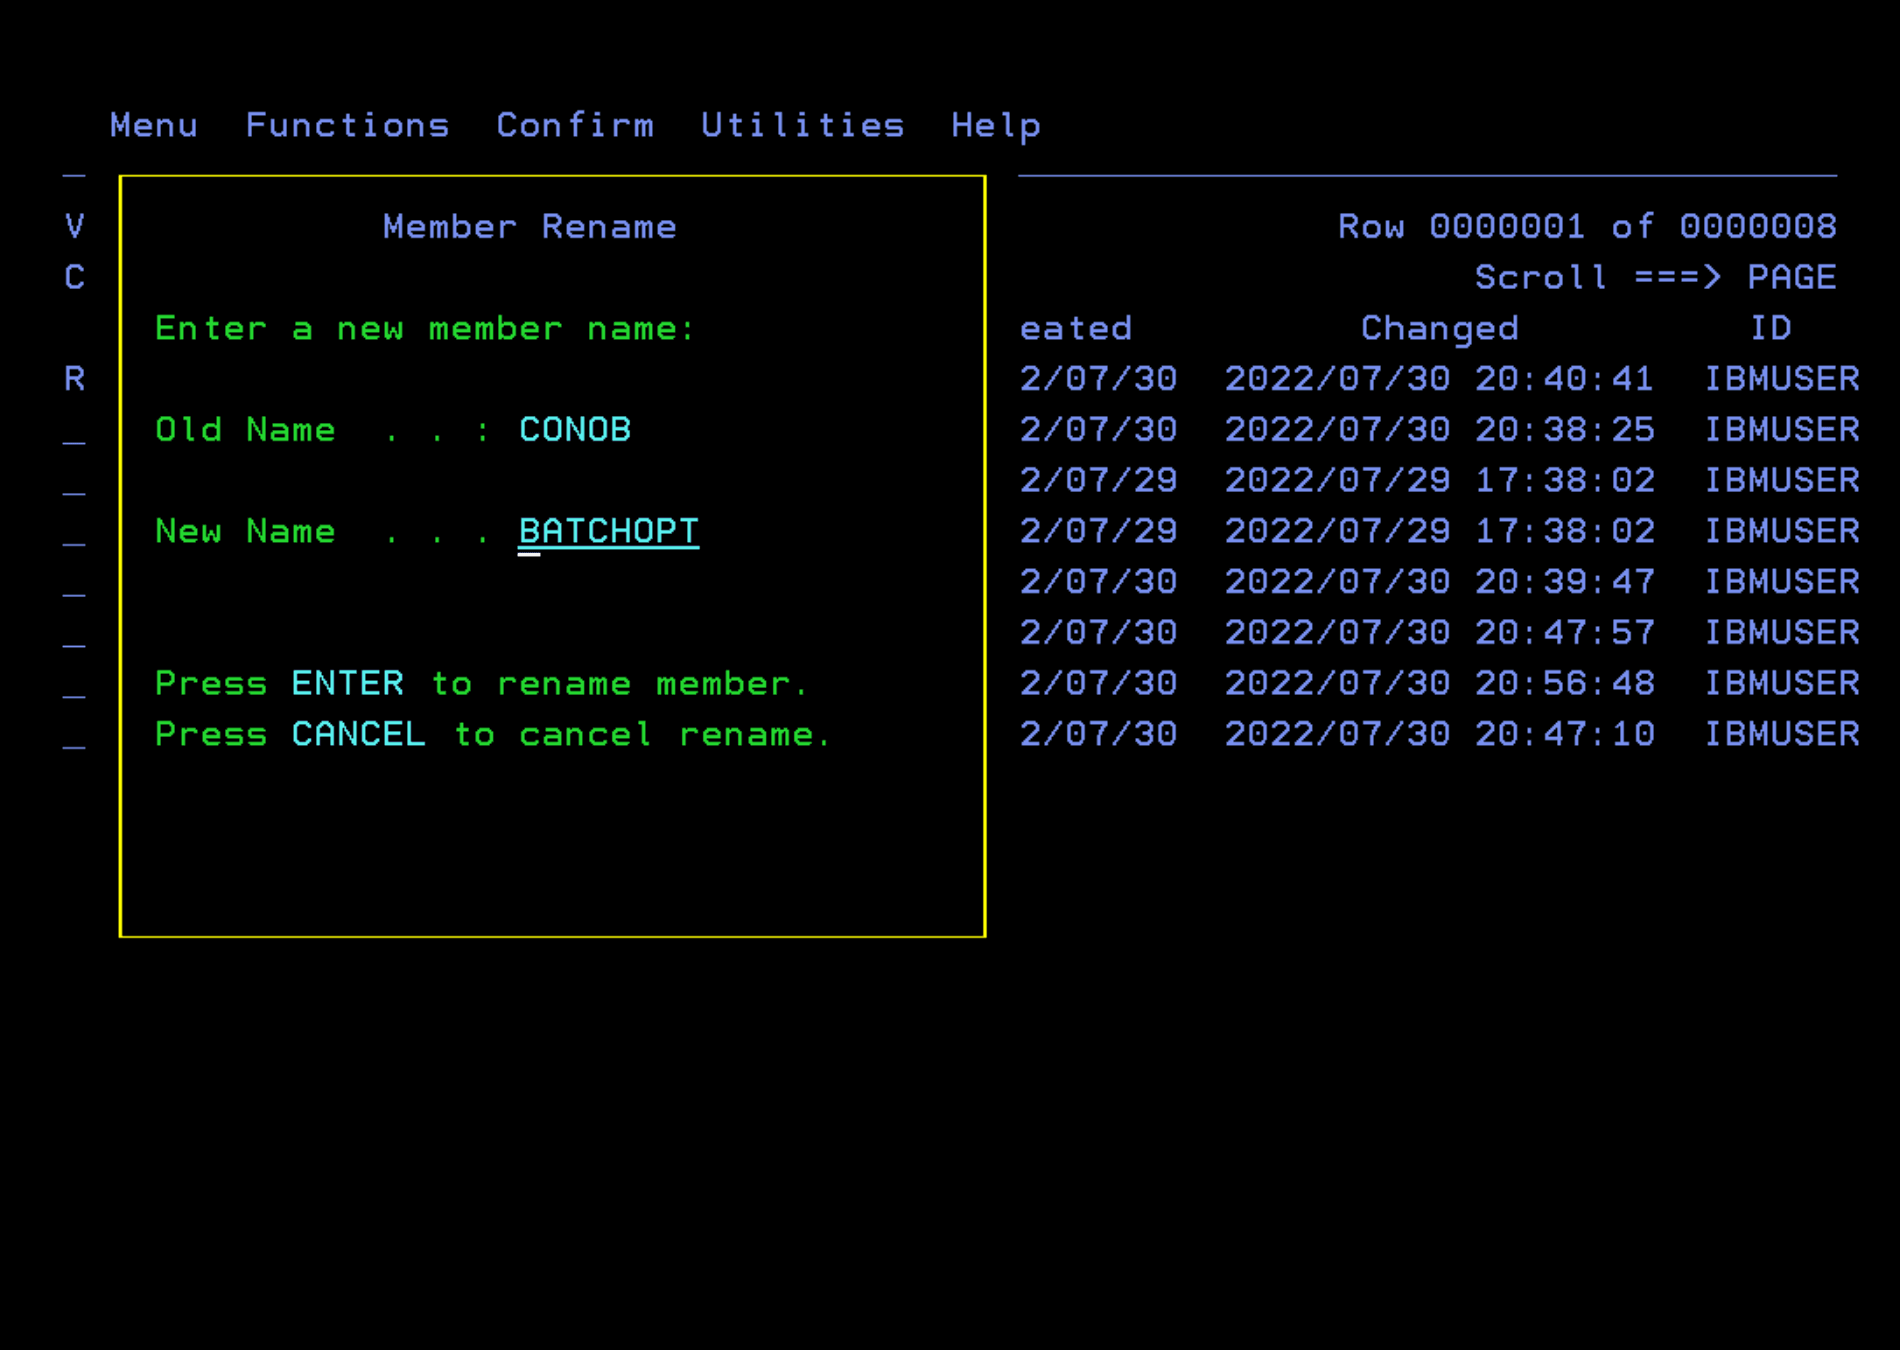
Finally, we will create the CONOB member in the same way.
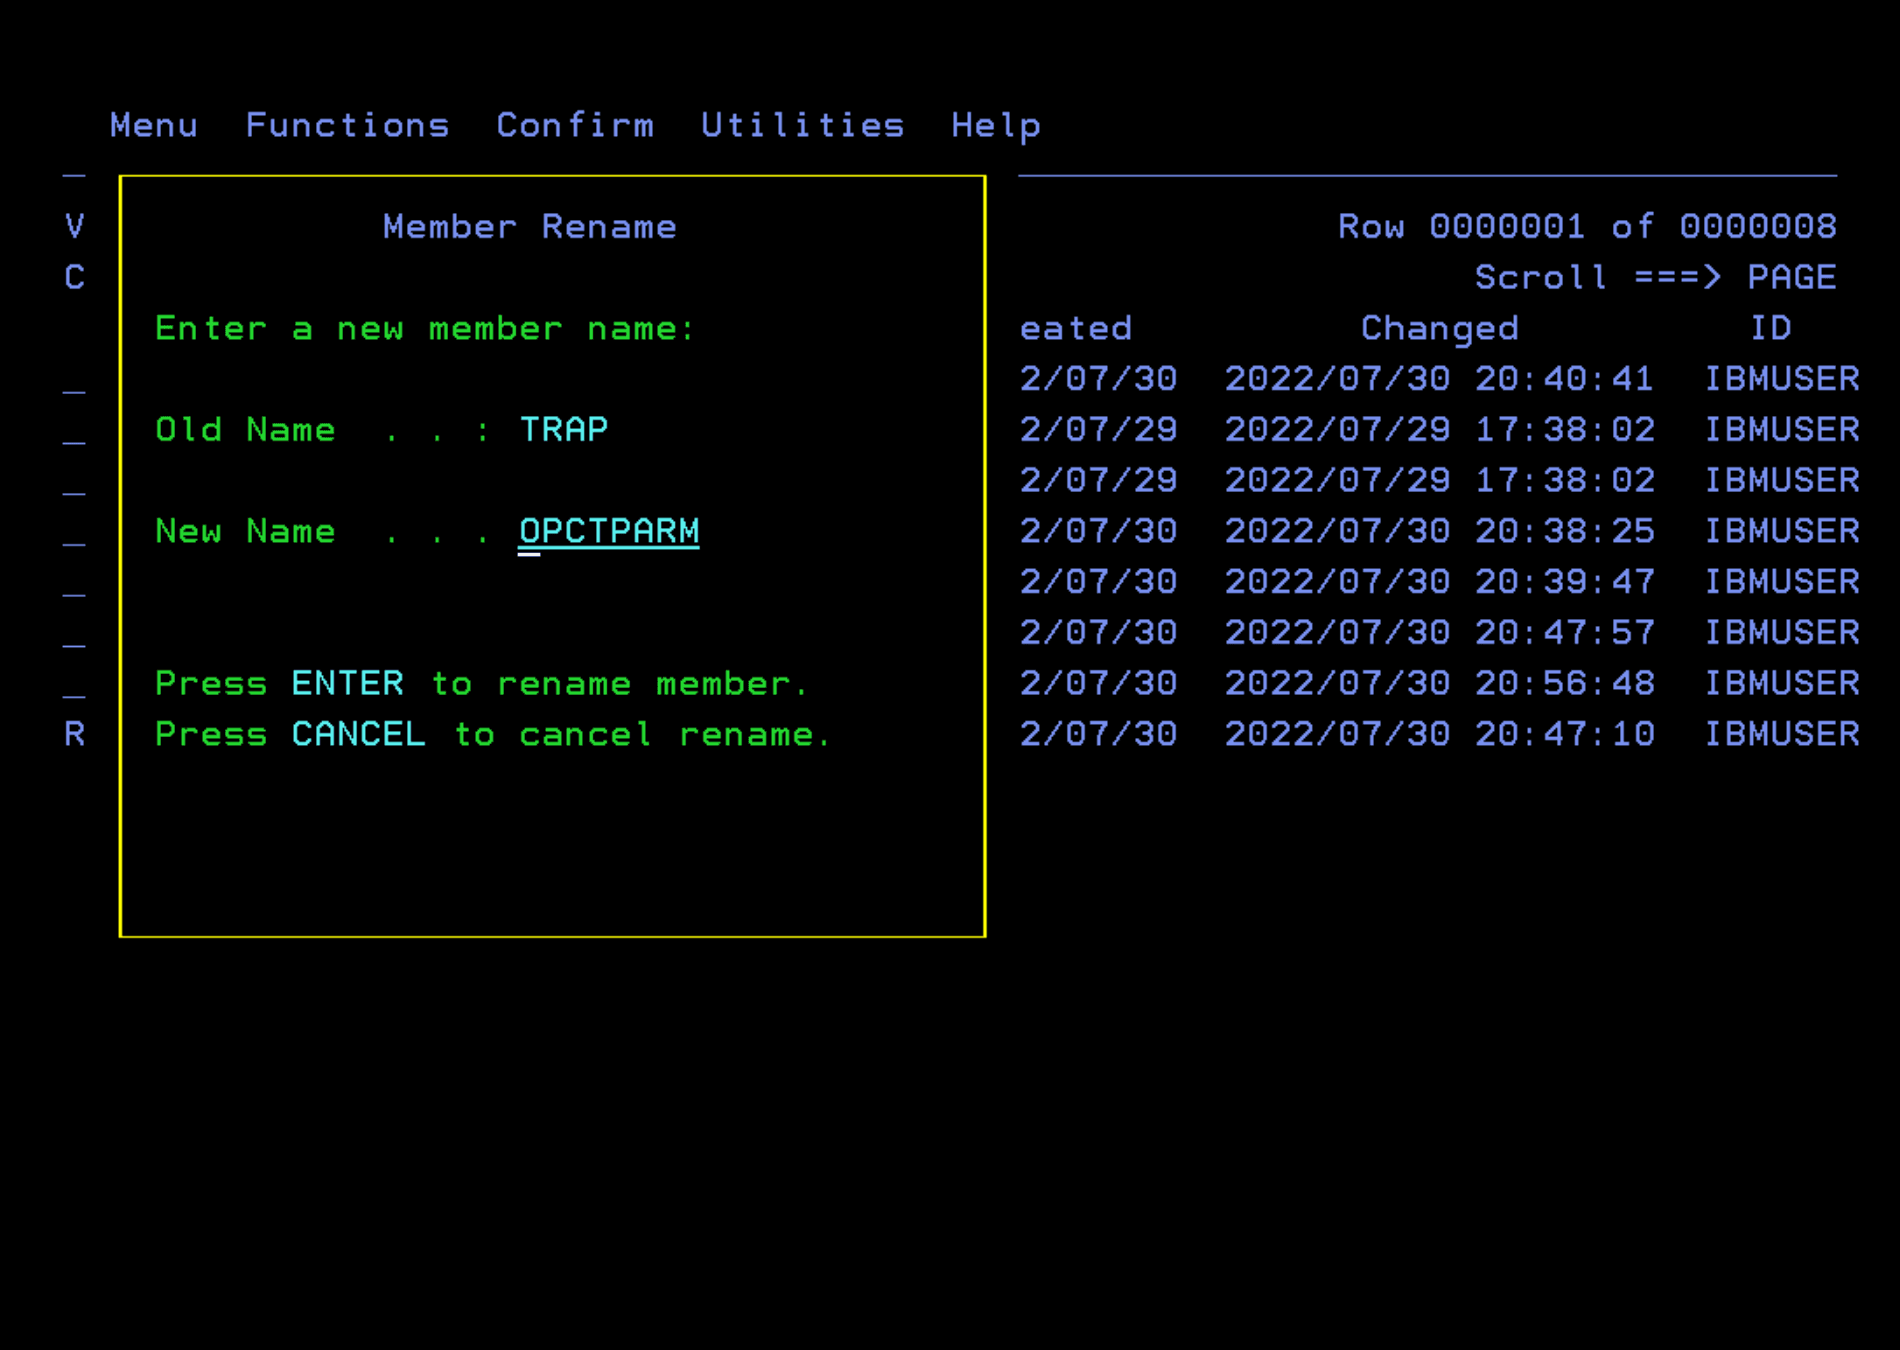
Now we will do the same with the EQQTRAP member.
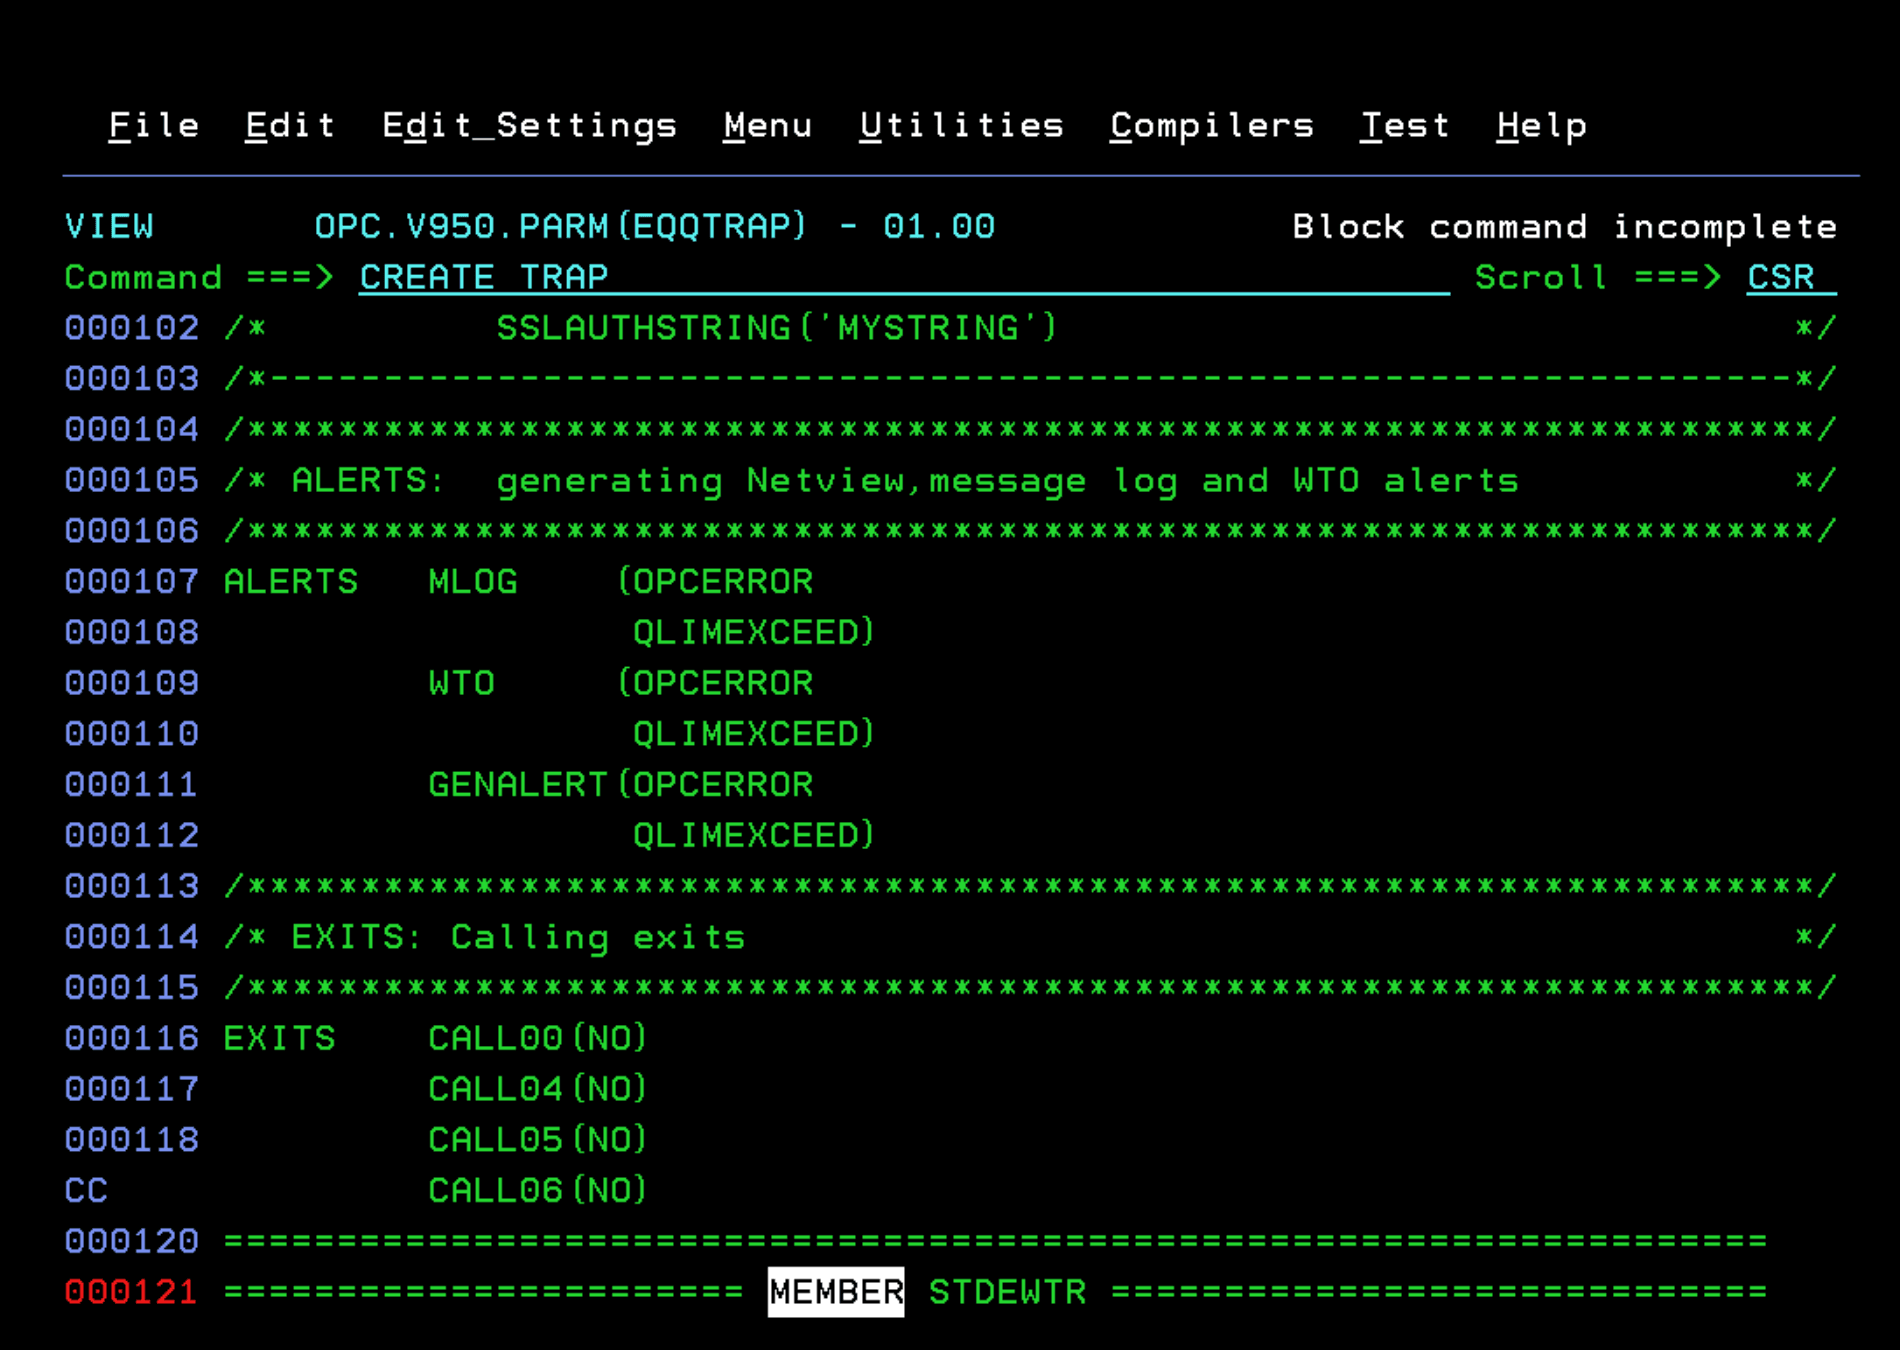
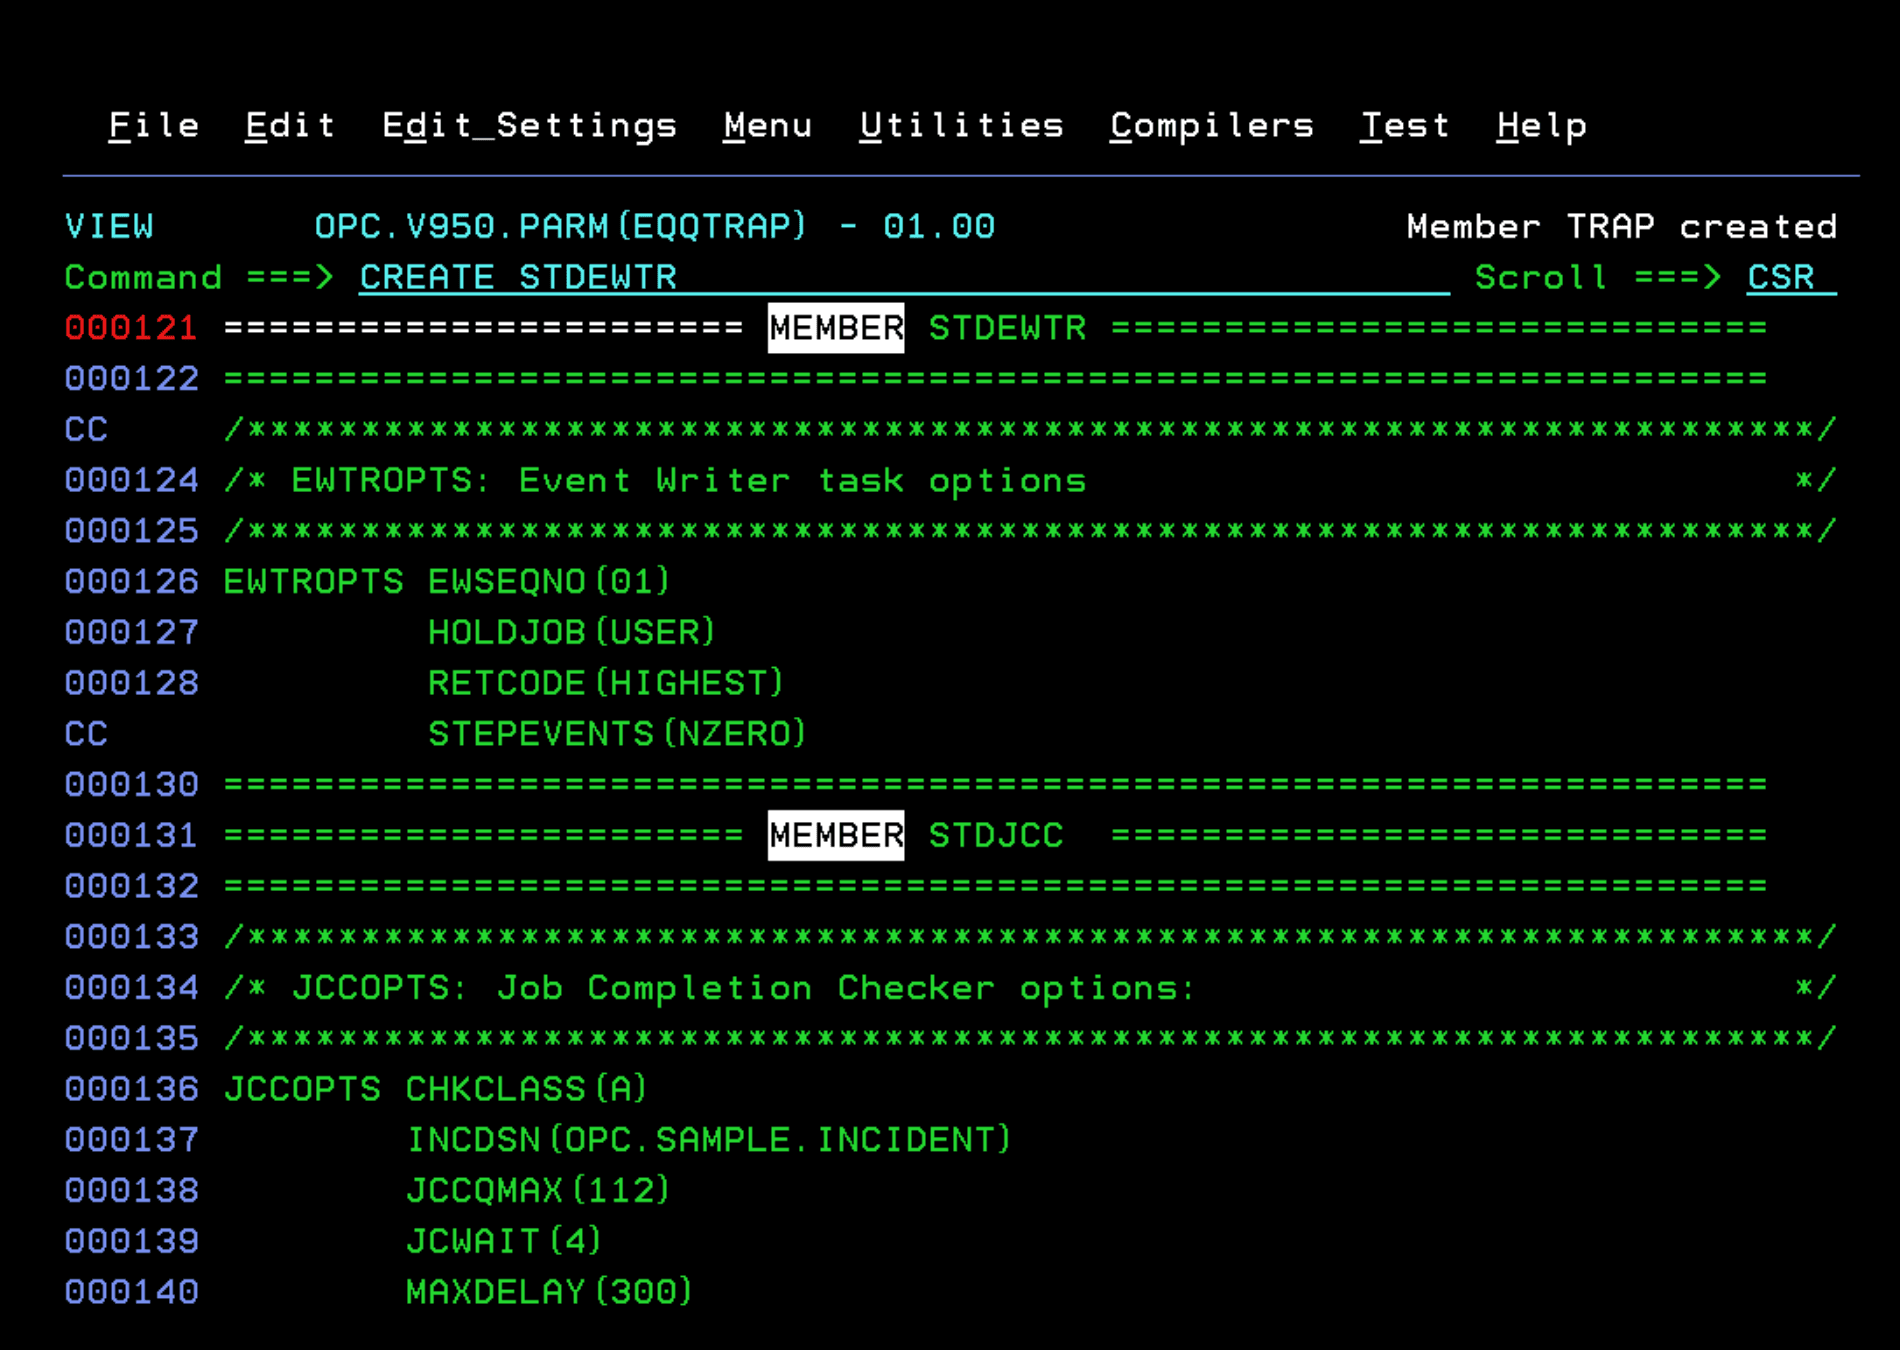
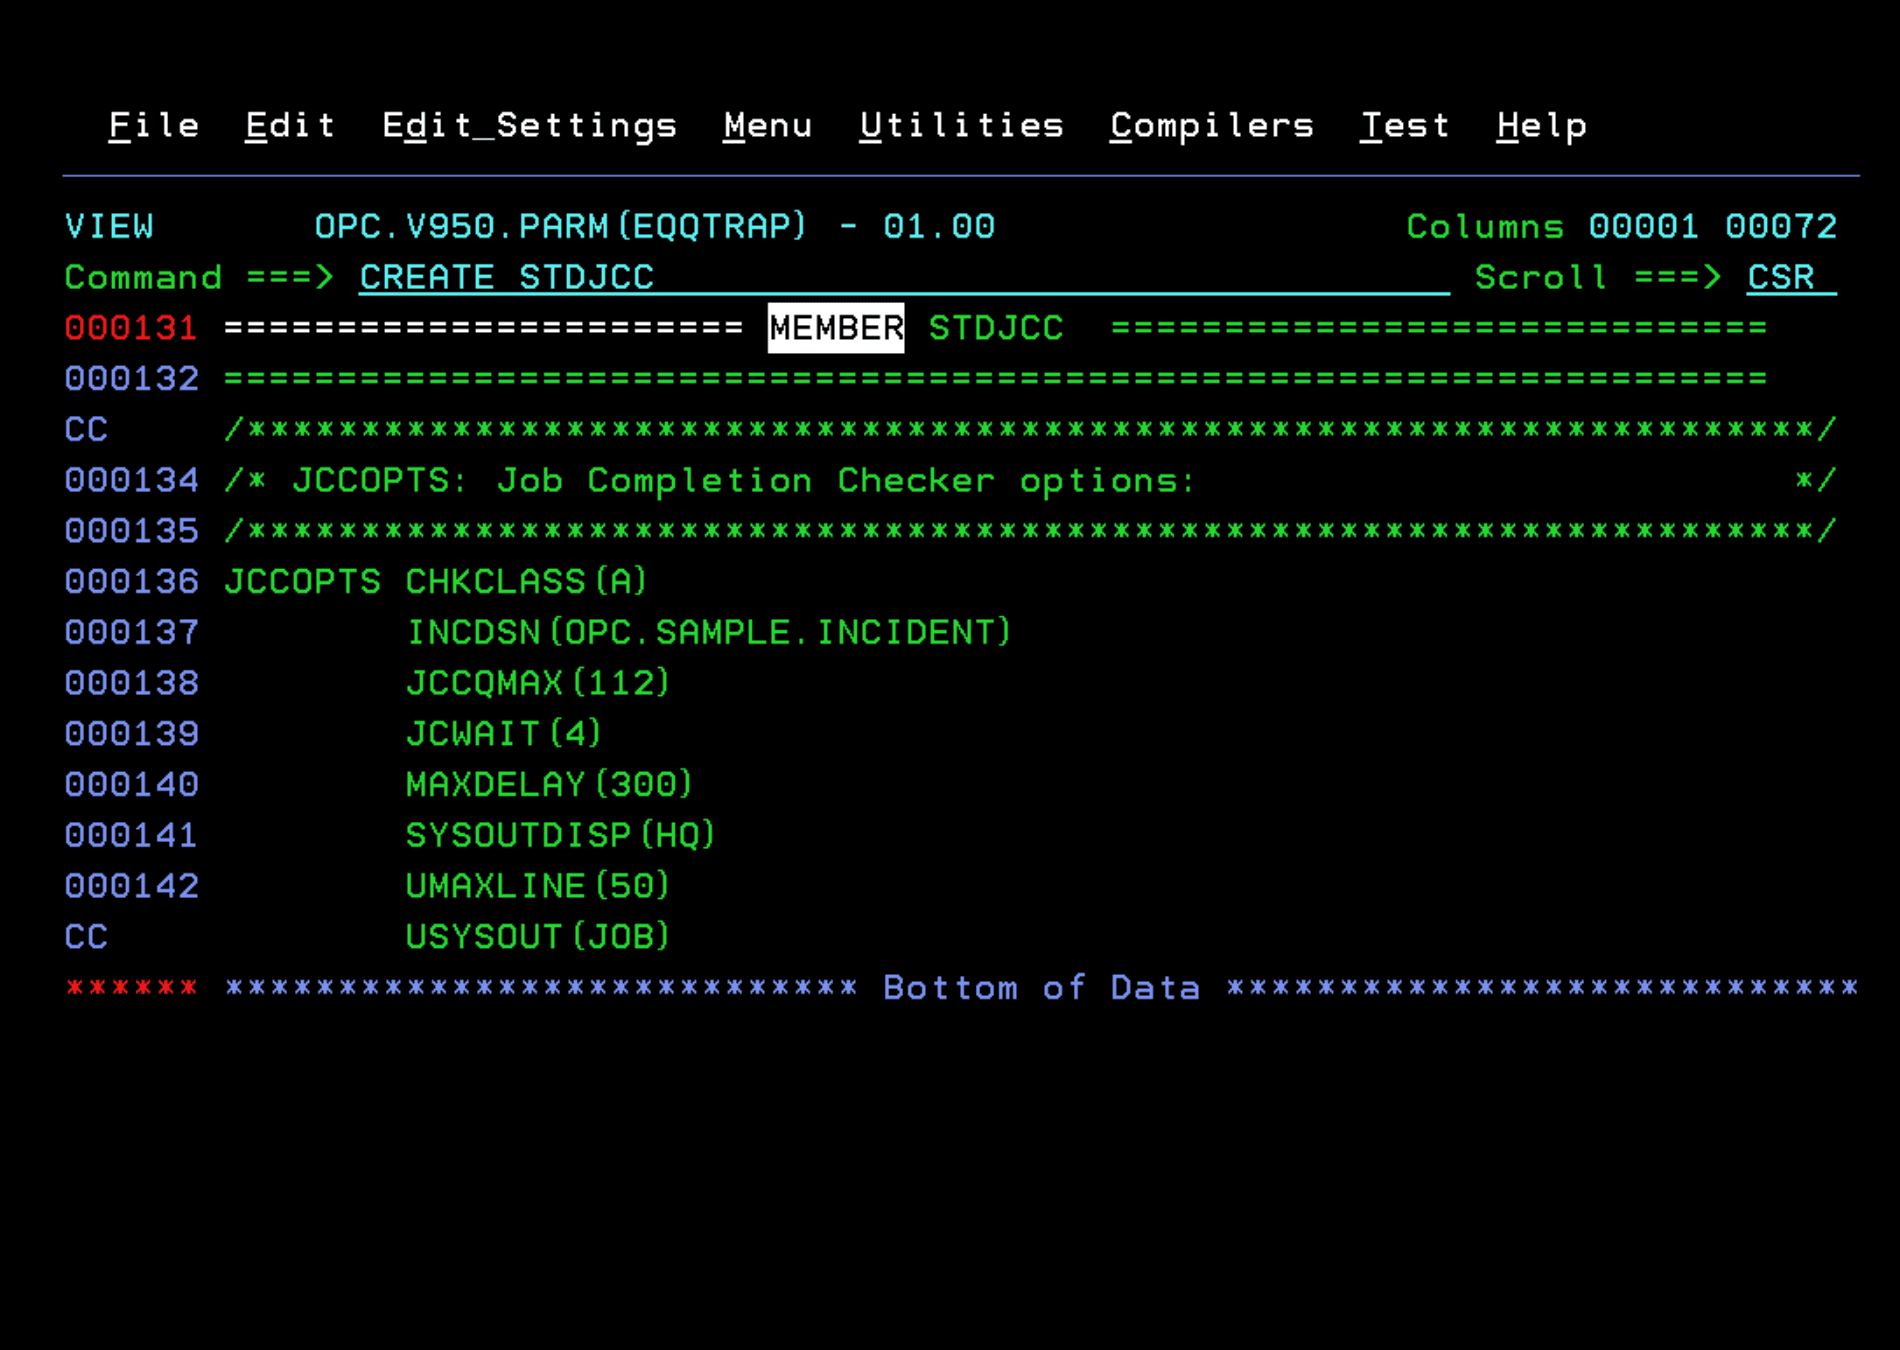
We will do the same to create the STDEWTR and STDJCC members.
We rename the CONOB member to BATCHOPT.
We rename the CONOP member to OPCCPARM.
We rename the TRAP member to OPCTPARM.
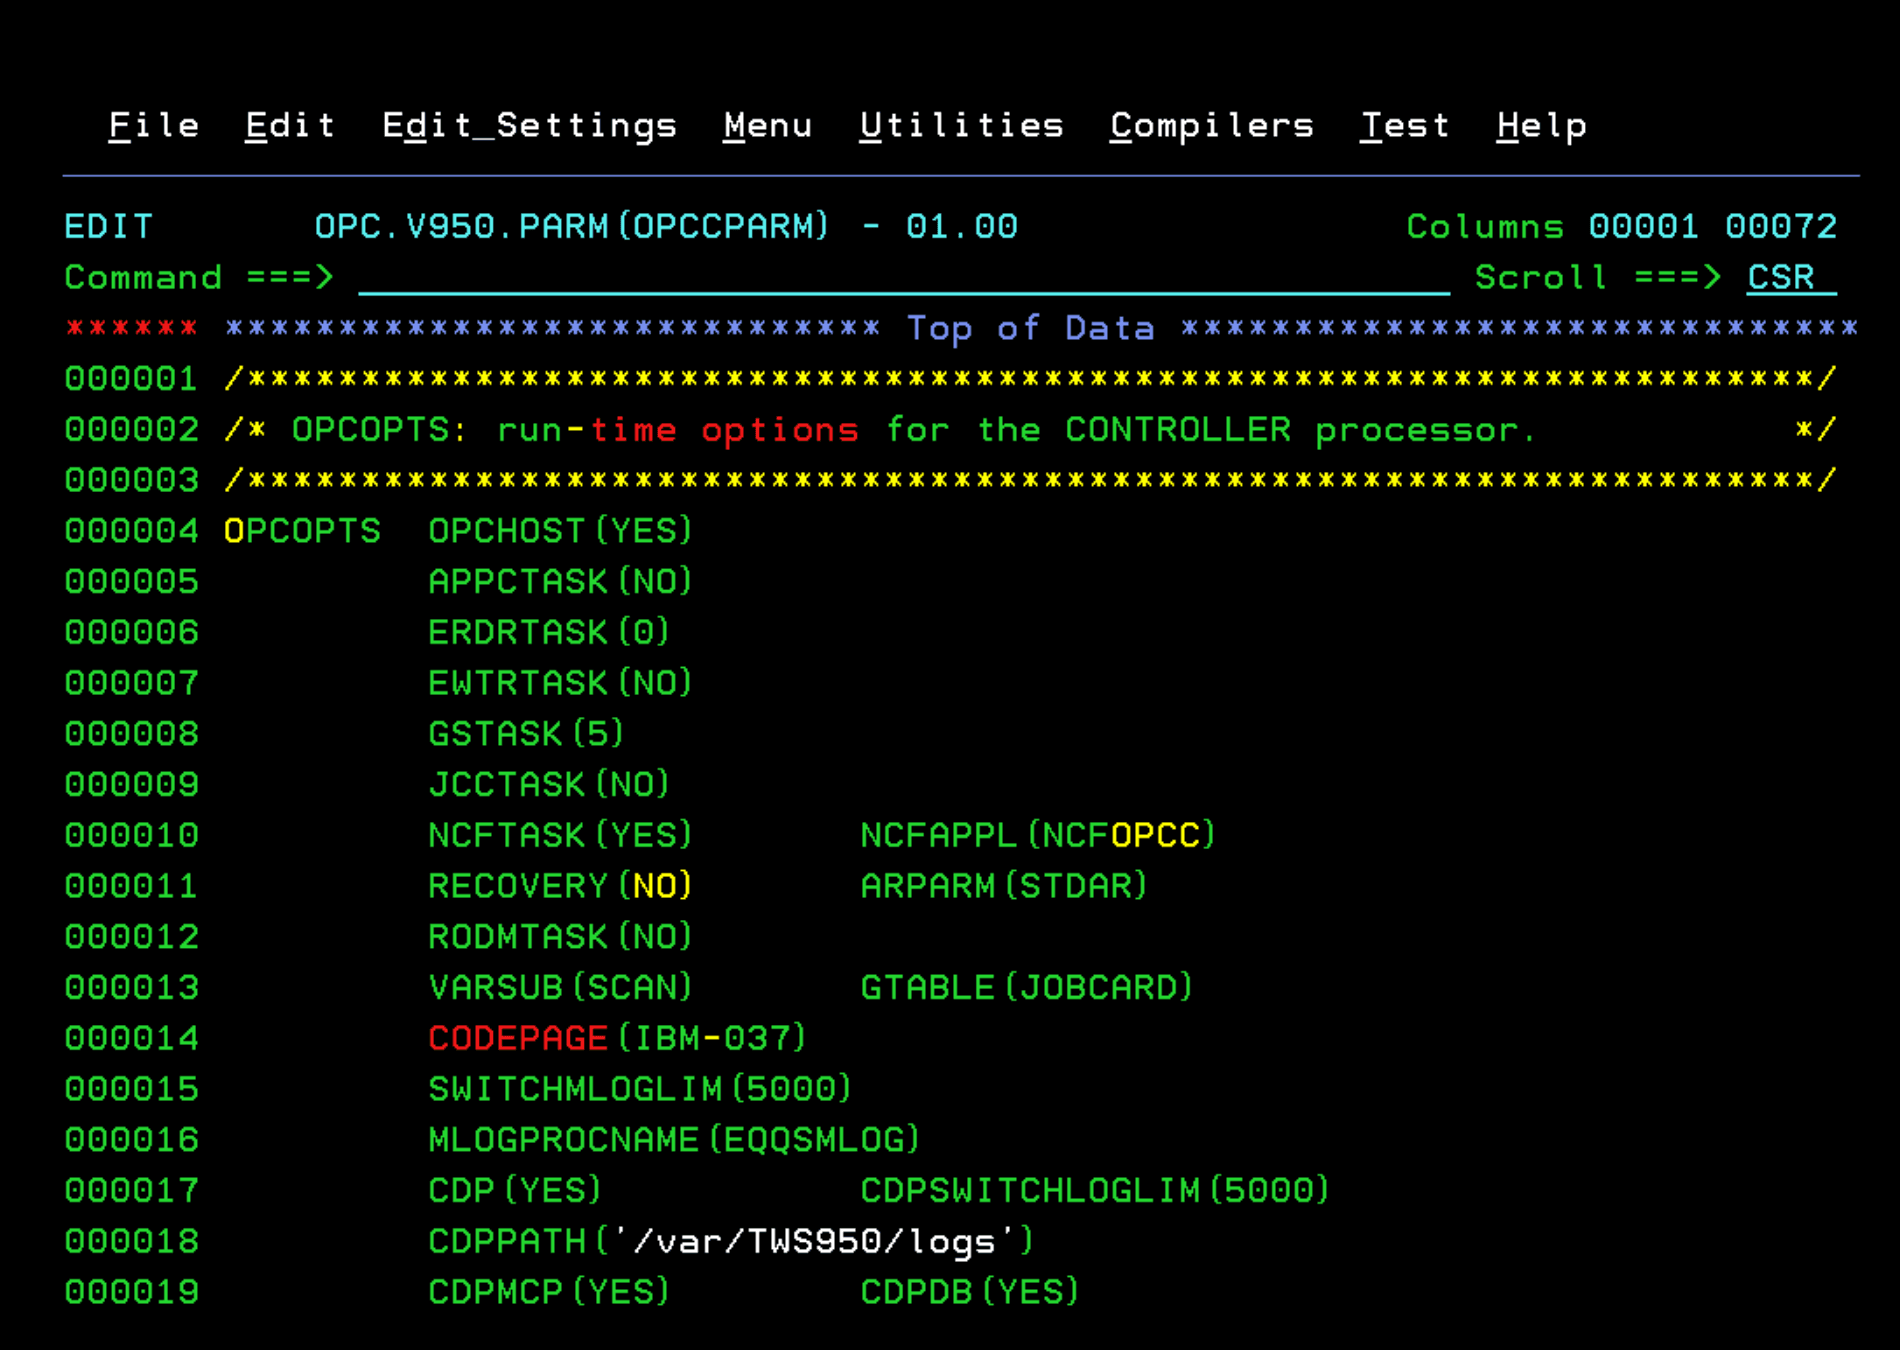
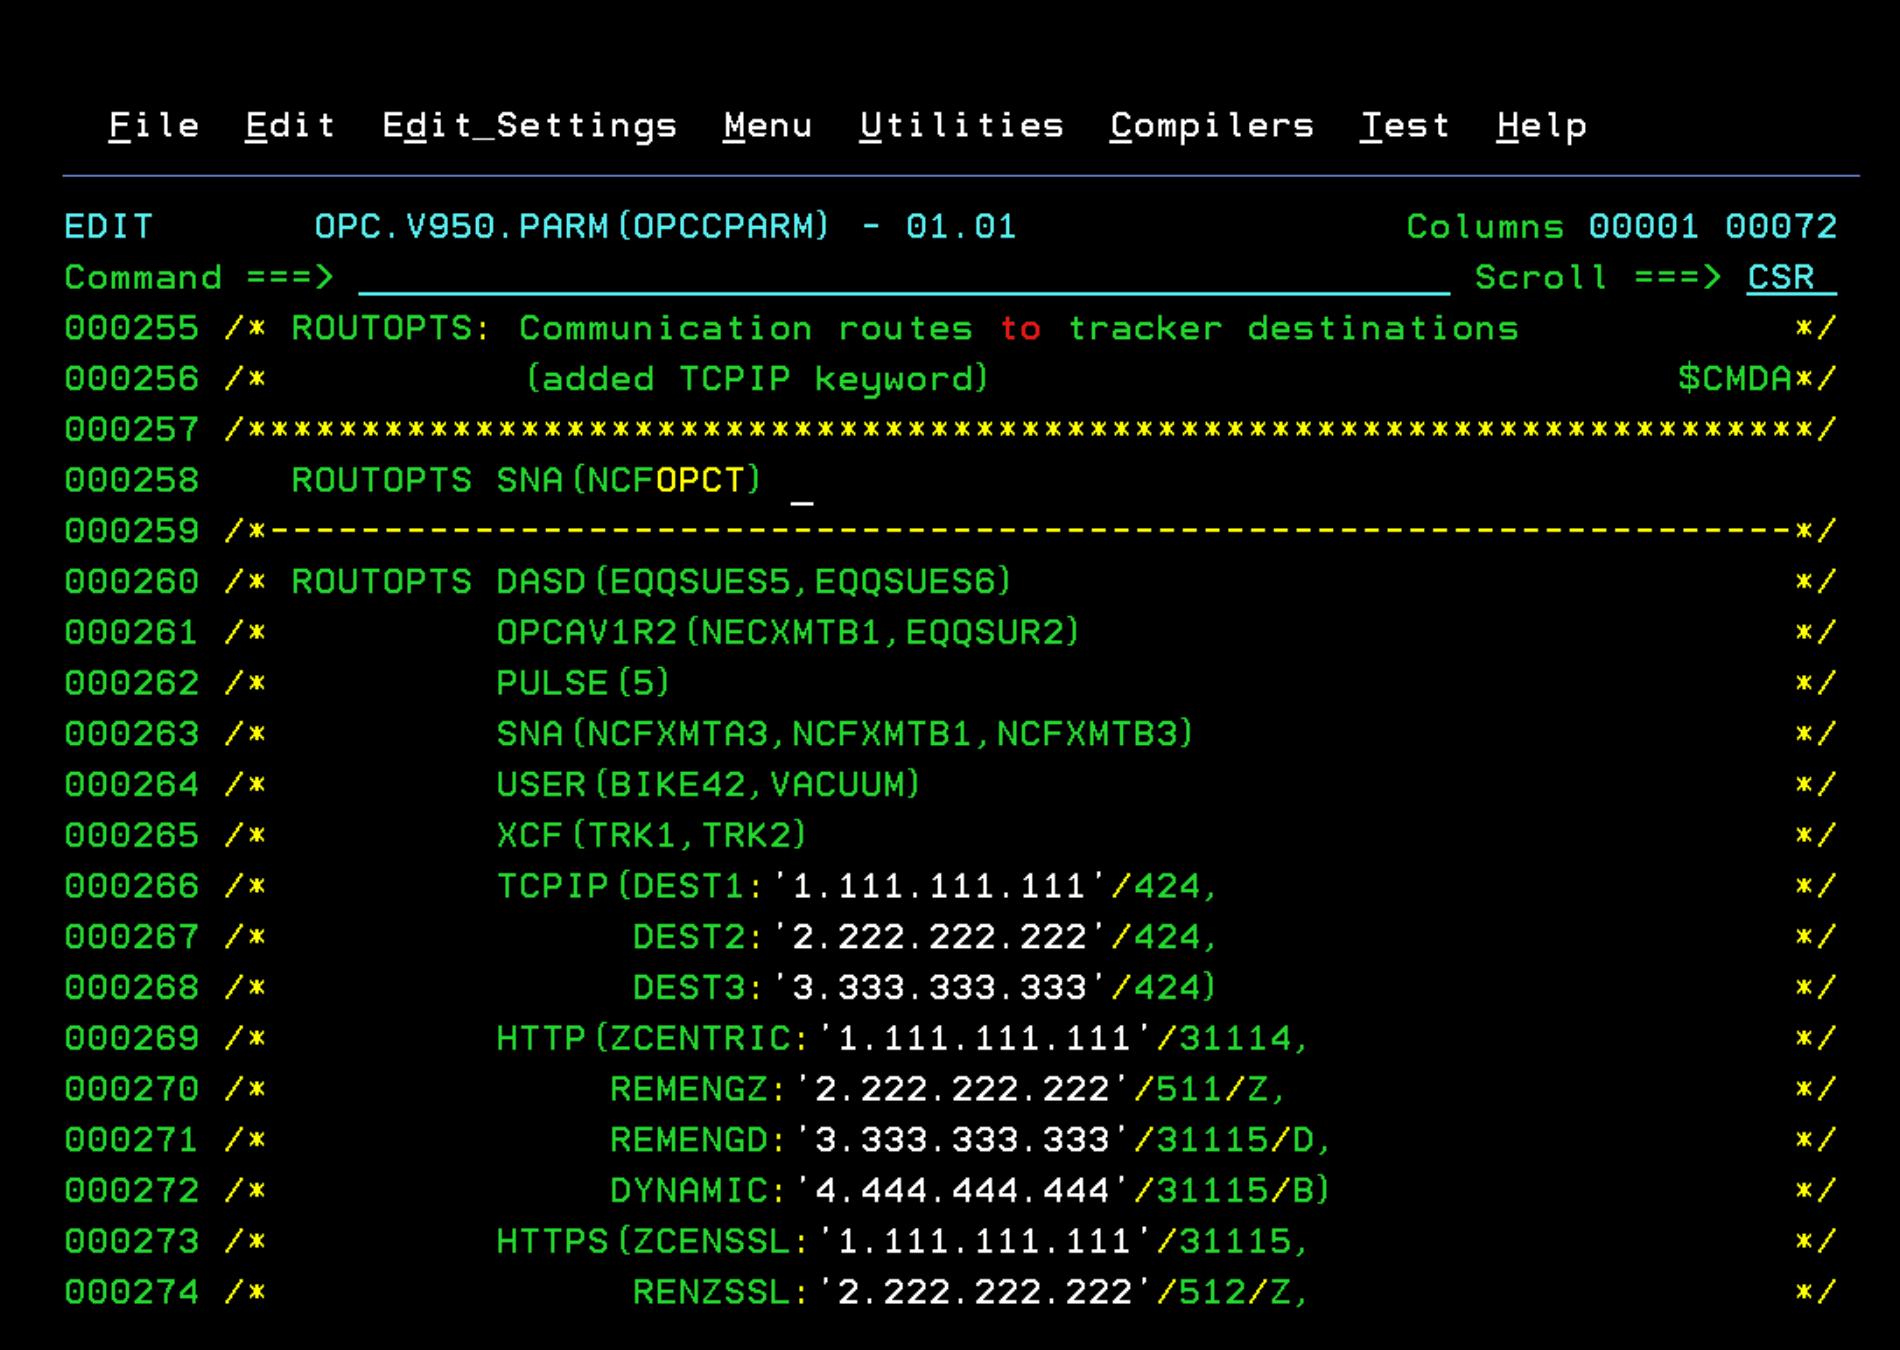
We enter to edit the OPCCPARM member.
We put NCFOPCC in the NCFAPPL parameter, which will be the name of our controller LU.
IMPORTANT! You must put RECOVERY NO, otherwise an abend will occur when starting the controller later.
We continue scrolling down and put NCFOPCT in the SNA parameter, so that it communicates with the tracker.
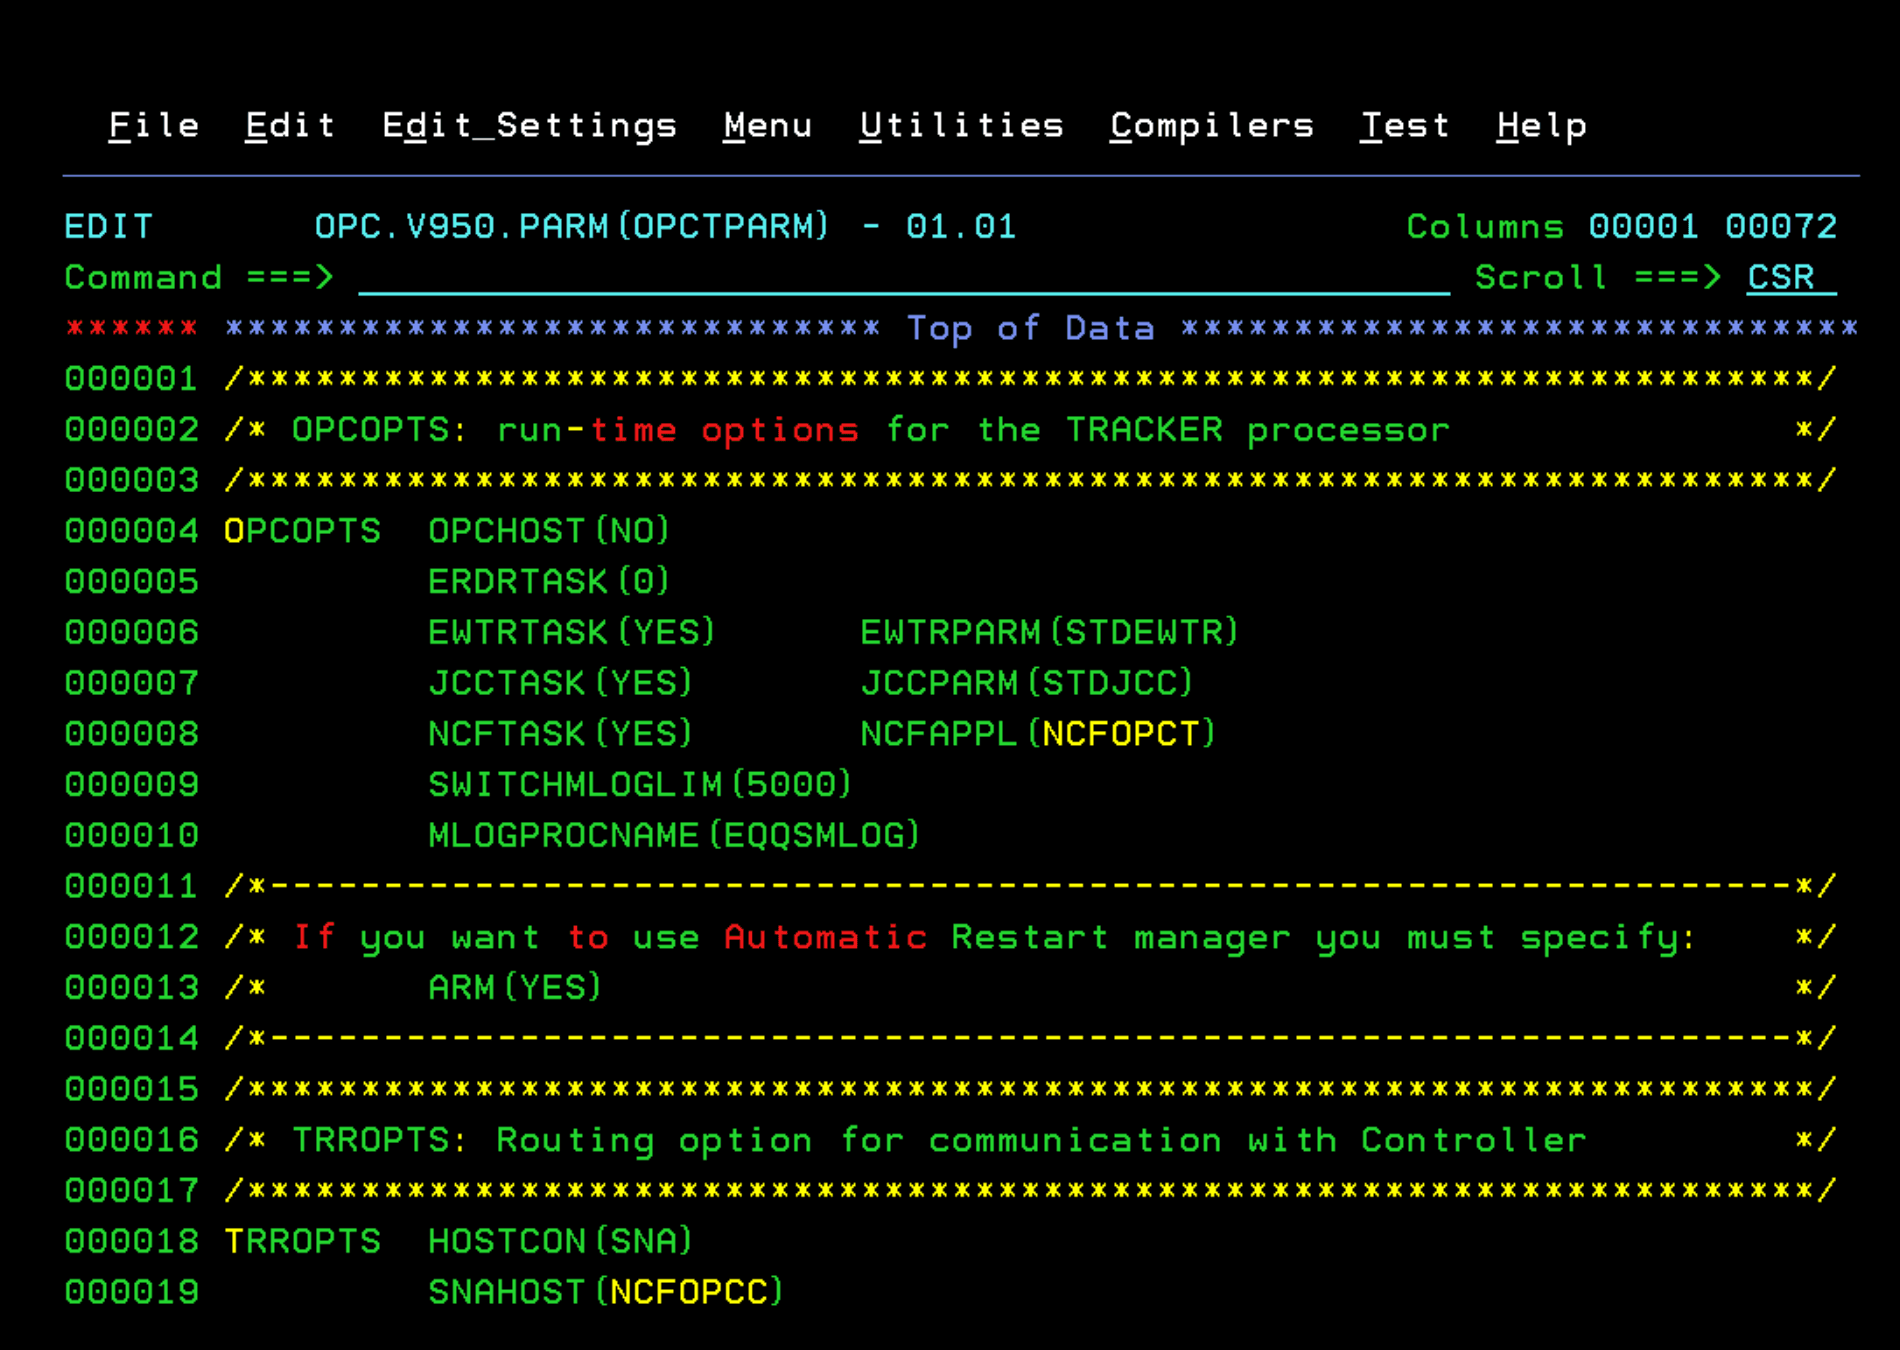
Now we edit the OPCTPARM member. We put NCFOPCT in the NCFAPPL parameter, which will be the name of our tracker LU.
In the SNAHOST parameter we put NCFOPCC, so that it communicates with the controller.
Configure VTAM
Now we are going to create the VTAM nodes.
The communication between Controller and Tracker will be done through VTAM. We must create them in the **.VTAMLST library corresponding to our system. To do this, we will check the VTAM task in PROCLIB.
Controller: I have created a member called AOPCC with the data in the image. The application name and ACBNAME must be the same. In my case, the name I put in the controller parameter file (OPCCPARM) was NCFOPCC.
        VBUILD TYPE=APPL
NCFOPCC APPL VPACING=10,                                              C
               ACBNAME=NCFOPCC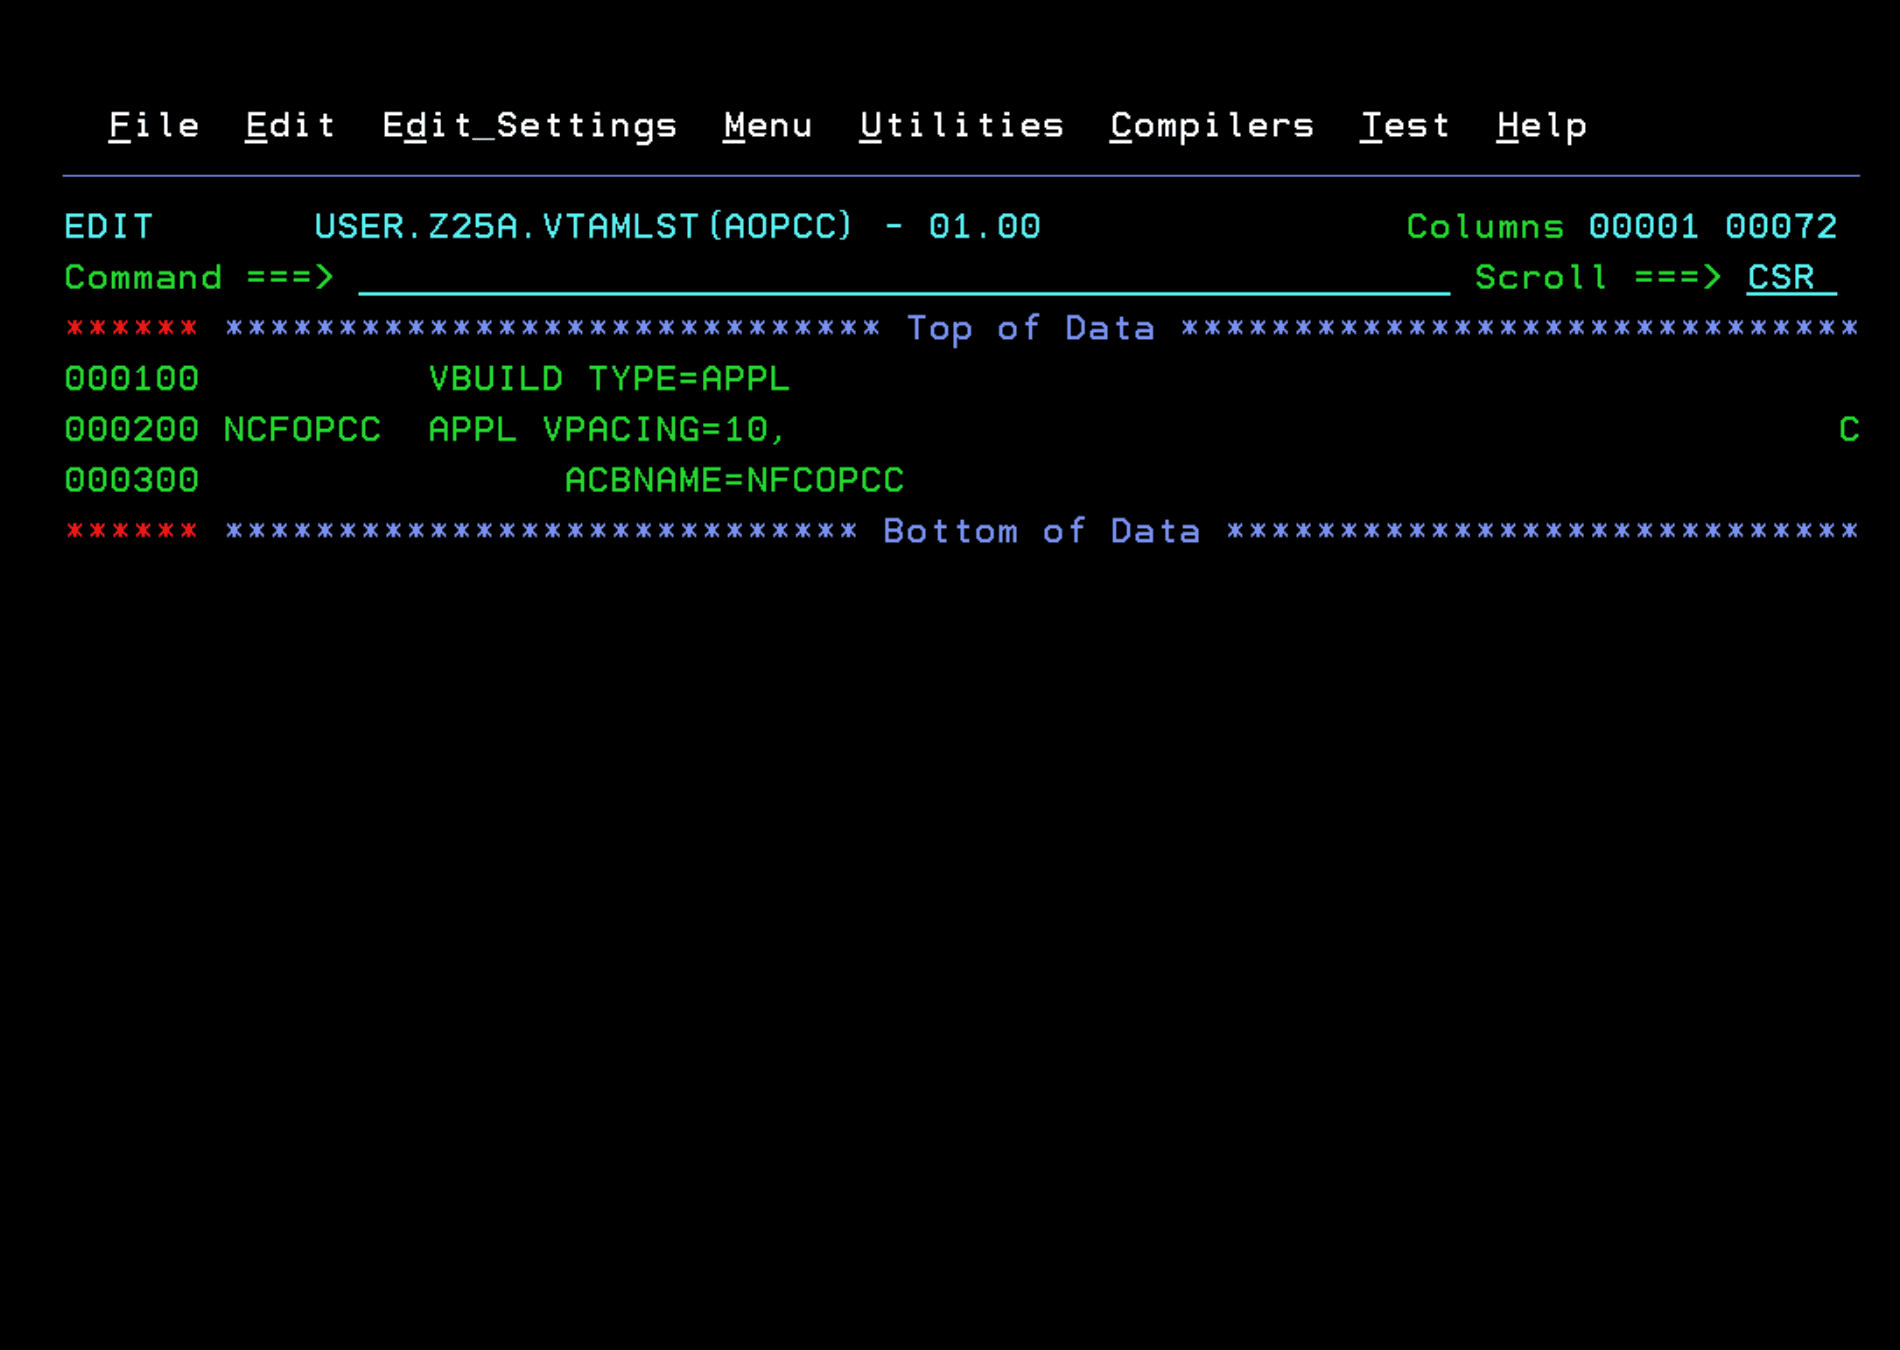
Tracker: I have created a member called AOPCT with the data in the image. The application name and ACBNAME must be the same. In my case, the name I put in the tracker parameter file (OPCTPARM) was NCFOPCT.
Look at the image to code it correctly. If you get any “syntax error” type error on the MODETAB line, make sure the spaces are placed correctly.
        VBUILD TYPE=APPL
NCFOPCT APPL ACBNAME=NCFOPCT,                                          C
               MODETAB=EQQLMTAB,                                       C
               DLOGMOD=NCFSPARM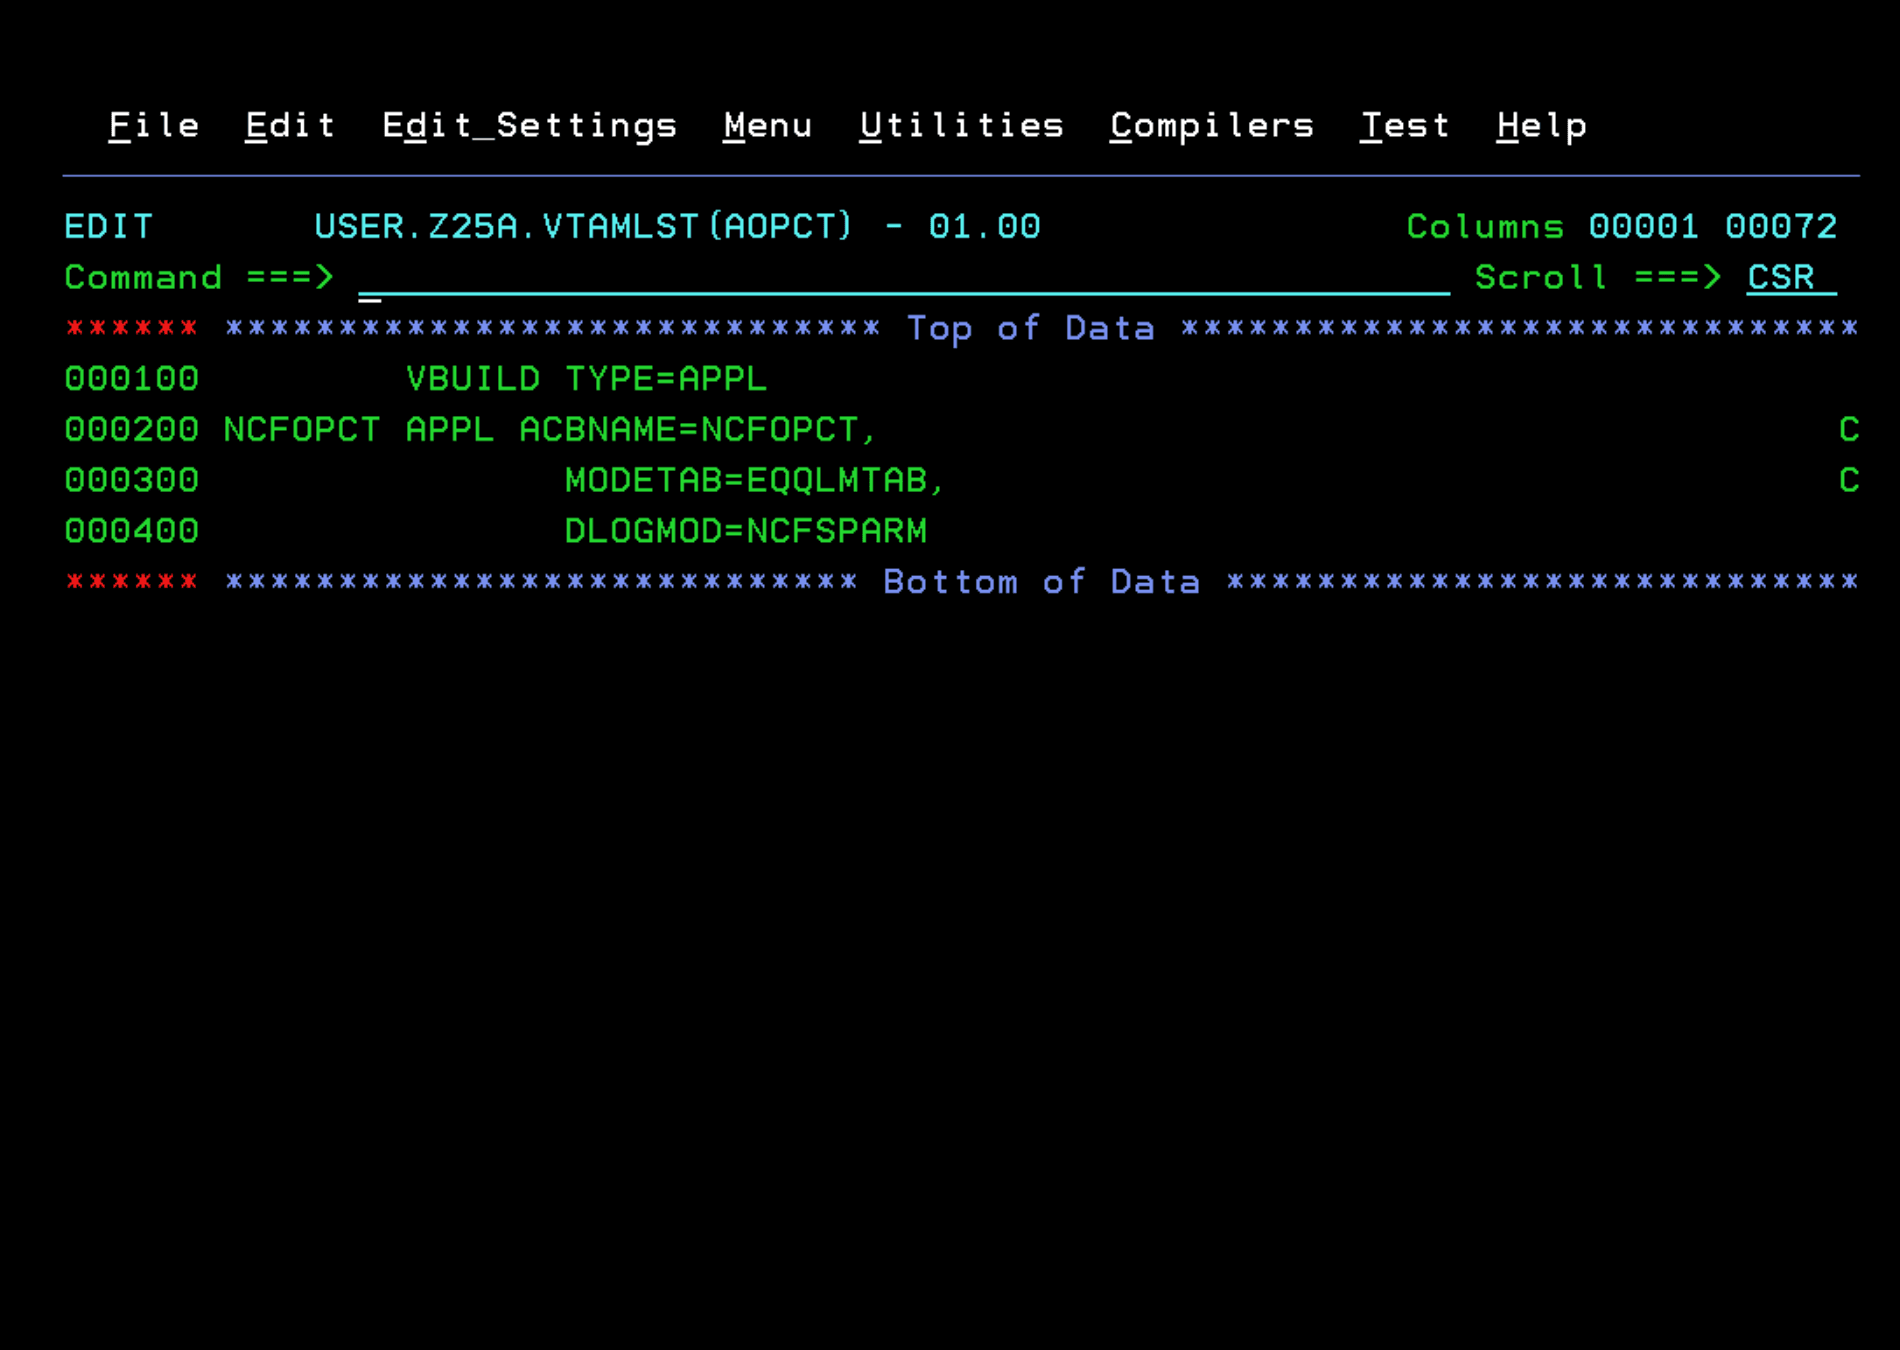
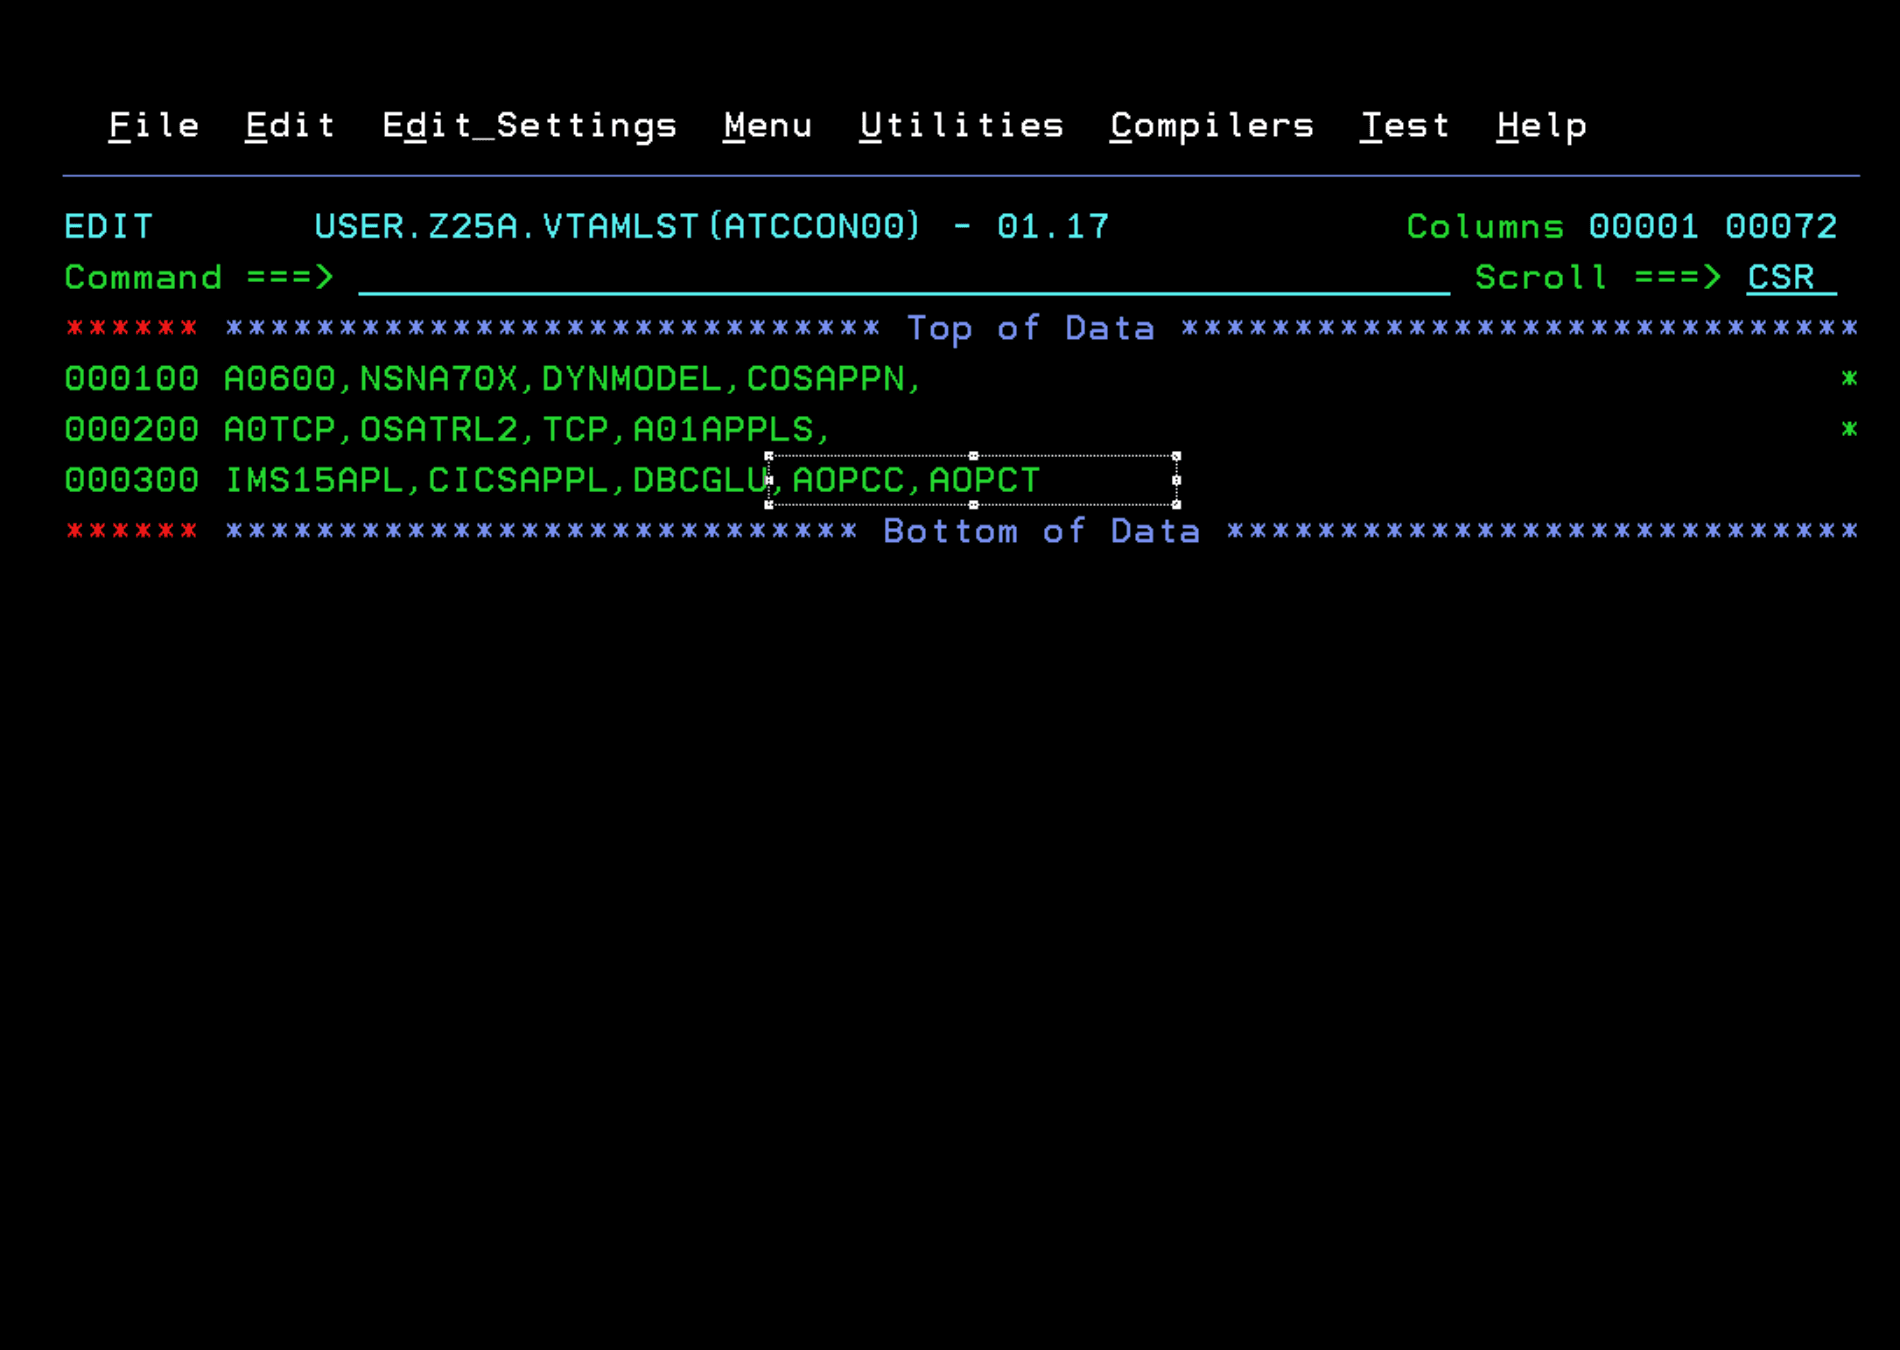
We are going to add both members to the VTAM initialization so that the nodes start automatically after an IPL. In my case, it’s the ATCCON00 member of VTAMLST.
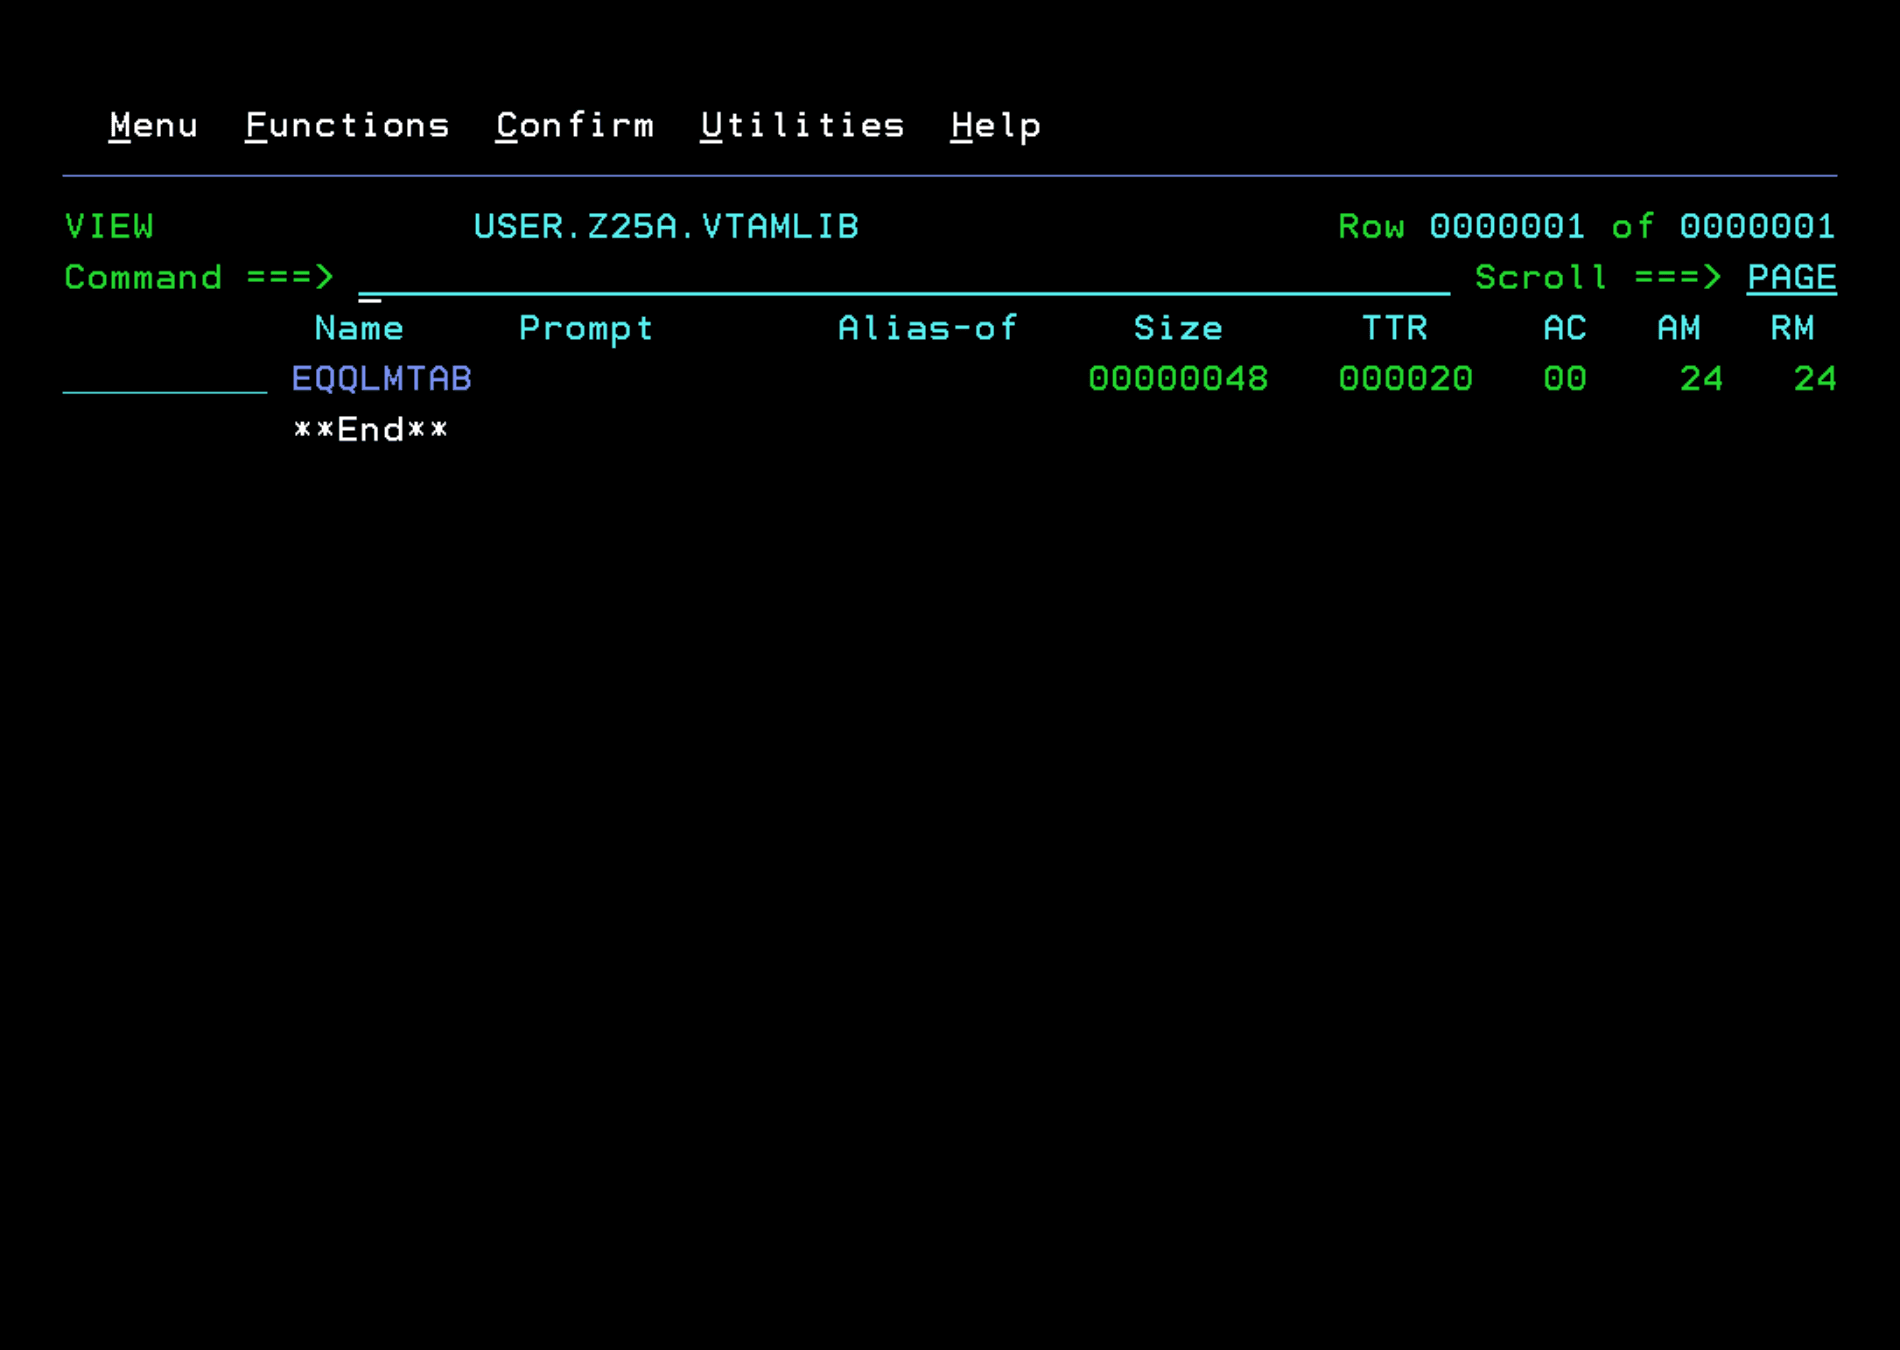
Now we must create the modetab EQQLMTAB in the VTAMLIB library of our system. To do this, we edit and submit the EQQLMTAB job from the **.SEQQSKL0 library.
We add the job header. We will also verify that the VTAMLIB library of the DD SYSLMOD is correct. We verify that the job completes successfully.

Create JCC Message Table
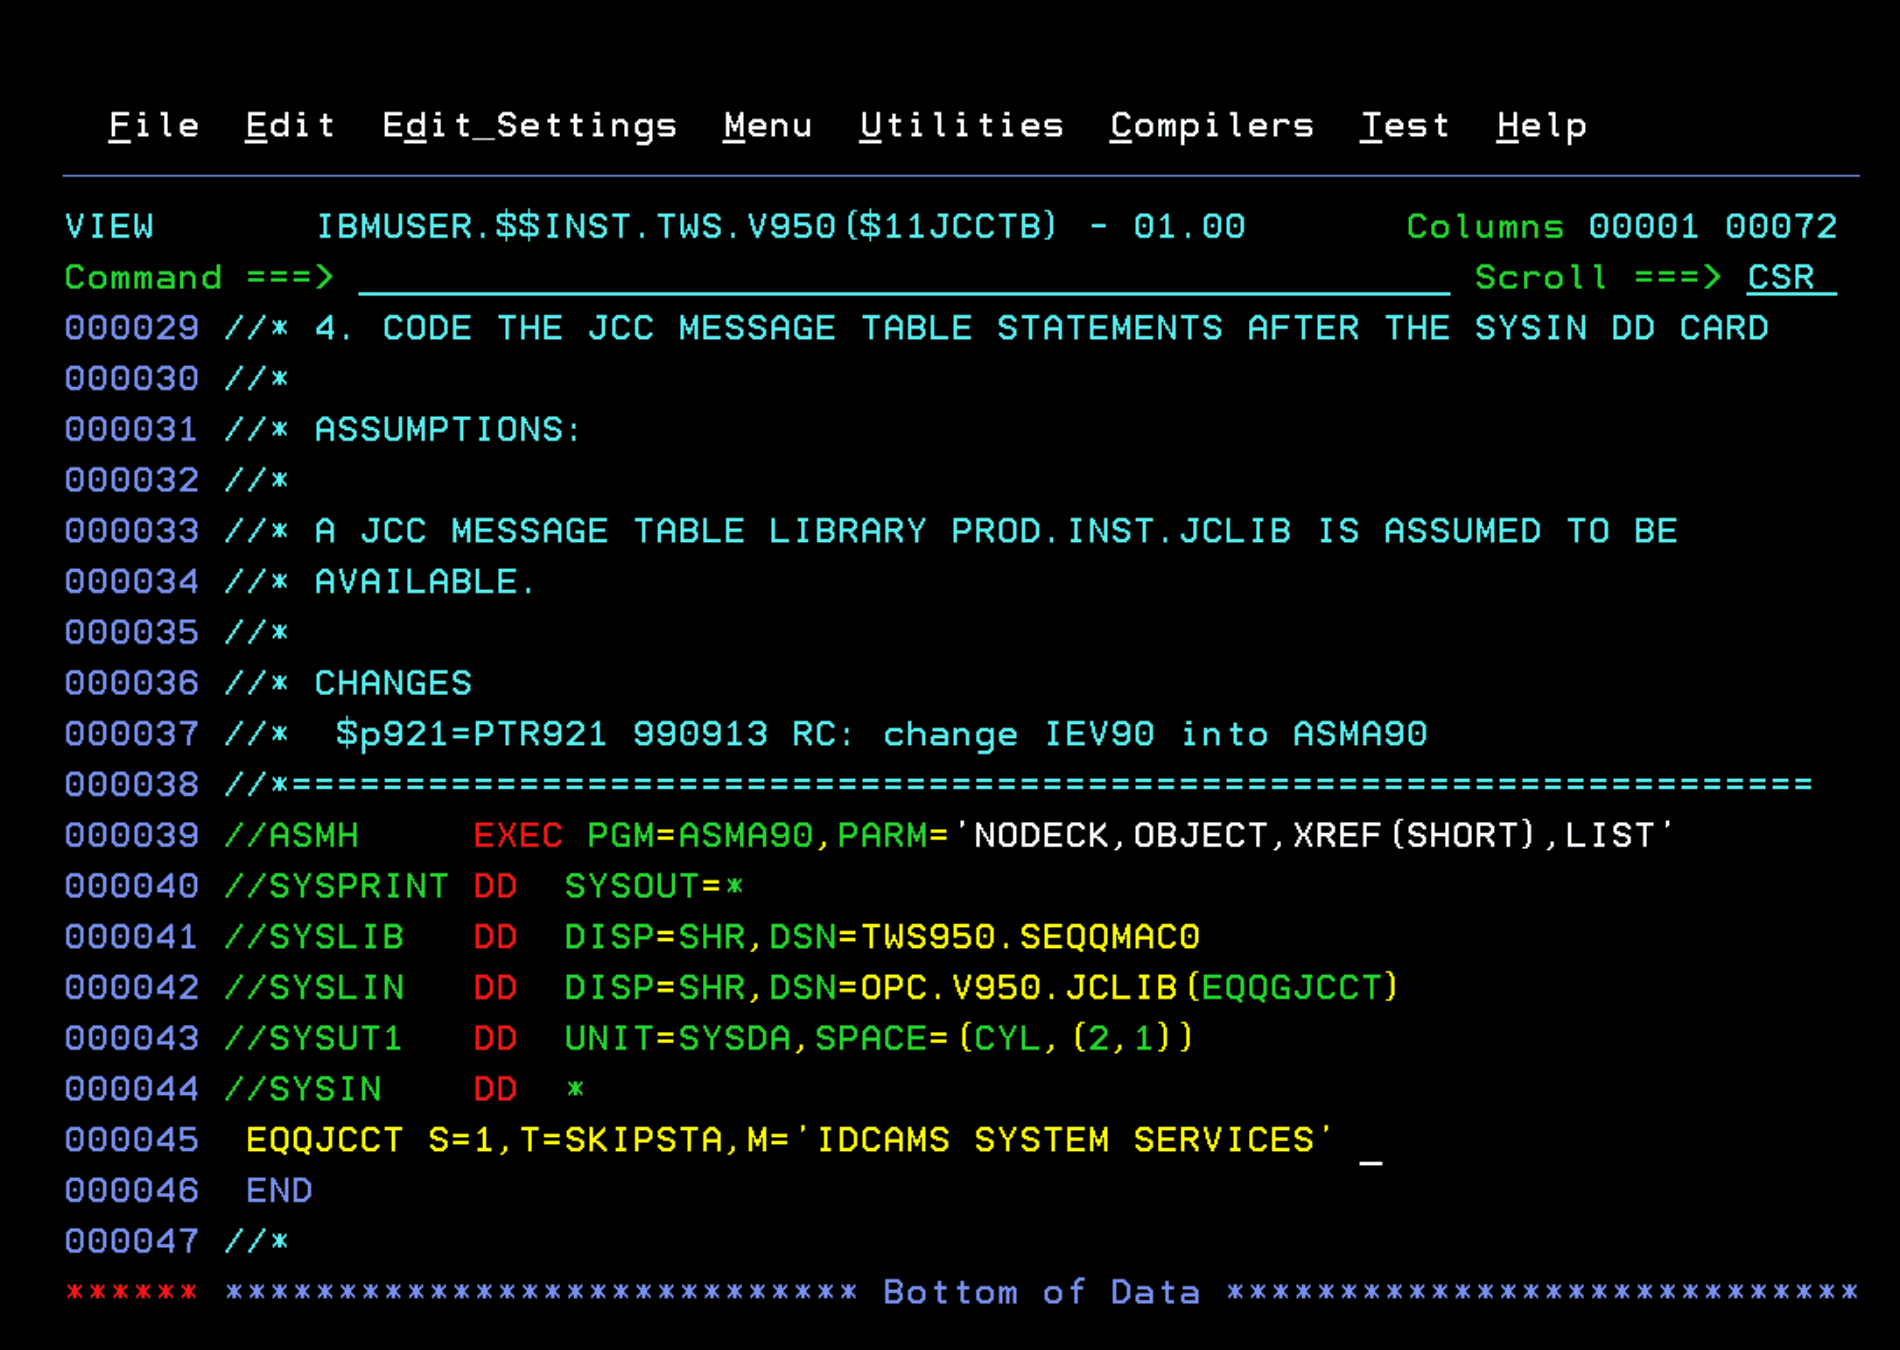
Now we are going to create the EQQGJCCT member, which is the JOB COMPLETION CHECKER message table. To do this, we enter the **.SEQQSAMP library and edit the EQQJCCTB member. We add a job header and adjust the libraries to adapt them to our system.
Also, we must replace the first line of SYSIN with the following:
EQQJCCT S=1,T=SKIPSTA,M='IDCAMS SYSTEM SERVICES'We run the job and verify that it completes successfully.
Access OPC from ISPF
We are going to change the ISPF panel to add an option to access OPC. To find out the name of the panel to edit, we will use the PANELID command.
We add a new option in the desired panel.
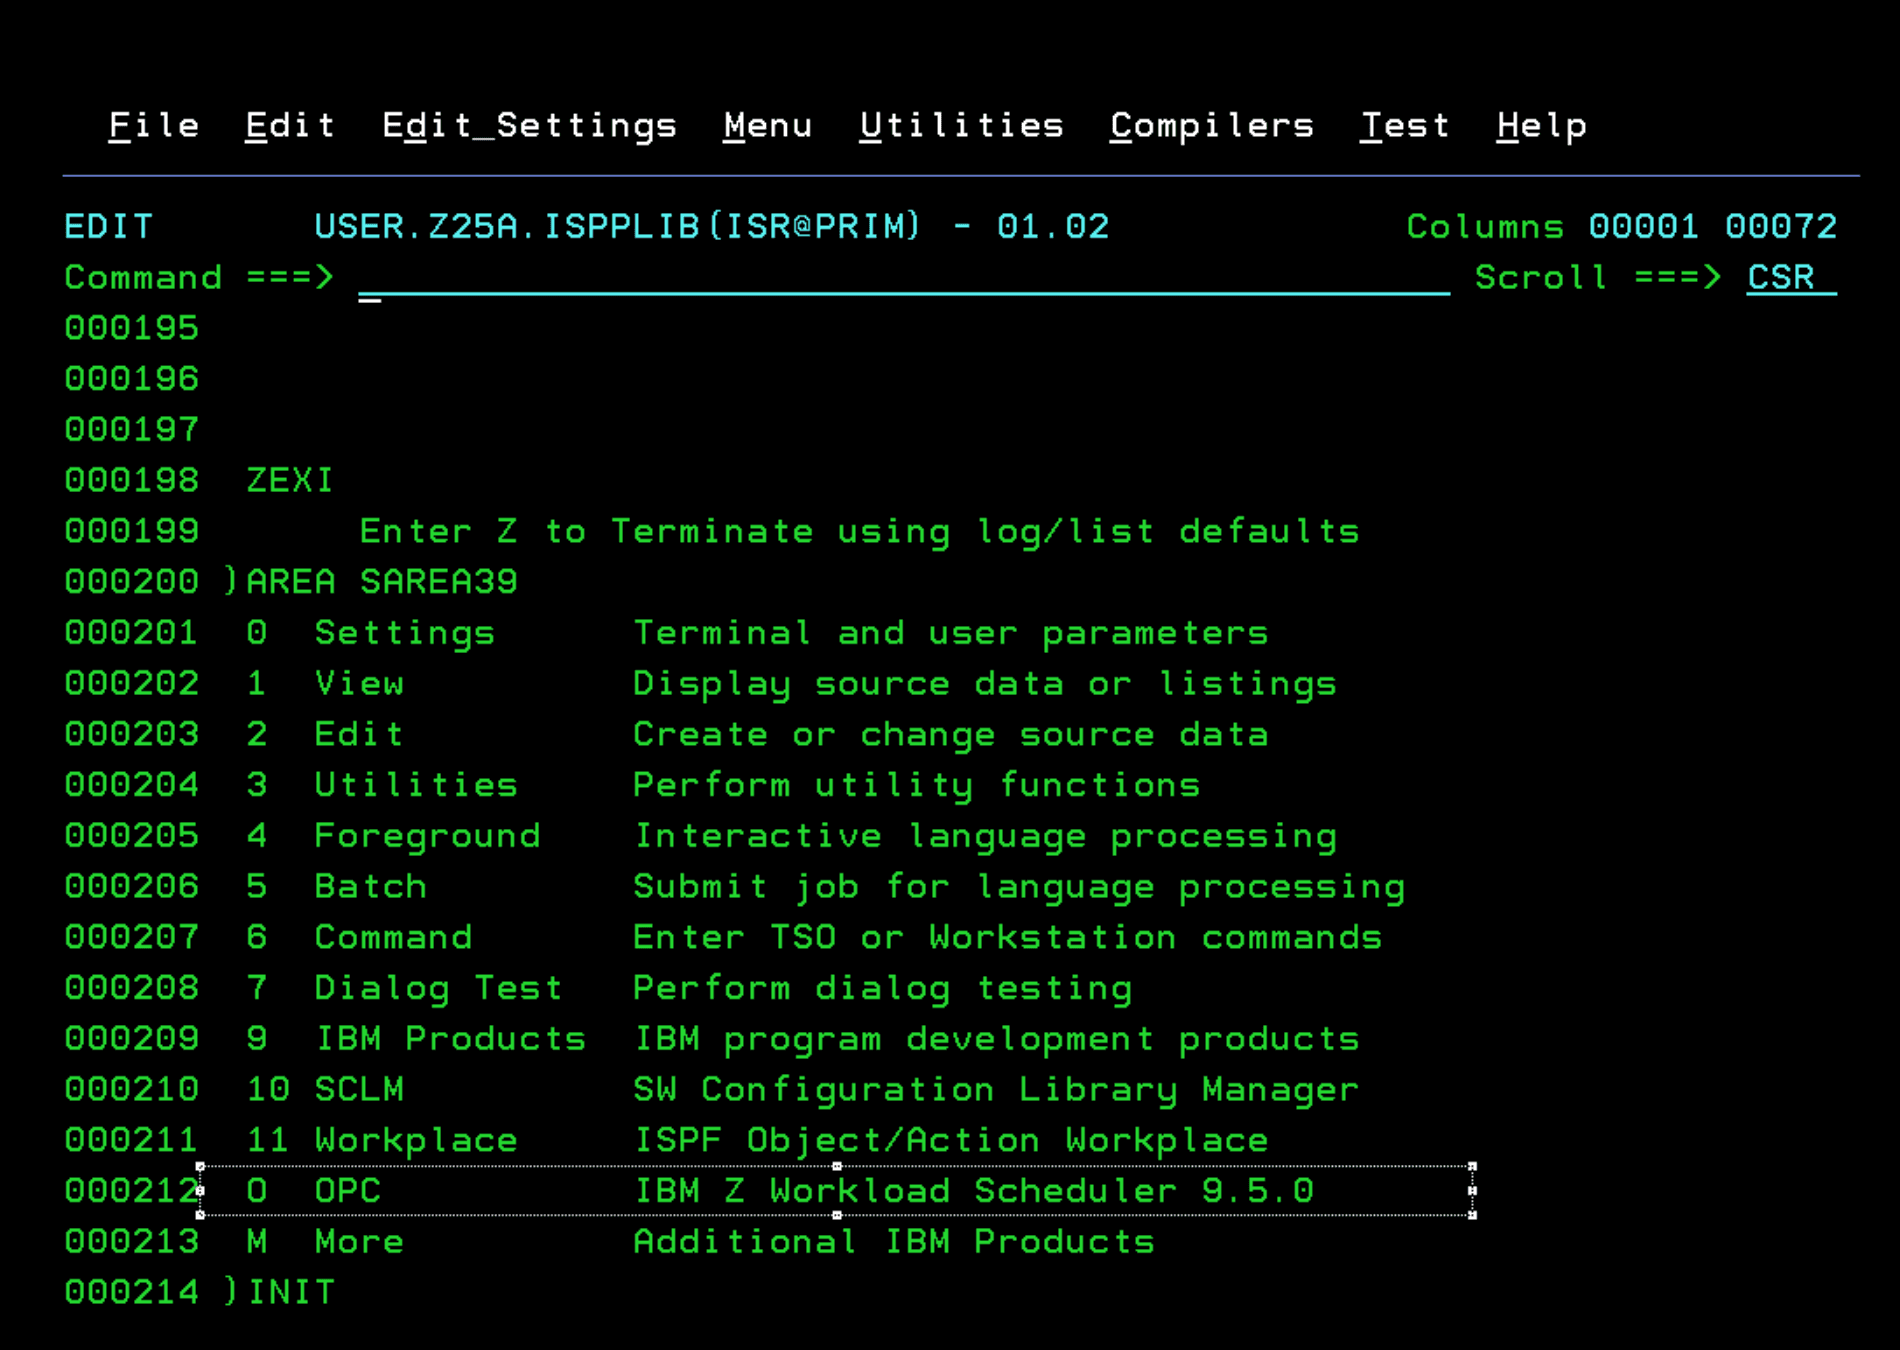
We add the following line within the options:
O,'PANEL(EQQOPCAP) NEWAPPL(EQQA)'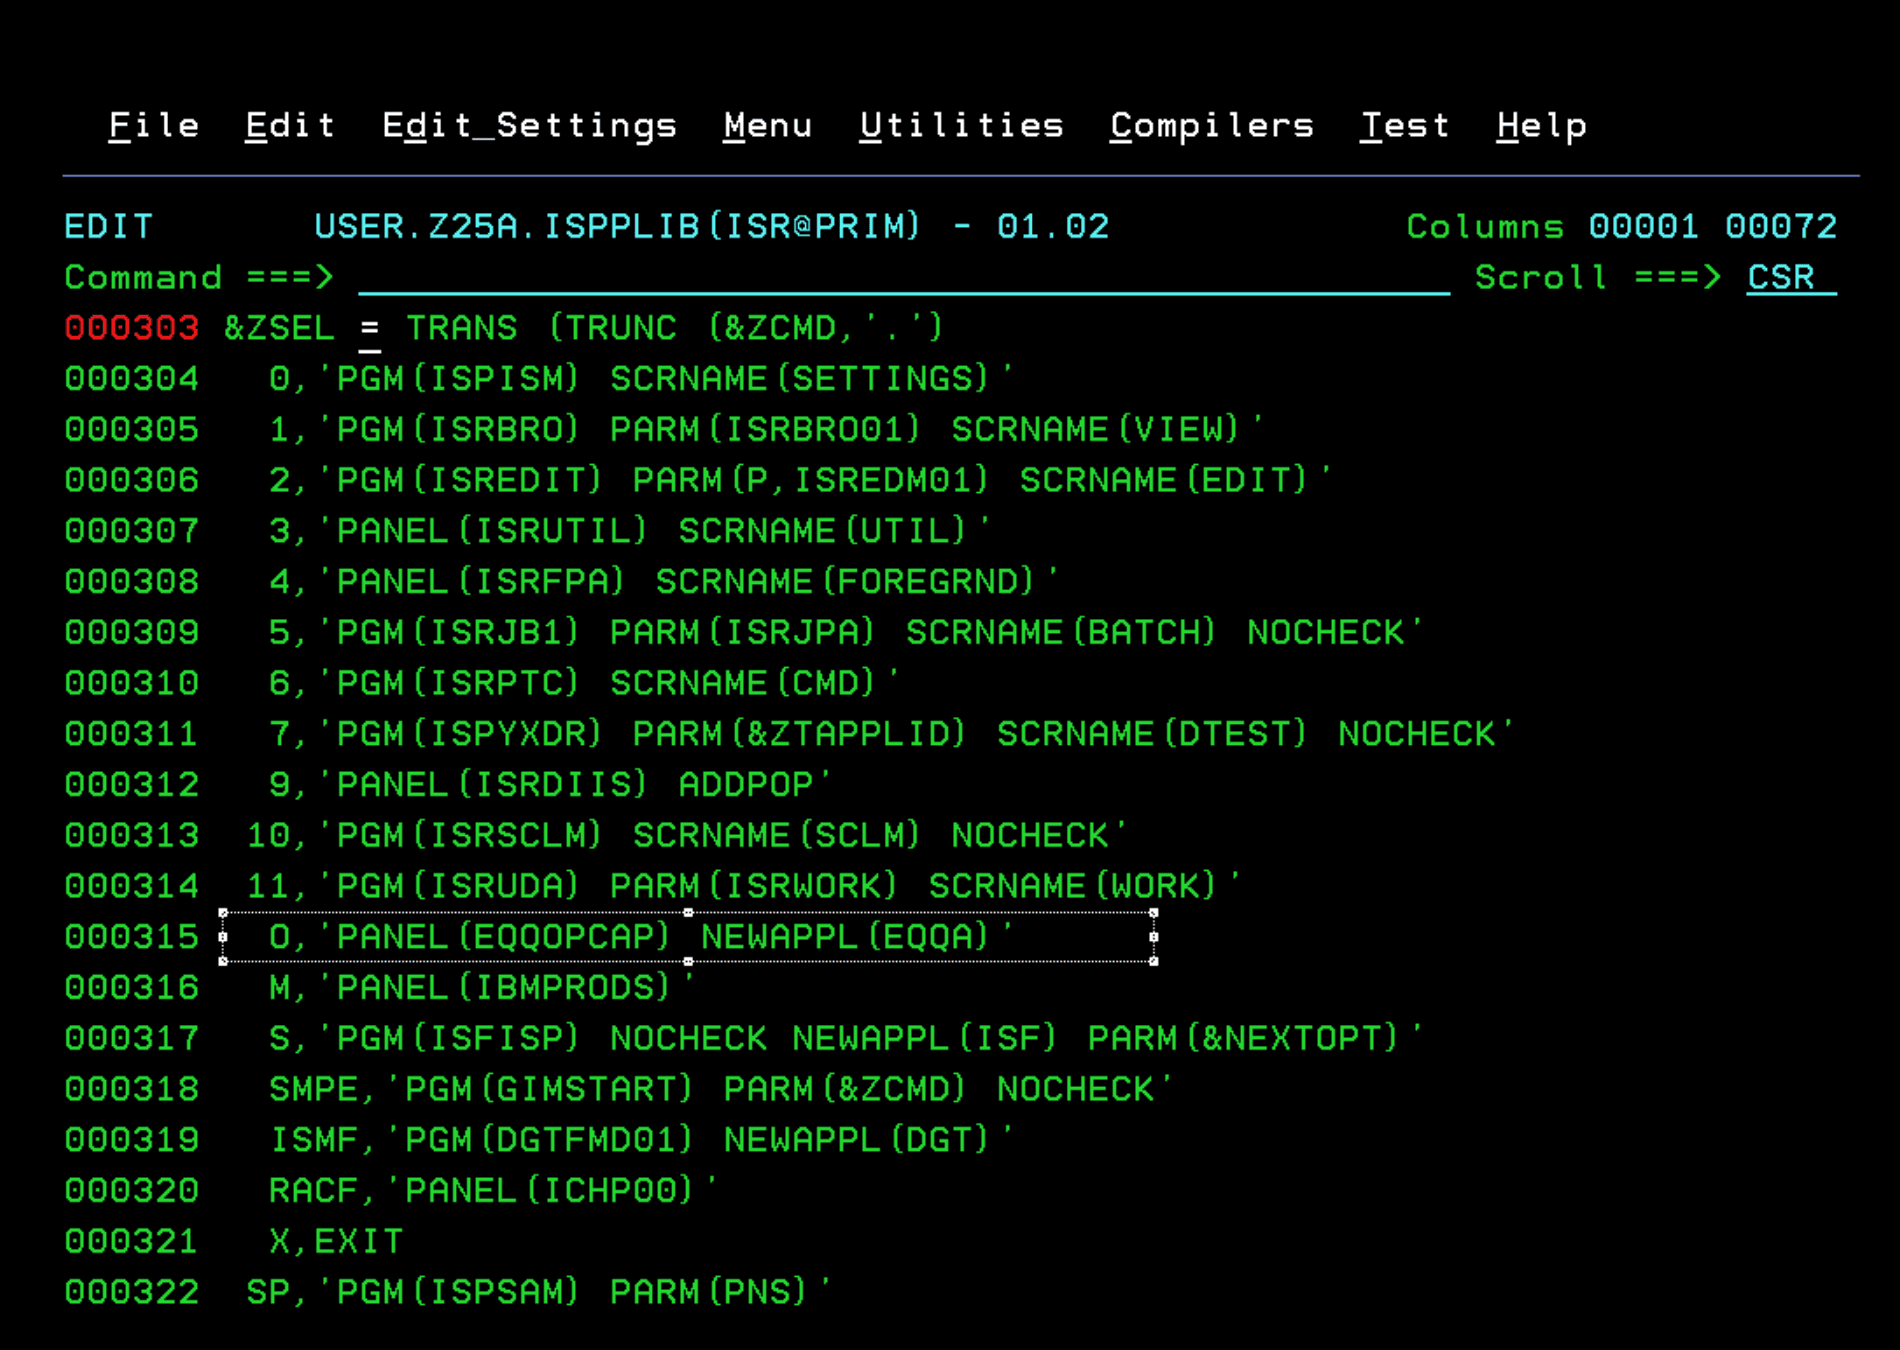
Finally, we will add the last libraries to the TSO logon procedure.
We add the following lines in the DD ISPPLIB:
//         DD  DISP=SHR,DSN=TWS950.SEQQGENU
//         DD  DISP=SHR,DSN=TWS950.SEQQPENU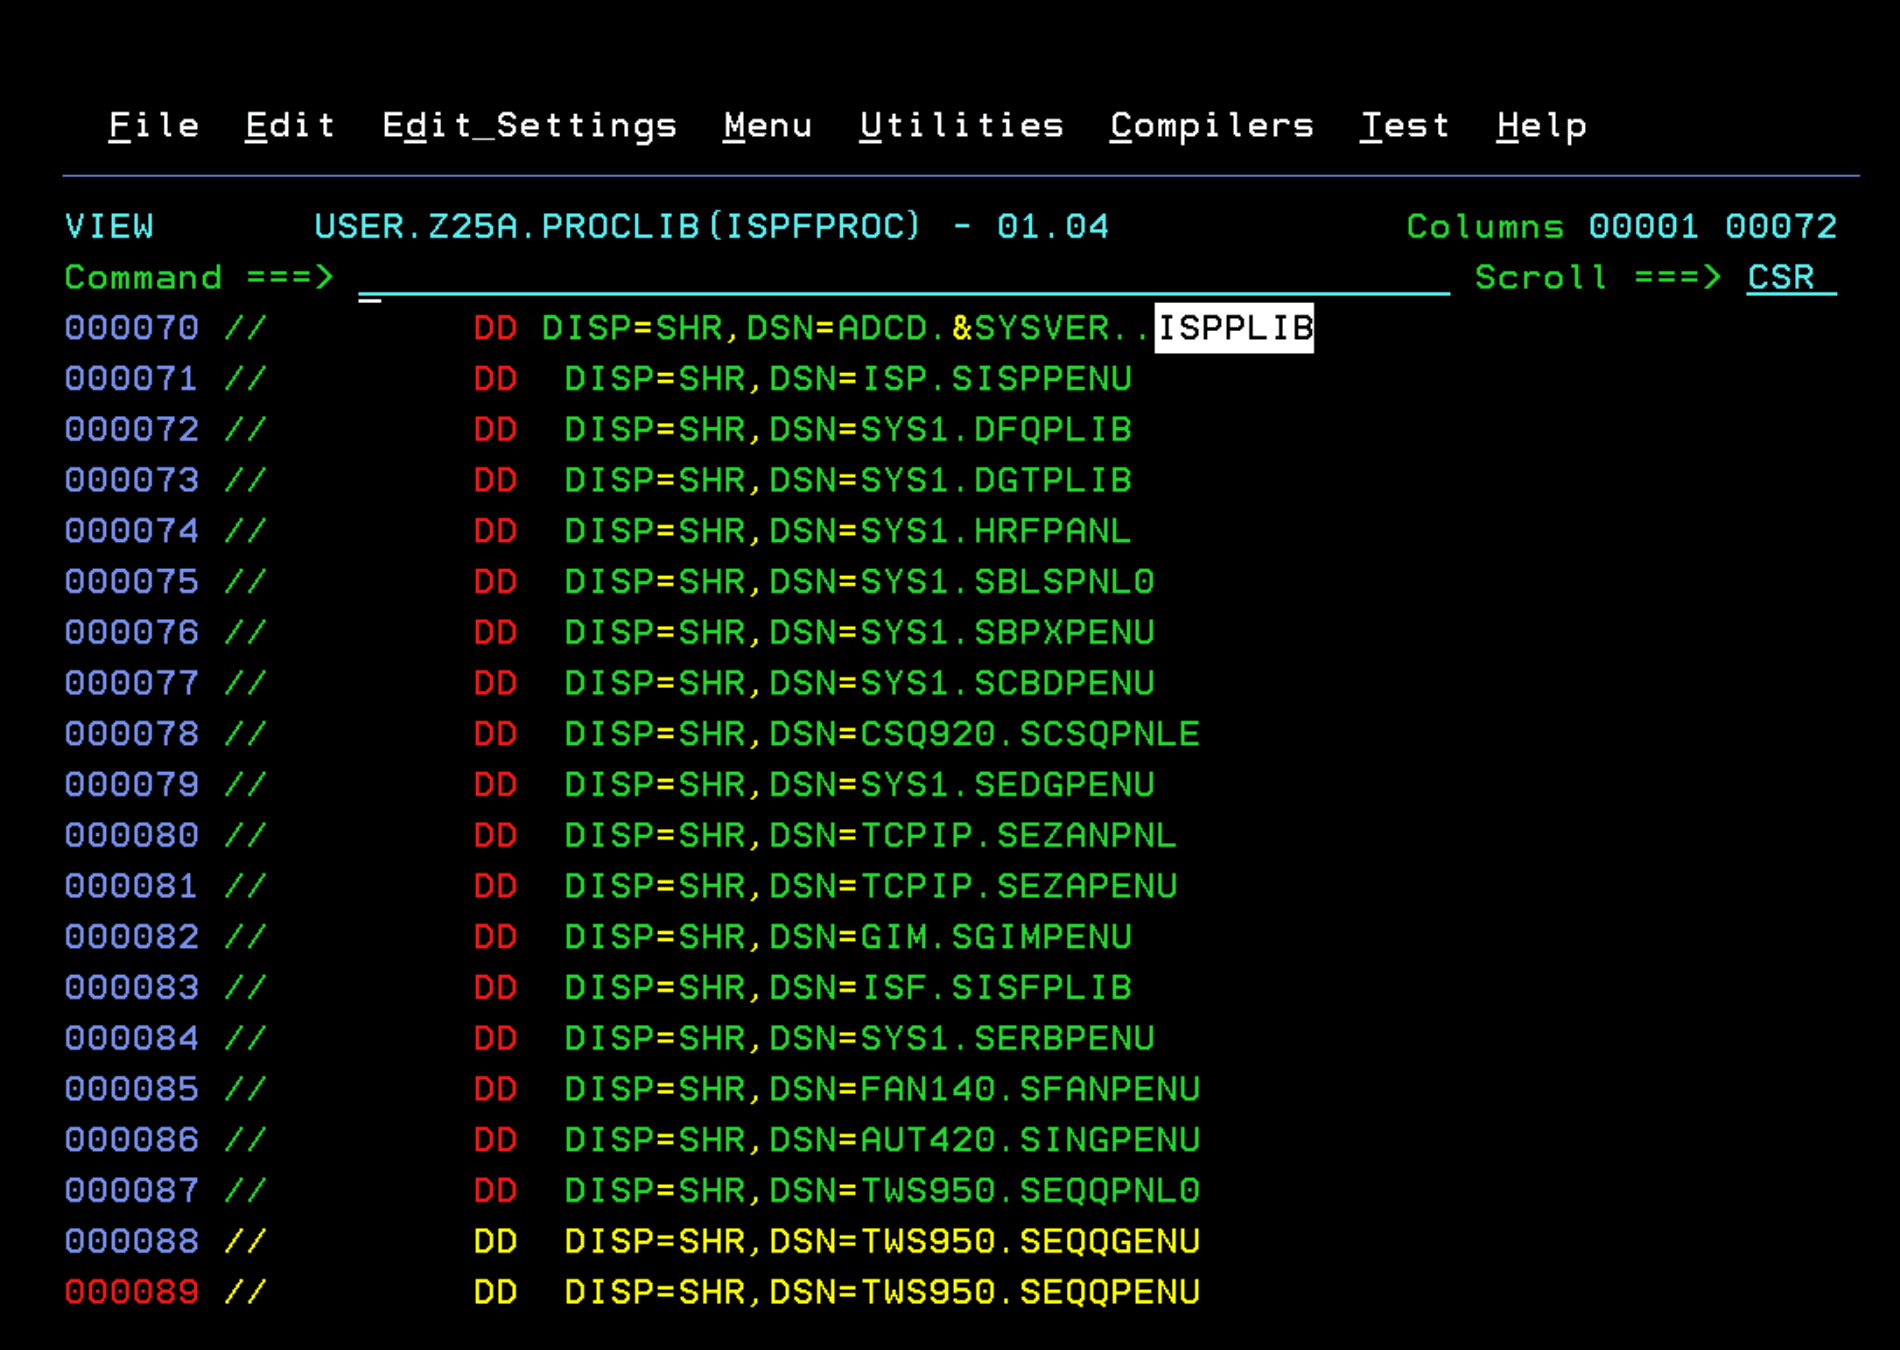
In the DD ISPMLIB:
// DD DISP=SHR,DSN=TWS950.SEQQMSG0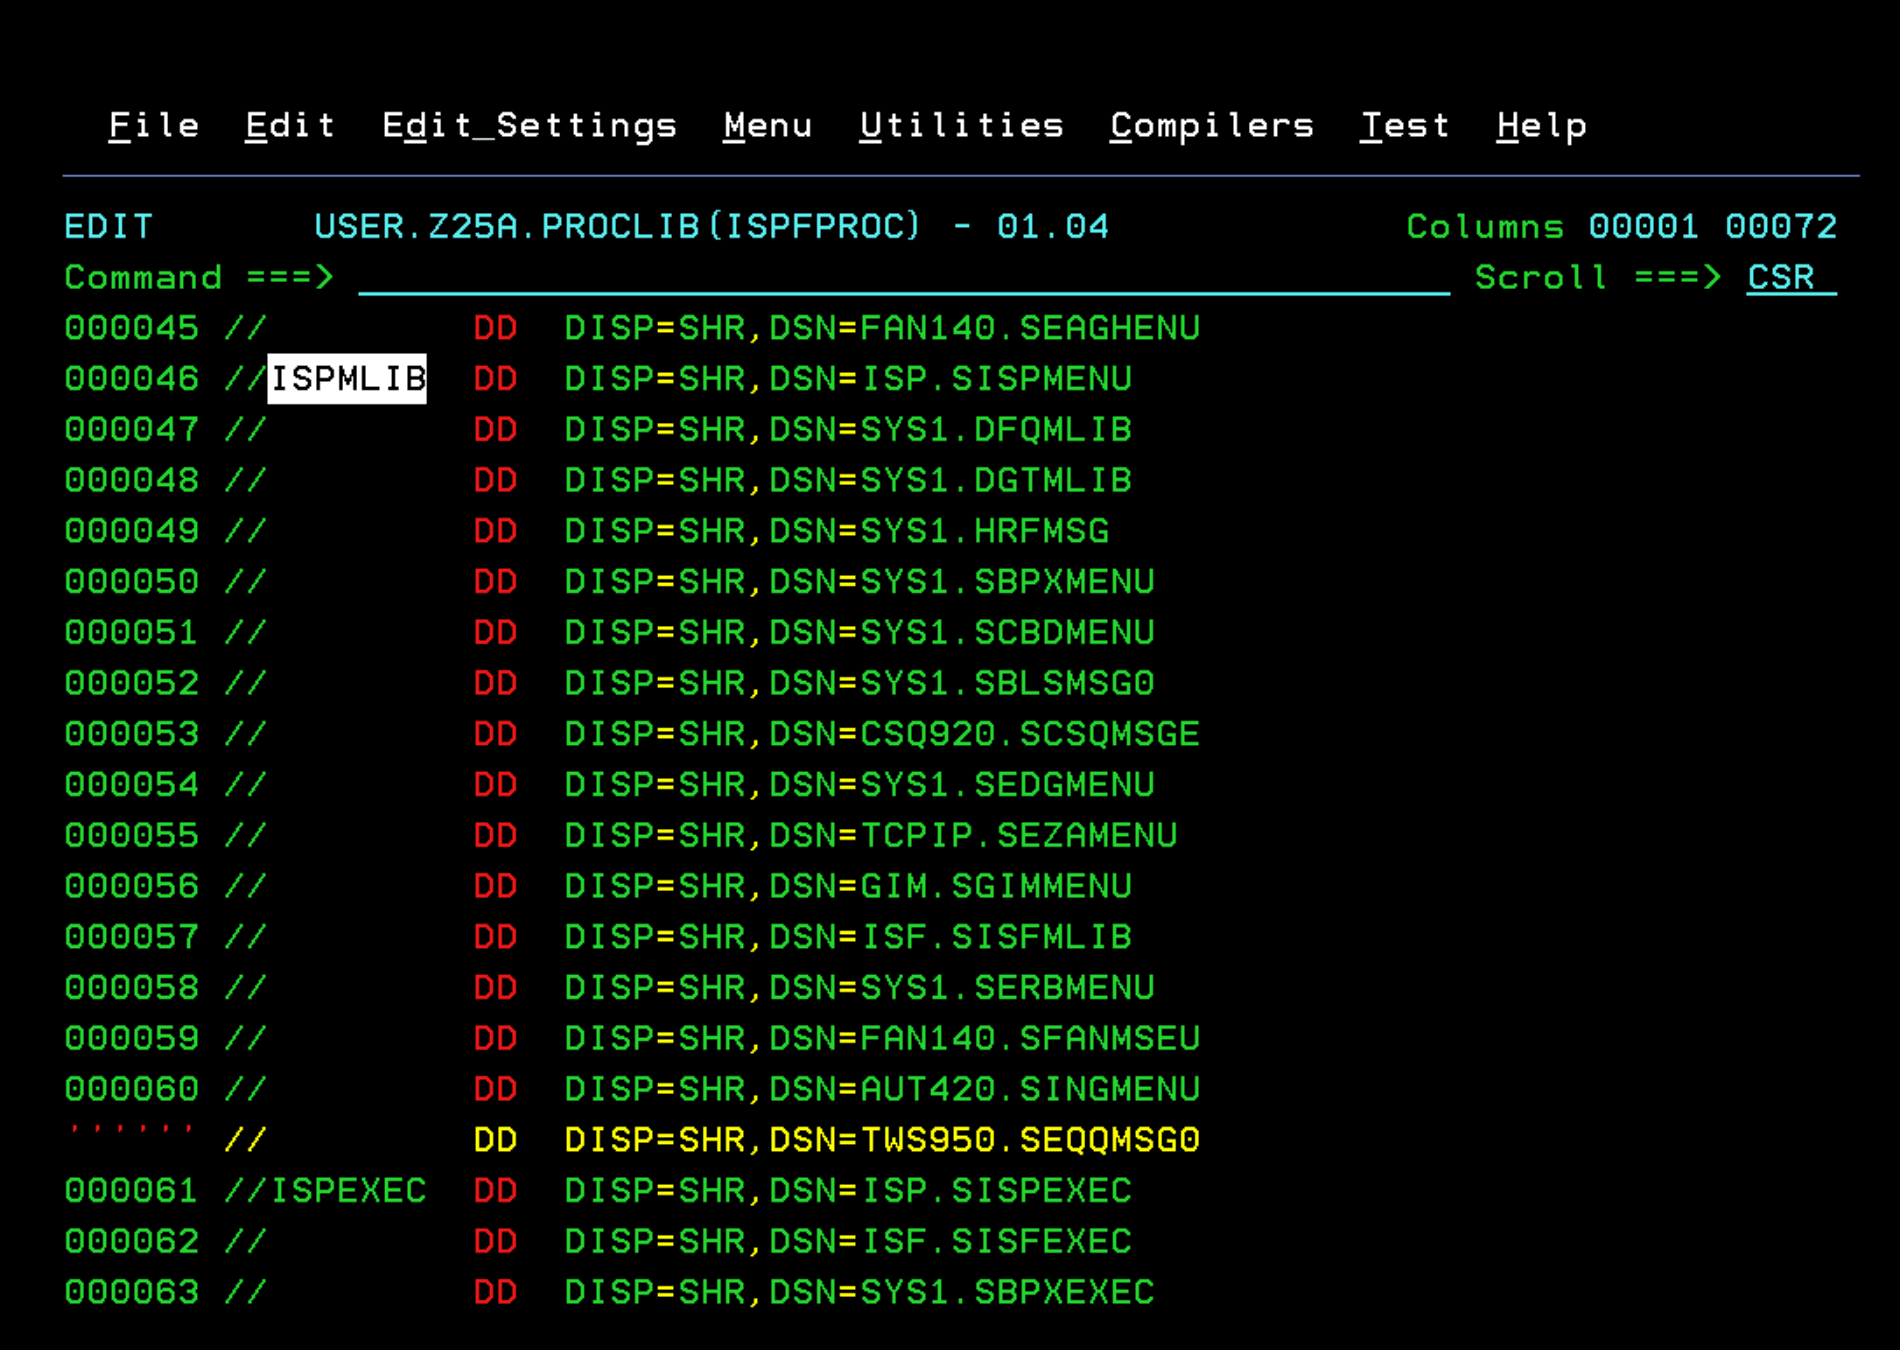
In the DD ISPTLIB:
// DD DISP=SHR,DSN=TWS950.SEQQTBL0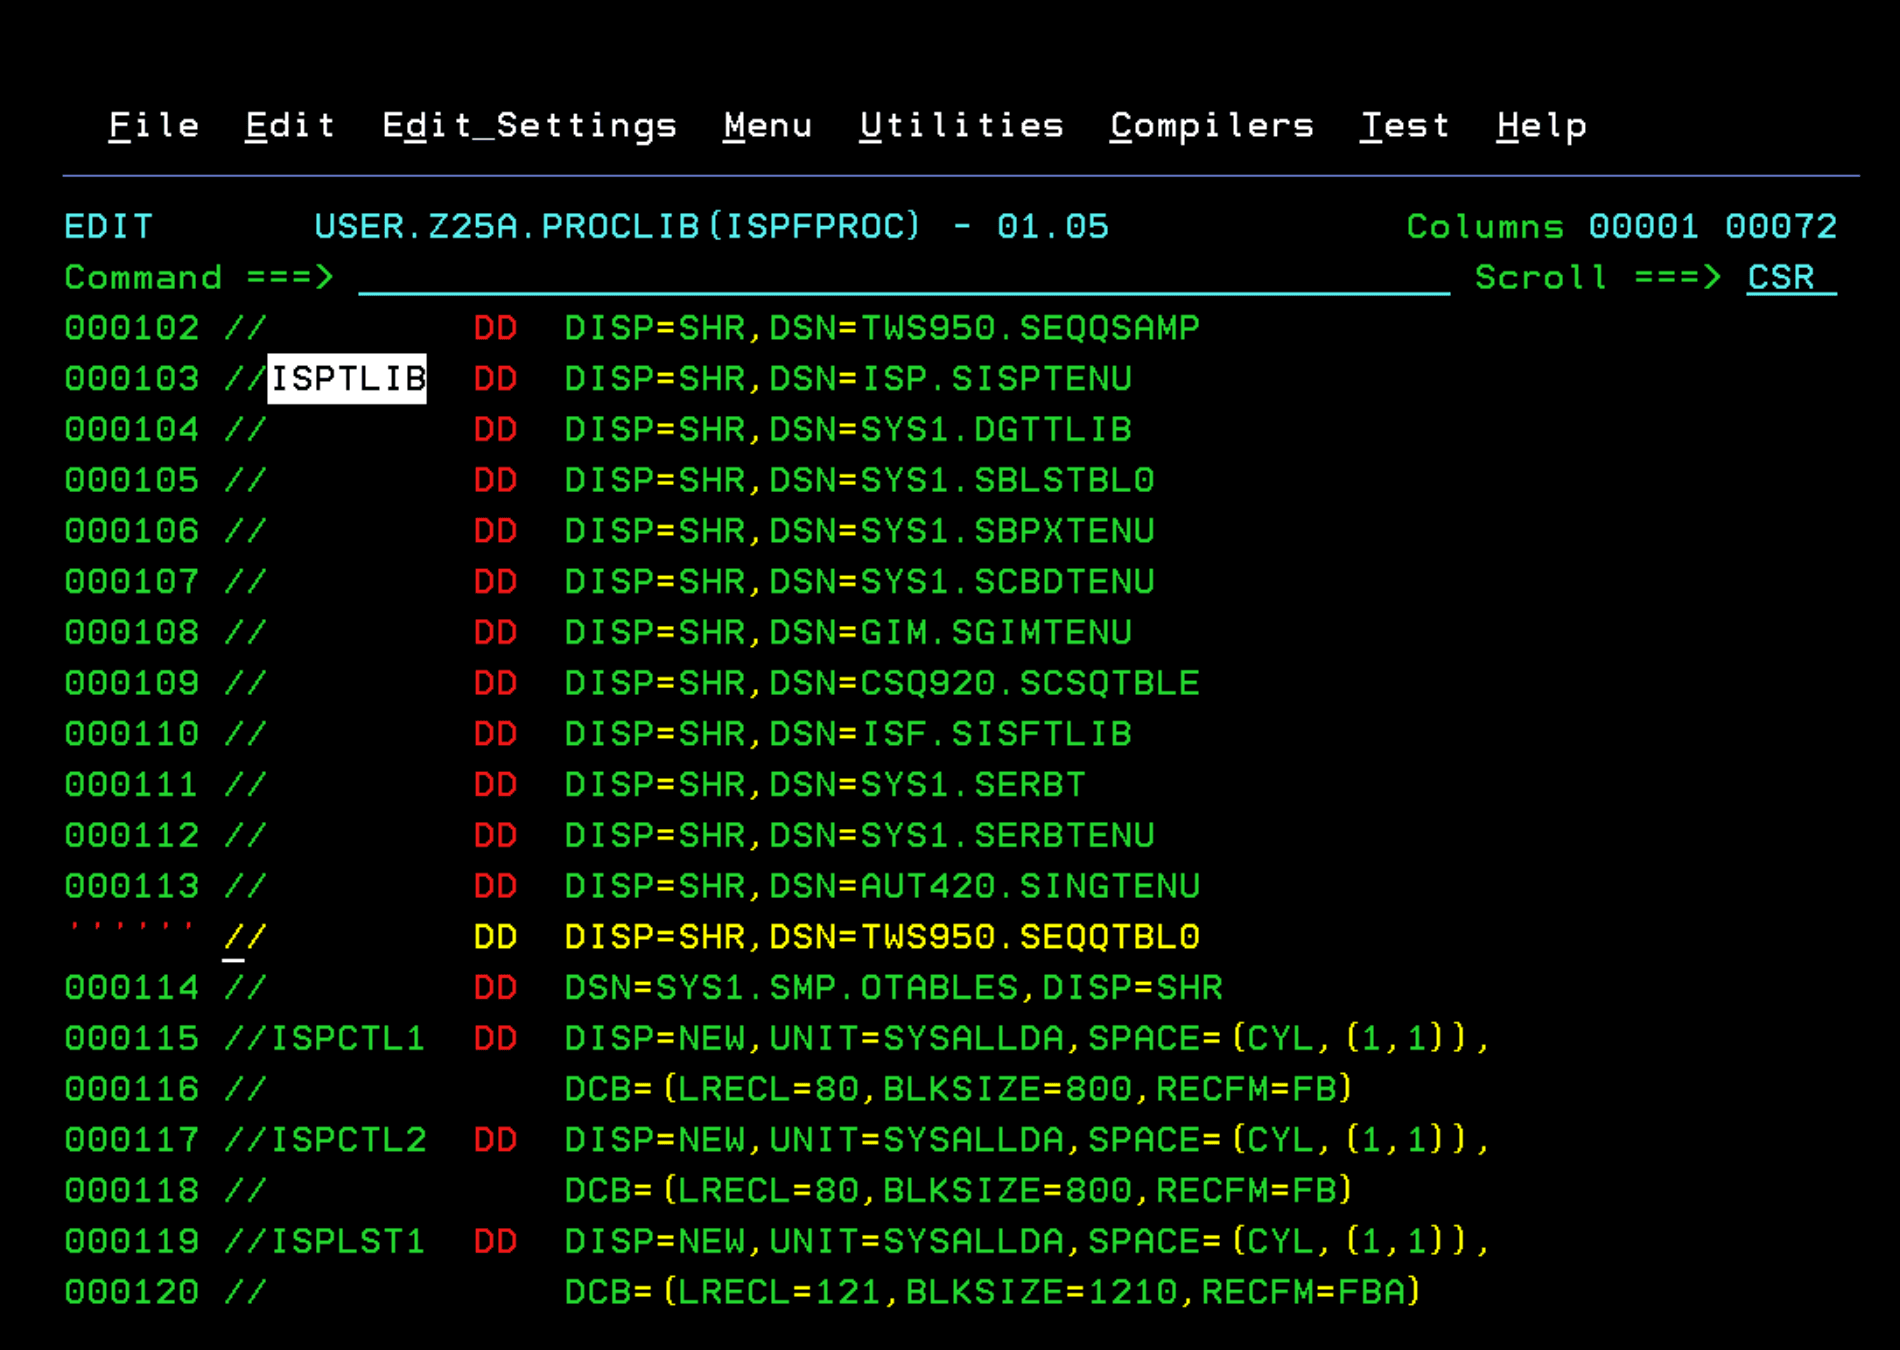
At the end of the file, we add three new DDs:
//EQQMLIB  DD  DISP=SHR,DSN=TWS950.SEQQMSG0
//EQQMLOG  DD  DISP=SHR,DSN=OPC.V950.MLOG
//EQQTMPL  DD  DISP=SHR,DSN=TWS950.SEQQLENU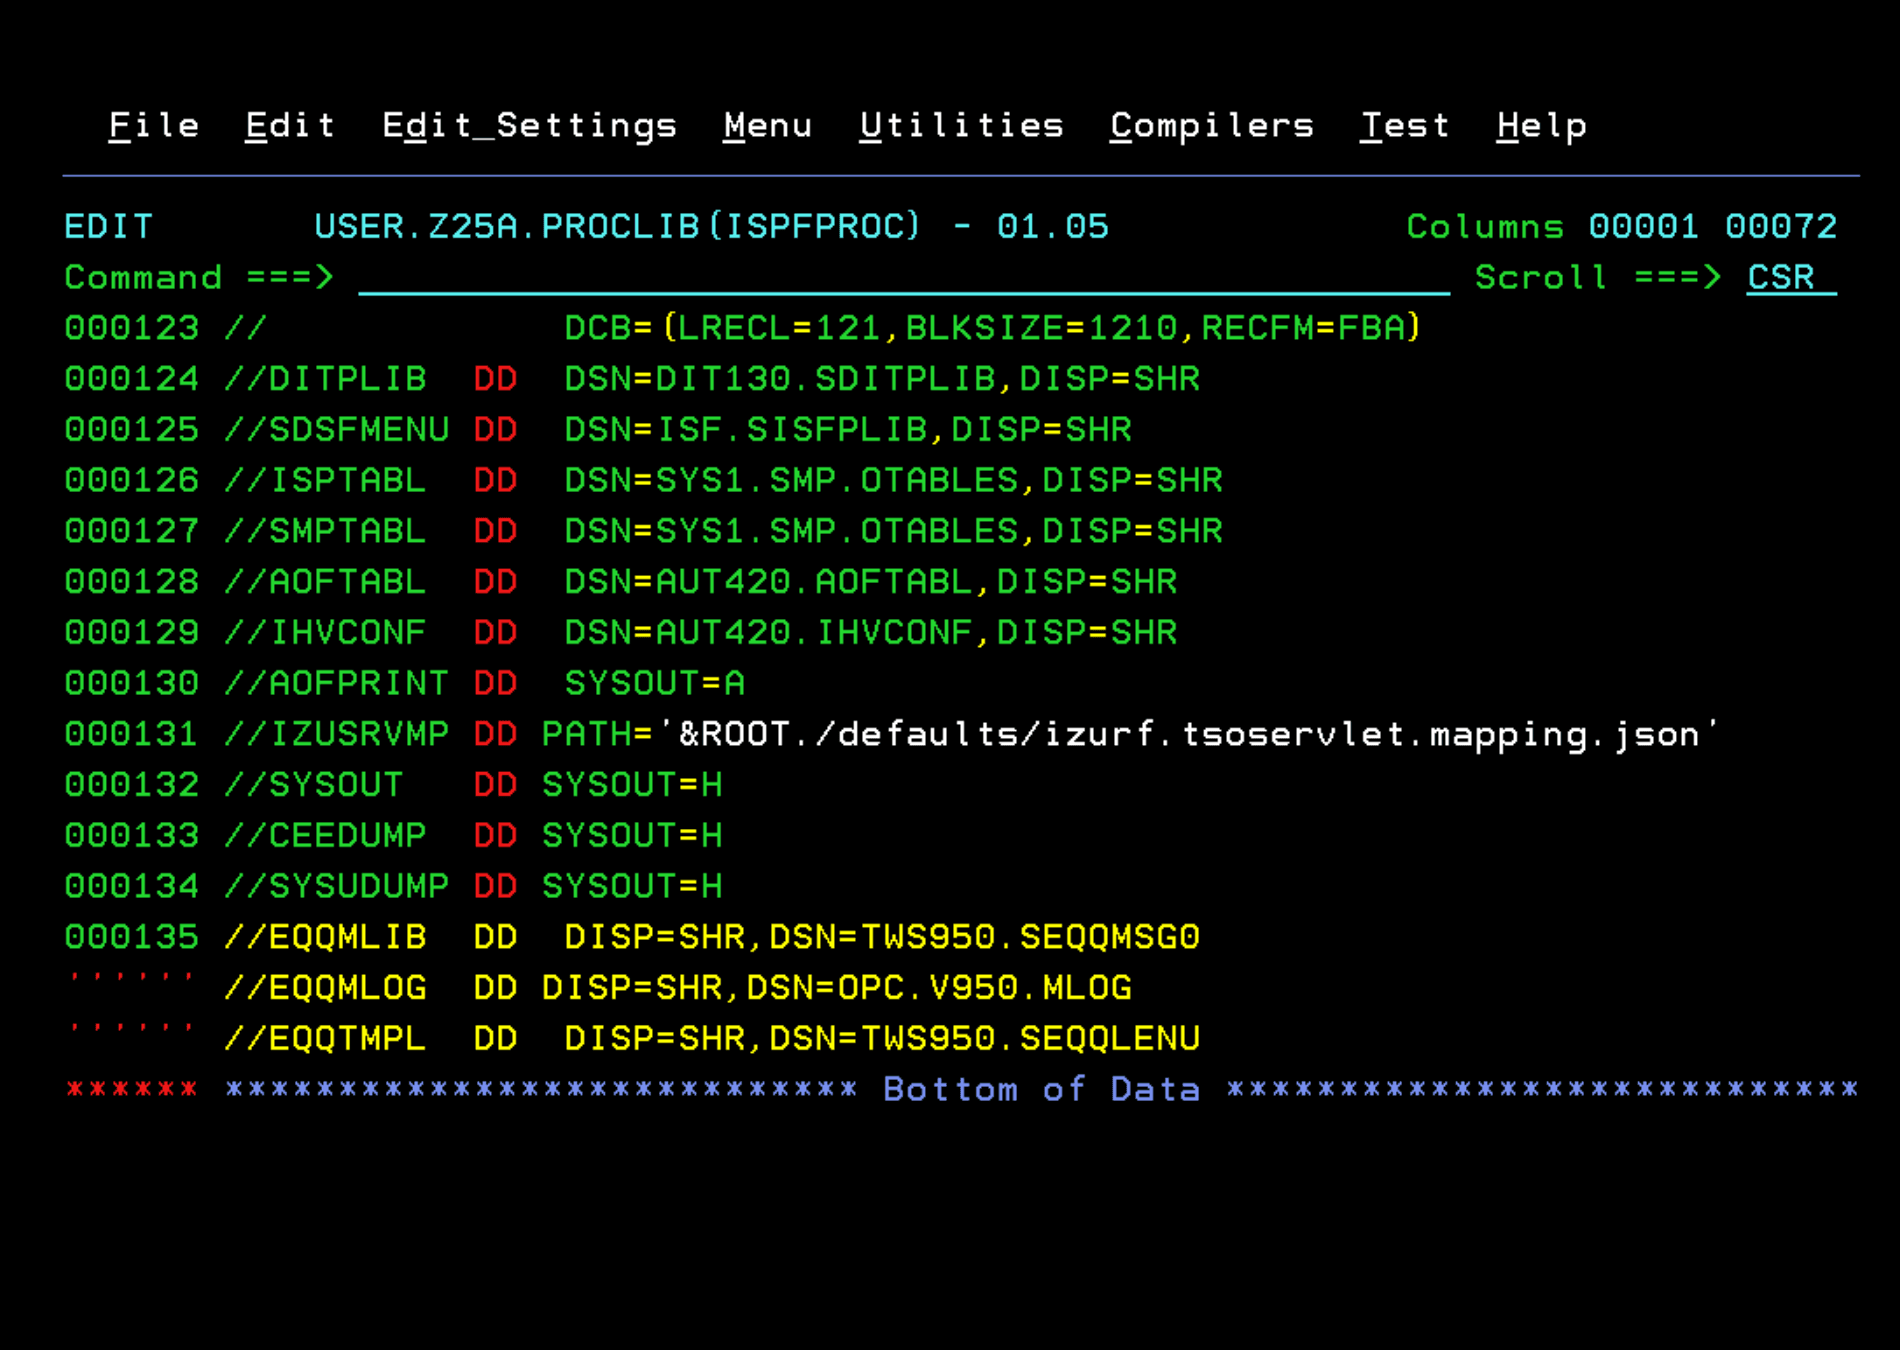
Additional Configuration
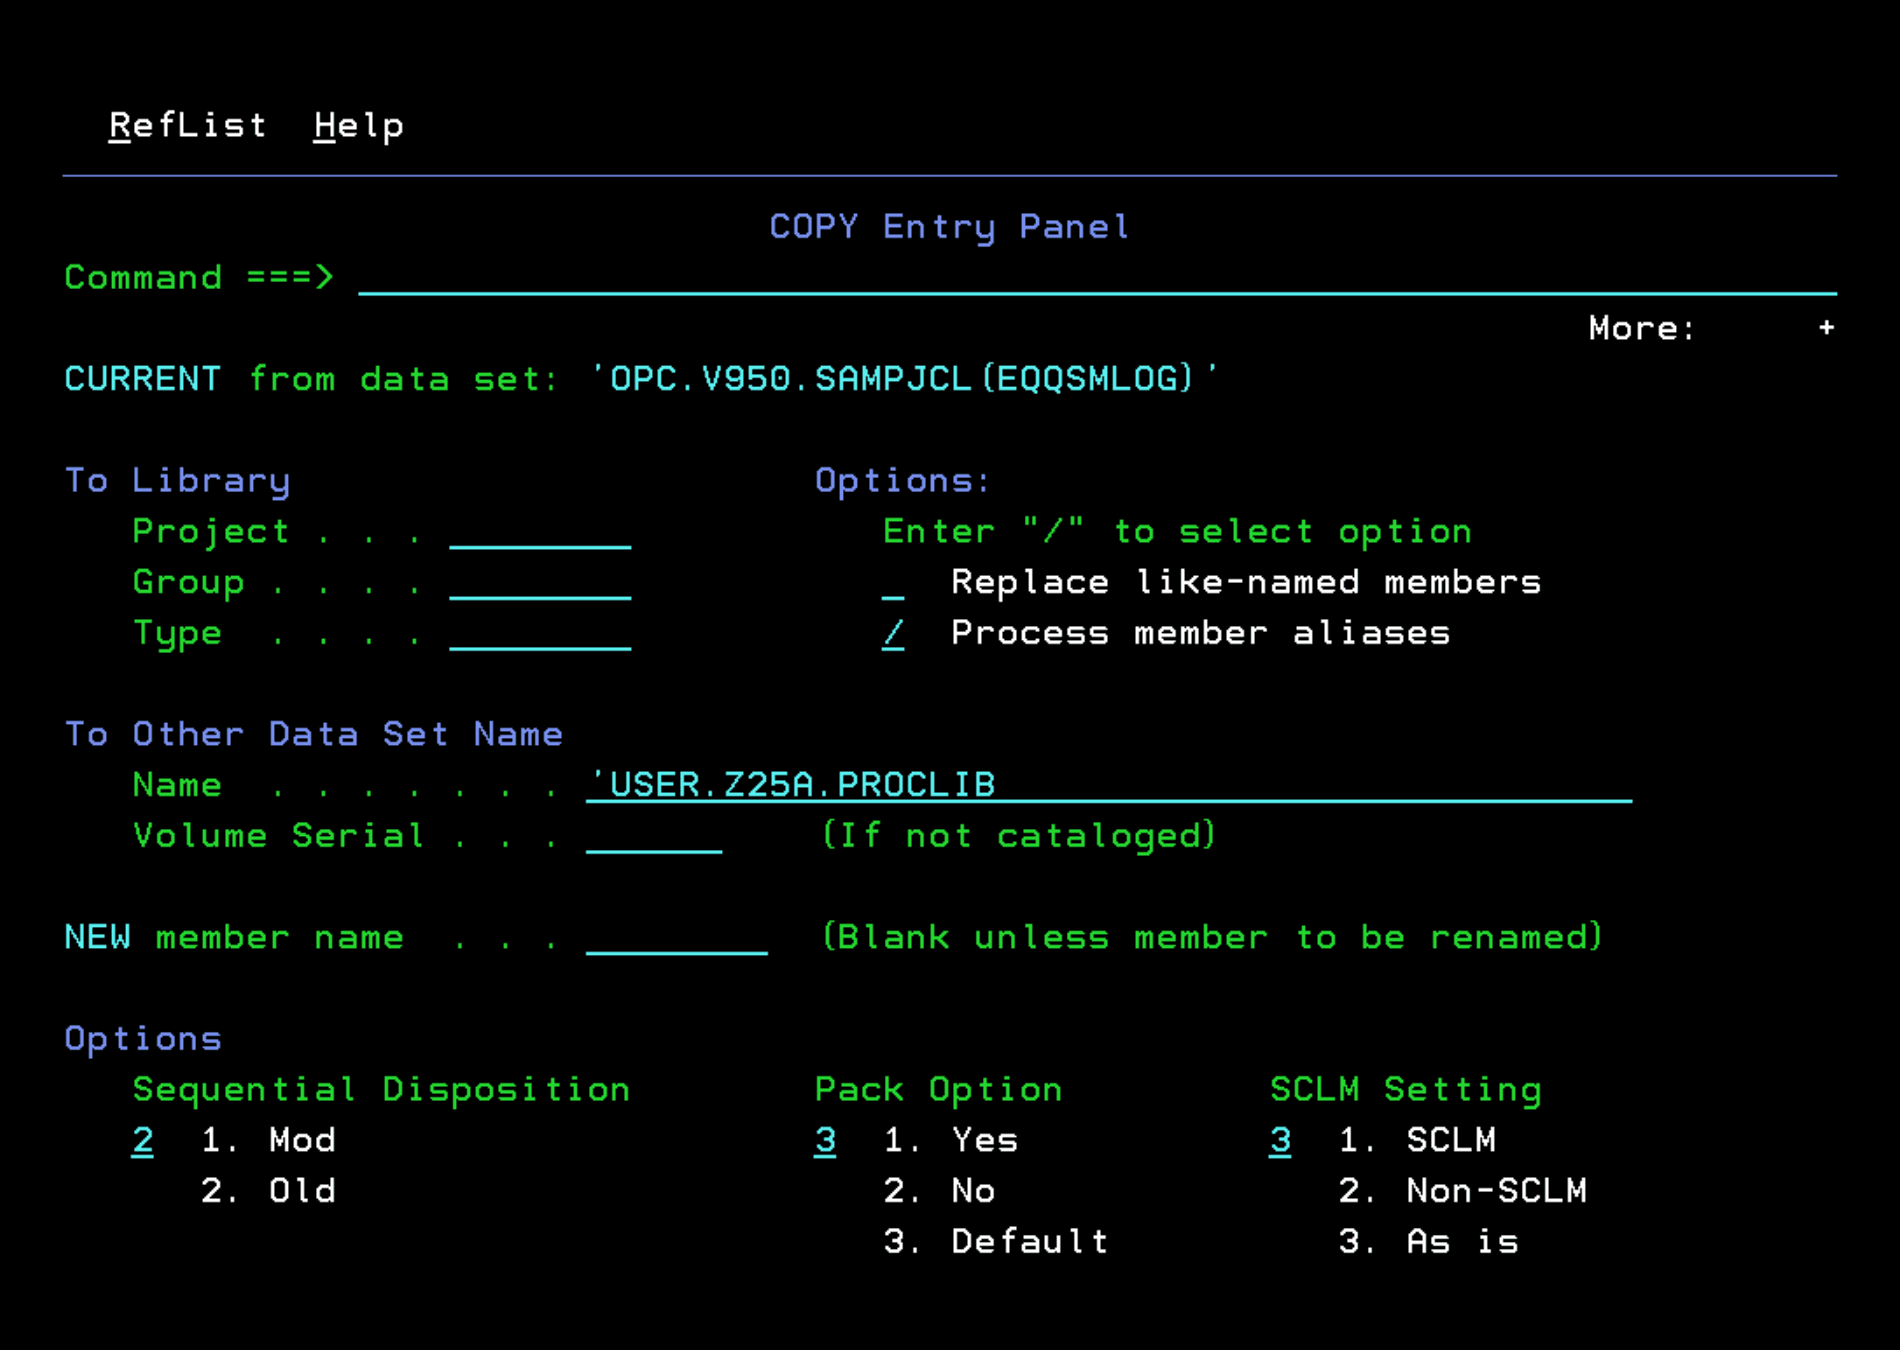
For the MLOG switch to work correctly, we must copy to PROCLIB the EQQSMLOG member from the sample library, in my case, OPC.V950.SAMPJCL.
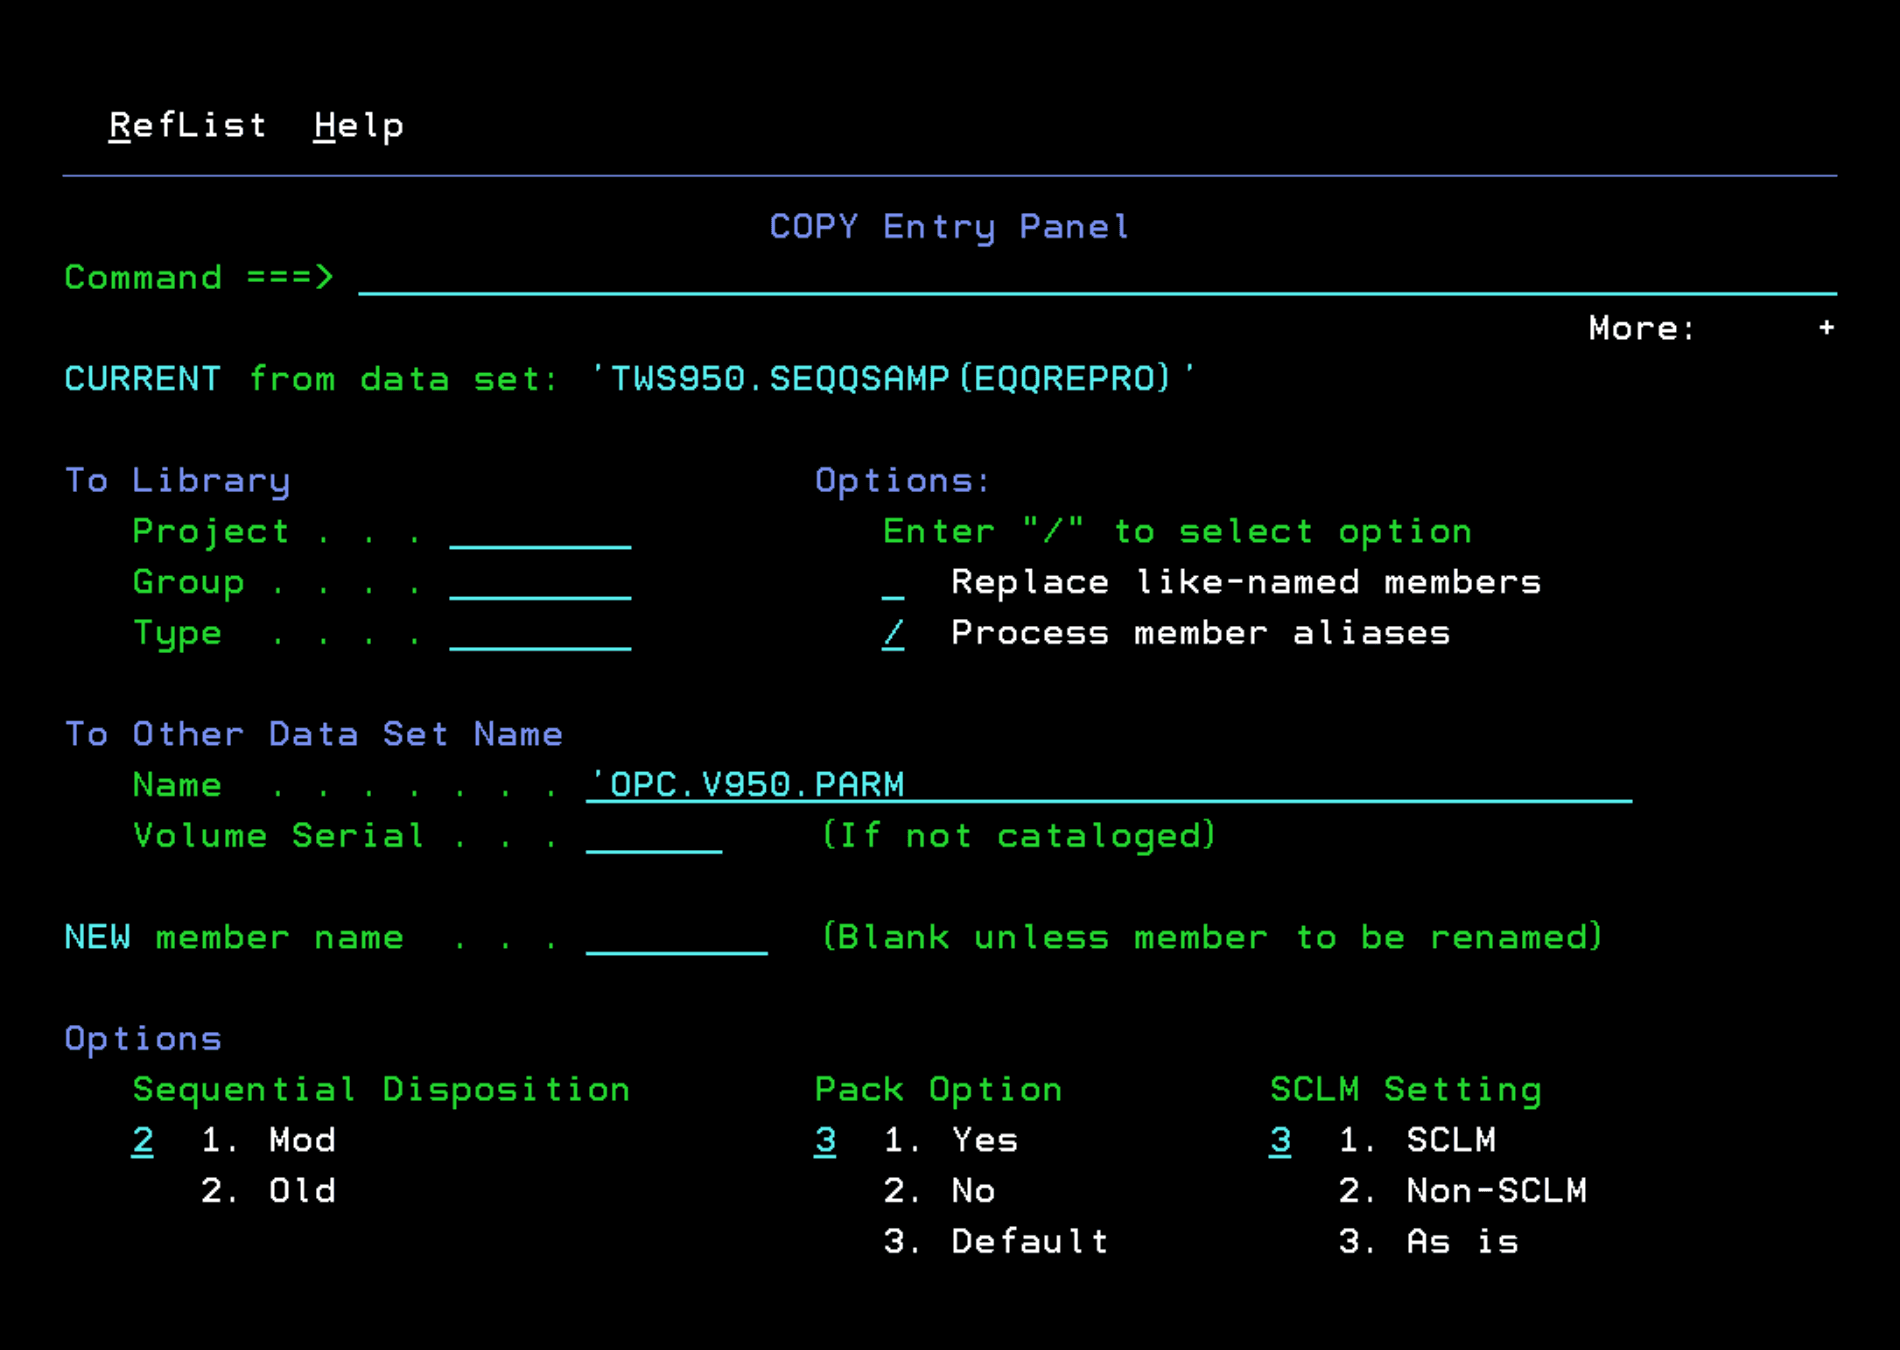
That procedure uses as sysin the EQQREPRO member from the **.SEQQSAMP library. We must copy it from that library to the OPC parameter library, in my case, OPC.V950.PARM.
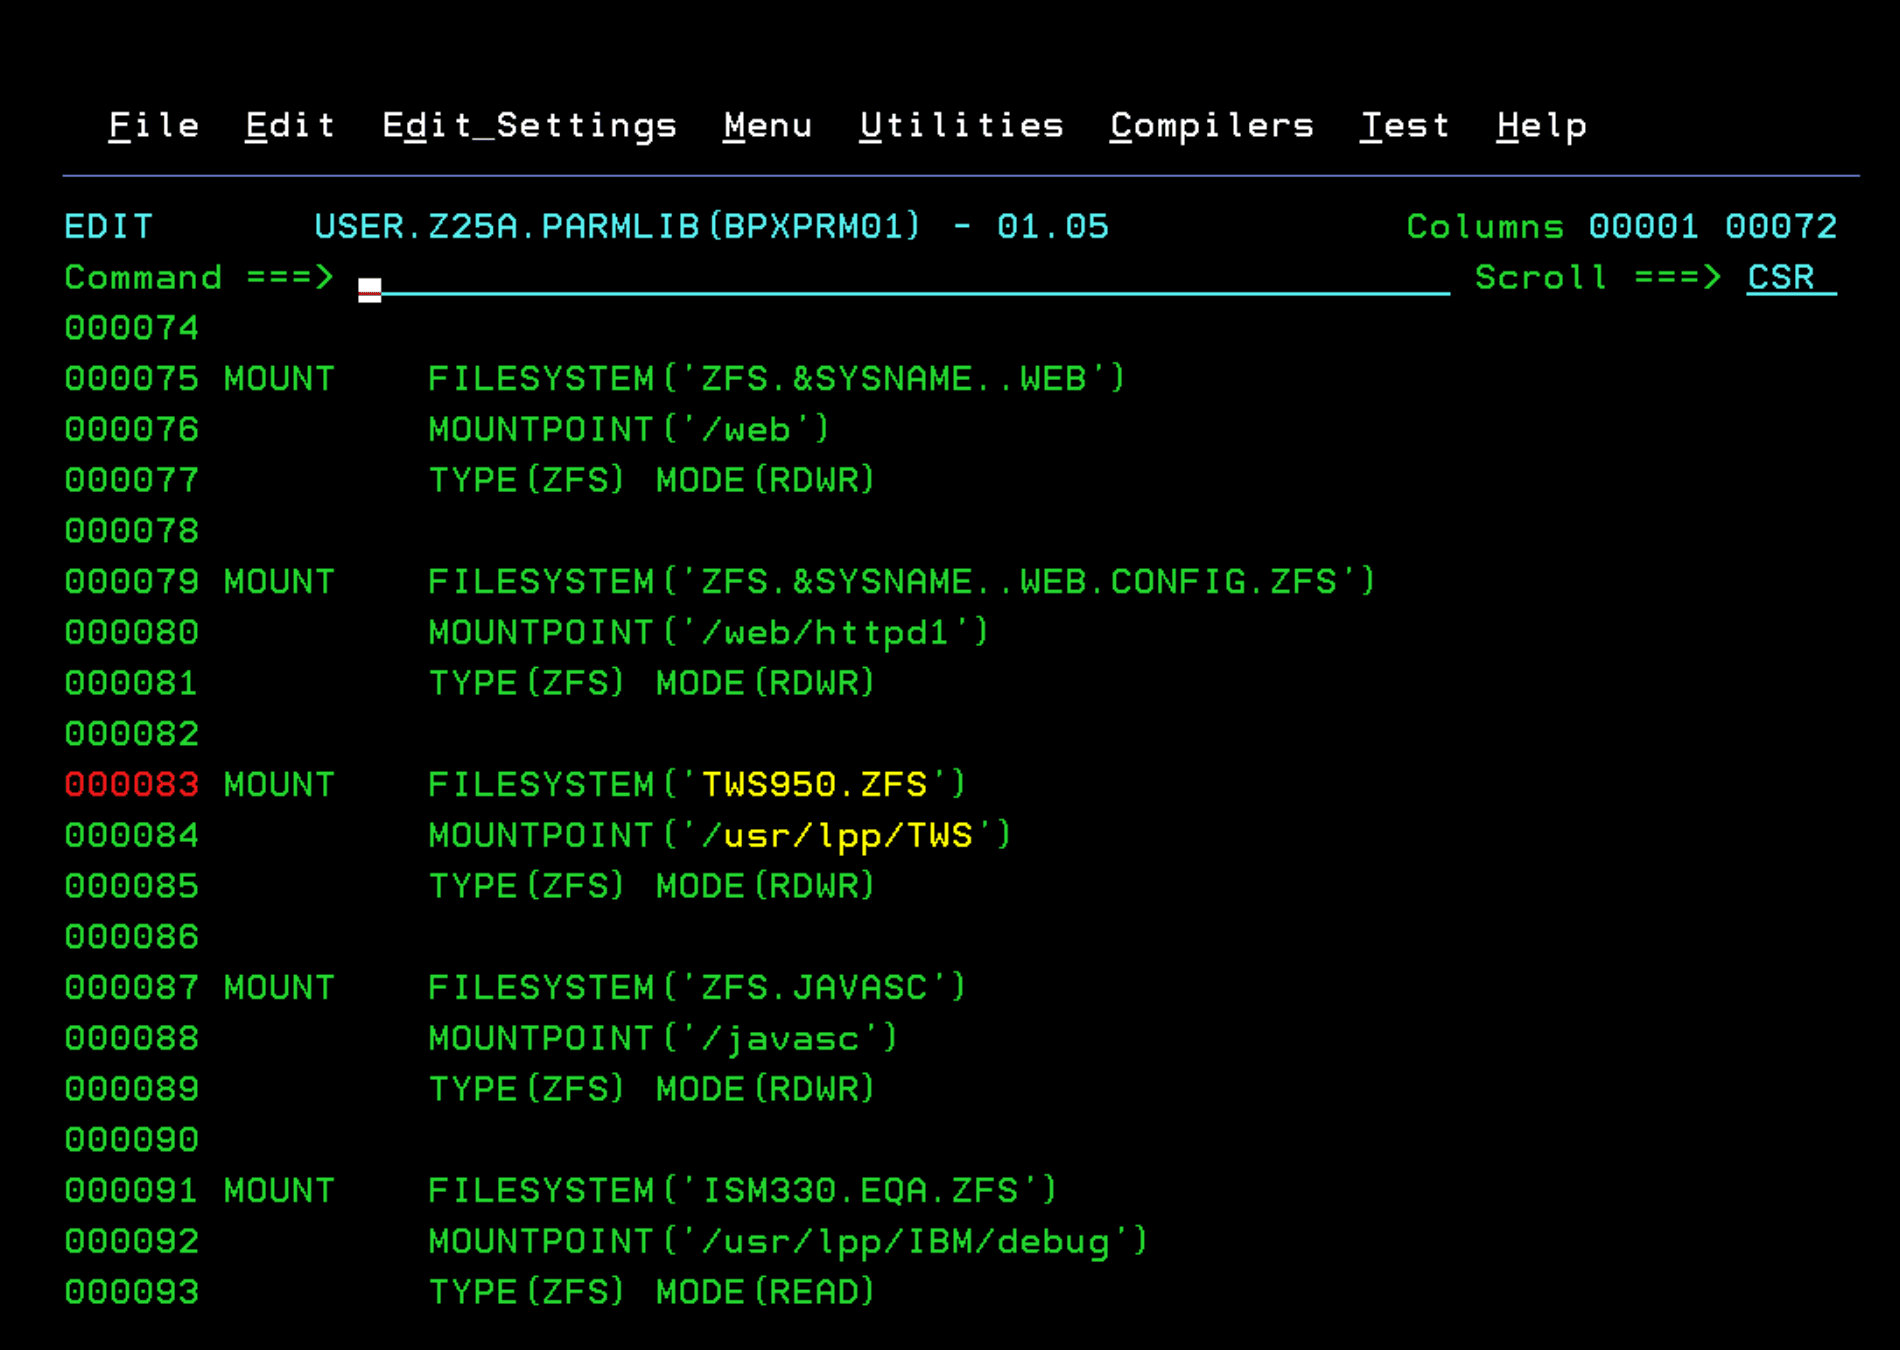
We edit the corresponding BPXPRMxx to mount the File System ‘TWS950.ZFS’ at mount point ‘/usr/lpp/TWS’.
We will create two MLOG files for the tracker since it cannot share them with the controller.
The characteristics of the datasets are the same as the controller MLOG files. I will call them:
- OPC.V950.MLOGT
- OPC.V950.MLOGT2
We also need to create the EV file (EQQEVD). I will call it:
- OPC.V950.OPCT.EV
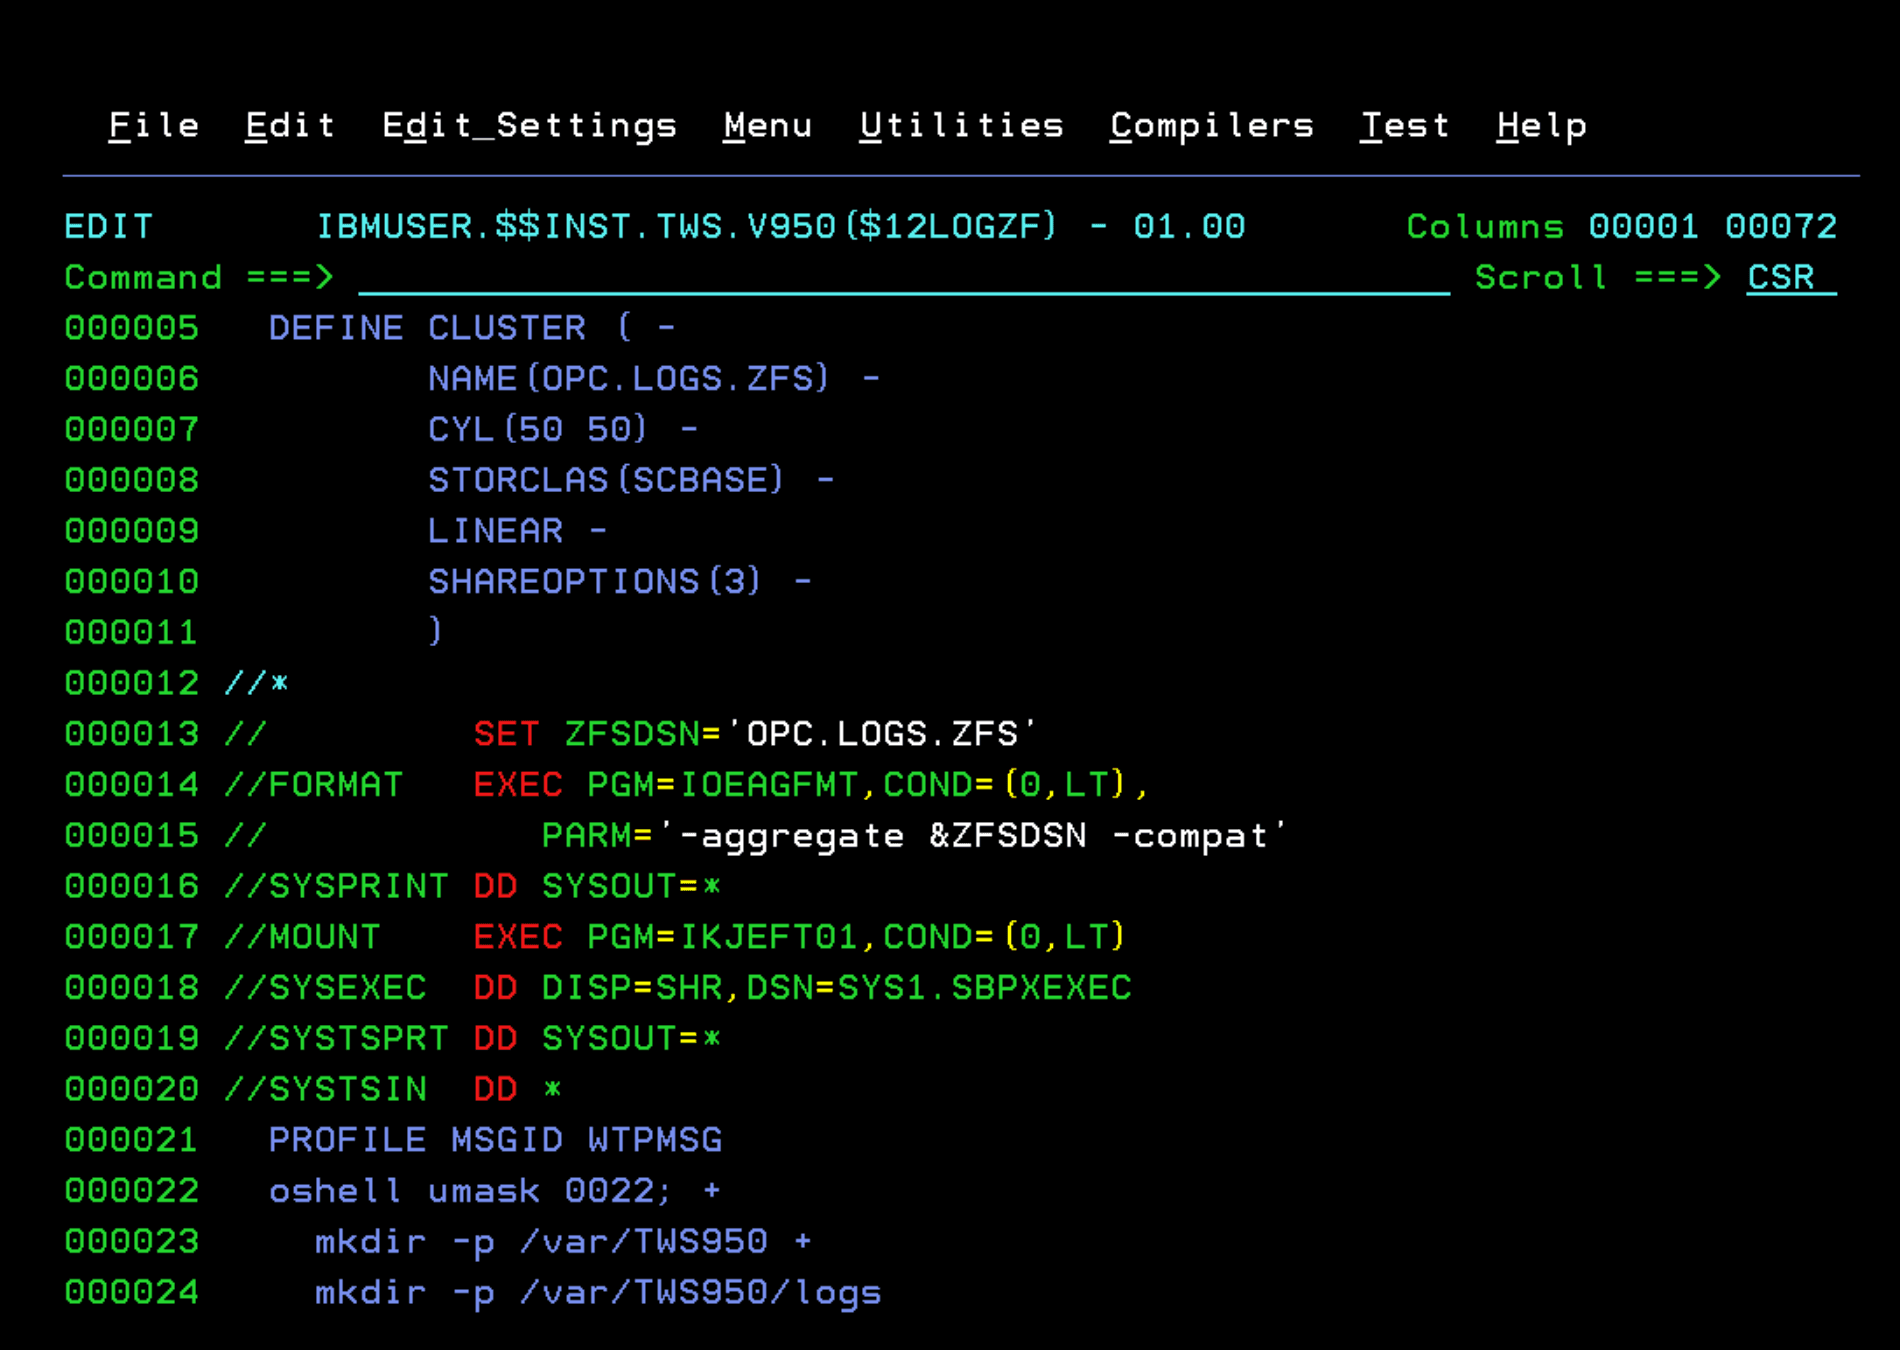
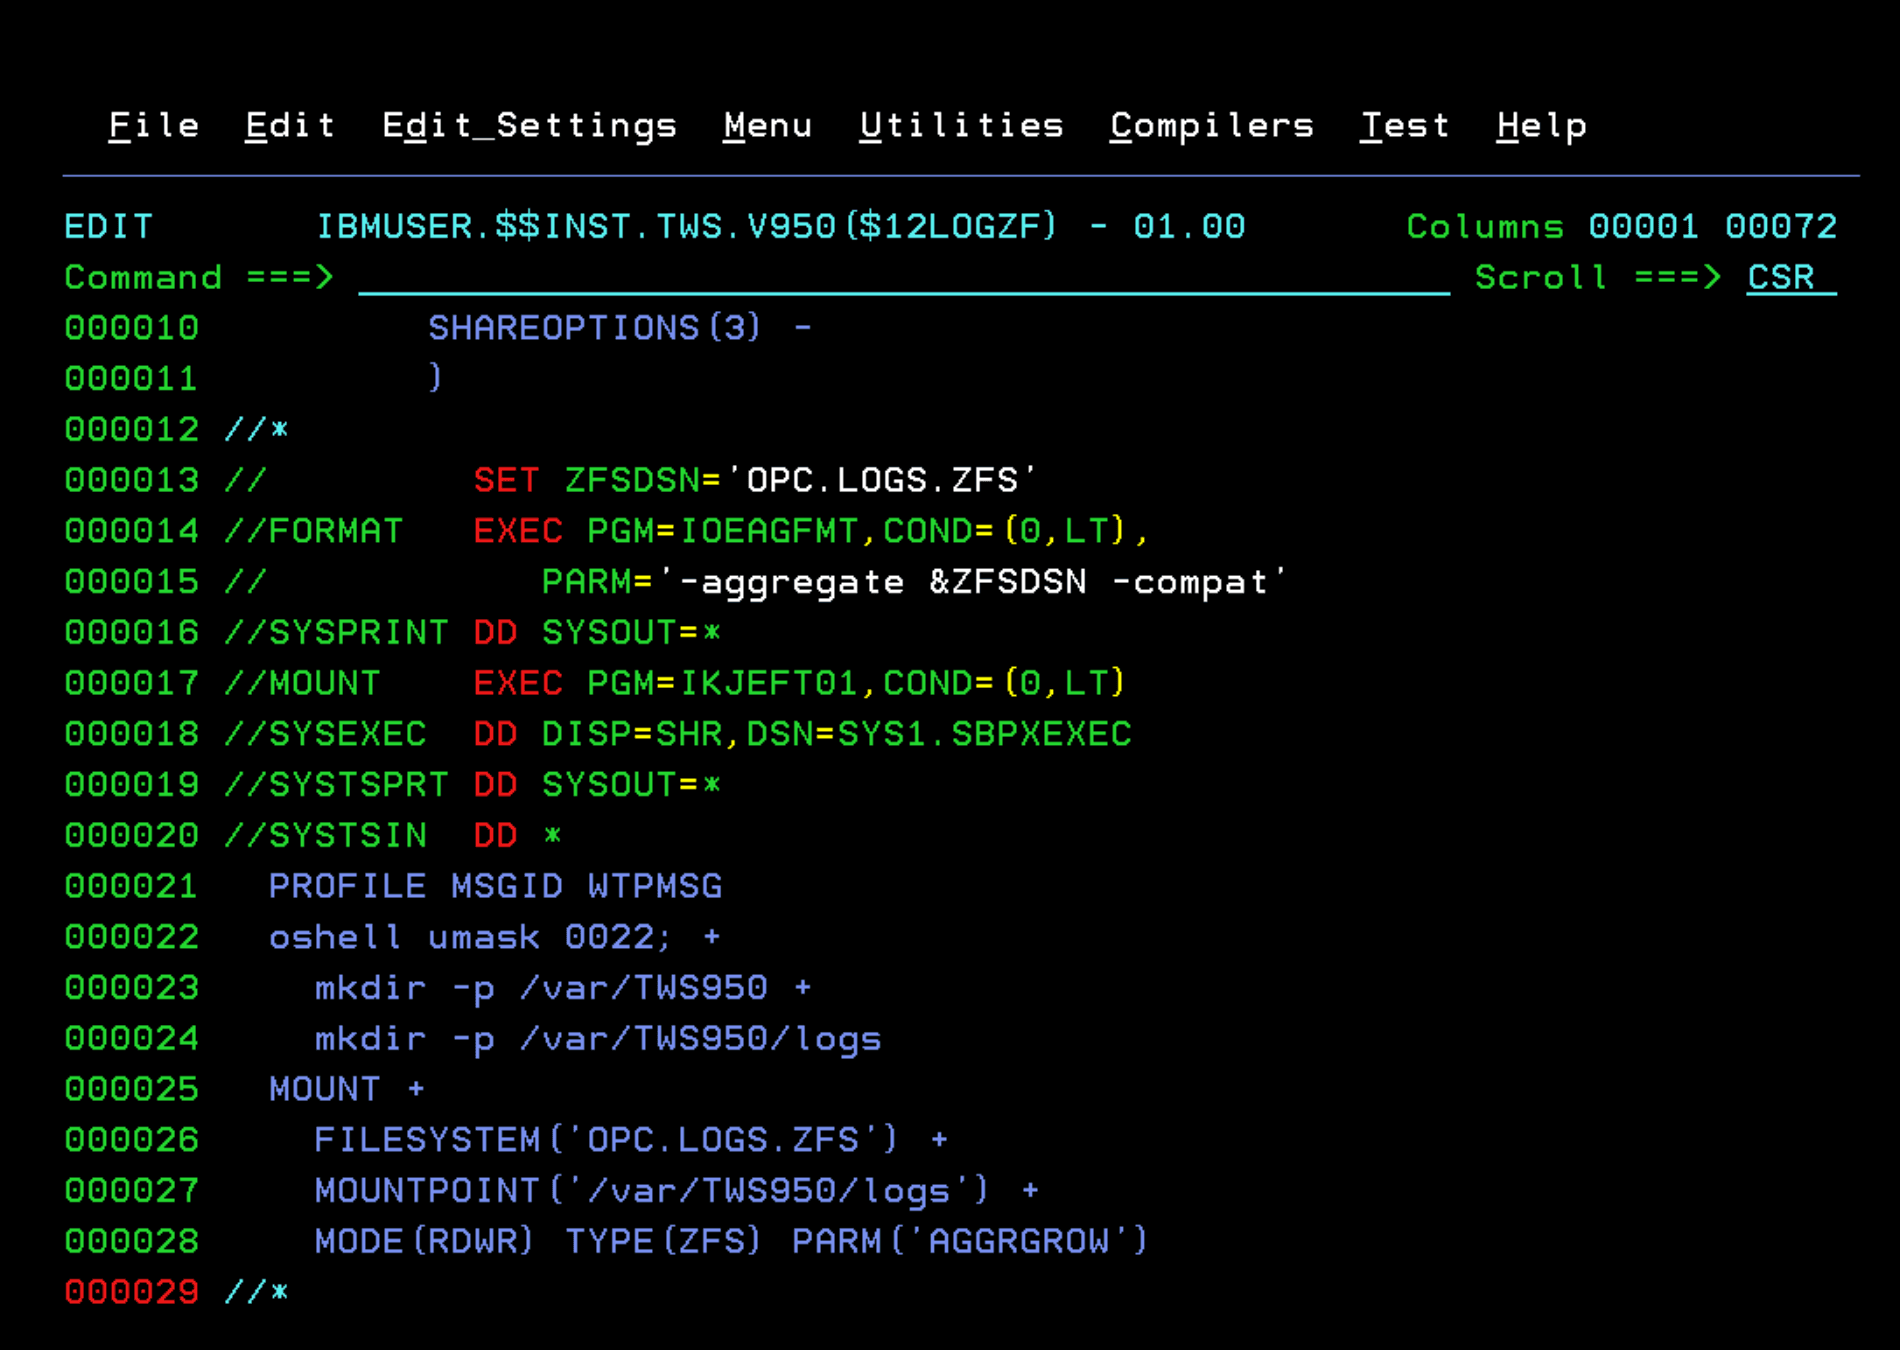
We also need to create the logs directory that we defined in the configuration earlier (/var/TWS950/logs) and mount a ZFS to store the content (important to include it in the corresponding BPXPRMxx).
//$12LOGZF JOB 0,REGION=0M,CLASS=A,MSGCLASS=A,NOTIFY=&SYSUID
//CREATE   EXEC PGM=IDCAMS
//SYSPRINT DD SYSOUT=*
//SYSIN    DD *
  DEFINE CLUSTER ( -
         NAME(OPC.LOGS.ZFS) -
         CYL(50 50) -
         STORCLAS(SCBASE) -
         LINEAR -
         SHAREOPTIONS(3) -
         )
/*
//         SET ZFSDSN='OPC.LOGS.ZFS'
//FORMAT   EXEC PGM=IOEAGFMT,COND=(0,LT),
//            PARM='-aggregate &ZFSDSN -compat'
//SYSPRINT DD SYSOUT=*
//*
//MOUNT    EXEC PGM=IKJEFT01,COND=(0,LT)
//SYSEXEC  DD DISP=SHR,DSN=SYS1.SBPXEXEC
//SYSTSPRT DD SYSOUT=*
//SYSTSIN  DD *
  PROFILE MSGID WTPMSG
  oshell umask 0022; +
    mkdir -p /var/TWS950 +
    mkdir -p /var/TWS950/logs
  MOUNT +
    FILESYSTEM('OPC.LOGS.ZFS') +
    MOUNTPOINT('/var/TWS950/logs') +
    MODE(RDWR) TYPE(ZFS) PARM('AGGRGROW')
/*
System Startup
Since we haven’t been activating the configuration dynamically, I will now do an IPL. Also, this way I make sure that all the modifications I made are correct.
After the IPL, we will start the OPCC and OPCT tasks with the commands:
S OPCC
S OPCT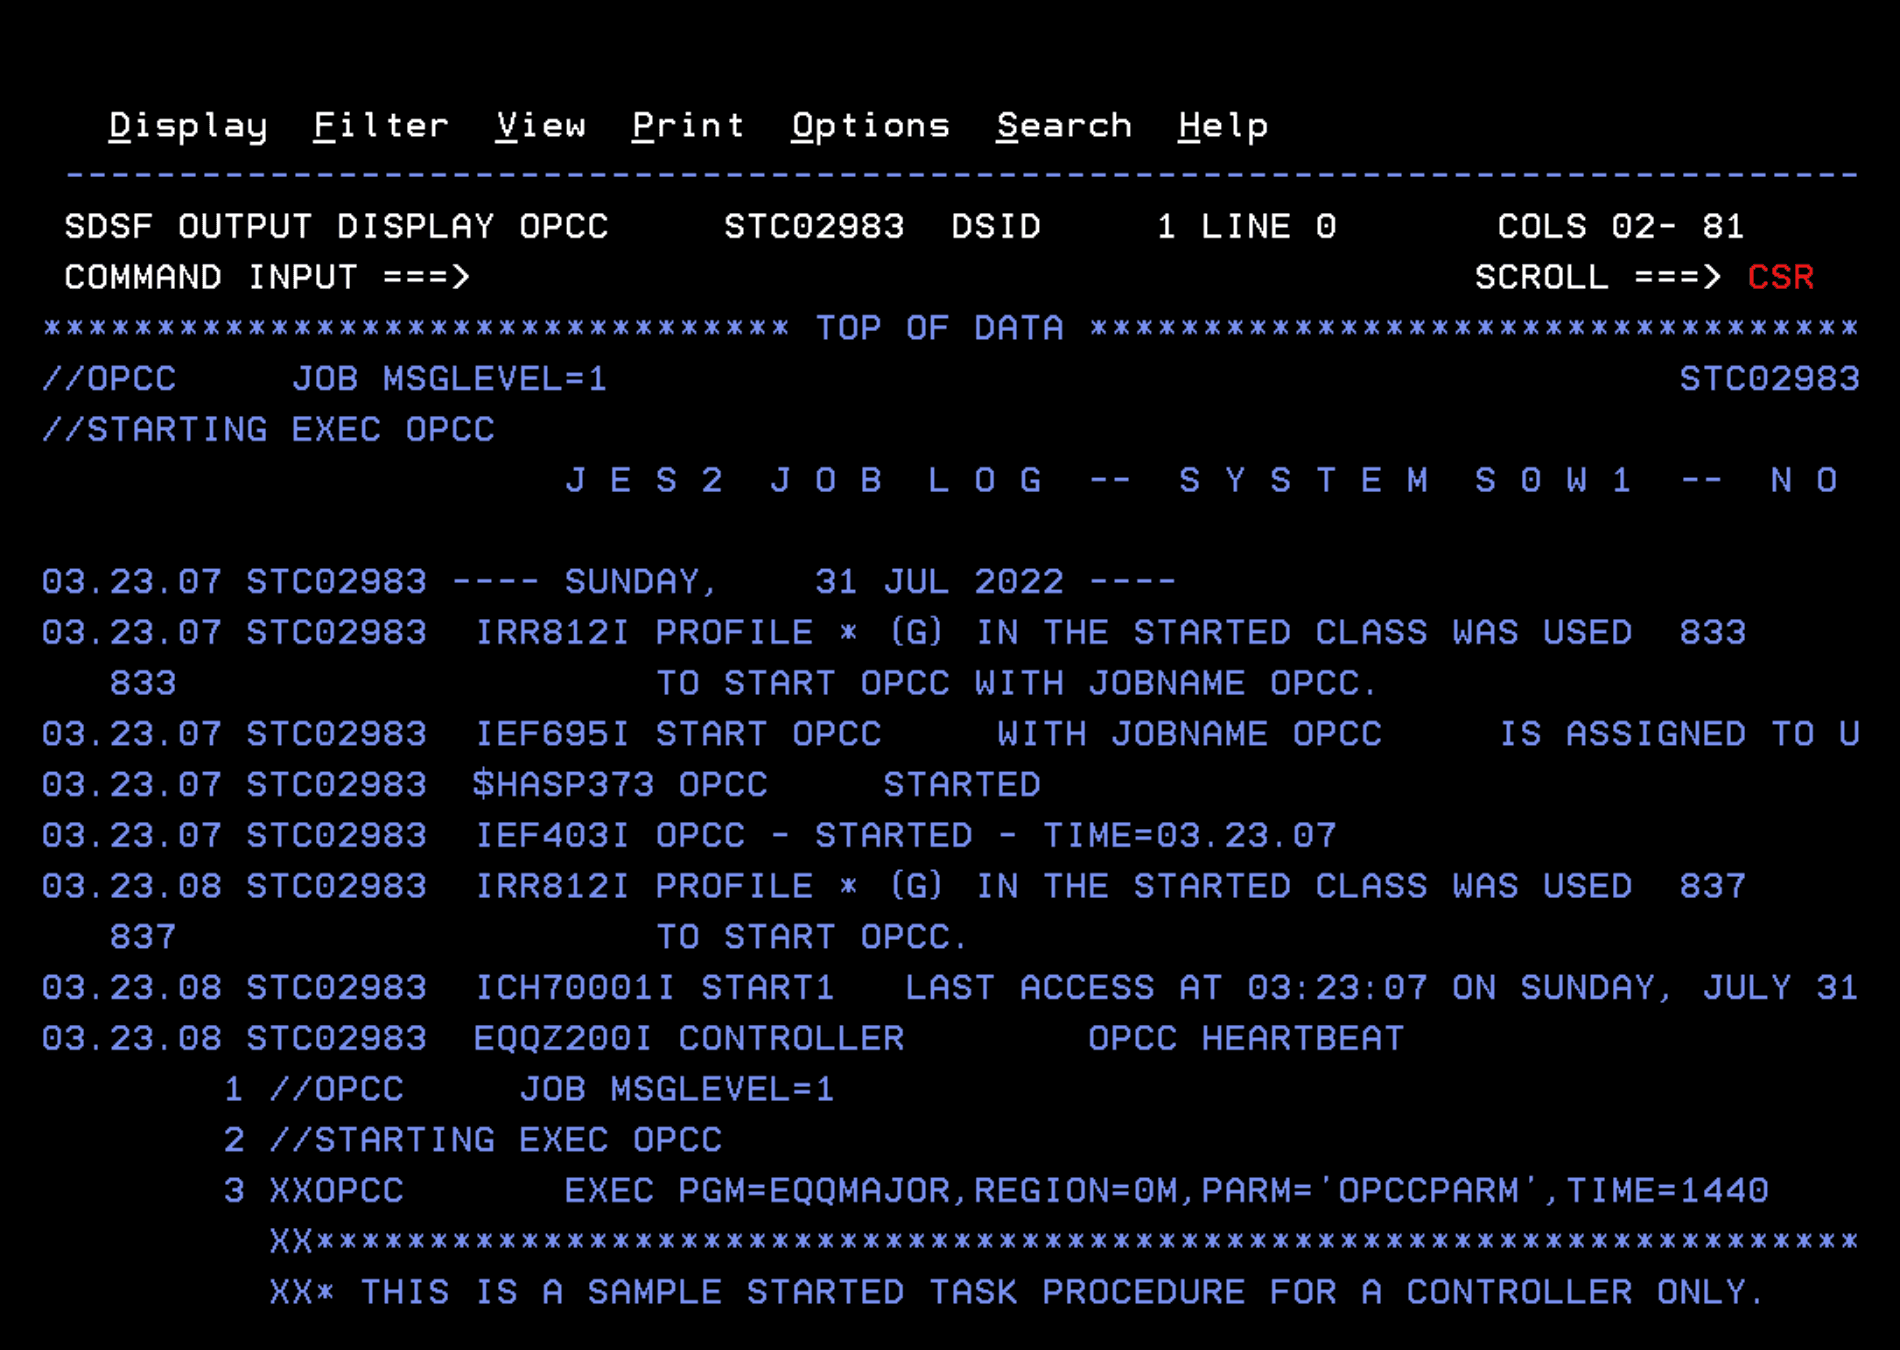
The following message is because we don’t have any Long-term plan or Current Plan created. Once created, the tracker will connect with the controller. For now, we can ignore it.
EQQV019E SESSION SETUP FAILED - PLU=NCFOPCC NOT AVAILABLE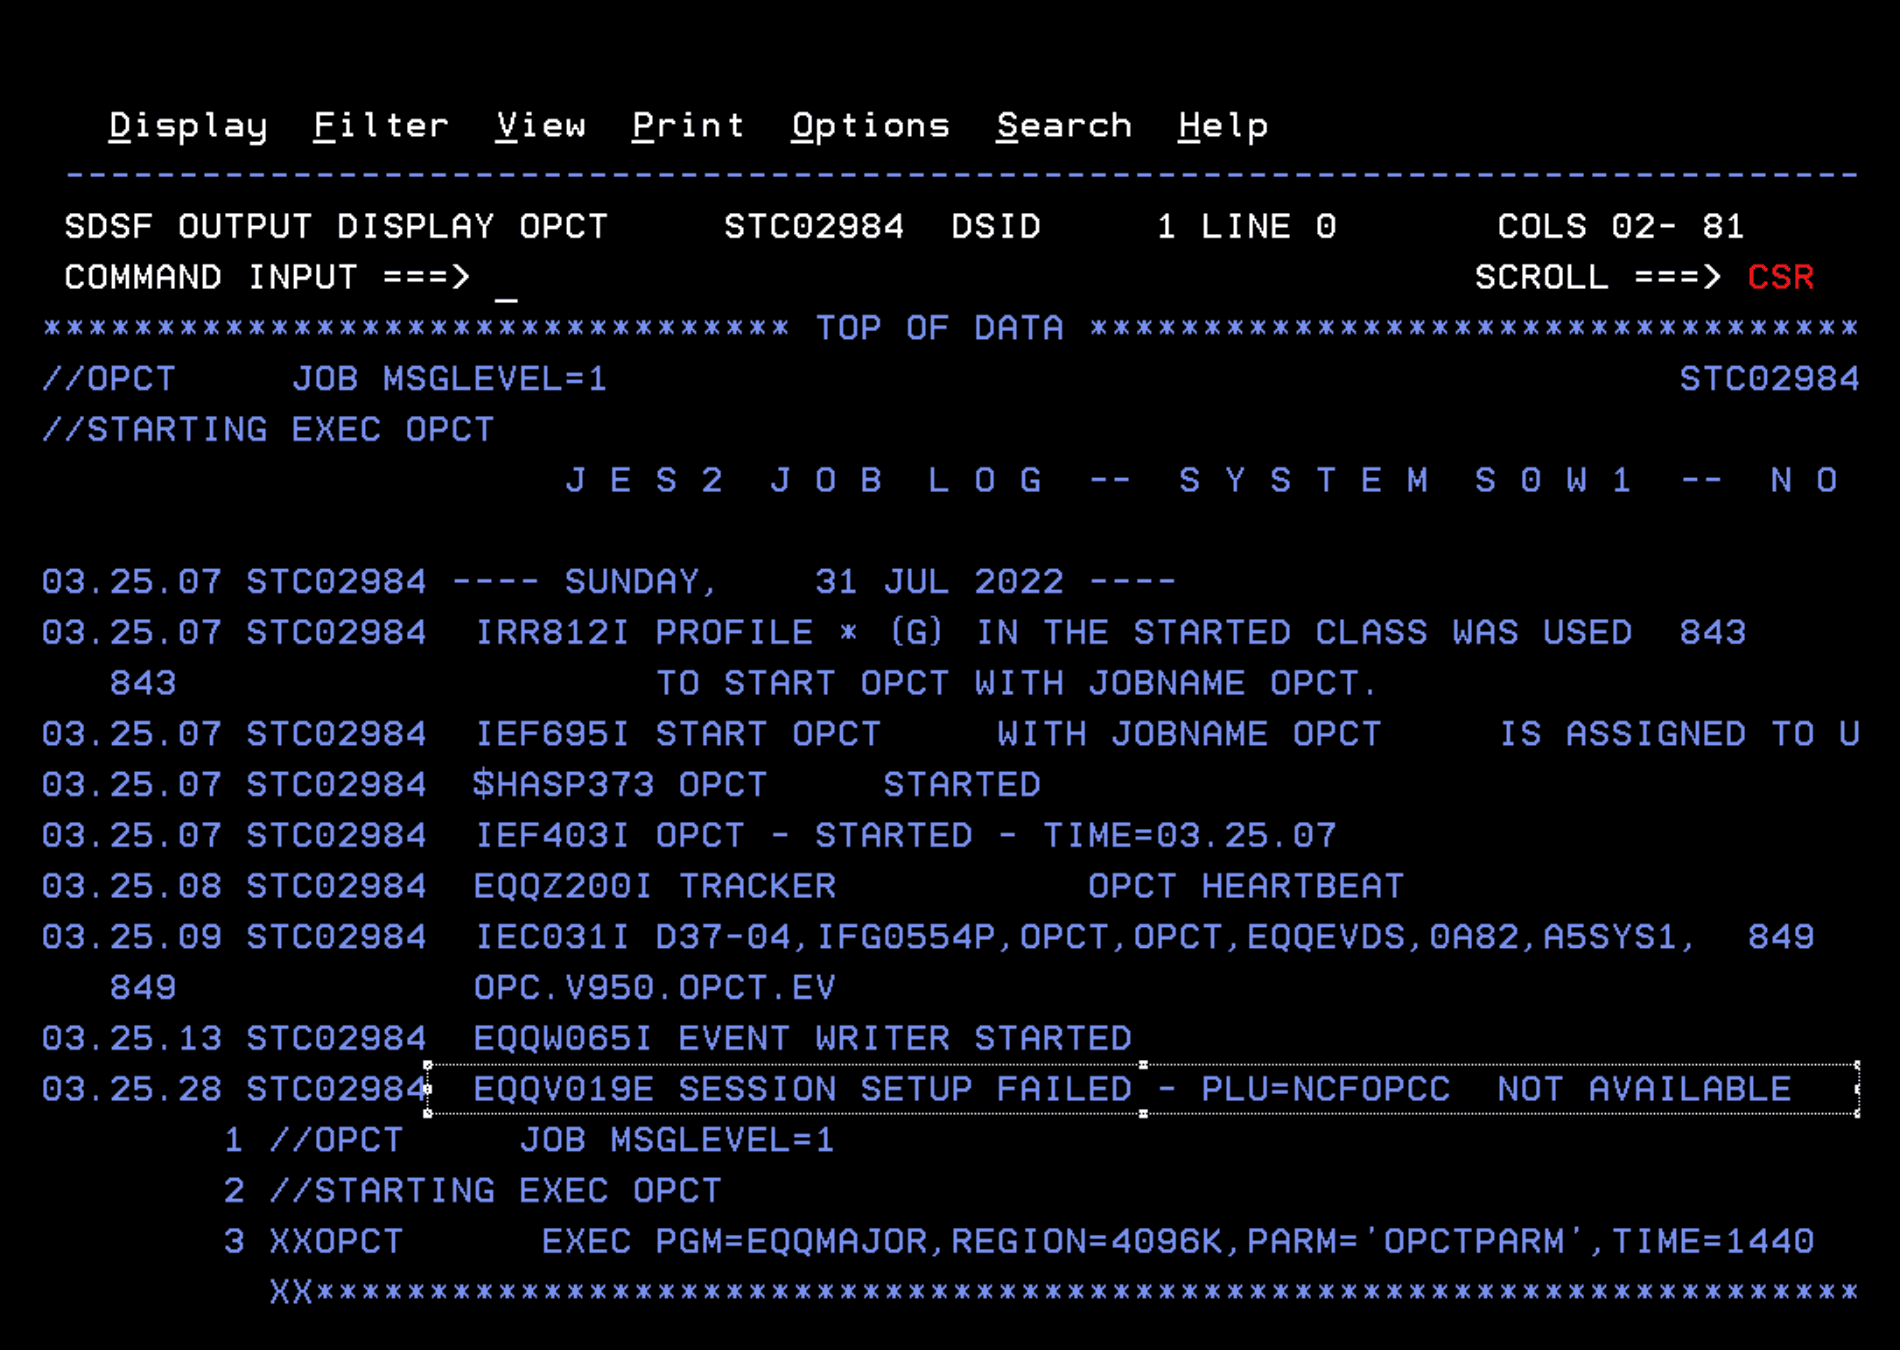
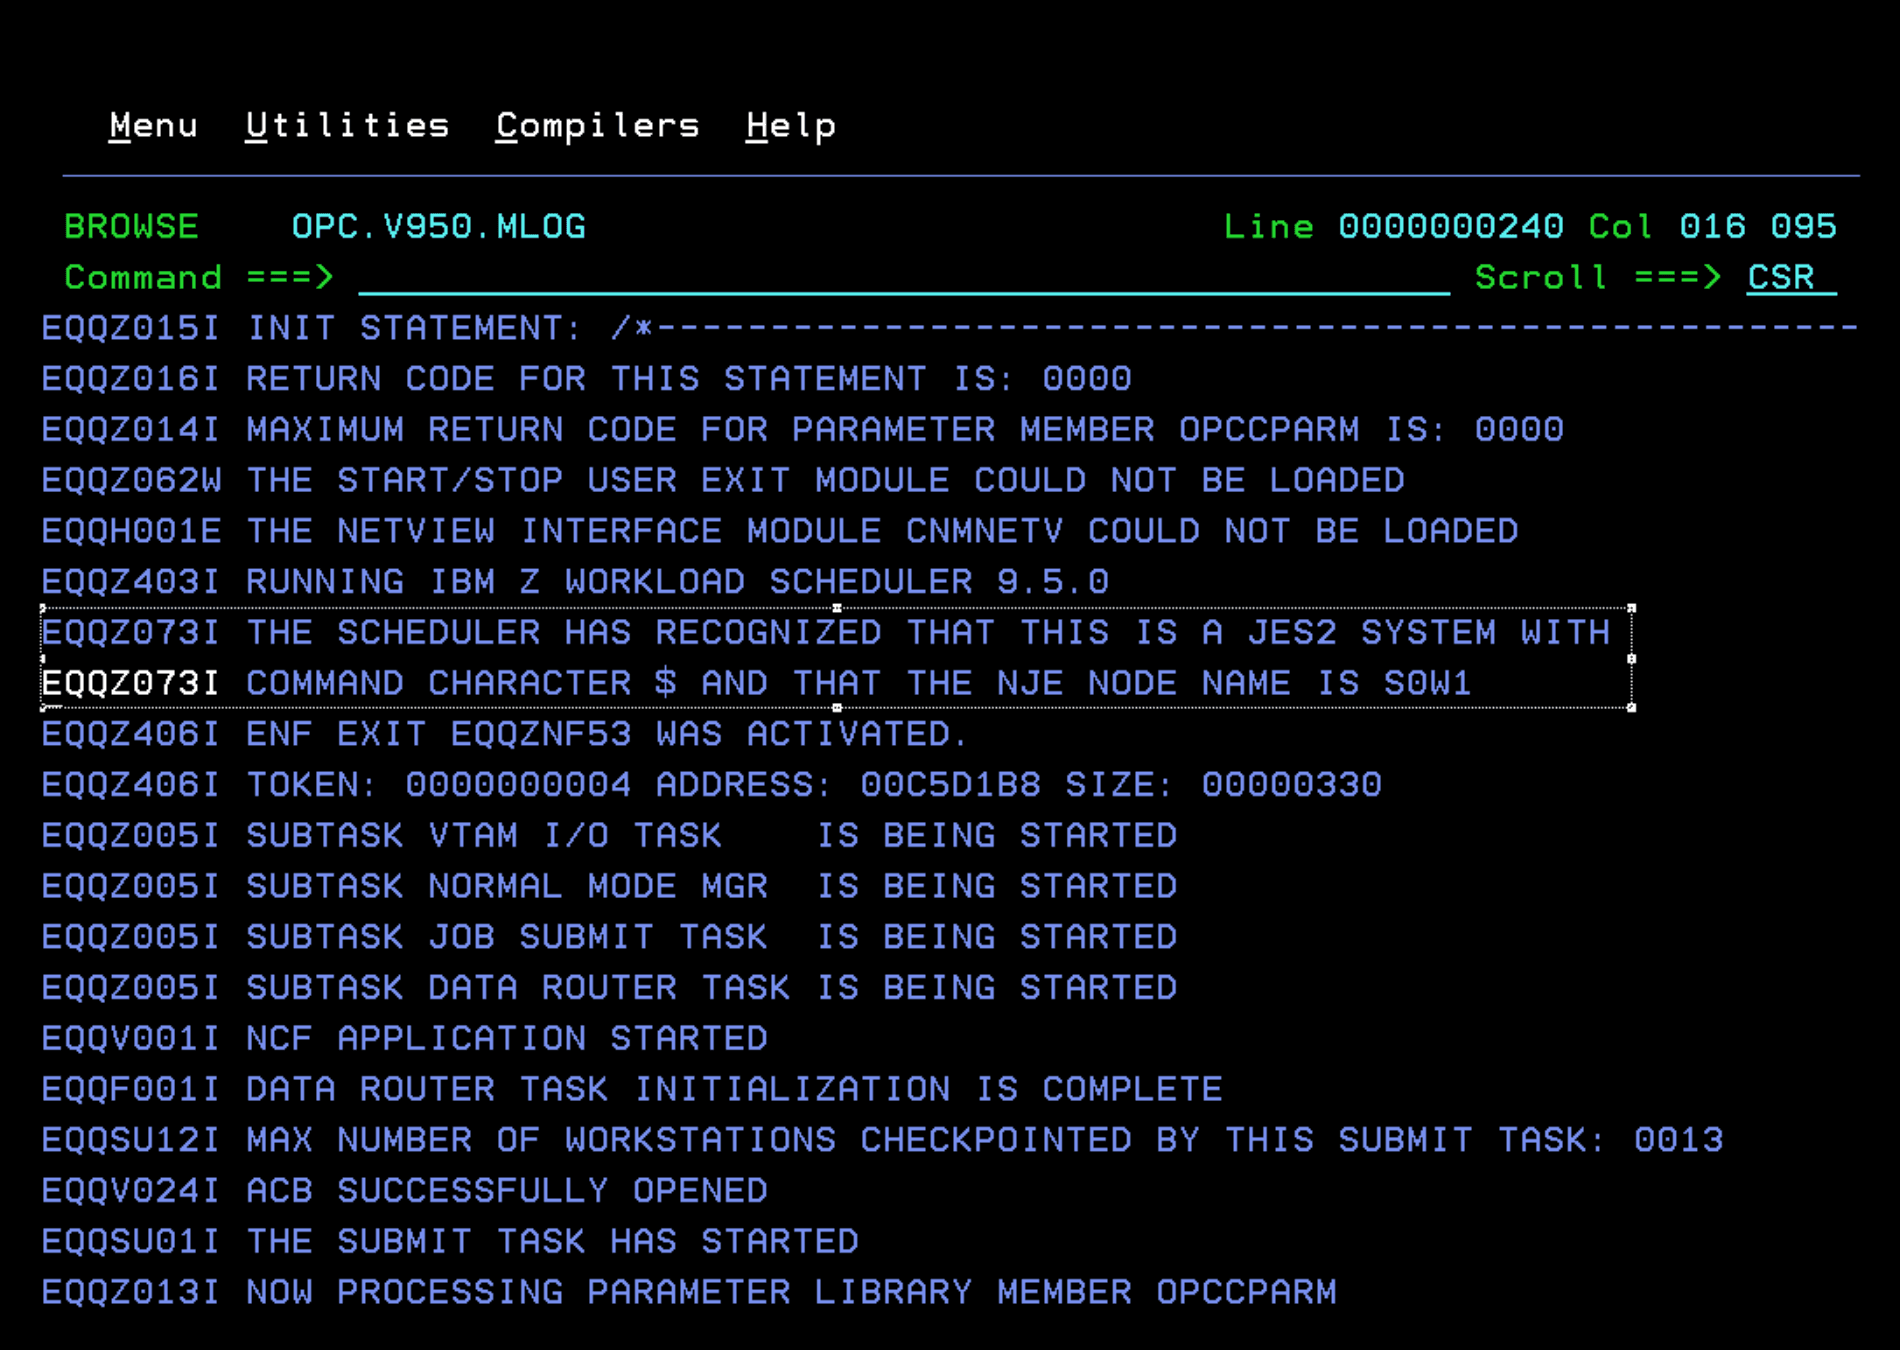
In the MLOG file we should see messages like those marked in the image.
This indicates that the EXITs have loaded correctly.
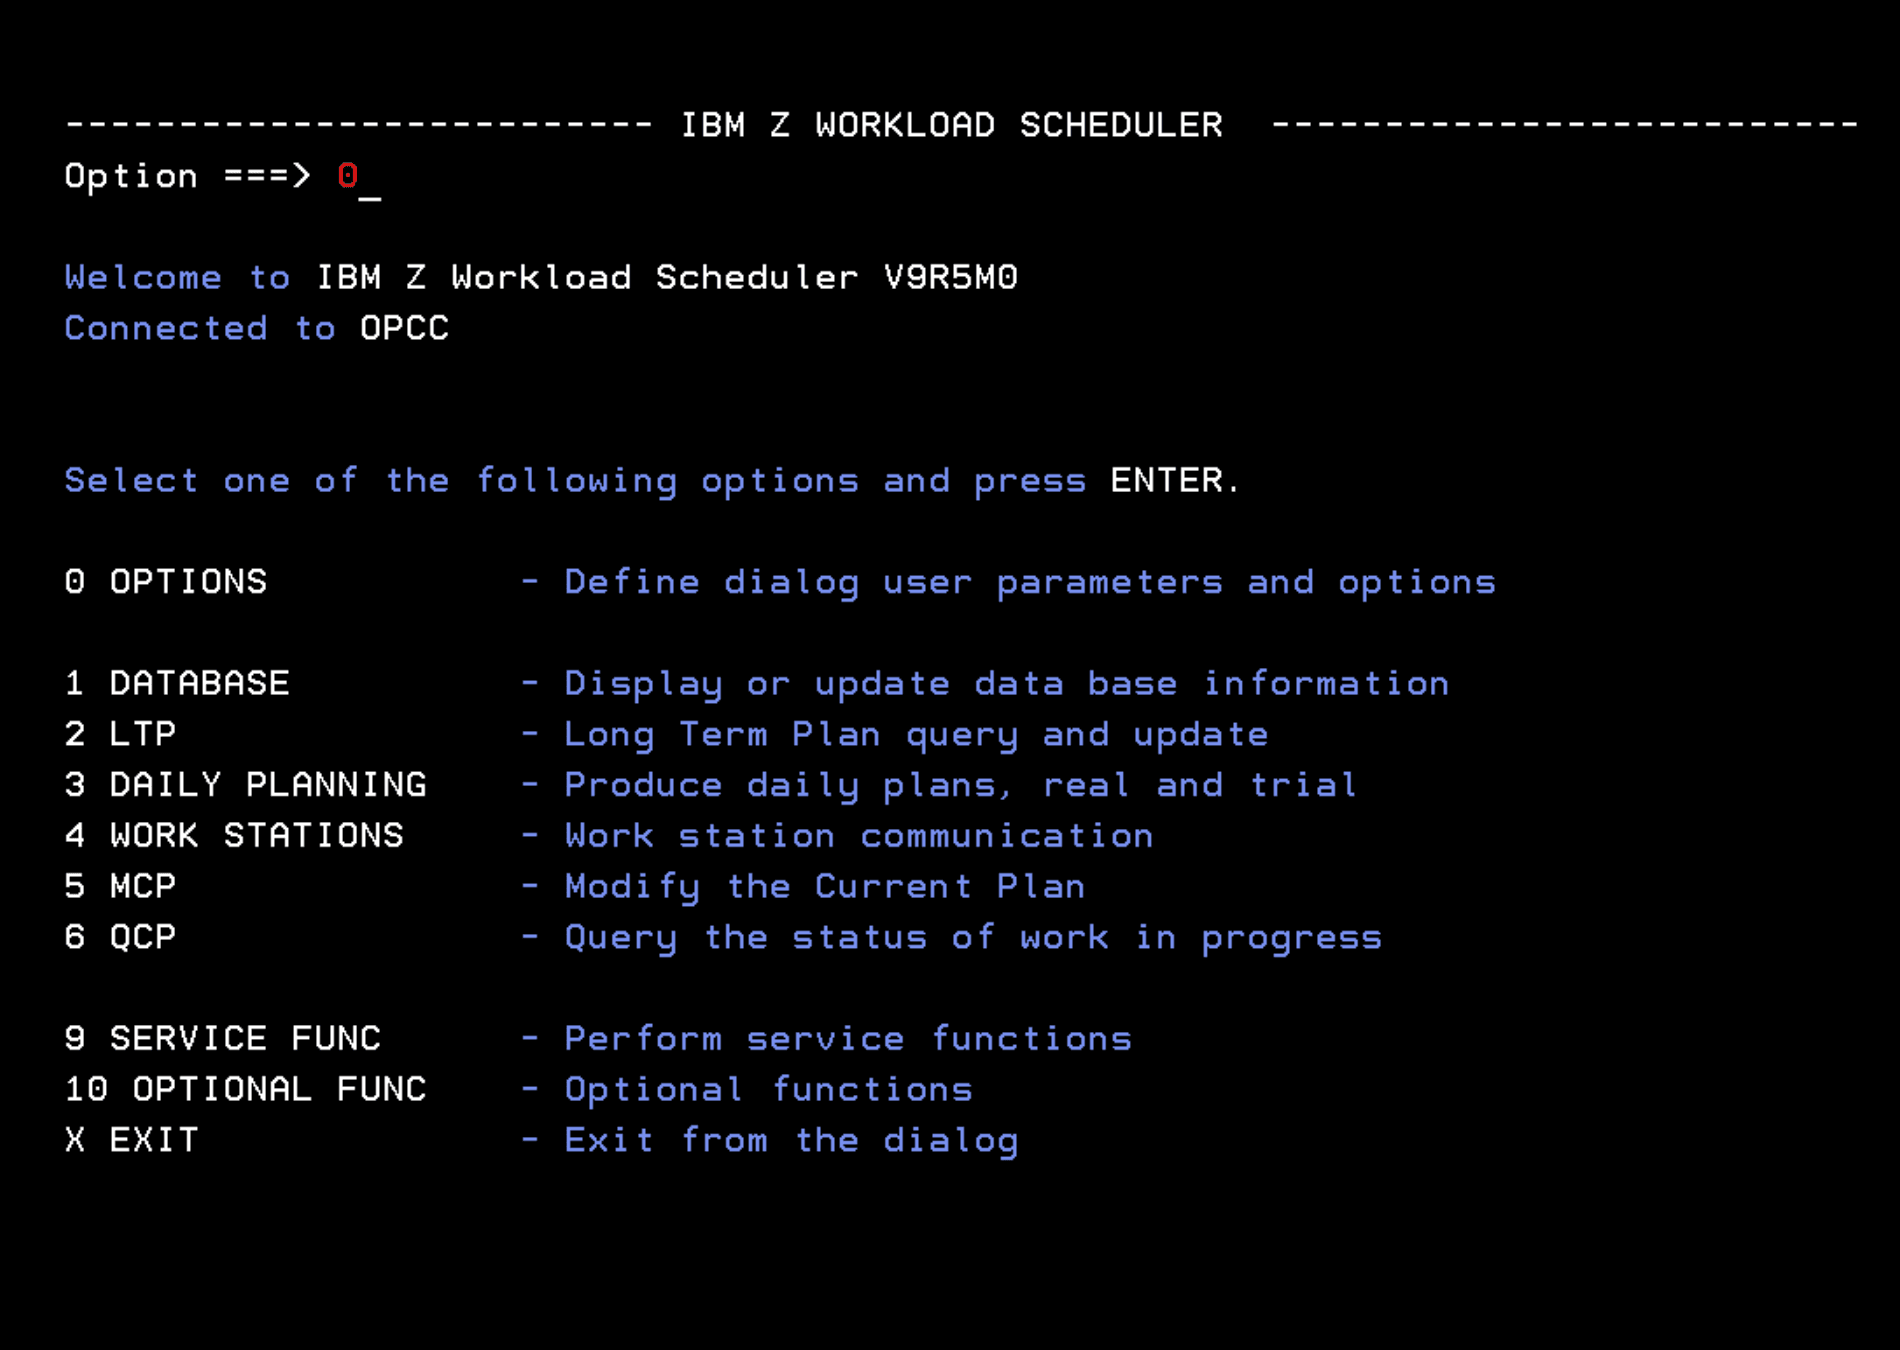
Now we enter the OPC panels.
To define the controller we are going to connect to, we go to option 0 - Options.
We enter option 1 – Subsystem.
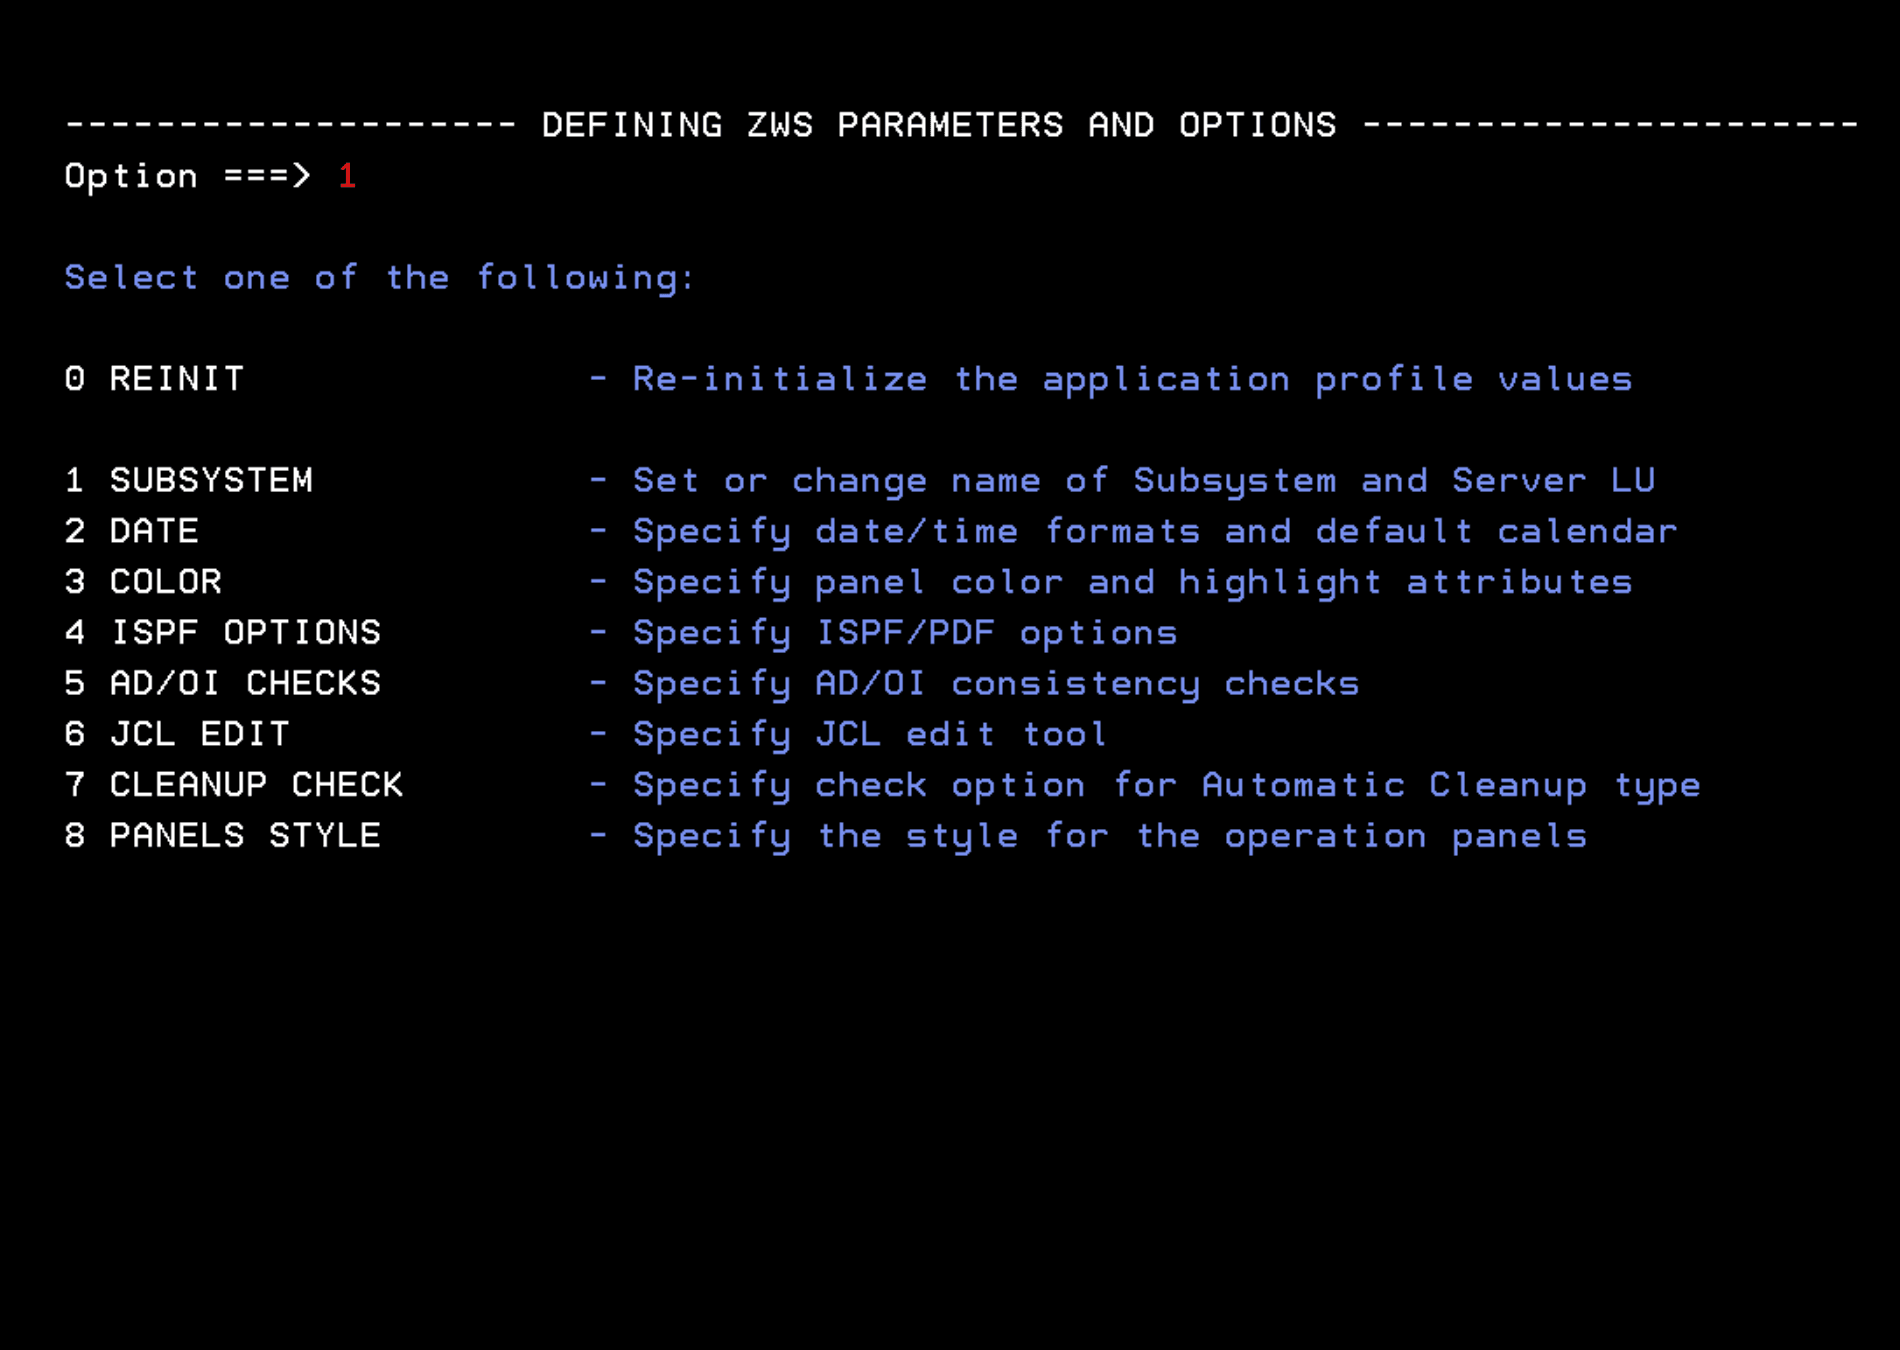
We select the Local option “OPC on same MVS”. The controller name is OPCC.

We will now be able to enter the different options of the tool.
I hope you liked it and that this basic installation demonstration of OPC / TWS / IZWS helps you.