Installation, License and Startup
This document includes: how to obtain the license, install the product, load the license on the USB token and start the system.
Obtain the License
We enter the IBM Rational License Key Center link, log in and enter the product.
I’m leaving the link to the IBM website in case access changes in the future:
https://www.ibm.com/support/pages/ibm-support-licensing-start-page
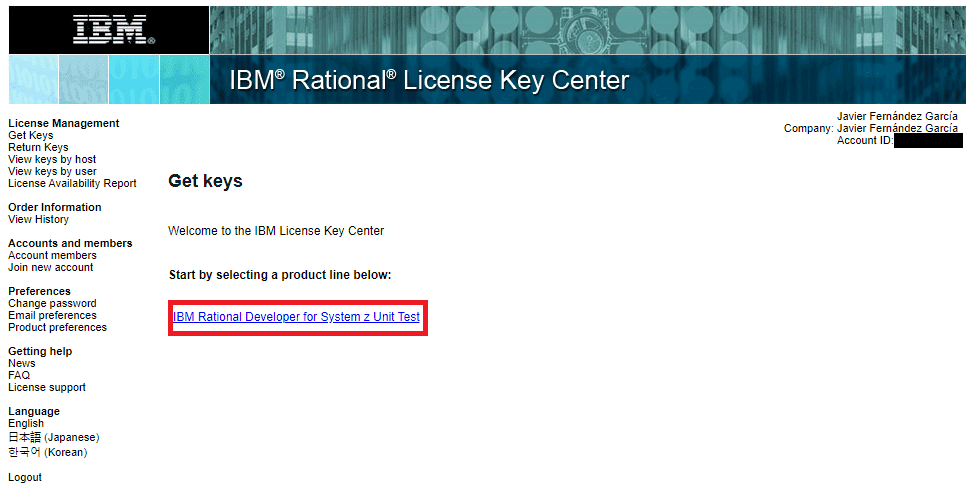
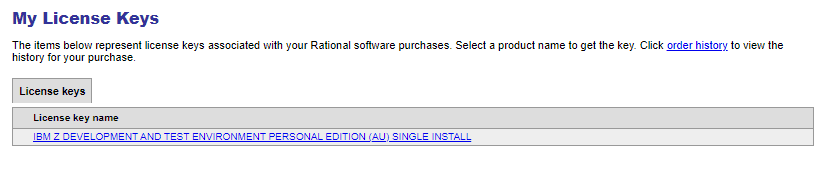
We enter the available license.
We click on Next.
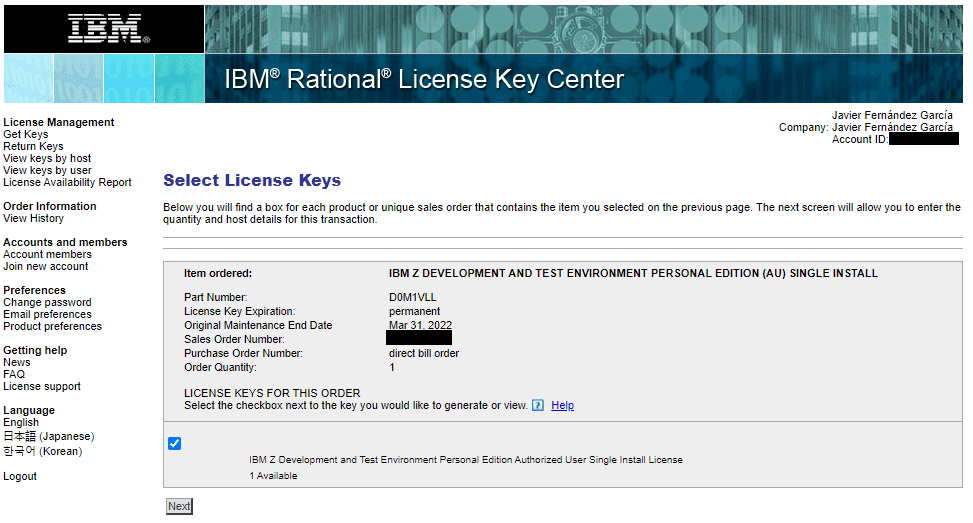
We enter the data.

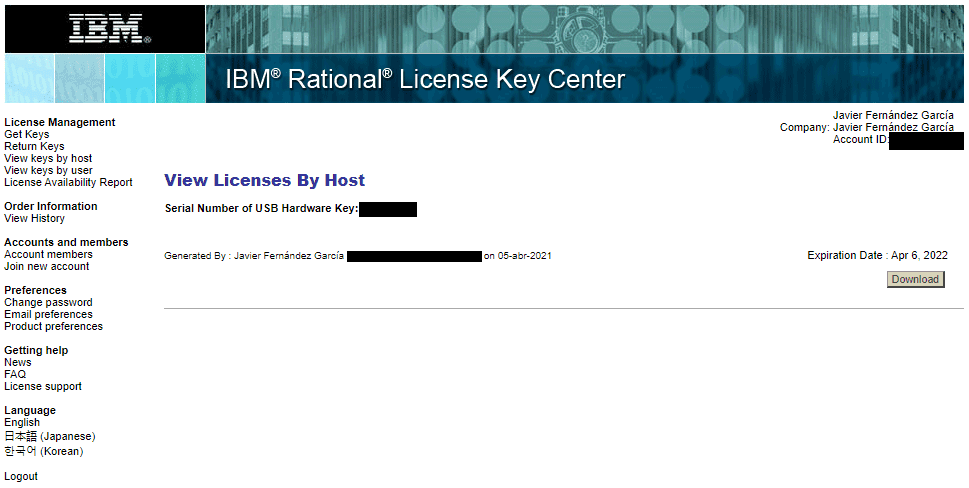
We download the license file.
IMPORTANT When the license is permanent, as in my case, it is mandatory to renew the license before the one we are generating expires (in my case, April 6, 2022).
It’s not necessary to wait the full year. It can be done a month or 15 days before. Better that than forgetting to do it.
I’m leaving the link to the IBM website with the steps to follow:
https://www.ibm.com/docs/en/zdt/13.0.0?topic=key-returning-existing-license
Emulator Installation
We now have the license file that we will use later. Now we go to the system where we will install the product and start the system.
When we connect the USB token to the system, we must NEVER change the time of the Ubuntu system because it can stop the token from working.
The best thing is to set the time zone to GMT+0 and, to be safe, disable automatic time update (due to winter/summer time change).
On the system, I created two folders. One with the program and another with the system disks. I still have to decrypt the volumes: C4RES1.ZPD and SARES1.ZPD.
To decrypt them, the license is necessary as it “marks” the disk with the license to prevent internet distribution.
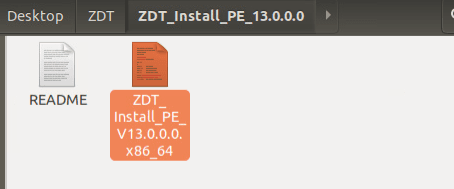

We install the product.
sudo ./ZDT_Install_PE_V13.0.0.0.x86_64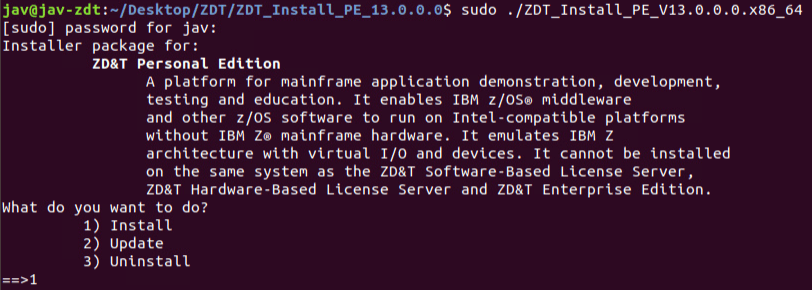
We accept the license agreement.
It will ask us if we want to install the network configuration and the necessary dependencies. In my case, I will do it.

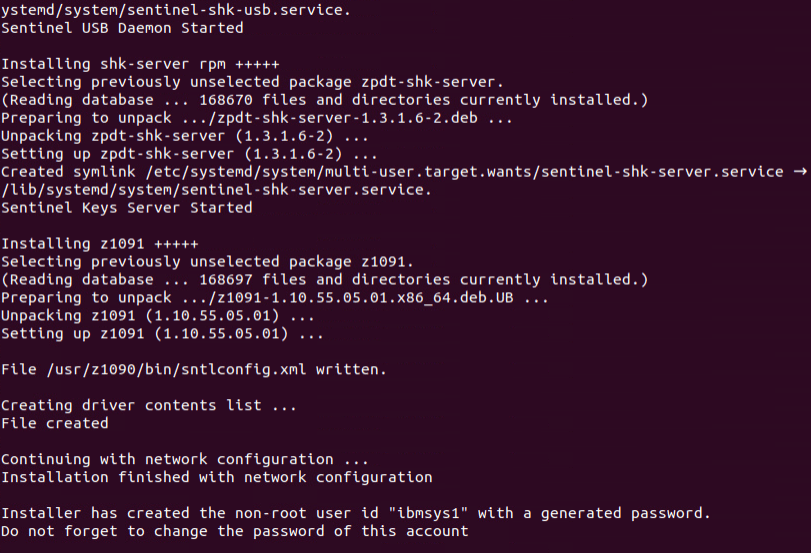
We wait for the installation to finish. This process will create the ibmsys1 user.
We change the user password with the command:
passwd ibmsys1
We verify that the installation was successful with the command:
dpkg -l | grep z1091
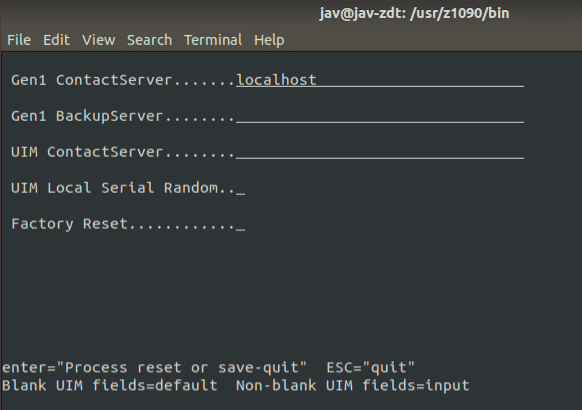
Now we go to the path /usr/z1090/bin and execute the command:
sudo ./clientconfig![]()
We leave the default information and press enter twice.
Load the License on USB Token
Now we connect the USB token to the PC. With the lsusb command we will see that the system recognizes it. It’s the “Rainbow Technologies, Inc.” device.
lsusb
Now we will issue the command to apply the license. In my case:
sudo ./Z1091_token_update -u /home/jav/Desktop/RDT-xxx-202204062359-3CP-1I-0.zipWhen finished, you will need to disconnect the token for 10-15 seconds.
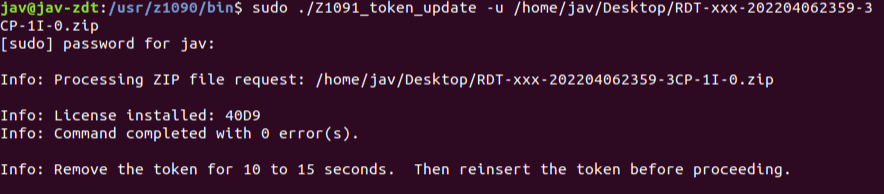
It’s also necessary to restart the license server, but in my case, since I had to restart the PC, I didn’t do it. The command is:
/opt/safenet_sentinel/common_files/sentinel_keys_server/loadserv restartWhen we reconnect the token, we can check the license status with the command:
./Z1091_token_update -status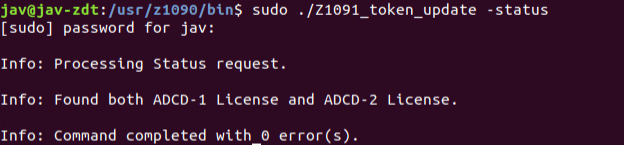
Now we log in with the user created during the product installation ibmsys1. We go to the path /usr/z1090/bin and execute the command to check the licenses:
cd /usr/z1090/bin
./uimcheck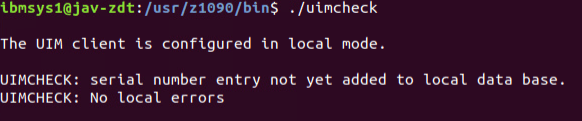
NOTE If when logging in with the ibmsys1 user, the terminal looks different from the other user’s, it’s because it runs in /bin/sh mode instead of /bin/bash. We will execute the following command to change it:
chsh -s /bin/bash ibmsys1
![]()
Decrypt the Disks
Since we can log in correctly with the ibmsys1 user, we go back to the root user and move the disks to the path /home/ibmsys1/volumes.
We change the file permissions, the “owner” and the group with the following commands (using the root user, in my case, called jav):
chown ibmsys1 *
chgrp zpdt *
chmod 755 *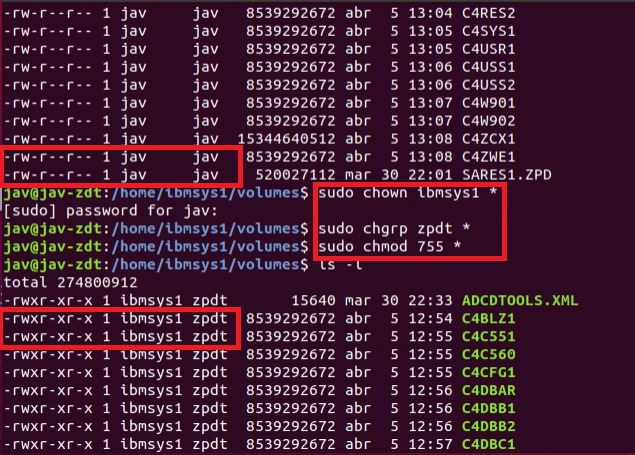
Now we go back to the ibmsys1 user. We go to the following path /usr/z1090/bin to decrypt the C4RES1.ZPD and SARES.ZPD disks.
We will use the following command:
cd /usr/z1090/bin
./Z1091_ADCD_install input_file output_file
For example:
./Z1091_ADCD_install /home/ibmsys1/volumes/C4RES1.ZPD /home/ibmsys1/volumes/C4RES1
./Z1091_ADCD_install /home/ibmsys1/volumes/SARES1.ZPD /home/ibmsys1/volumes/SARES1
In my case, it gave the following error which can be ignored:
LIC hasp: \* Communication error between API and local Sentinel License Manager : code=33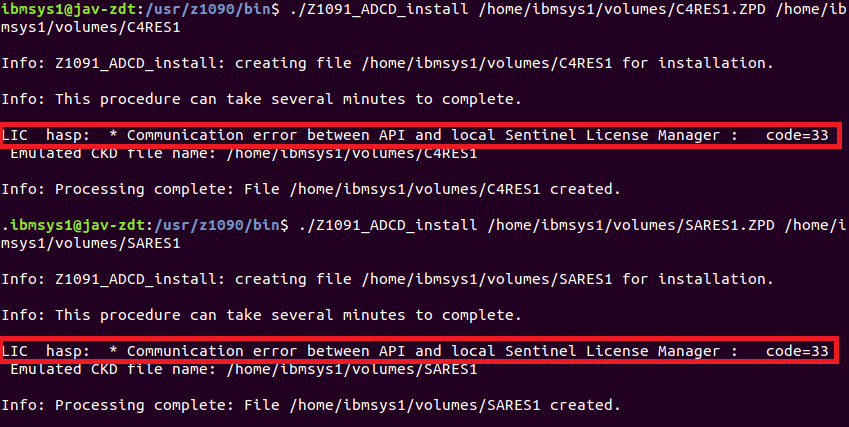
Generate Configuration File
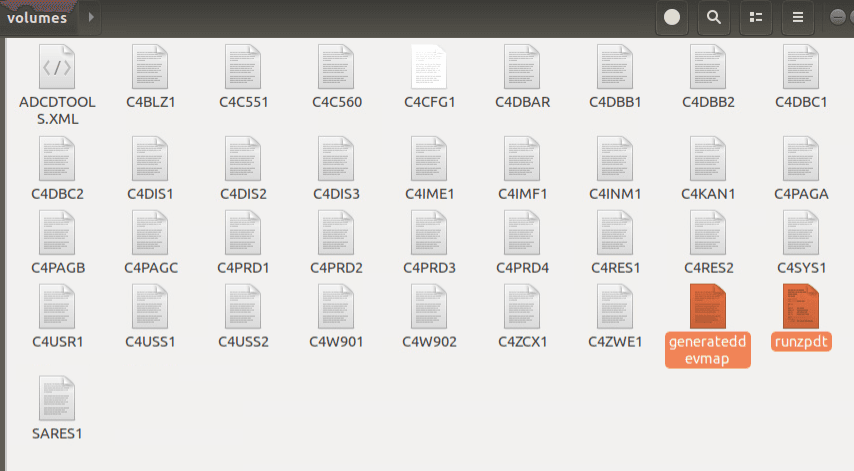
We now have the disks decrypted. We have to delete the .ZPD files so that the next step doesn’t fail. Now we are going to generate the configuration file with the devices, disks, etc. To do this, a script must be executed:
NOTE If it gives an error, you need to install the net-tools package. Command:
apt-get install net-toolscd /opt/ConfigGuideSample
perl create_devmap.pl volumes_path > generateddevmapFor example:
perl create_devmap.pl /home/ibmsys1/volumes > generateddevmap
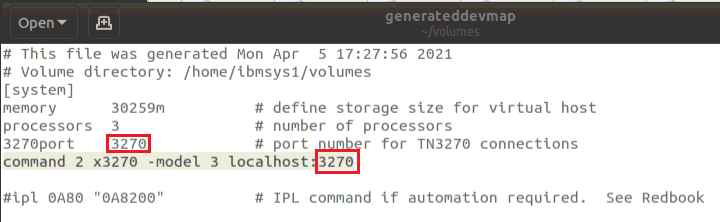
We will have a file like the following:

Now we will copy the generateddevmap and runzpdt files from the /opt/ConfigGuideSample directory to the directory where we have the volumes /home/ibmsys1/volumes.
Install x3270 Terminal
Optionally, we can install the x3270 terminal and configure the emulator startup to have the console in this terminal.
To install x3270:
apt-get install x3270Then, add this command to the Devmap file:
command 2 x3270 -model 3 localhost:3270“model 3” is a 32-line terminal and “model 4” is 43. We should use the port we have configured.
This way, when we start the emulator, it will start the terminal and we will have the console.
System Startup
From /home/ibmsys1/volumes, we start the emulator with the command:
cd /home/ibmsys1/volumes
./runzpdt -d <devmap name> -l <loadparm option>
For example:
./runzpdt -d generateddevmap -l cs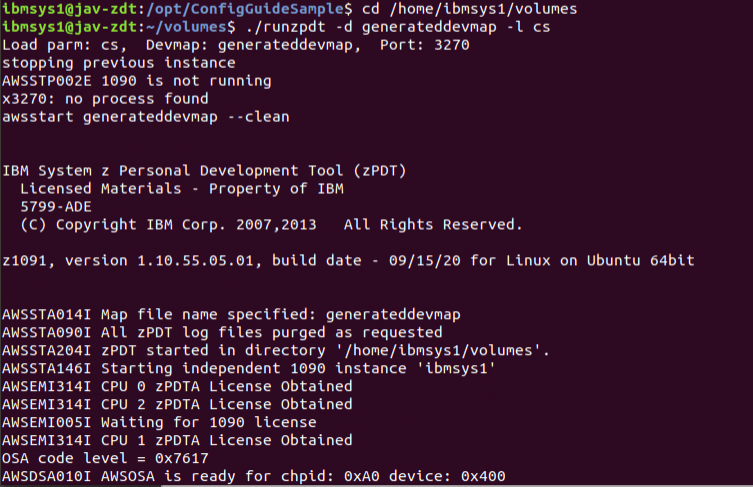
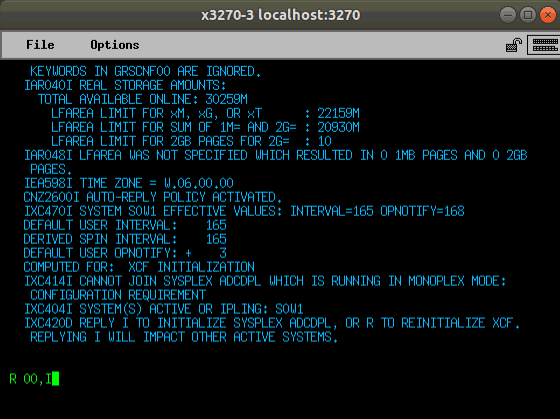
The system will start booting. In the console, we respond R 00,I to the reply.
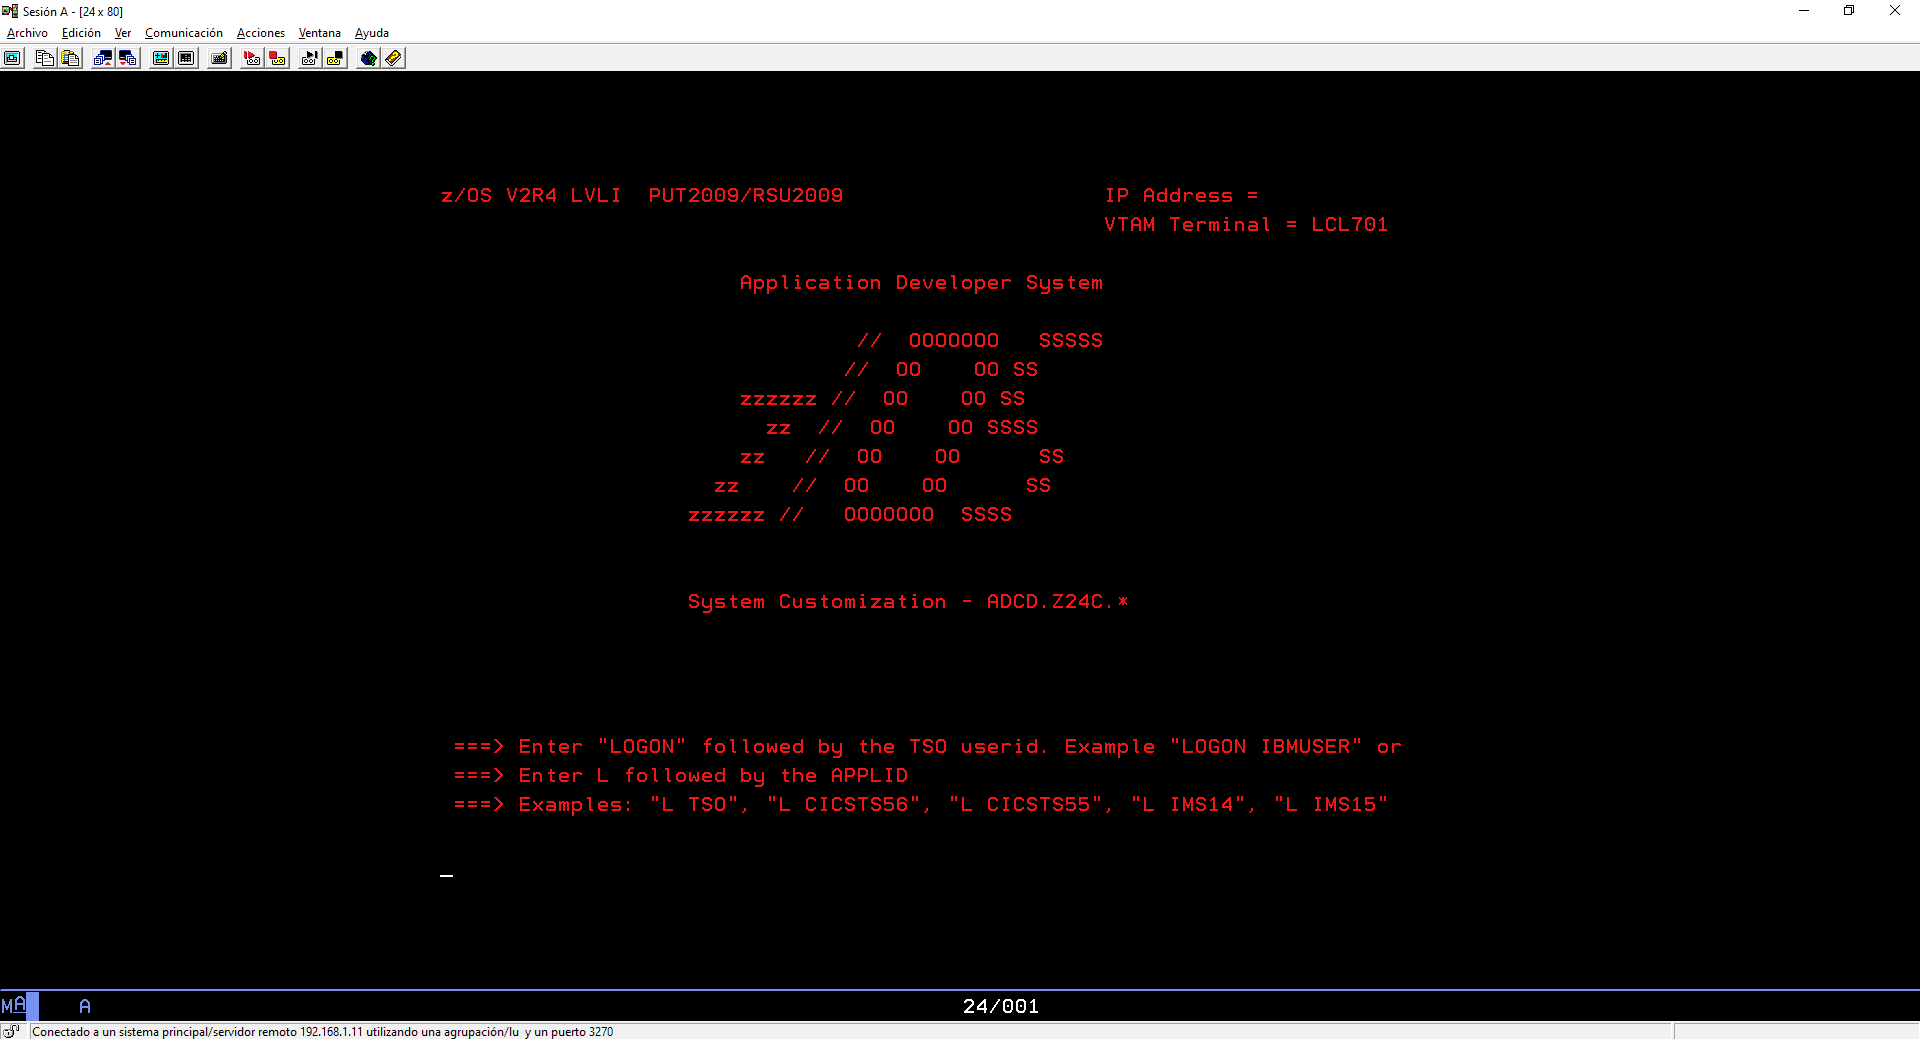
Once the system finishes booting, we will be able to access it.
System Shutdown
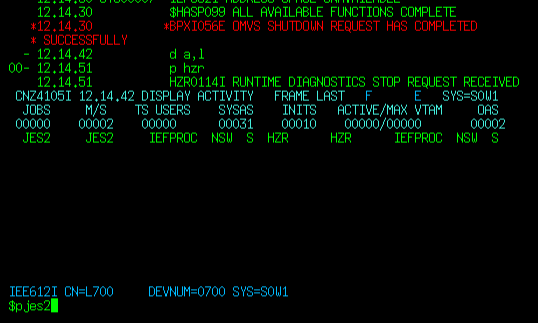
To stop the emulator, we will use the shutdown commands that exist in these systems (the fact that they exist here doesn’t mean they’re on other “real” systems).
In my case, since I started with LOADPARM “CS”, I will stop with the command S SHUTDOWN.
Another command that works to stop is S SHUTALL. There are more available, but I mainly use those two.
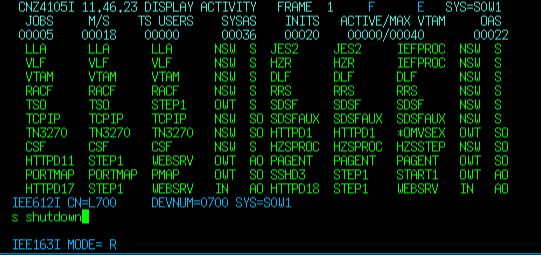
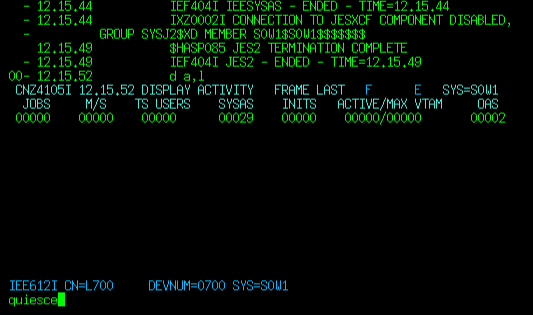
Once everything has stopped, after the $PJES2 command, we will issue the QUIESCE command on the z/OS console. It’s a way to stop the processors.
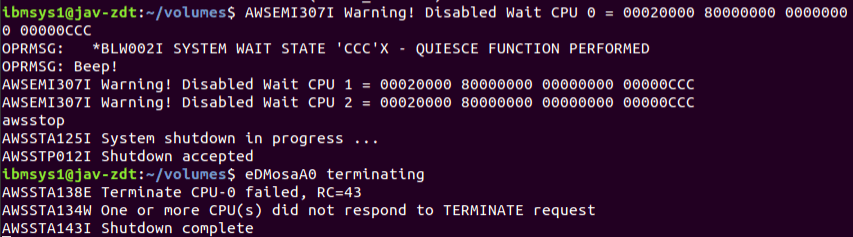
Then in the emulator terminal (on Ubuntu), we will issue the awsstop command to stop the emulator.